
1. Introduction
This manual provides instructions for the installation and operation of the LAWOHO 883LM Multi-Function Wired Wall Push Button. This device is designed as a replacement or additional control for compatible garage door openers.
Important Compatibility Note: This wall push button is specifically designed for Security+ 2.0 garage door openers that feature a yellow learn button on the motor unit. It is not a universal device and will not function with other learn button colors (red, green, purple, orange) or with Liftmaster 8500 / 828LM models.

Image 1.1: The LAWOHO 883LM Multi-Function Wired Wall Push Button.
2. Compatibility Requirements
The LAWOHO 883LM wired wall push button is compatible with specific garage door opener models. Please verify your opener's specifications before installation.
- Security+ 2.0 Systems: This device is compatible only with Security+ 2.0 systems.
- Yellow Learn Button: Your garage door opener motor unit must have a yellow learn button or a yellow antenna wire.
- Compatible Models: Replacement for most standard Chamberlain, Liftmaster, Sears Craftsman, Raynor & AccessMaster models made after 2011, including 891LM, 893LM, 950ESTD, 953ESTD, and MyQ systems (where applicable with yellow learn button).
- Incompatible Models: Not compatible with Liftmaster 8500 model 828LM, or any garage door opener with green, red, orange, or purple learn buttons. Not compatible with wireless Wi-Fi garage door opener wall buttons like LM8500 or LM8500W Elite Series 8500.
2.1 Identifying Your Garage Door Opener's Learn Button
To determine if your garage door opener is compatible, locate the learn button on the motor unit. This button is typically found on the back or side of the motor, often under the light lens.
- Locate the antenna wire dangling from the bottom of the motor unit.
- If a light cover is present, remove it to access the control panel.
- Identify a brightly colored square or circular button on the back panel.
- If this button is yellow, then this wall push button is compatible.
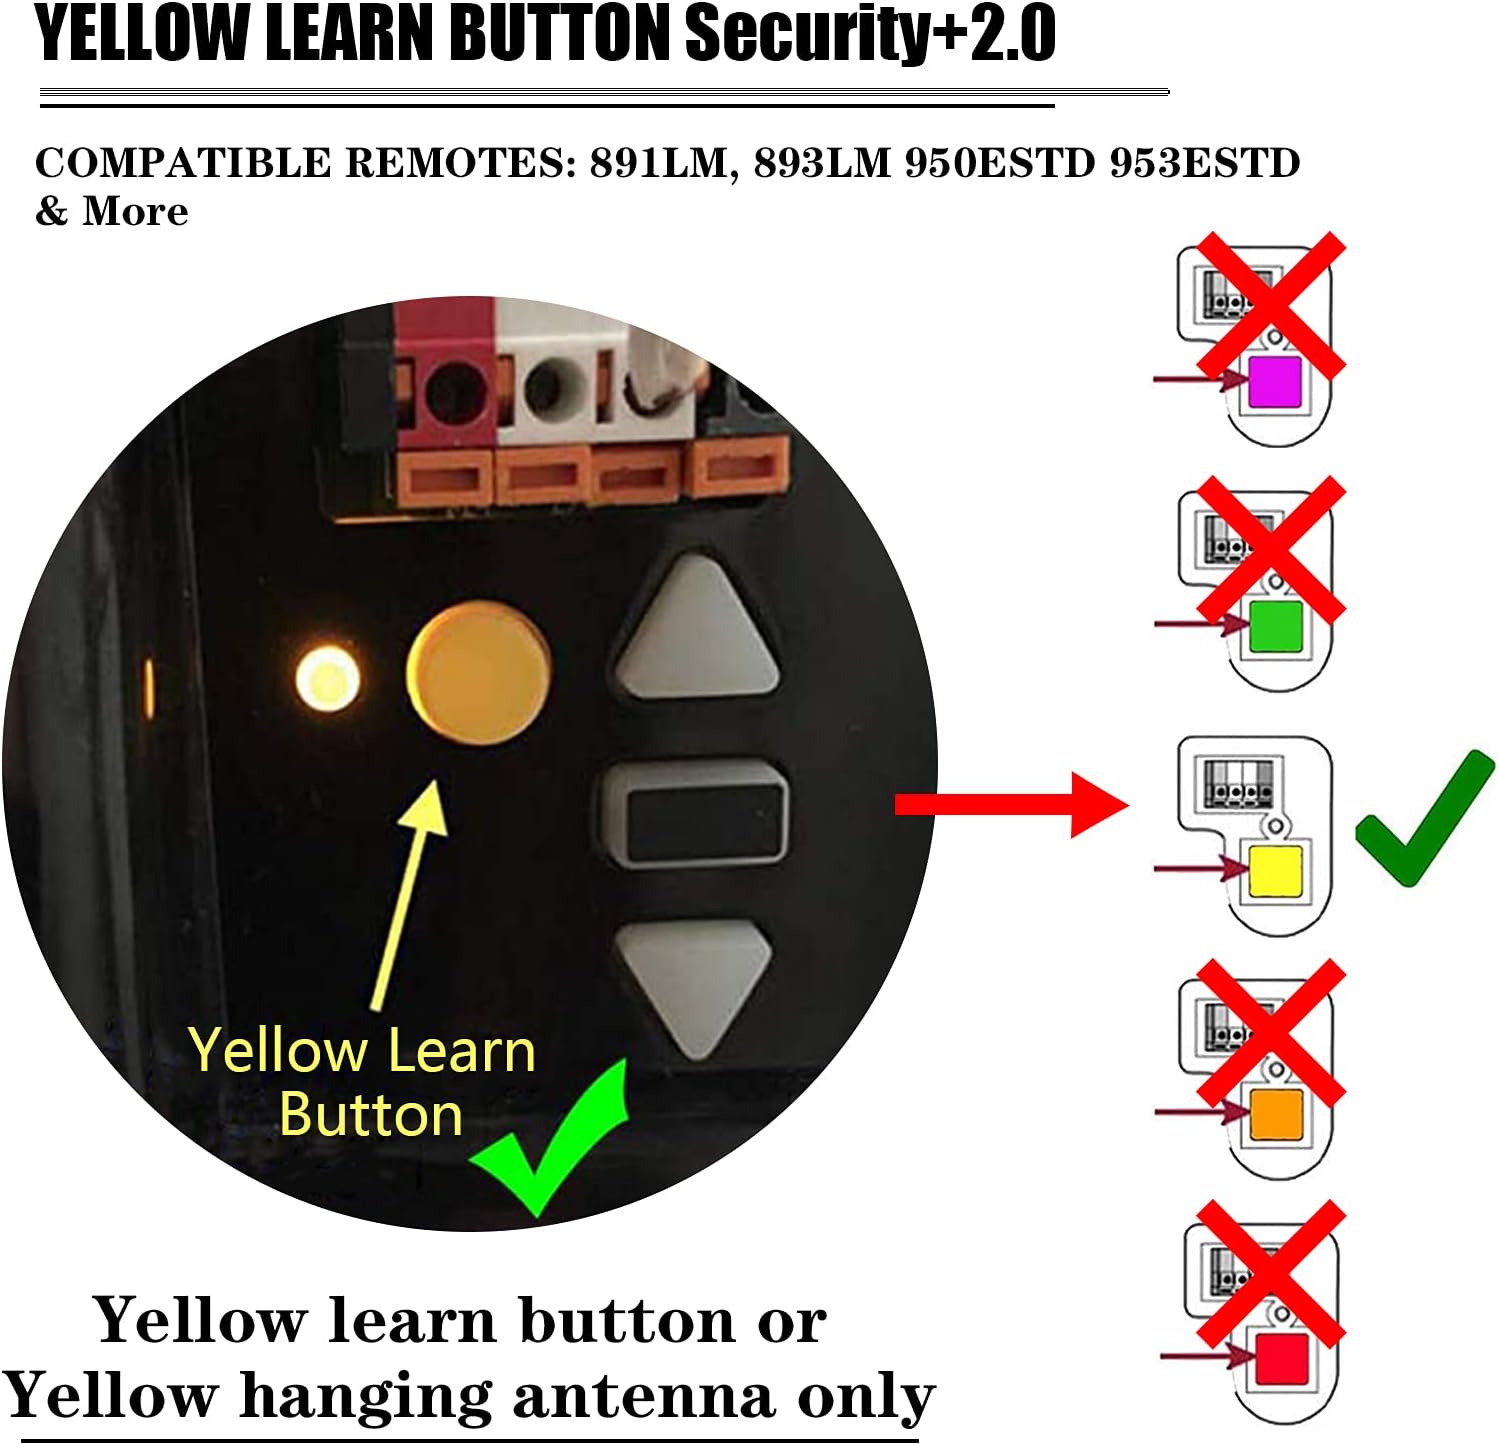
Image 2.1: Example of a yellow learn button on a garage door opener motor unit. Only yellow learn buttons are compatible.

Image 2.2: Visual representation of incompatibility with LiftMaster 8500 and LM8500W models.

Image 2.3: Emphasizing compatibility only with 883LM wired wall buttons for Security+ 2.0 yellow learn button systems.
3. Package Contents
Verify that all items are present in your package:
- 1 x LAWOHO 883LM Multi-Function Wired Wall Push Button
- 2 x Mounting Screws
- 1 x Product Instruction Manual (this document)

Image 3.1: The LAWOHO 883LM wall button, two screws, and the instruction manual included in the package.
4. Installation Instructions
Follow these steps carefully to install your LAWOHO 883LM wall push button. Ensure the garage door opener is unplugged before beginning installation for safety.
- Unplug the Garage Door Opener: For safety, disconnect power to your garage door opener by unplugging it from the electrical outlet.
- Prepare Wires: Strip approximately 1/4 inch (6 mm) of insulation from each end of the supplied door control connection wire. Separate the wires.
- Connect Wires to Wall Button: Connect one wire to each of the two screw terminals on the back of the wall control. The white wire should connect to the screw labeled "WHT" (or the top screw), and the red wire should connect to the screw labeled "RED" (or the bottom screw).
- Mount the Door Control: Use the included screws to fix the wall push button securely to the wall at a convenient height.
- Route Wires to Opener: Run the white and red/white wires from the door control to the garage door opener. Attach the wire to the wall using staples (if applicable) to keep it neat and secure.
- Prepare Opener Wires: Strip approximately 7/16 inch (11 mm) of insulation from the other end of the wire near the garage door opener.
- Connect Wires to Opener: Connect the white wire to the red terminal and the red wire to the white terminal on the garage door opener's terminal block.
- Restore Power: Reconnect power to the garage door opener by plugging it back into the electrical outlet. The LED behind the push button on the door control will blink if installed correctly.
- Synchronize and Test: To synchronize the door control to the garage door opener, press the push button until the garage door opener activates (this may take up to 3 presses). Test the door control by pressing the button.

Image 4.1: Detailed wiring diagram showing connections for the white and red wires to the wall button and the garage door opener terminals.
5. Operation
The LAWOHO 883LM Multi-Function Wired Wall Push Button features two primary controls:
- Door Control Push Button: The large central button.
- Press once to open the garage door.
- Press once to close the garage door.
- Press once while the door is in motion to stop it.
- Light Button: The smaller button located on the side.
- Press once to turn the garage door opener's light on.
- Press once to turn the garage door opener's light off.
The illuminated button makes it easy to locate and operate the garage door opener in low-light conditions.
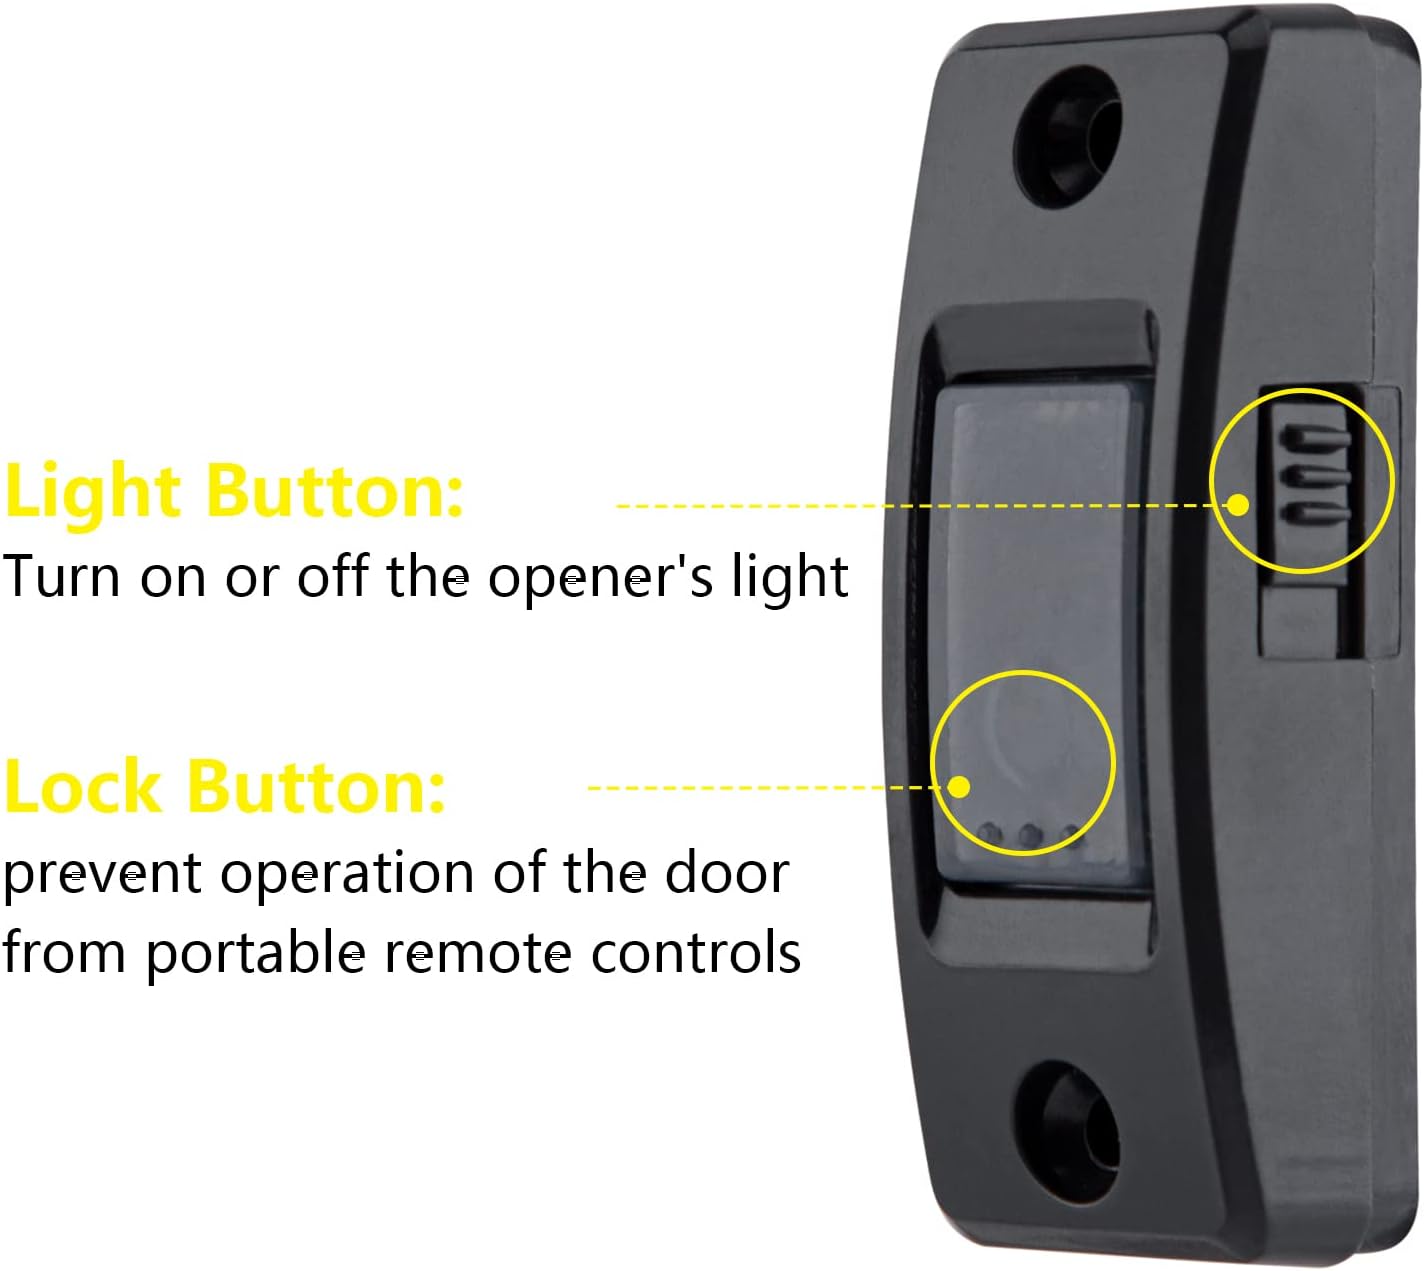
Image 5.1: Illustration of the door control push button and the light button functions.
6. Troubleshooting
If you encounter issues with your LAWOHO 883LM wall push button, refer to the following common problems and solutions:
6.1 Wall Button Does Not Program or Function
- Wiring Check: Ensure the wires are correctly attached to the wall button and the garage door opener. The white wire should connect to the "WHT" screw (or top) on the wall button and the red terminal on the opener. The red wire should connect to the "RED" screw (or bottom) on the wall button and the white terminal on the opener.
- Single Wall Button Rule: Only one wall button should be connected to a single garage door opener. If you are replacing an old button, ensure it is completely disconnected before installing the new one.
- Compatibility Verification: Double-check that your garage door opener has a yellow learn button or a yellow antenna wire. This device is not compatible with green, red, orange, or purple learn buttons, nor with Liftmaster 8500 model 828LM.
- Power Cycle: Unplug the garage door opener for a few minutes, then plug it back in. Re-attempt the synchronization process (Step 9 in Installation).
- Professional Assistance: If the issue persists after following these steps, consult a qualified garage door technician or contact customer support.

Image 6.1: Summary of troubleshooting steps, emphasizing compatibility and wiring checks.
7. Specifications
| Model Number | 10724 (883LM equivalent) |
| Brand | LAWOHO |
| Compatibility | Security+ 2.0 Garage Door Openers with Yellow Learn Button |
| Dimensions (L x W x H) | 7 cm x 2.7 cm x 1.9 cm (2.75 in x 1.06 in x 0.75 in) |
| Item Weight | 0.704 ounces |
| Power Source | Wired (No batteries required) |

Image 7.1: Diagram showing the physical dimensions of the LAWOHO 883LM wall push button.
8. Warranty and Support
For any issues or questions regarding your LAWOHO 883LM Multi-Function Wired Wall Push Button, please contact LAWOHO customer service. Refer to your purchase documentation for specific warranty details.
Customer Service: If you experience any problems after purchasing the 883LM push button, professional customer service is available to assist you.