
1. Introduction
This manual provides detailed instructions for the installation, operation, and maintenance of your Lapcare H61 Micro ATX Motherboard. Designed for Intel Socket 1155 processors, this motherboard supports DDR3 memory and includes an NVMe slot for high-speed storage. Please read this manual thoroughly before proceeding with installation to ensure proper setup and optimal performance.
2. Product Overview
The Lapcare H61 Micro ATX Motherboard is engineered for reliable performance in personal computer systems. It features essential components and connectivity options for a standard build.
Key Features:
- DDR3 Memory Support
- SATA II Connectivity
- 10/100 Mbps LAN
- Integrated 6-channel Audio
- Multiple USB 2.0 Ports
- NVMe Slot for high-speed storage
- Micro ATX Form Factor
Motherboard Layout:

Figure 2.1: Top-down view of the Lapcare H61 Micro ATX Motherboard, highlighting the CPU socket, DDR3 RAM slots, PCI Express slots, SATA ports, and the NVMe slot.
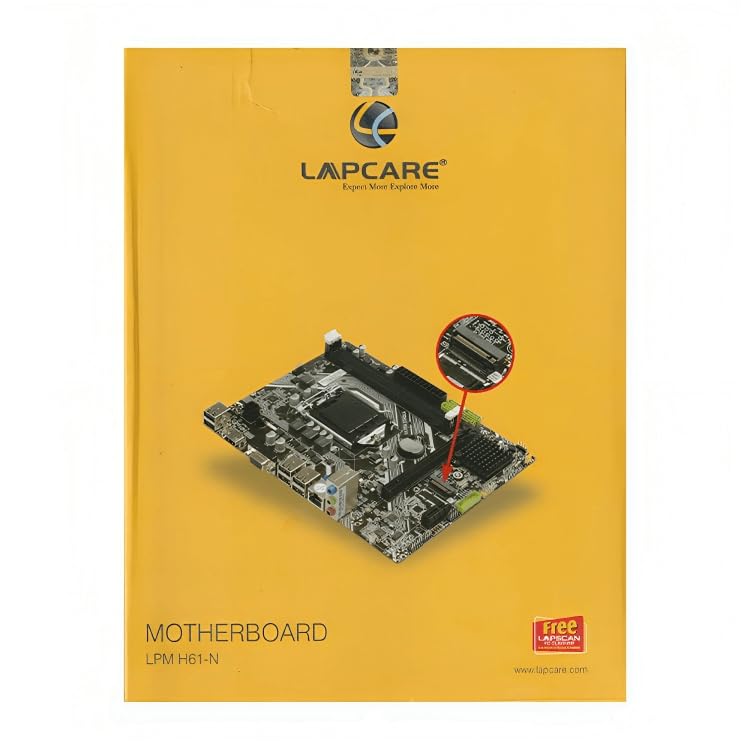
Figure 2.2: Angled view of the Lapcare H61 Micro ATX Motherboard, illustrating the rear I/O ports (VGA, HDMI, USB, LAN, Audio) and internal connectors such as USB headers and power connectors.
3. Setup Instructions
Follow these steps carefully to install your motherboard and its components.
3.1. Prepare Your Workspace
- Ensure you have a clean, well-lit, and static-free environment.
- Gather all necessary components: CPU, CPU cooler, DDR3 RAM, storage devices (SATA/NVMe), power supply, and PC case.
- Wear an anti-static wrist strap or periodically touch a grounded metal object to discharge static electricity.
3.2. CPU Installation
- Locate the LGA 1155 CPU socket on the motherboard.
- Gently push down the load lever and pull it out to open the CPU socket cover.
- Carefully align your Intel Socket 1155 processor with the socket, ensuring the golden triangle on the CPU matches the triangle on the socket. Do not force the CPU into the socket.
- Lower the load plate and push the load lever back into place until it clicks, securing the CPU.
- Install the CPU cooler according to its manufacturer's instructions.
3.3. RAM Installation
- Locate the two DDR3 DIMM slots on the motherboard.
- Open the clips at both ends of the DIMM slot.
- Align the notch on the DDR3 memory module with the key in the DIMM slot.
- Insert the memory module firmly into the slot until the clips snap into place. Ensure both clips are closed.
3.4. Storage Device Installation
SATA Drives:
- Connect one end of a SATA data cable to a SATA 3Gb/s port on the motherboard.
- Connect the other end of the SATA data cable to your SATA hard drive or SSD.
- Connect a SATA power cable from your power supply to the SATA drive.
NVMe SSD:
- Locate the NVMe slot on the motherboard.
- Remove the screw and stand-off from the NVMe slot.
- Insert your NVMe SSD into the slot at a 30-degree angle.
- Push the SSD down and secure it with the screw onto the stand-off.
3.5. Power Connections
- Connect the 24-pin ATX power connector from your power supply to the 24-pin power socket on the motherboard.
- Connect the 4-pin 12V ATX power connector from your power supply to the 4-pin 12V power socket near the CPU.
3.6. Front Panel and Peripheral Connections
- Connect the front panel connectors (Power SW, Reset SW, HDD LED, Power LED) to the F_Panel header according to the pinout diagram in your PC case manual.
- Connect front panel USB 2.0 cables to the onboard USB 19-pin and 2.0 connectors.
- Connect front panel audio cables to the F_Audio connector.
- Connect case fans to the CPU_FAN/SYS_FAN connectors.
- Install any additional PCI Express expansion cards (e.g., graphics card) into the available slots.
4. Operating Instructions
4.1. First Boot
- After all components are installed and connected, close your PC case.
- Connect your monitor, keyboard, mouse, and power cable to the PC.
- Turn on the power supply and then press the power button on your PC case.
- The system should power on and display the BIOS/UEFI splash screen.
4.2. BIOS/UEFI Setup
- During startup, repeatedly press the DEL key (or F2, depending on BIOS version) to enter the BIOS setup utility.
- In the BIOS, you can configure system settings such as boot order, date/time, and hardware parameters.
- Save changes and exit the BIOS to continue with operating system installation.
4.3. Operating System Installation
Insert your operating system installation media (USB drive or DVD) and follow the on-screen prompts to install the OS. Ensure all necessary drivers are installed after the OS installation for optimal performance.
5. Maintenance
Regular maintenance helps ensure the longevity and stable operation of your motherboard.
- Dust Removal: Periodically clean dust from inside your PC case, especially from fans and heatsinks, using compressed air. Ensure the system is powered off and unplugged before cleaning.
- BIOS Updates: Check the Lapcare official website for BIOS updates. Only update the BIOS if necessary and follow the instructions precisely to avoid system instability.
- Cable Management: Ensure internal cables are neatly routed to improve airflow and prevent interference.
6. Troubleshooting
If you encounter issues, refer to the following common troubleshooting steps:
6.1. No Power / No Boot
- Check all power connections: 24-pin ATX, 4-pin 12V, and power supply cable to the wall outlet.
- Ensure the power supply switch is in the 'ON' position.
- Verify front panel power switch connection to the motherboard.
- Test the power supply with another system or a power supply tester if available.
6.2. No Display
- Ensure the monitor is powered on and connected to the correct video output (VGA or HDMI) on the motherboard or graphics card.
- Reseat the RAM modules. Try booting with only one RAM module installed.
- Reseat any installed graphics card.
- Clear the CMOS (refer to motherboard manual for jumper location, usually near the battery).
6.3. System Instability / Crashes
- Check CPU and GPU temperatures. Overheating can cause instability.
- Run memory diagnostic tools to check for faulty RAM.
- Ensure all drivers are up to date.
- Verify power supply wattage is sufficient for all components.
7. Specifications
Detailed technical specifications for the Lapcare H61 Micro ATX Motherboard (Model LKMBMH8003).
| Feature | Specification |
|---|---|
| Brand | Lapcare |
| Model Number | LKMBMH8003 |
| Form Factor | Micro ATX |
| CPU Socket | LGA 1155 |
| Compatible Processors | Intel® Socket 1155 for 3rd/2nd Generation Core™ i7/Core™ i5/Core™ i3/Pentium®/Celeron® Processors |
| Chipset | Intel® H61 Chipset |
| Memory Support | 2 x DDR3 DIMMs, 1066/1333MHz |
| Storage | 4 x SATA 3Gb/s ports, 1 x NVMe Slot |
| Expansion Slots | 1 x PCI Express x16 slot, 1 x PCI Express x1 slot |
| LAN | Realtek®8105E 10/100 Mbps |
| Audio | Realtek®661, Flexible 6-channel Audio |
| USB Ports (Rear) | 6 x USB 2.0 ports |
| USB Ports (Onboard) | 2 x USB 2.0 headers (supports 4 additional USB 2.0 ports) |
| Video Output | 1 x VGA port, 1 x HDMI port |
| Dimensions (LxWxH) | 7.5 x 5.4 x 3.5 cm |
| Item Weight | 560 g |
8. Warranty and Support
For information regarding product warranty, technical support, or service, please refer to the warranty card included with your product or contact your retailer. You may also visit the official Lapcare website for the latest support resources and contact details.