
Andoer 111
Andoer 4K Compact Digital Camera User Manual
Model: 111
Introduction
Thank you for purchasing the Andoer 4K Compact Digital Camera. This camera is designed for ease of use, offering high-quality photo and video capture in a portable form factor. It features a 48-megapixel image resolution, 4K video recording capabilities, a 2.4-inch IPS screen, 16X digital zoom, anti-shake technology, and a built-in flash. This manual provides detailed instructions to help you get the most out of your new camera.

Image: Overview of the Andoer Digital Camera, highlighting features such as strong battery life, 4K video, micro size, 2.4-inch IPS screen, and 16X digital zoom.
What's in the Box
Please check the package contents to ensure all items are present:
- Andoer 4K Compact Digital Camera
- Wrist Strap
- Carrying Bag
- USB Cable
- 32GB Memory Card (TF Card)
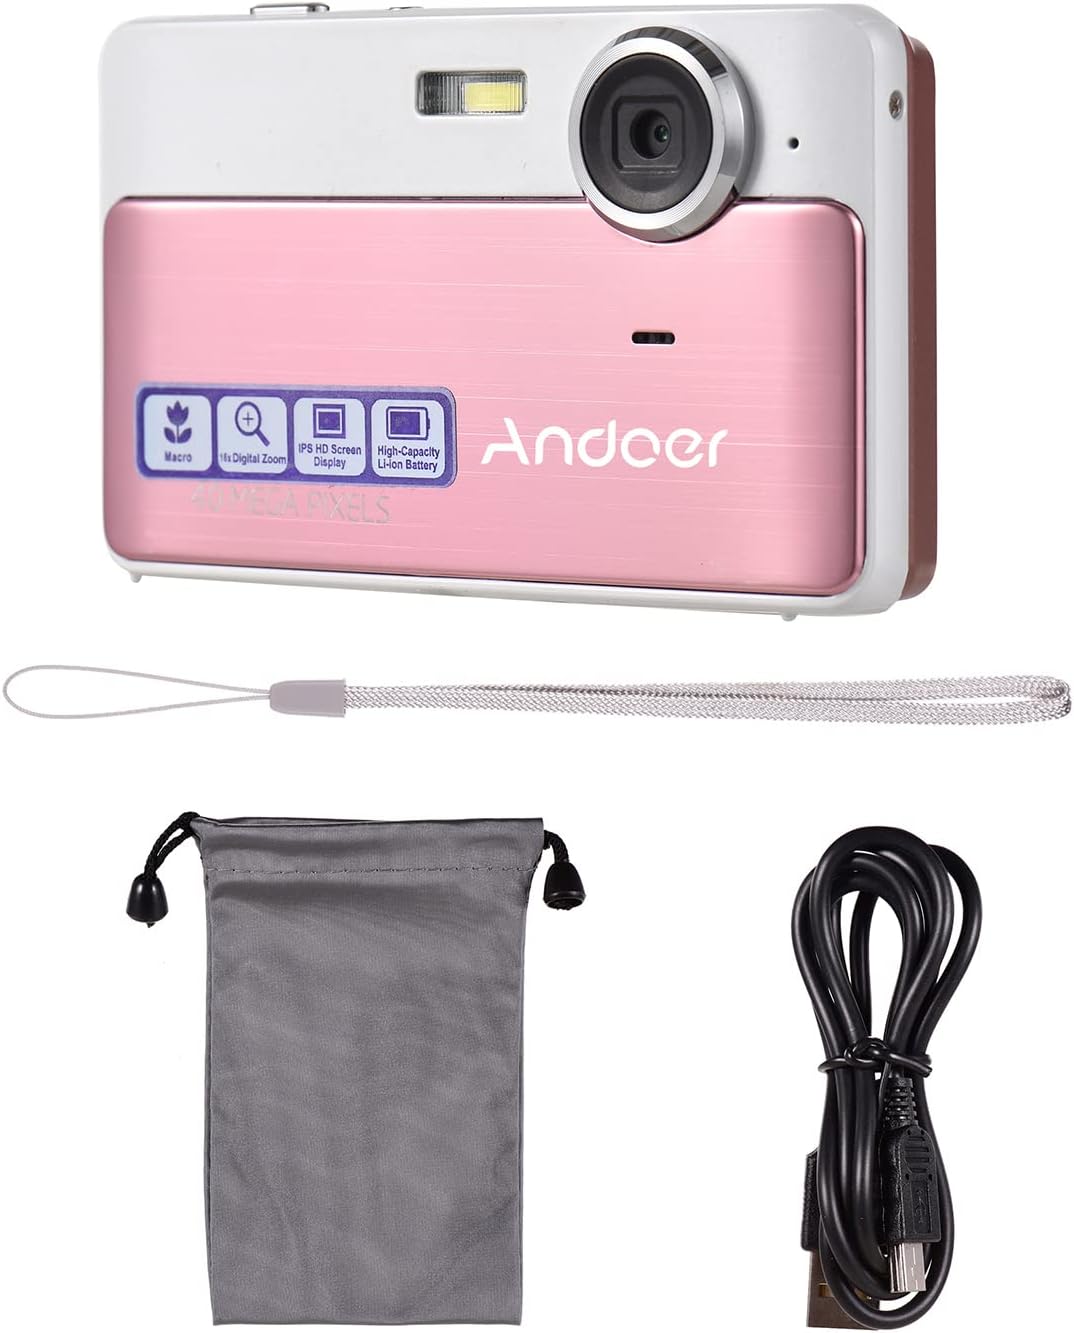
Image: The package contents including the pink digital camera, a grey carrying bag, a white wrist strap, a black USB cable, and a 32GB memory card.
Product Overview
Familiarize yourself with the various parts and controls of your Andoer Digital Camera.

Image: Labeled diagrams of the camera's top, back, and bottom views, indicating buttons and ports such as ON/OFF, OK, indicator light, zoom, macro, mode, flash/up, delete/right, self-timer/down, scene/left, flash, lens, plastic cover, tripod nut, and card slot.
Key Components:
- Lens: Captures images and videos.
- Flash: Provides illumination in low-light conditions.
- 2.4-inch IPS Screen: Displays live view, menus, and playback.
- Control Buttons: Navigate menus, adjust settings, and operate camera functions.
- USB Port: For charging and data transfer.
- Card Slot: For inserting the TF (Micro SD) memory card.
- Tripod Nut: For mounting the camera on a tripod.
Setup
1. Charging the Battery
The camera has a built-in 600mAh lithium battery. Before first use, ensure the battery is fully charged.
- Connect the included USB cable to the camera's USB port.
- Connect the other end of the USB cable to a USB power adapter (not included) or a computer's USB port.
- The indicator light will show charging status. Once fully charged, the light will change or turn off.
2. Inserting the Memory Card
The camera requires a TF (Micro SD) memory card for storing photos and videos. A 32GB memory card is included.
- Locate the card slot on the side or bottom of the camera (refer to Product Overview diagram).
- Gently insert the TF card into the slot with the metal contacts facing the correct direction (usually towards the front of the camera or as indicated by a small icon).
- Push the card in until it clicks into place. To remove, push it in again until it springs out.
Note: Ensure the camera is turned off before inserting or removing the memory card to prevent data corruption.
Operating Instructions
1. Power On/Off
- To turn on the camera, press and hold the ON/OFF button.
- To turn off the camera, press and hold the ON/OFF button again.
2. Taking Photos
- Ensure the camera is in photo mode (indicated on the screen). If not, press the MODE button to switch.
- Frame your shot using the 2.4-inch IPS screen.
- Use the W/T buttons (Zoom In/Out) to adjust the 16X digital zoom.
- Press the OK button (shutter button) to capture the photo.

Image: A visual representation of the 16X digital zoom function, showing how the camera can enlarge images to capture details.
3. Recording Videos
- Press the MODE button to switch to video recording mode.
- Press the OK button to start recording. A timer or indicator will appear on the screen.
- Press the OK button again to stop recording.
4. Using the Flash
The camera has a built-in flash for low-light conditions.
- In photo mode, press the Flash/Up button to cycle through flash modes (e.g., Auto Flash, Fill-in Flash, Red-eye Reduction, Flash Off).
- Select the appropriate mode for your shooting environment.
5. Scene Settings
Optimize your photos for different environments using scene settings.
- Press the Scene/Left button to access scene modes.
- Available modes include: Auto, Landscape, Macro, Night Scenery, Portrait, Night Portrait, Beach, Sport, Dinner.
- Use the navigation buttons to select a mode and press OK to confirm.

Image: A graphic illustrating various scene settings available on the camera, including Auto, Landscape, Night Scenery, Portrait, Night Portrait, Beach, Sport, and Dinner, alongside an image showcasing maximum 48MP photo resolution.
6. Macro and Long Distance Switching
Adjust focus for close-up or distant subjects.
- Press the Macro button (often integrated with other navigation buttons) to toggle between Macro mode (for close-up shots, typically within 10cm) and normal/long distance mode.
- When Macro mode is active, a macro icon will appear on the screen.

Image: A diagram showing how to switch between Macro and Long Distance focus modes. It explains that in Macro mode, objects within 10cm of the camera appear clearer.
7. Playback Mode
- Press the MODE button until you enter playback mode.
- Use the navigation buttons (Left/Right) to browse through your captured photos and videos.
- Press OK to view a video.
8. Connecting to a Computer
- Turn on the camera.
- Connect the camera to your computer using the supplied USB cable.
- The camera should appear as a removable disk drive on your computer, allowing you to transfer files.
Maintenance
Cleaning the Camera
- Use a soft, dry cloth to clean the camera body.
- For the lens and screen, use a specialized lens cleaning cloth and solution if necessary. Avoid abrasive materials.
- Do not use organic solvents or strong chemicals to clean the camera.
Battery Care
- Recharge the battery regularly, even if the camera is not in use, to maintain battery health.
- Avoid exposing the camera to extreme temperatures, which can affect battery performance.
Memory Card Handling
- Always format a new memory card in the camera before first use.
- Do not remove the memory card while the camera is writing data (e.g., during recording or saving).
- Keep memory cards away from strong magnetic fields.
Troubleshooting
| Problem | Possible Cause / Solution |
|---|---|
| Camera does not turn on. | Battery is depleted. Charge the battery fully. |
| Cannot take photos/record videos. | Memory card is full or not inserted correctly. Insert/replace memory card or delete files. Ensure camera is in correct mode. |
| Images are blurry. | Lens is dirty. Clean the lens. Insufficient light (use flash). Camera shake (hold steady or use anti-shake feature). Incorrect focus mode (adjust Macro/Long Distance). |
| Camera freezes. | Remove and reinsert the memory card. If issue persists, turn off and on again. |
| Cannot connect to computer. | Ensure USB cable is properly connected. Try a different USB port or cable. Ensure camera is powered on. |
Specifications
| Feature | Detail |
|---|---|
| Model Name | 111 |
| Image Resolution | Up to 48 Megapixels (40MP, 30MP, 24MP, 18MP, 12MP, 8MP, 5MP) |
| Video Resolution | 4K, 1080P, 720P |
| Screen | 2.4-inch IPS Screen |
| Digital Zoom | 16X |
| Image Stabilization | Digital Anti-Shake |
| Battery Type | Built-in 600mAh Lithium Battery |
| Storage | External, supports up to 32GB TF (Micro SD) Memory Card |
| Photo Format | JPG |
| Video Format | AVI |
| Port | USB 2.0 |
| Item Size | 9.5 * 5.8 * 2.2cm / 3.7 * 2.3 * 0.9inch |
| Item Weight | 90g / 3.2oz |
| Supported Languages | English, French, Spanish, German, Italian, Portuguese, Japanese, Arabic, Simple Chinese, etc. |

Image: The physical dimensions of the camera, showing a length of 9.5cm, height of 5.8cm, and thickness of 2.2cm.
Warranty and Support
Andoer products are manufactured to high quality standards. For any issues or support inquiries, please refer to the seller's return policy or contact Andoer customer service through their official channels. Please retain your proof of purchase for warranty claims.
For further assistance, you may visit the Andoer Store on Amazon.
Ask a question about this manual
Ask about setup, troubleshooting, compatibility, parts, safety, or missing instructions. Manuals+ will review the question and use this page’s manual context to help answer it.