Introduction
This manual provides comprehensive instructions for the safe and effective use of the Healthcaretuye Hemoglobin Meter (Model BHM-101). This device is designed for rapid measurement of hemoglobin levels, providing results in approximately 15 seconds. It is intended for informational purposes and should be operated strictly according to these guidelines.

Image: The Hemoglobin Meter kit, including the meter, test strips, lancets, and capillary tubes.
Important Safety Information
Please read all instructions carefully before using the device.
- Indications: anemia, hemolytic anemia, chemotherapy monitoring
- Legal Disclaimer: Please operate the meter according to the instructions; incorrect operation will lead to errors in results.
- This device is for in vitro diagnostic use only.
- Do not use expired test strips or control solutions.
- Ensure proper disposal of used lancets and test strips according to local regulations.
Package Contents
Verify that all items listed below are present in your package.
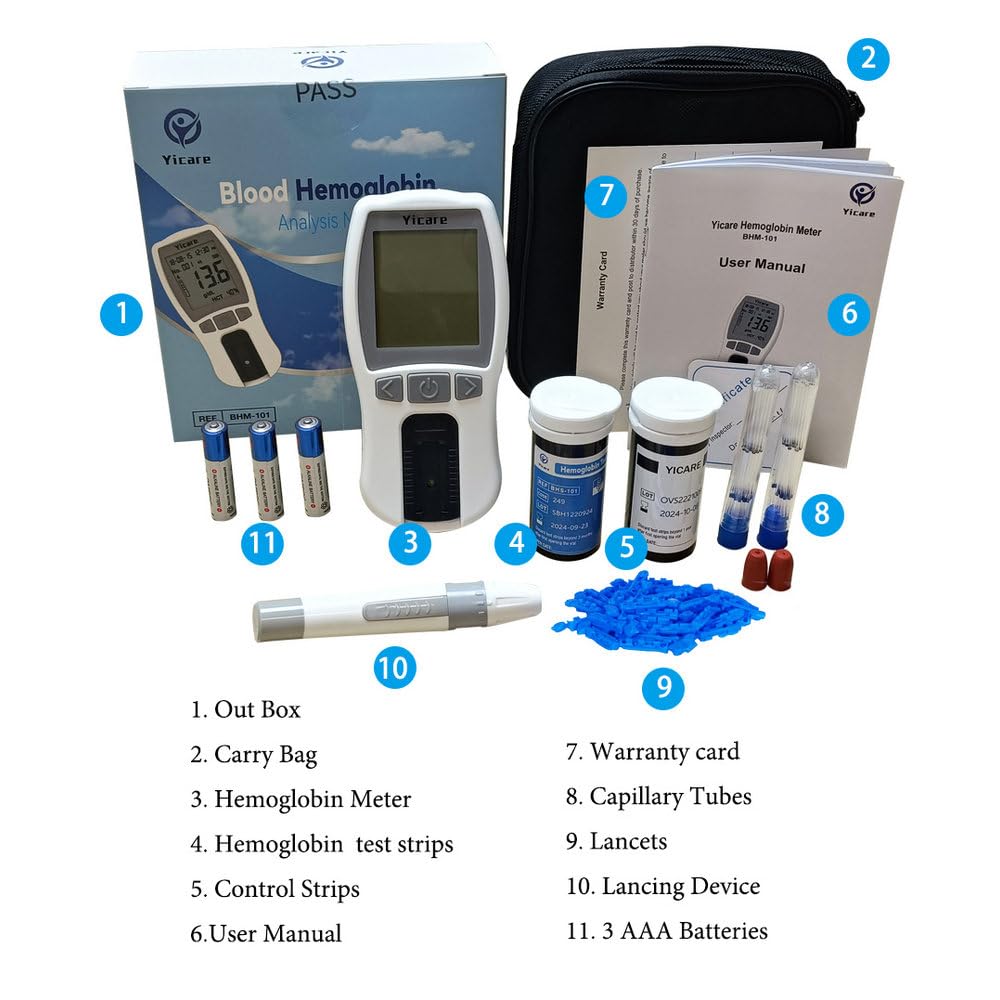
Image: An overview of the Hemoglobin Meter kit components, including the meter, test strips, lancets, capillary tubes, lancing device, and user manual.
- 1x Hemoglobin Meter
- 25x Hemoglobin Test Strips
- 25x Lancets
- 25x Capillary Tubes
- 1x Lancing Device
- 1x User Manual
- 1x Carry Bag
- 1x Warranty Card
- Control Strips (quantity may vary)
- Code Chip
- Note: 3xAAA batteries are not included in the package.
Product Features
The Healthcaretuye Hemoglobin Meter offers several key features for efficient and reliable testing:

Image: A graphic highlighting the key features of the Hemoglobin Meter, including rapid testing, long endurance, micro specimen requirement, and data transfer capability.
- Rapid Test: Test results are provided quickly, in approximately 15 seconds.
- Micro Specimen: Only a small blood sample of 10µL is required for testing.
- Long Endurance: Designed for extended use with removable 3xAAA batteries, allowing for more than 1000 tests.
- Data Transfer: Capable of transferring data to a PC via a USB cable (USB cable not included).
Setup
1. Battery Installation
The Hemoglobin Meter operates on 3xAAA batteries. Ensure batteries are inserted correctly for proper function.
- Open the battery compartment cover on the back of the meter.
- Insert 3xAAA batteries, ensuring correct polarity (+/-).
- Close the battery compartment cover securely.

Image: Rear view of the Hemoglobin Meter showing the battery compartment and product label.
2. Setting Date and Time
It is crucial to set the correct date and time on the meter for accurate record-keeping and to avoid error codes (e.g., E-3 related to expired strips). Refer to the on-screen prompts or the user manual for specific navigation steps using the meter's buttons.
3. Inserting the Code Chip
Each new vial of test strips comes with a corresponding code chip. This chip calibrates the meter to the specific batch of strips, ensuring accurate results.
- Locate the code chip provided with your test strips.
- Insert the code chip into the designated slot on the meter.
- Ensure the code displayed on the meter matches the code on the test strip vial.
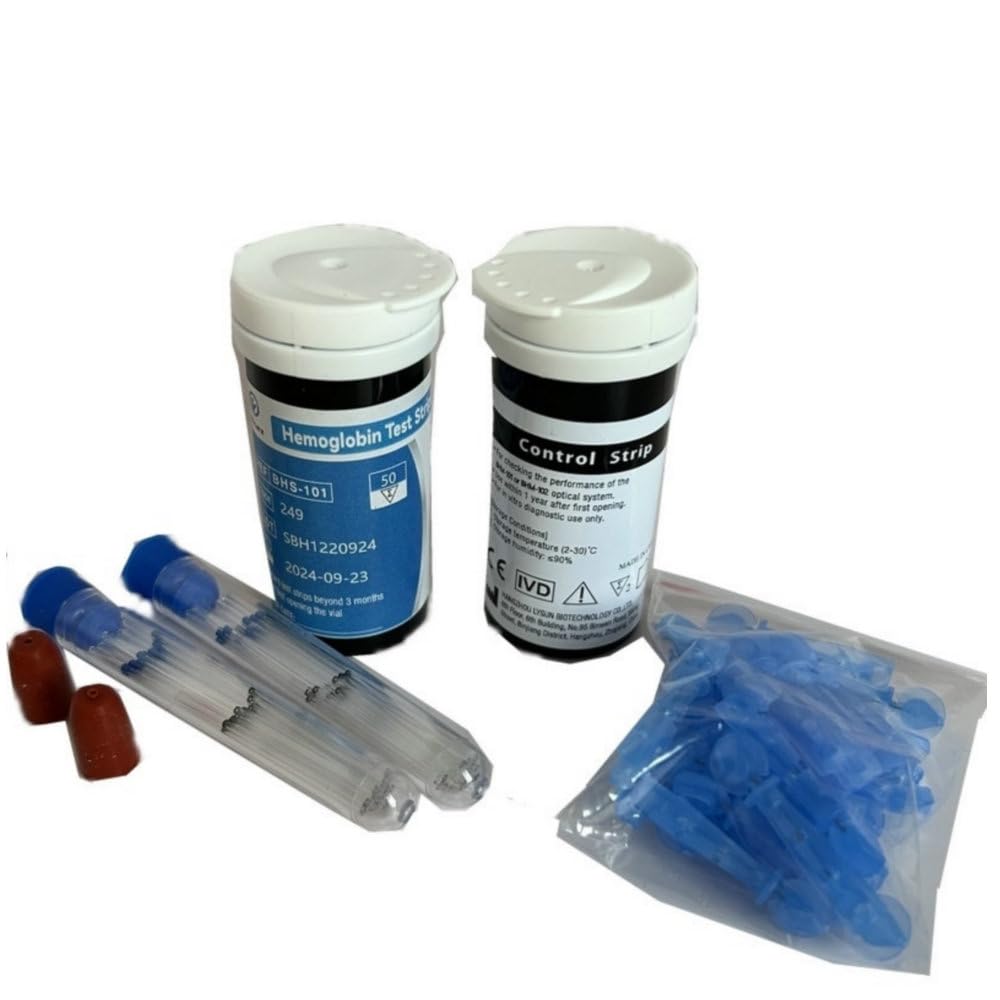
Image: A close-up of the Hemoglobin Meter and test strips, demonstrating the slot for the code chip.
Operating Instructions
1. Preparing for a Test
- Wash your hands thoroughly with soap and warm water, then dry them completely.
- Prepare the lancing device with a new, sterile lancet.
- Remove one test strip from its vial and immediately close the vial cap tightly to protect remaining strips.
- Insert the test strip into the meter's test strip port. The meter will turn on automatically.
2. Obtaining a Blood Sample
- Use the lancing device to prick the side of your fingertip.
- Gently milk the finger to form a round drop of blood. Do not squeeze excessively, as this can dilute the sample.
3. Applying the Blood Sample
- Touch the tip of the test strip to the blood drop. The blood will be drawn into the strip by capillary action.
- Ensure the reaction window of the test strip is completely filled with blood. Do not apply blood to the top of the strip.
4. Reading the Result
- The meter will begin the test automatically once sufficient blood is applied.
- The hemoglobin result will be displayed on the screen in approximately 15 seconds.
- Record your result if necessary.
5. Disposing of Used Materials
- Carefully remove the used test strip from the meter.
- Dispose of the used test strip and lancet in a suitable sharps container or biohazard waste bag according to local regulations.
Maintenance
Cleaning the Meter
Wipe the exterior of the meter with a soft, slightly damp cloth. Do not use harsh chemicals, abrasive cleaners, or immerse the meter in water.
Ensure the sensor area is clean and free from debris or blood residue.
Storage
Store the meter and test strips in a cool, dry place, away from direct sunlight, extreme temperatures, and humidity.
Keep test strip vials tightly closed when not in use to prevent moisture exposure.
Troubleshooting
This section provides solutions for common error codes and issues you may encounter during operation.

Image: A table detailing common error codes (E-1, E-2, E-3, E-4, E-6, E-7, No Code, HI, LO) and their corresponding solutions for the Hemoglobin Meter.
| Code | Description | Solution |
|---|---|---|
| E-1 | Sensor area damaged, dirty, or blocked at turn-on. | Ensure sensor area is clean. Restart meter. Contact your distributor if sensor window is broken. |
| E-2 | Test strip removed during the test. | Repeat the test and ensure the test strip remains in place. |
| E-3 | Test strip expired. | Replace test strips and code chip. Check their expiry date. Set the correct date and time for the machine. |
| E-4 | Battery power is low. | Replace the batteries. |
| E-6 | Code chip was removed. | Insert proper code chip. Confirm the code chip matches the test strip code and repeat the test. |
| E-7 | Environment temperature is higher than 35°C or lower than 10°C. | Operate the meter in an environment where the temperature is between 10-35°C. |
| No Code | The CODE is not inserted. | Insert the CODE. |
| HI | The result is higher than the limit. | Retest with a new strip and contact your doctor. |
| LO | The result is lower than the limit. | Retest with a new strip and contact your doctor. |
Specifications
- Product Dimensions: 2.6"L x 0.75"W x 5.31"H
- Battery Type: 3xAAA Alkaline batteries
- Operating Time: 15 seconds per test
- Brand: Healthcaretuye (Yicare)
- Model: BHM-101
- UPC: 746198990531
- Manufacturer: Healthcaretuye
- Date First Available: November 2, 2022
Warranty and Support
For any questions or assistance with your Hemoglobin Meter, please contact Healthcaretuye directly via Amazon. One-on-one guidance is available to ensure a smooth and accurate testing experience.
Information regarding specific warranty periods may be found on the included warranty card.
Seller: HealthCareTuye
Return Policy: 30-day refund/replacement policy (as per Amazon listing).


