
Introduction
This manual provides detailed instructions for the installation, operation, maintenance, and troubleshooting of your KiriNavi 12.1 Inch Tesla Style Car Radio. Please read this manual thoroughly before using the product to ensure proper functionality and to maximize your user experience. This unit is designed specifically for Ford Explorer and Interceptor models manufactured between 2011 and 2019.
Product Overview
The KiriNavi Car Radio is an advanced multimedia system designed to upgrade your vehicle's infotainment capabilities. Key features include:
- Operating System: Android 12 with an 8-core CPU, 4GB RAM, and 32GB ROM for enhanced performance.
- Display: 12.1-inch IPS touchscreen with 1280x1024P resolution.
- Connectivity: Integrated Wi-Fi and 4G network support.
- Navigation: Built-in GPS with support for online and offline maps.
- Smartphone Integration: Compatible with Apple CarPlay and Android Auto (wired and wireless).
- Audio Features: Digital Sound Processor (DSP) with 32-band equalizer, FM/AM/RDS radio, and subwoofer support.
- Vehicle Integration: Supports original steering wheel controls and includes a backup camera with AHD and night vision.
- Multimedia: Bluetooth 5.0 for hands-free calling and music streaming, USB, and AUX input.
Setup and Installation
Installation of this car radio requires technical knowledge and careful handling of vehicle electronics. It is recommended to seek professional installation if you are not familiar with car audio system wiring.
Package Contents
Before beginning installation, verify that all components are present in the package:

This image displays all components included in the KiriNavi car radio package, such as the main unit, RCA cables, reversing control cable, GPS antenna, USB cables, power cable with CANBUS, 4G antenna, user manual, and installation tools.
Installation Steps Overview
- Preparation: Disconnect the vehicle's battery before starting any electrical work.
- Remove Original Unit: Carefully remove the existing car radio and climate control console from your Ford Explorer/Interceptor. Refer to your vehicle's service manual for specific panel removal instructions.
- Connect Wiring: Connect the provided wiring harnesses, including the power cable with CANBUS, RCA cables, GPS antenna, 4G antenna, and USB cables, to the corresponding ports on the new KiriNavi unit and your vehicle's wiring. Ensure all connections are secure.
- Backup Camera Installation: If installing the included backup camera, route the camera cable to the rear of the vehicle and connect it to the reverse lights for automatic activation. Connect the video signal cable to the unit's reversing control input.
- Mount New Unit: Secure the KiriNavi unit into the dashboard opening. Ensure a snug fit.
- Reconnect Battery: Reconnect the vehicle's battery.
- Initial Power-Up and Testing: Turn on the vehicle and test all functions of the new radio, including audio, navigation, touch screen response, steering wheel controls, and backup camera.

This image shows the KiriNavi 12.1-inch car radio seamlessly integrated into the dashboard of a Ford Explorer, demonstrating its appearance after installation. Smaller insets show the original dashboard layout before the upgrade.
Operating Instructions
Basic Navigation and Interface
Upon startup, the unit will display the main Android interface. You can navigate through applications by swiping the screen and tapping icons. The bottom bar typically contains quick access buttons for Home, A/C controls, and Back.
CarPlay and Android Auto
Connect your smartphone via USB or wirelessly to activate CarPlay or Android Auto. This allows access to your phone's navigation, music, messages, and calls directly on the car radio screen.

This image illustrates the CarPlay and Android Auto interfaces on the KiriNavi car radio screen, showing navigation, music, and communication apps. It also depicts smartphones connected to the system, highlighting both wired and wireless connectivity options.
GPS Navigation
The unit comes with pre-installed GPS capabilities. You can use online mapping applications via Wi-Fi or 4G, or utilize offline maps. Ensure the GPS antenna is properly installed for optimal signal reception.

This image highlights the connectivity options of the KiriNavi car radio, showing icons for Wi-Fi and 4G network access, alongside various GPS navigation app icons and a map display on the unit.
Audio System
- Radio: Access FM/AM radio stations. Use the on-screen controls to scan, save presets, and adjust settings.
- Bluetooth: Pair your phone via Bluetooth 5.0 for hands-free calls and audio streaming. Access your phone's contacts and call history directly from the unit.
- DSP Equalizer: Utilize the Digital Sound Processor (DSP) to fine-tune audio output. The 32-band equalizer allows for precise adjustments to match your audio preferences.
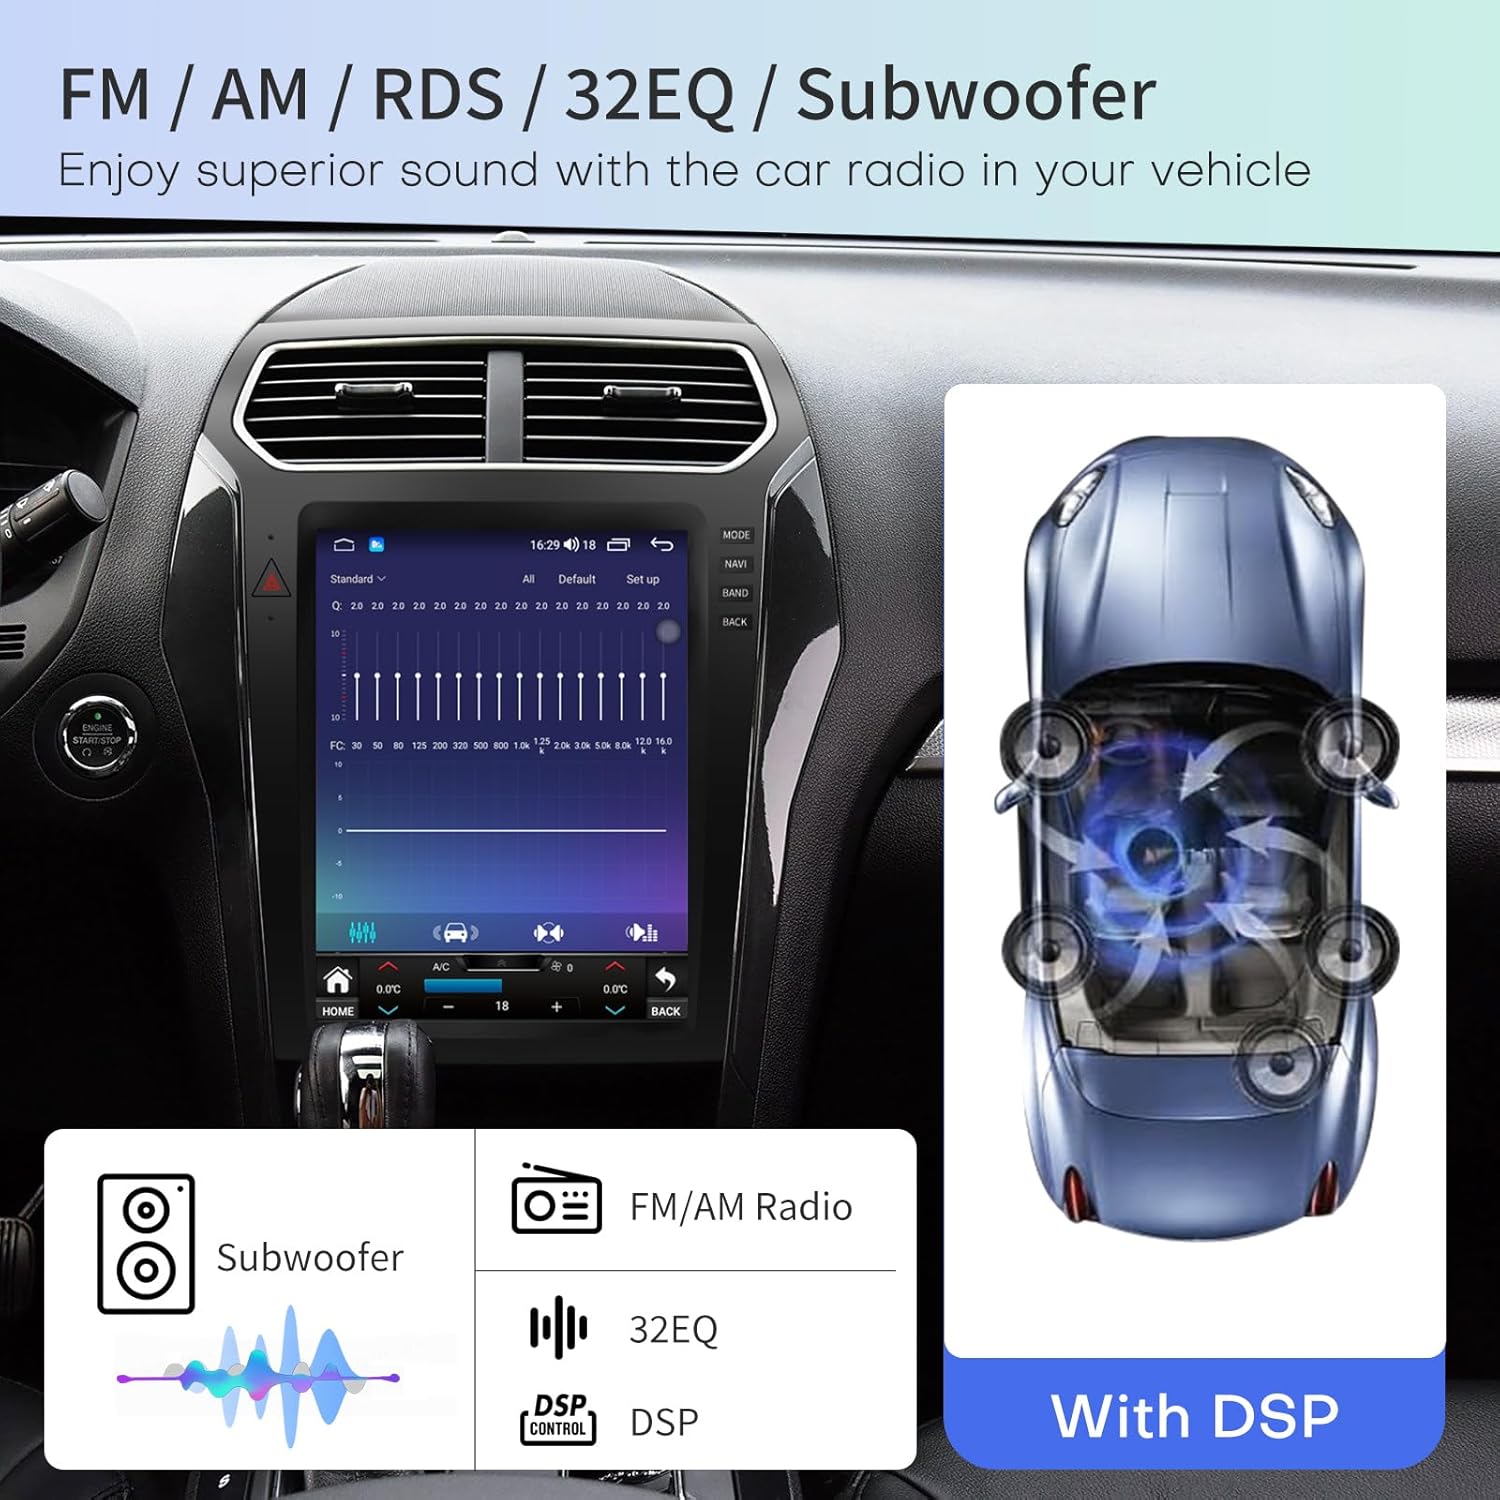
This image shows the digital sound processor (DSP) interface on the KiriNavi car radio, featuring a 32-band equalizer for audio customization and controls for subwoofer output, illustrating advanced audio tuning capabilities.
Steering Wheel Control
The unit supports your vehicle's original steering wheel controls. After installation, you may need to configure these controls through the unit's settings menu to ensure proper mapping of functions like volume, track skip, and call answer/end.
Backup Camera
When the vehicle is shifted into reverse, the unit automatically displays the feed from the connected backup camera, providing a wide-angle view with parking guidelines to assist with safe maneuvering.
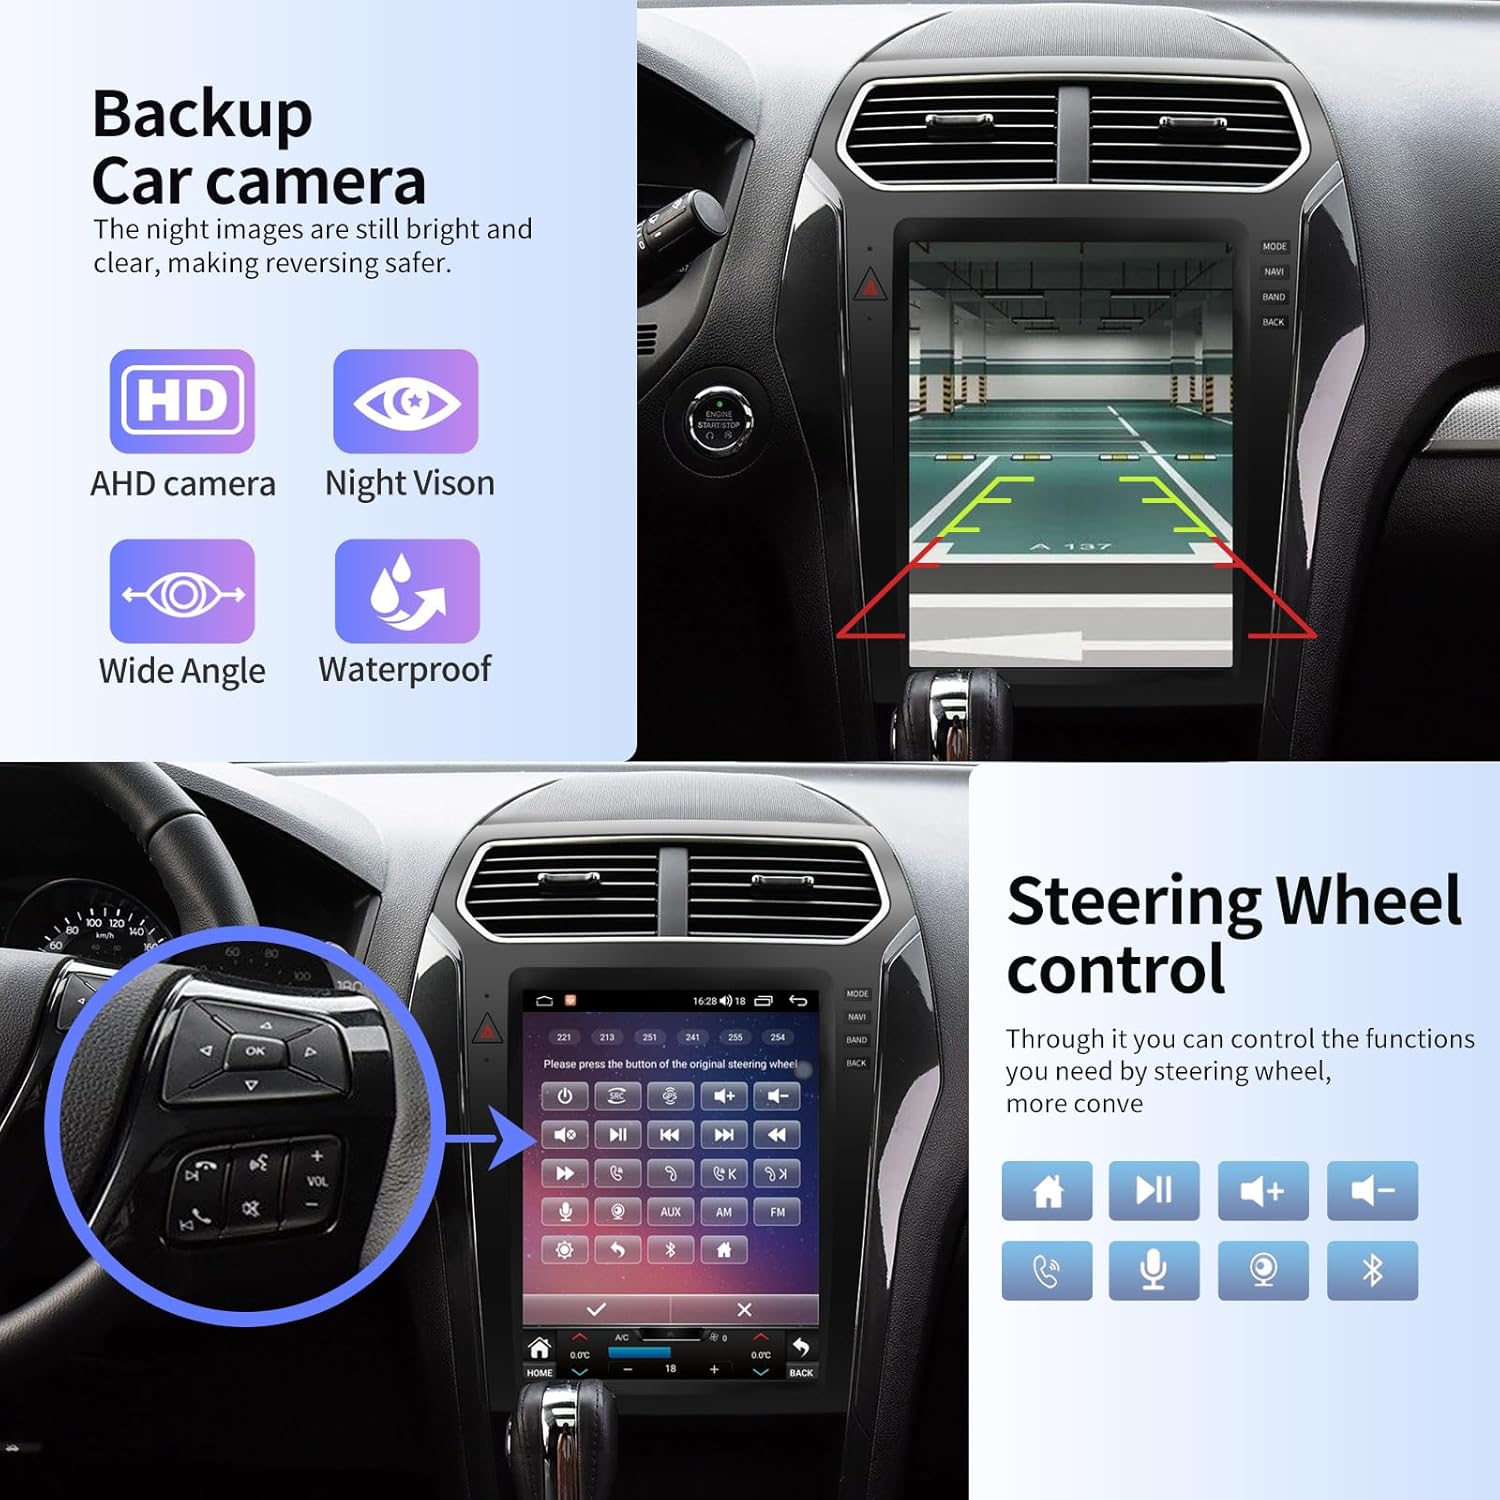
This image illustrates the backup camera functionality, showing a clear rear view with parking guidelines on the KiriNavi screen. It also depicts the integration with original steering wheel controls for convenient operation.
Split Screen Display
The unit supports split-screen functionality, allowing you to run two applications simultaneously, such as navigation on one side and a media player on the other.

This image shows the KiriNavi car radio screen divided into two sections, simultaneously displaying Google Maps for navigation and a video player, illustrating the split-screen multitasking capability.
Maintenance
- Screen Cleaning: Use a soft, lint-free cloth to clean the touchscreen. For stubborn smudges, lightly dampen the cloth with a screen cleaner solution. Avoid harsh chemicals or abrasive materials.
- Software Updates: Periodically check for software updates through the unit's settings menu or the manufacturer's website to ensure optimal performance and access to new features.
- General Care: Avoid exposing the unit to extreme temperatures, direct sunlight for prolonged periods, or excessive moisture.
Troubleshooting
If you encounter issues with your KiriNavi car radio, refer to the table below for common problems and their solutions.
| Problem | Possible Cause | Solution |
|---|---|---|
| Unit does not power on. | Incorrect wiring; Blown fuse; Vehicle battery issue. | Check power connections and fuses. Ensure vehicle battery is charged. Consult a professional installer. |
| No audio output. | Volume too low; Mute activated; Speaker wiring issue. | Increase volume, check mute status. Verify speaker connections. |
| GPS signal is weak or inaccurate. | GPS antenna improperly installed or obstructed. | Ensure GPS antenna is mounted in a clear location with an unobstructed view of the sky. Check antenna connection. |
| Backup camera not displaying. | Camera wiring incorrect; Reverse trigger not connected. | Verify camera power and video connections. Ensure the reverse trigger wire is correctly connected to the vehicle's reverse light circuit. |
| Steering wheel controls not working. | CANBUS connection issue; Controls not configured. | Check CANBUS wiring. Access the unit's settings to configure or re-learn steering wheel controls. |
| Bluetooth connectivity issues. | Device not paired; Bluetooth disabled; Interference. | Ensure Bluetooth is enabled on both devices. Re-pair the device. Move closer to the unit if experiencing signal drops. |
| AC/Heat controls unresponsive or delayed. | Software glitch; CANBUS communication issue. | Restart the unit. Check CANBUS connections. Ensure the unit's software is up to date. |
| Screen day/night mode incorrect. | Incorrect time zone or automatic setting. | Connect to home internet or a hotspot to allow the unit to synchronize time and location, or manually set the correct time zone in settings. |
Specifications
| Feature | Detail |
|---|---|
| Model Name | RM |
| Operating System | Android 12 |
| Processor | 8-Core CPU |
| Memory (RAM) | 4GB |
| Storage (ROM) | 32GB |
| Display Size | 12.1 Inches |
| Display Resolution | 1280x1024P IPS Touchscreen |
| Connectivity | Bluetooth 5.0, Wi-Fi, 4G, USB, Ethernet |
| GPS | GPS + GLONASS, Supports Online/Offline Maps |
| Audio Output Mode | Stereo, DSP with 32-band EQ, Subwoofer Support |
| Special Features | CarPlay, Android Auto, Split Screen, Steering Wheel Control, Backup Camera (AHD, Night Vision, 170° Viewing Angle) |
| Compatible Vehicles | Ford Explorer / Interceptor (2011-2019) |
| Item Weight | 7.96 pounds |
| Package Dimensions | 19.76 x 14.41 x 5.47 inches |
Warranty Information
Specific warranty details for this KiriNavi product are not provided in the available information. Please refer to the product packaging or contact the seller directly for comprehensive warranty terms and conditions.
Customer Support
For technical assistance, installation guidance, or any product-related inquiries, please contact KiriNavi customer support. You can typically reach the seller through the platform where you purchased the product.
If purchased on Amazon, follow these steps:
- Go to the product page on Amazon.
- Locate the 'Sold by KiriNavi' section.
- Click on the seller's name ('KiriNavi') to visit their storefront.
- On the storefront, look for a 'Ask a question' button or similar contact option.

This image provides a visual guide on how to access technical support for the KiriNavi car radio through the Amazon platform, detailing steps to find the seller and ask a question.