
1. Introduction
This manual provides essential information for the installation, operation, and maintenance of your SRJTEK LCD Screen Replacement with Frame for the OnePlus Nord N100. Please read these instructions carefully before proceeding with any installation or repair to ensure proper function and to prevent damage to your device or the replacement part.
2. Compatibility
This replacement screen is specifically designed for the OnePlus Nord N100. It is compatible with the following model numbers:
- BE2011
- BE2012
- BE2013
- BE2015
To verify your phone's model number, navigate to the 'About Phone' section in your device settings.
3. Package Contents
Upon opening your package, please ensure all the following items are present:
- 1x LCD with Touch Screen and Digitizer Assembly (with Frame)
- 1x Anti-drop All-inclusive Tempered Film
- 1x Adhesive Tape
- 1x Set of Special Disassembly Tools
4. Safety Precautions
Working with electronic components requires care. Please observe the following safety guidelines:
- Power Off Device: Always ensure your phone is completely powered off before beginning any repair.
- Static Electricity: Take precautions against static electricity, which can damage electronic components. Consider using an anti-static wrist strap.
- Fragile Components: The screen assembly is made of glass and is very fragile. Handle it with extreme care to avoid damage to the LCD screen or integrated circuit (IC).
- Tool Usage: Use the provided disassembly tools carefully to avoid scratching or damaging your device.
- Professional Assistance: If you are unsure about any step, it is recommended to seek assistance from a professional technician.
5. Setup and Installation Guide
This section outlines the general steps for replacing your OnePlus Nord N100 screen. We highly recommend watching a dedicated installation tutorial video to familiarize yourself with the detailed procedures before attempting the installation.
5.1 Pre-Installation Checks
- Verify Model: Confirm your phone's model number matches the compatible models listed in Section 2.
- Power Off: Ensure your device is completely powered off and disconnected from any power source.
- Inspect New Screen: Carefully inspect the new LCD screen assembly for any visible damage before installation.
- Test Functionality (Before Adhesion): Before fully installing and adhering the new screen, connect the flex cables to the motherboard and test the display and touch functionality. Do not remove protective films or adhesive until you have confirmed the screen is working correctly.
5.2 Installation Steps Overview
The replacement screen comes with a frame, simplifying the installation process. You will need to transfer other internal components from your original phone to the new frame and screen assembly.
General steps include:
- Carefully open your phone and disconnect the battery.
- Remove the damaged screen assembly and transfer all necessary internal components (e.g., motherboard, battery, cameras, speakers, vibrator, buttons) to the new frame.
- Connect the flex cables of the new screen assembly to the motherboard.
- Reconnect the battery and perform the pre-installation test (Section 5.1, Step 4).
- Once functionality is confirmed, secure all components and carefully close the phone.

Figure 1: The LCD screen assembly with its integrated frame, ready for component transfer.
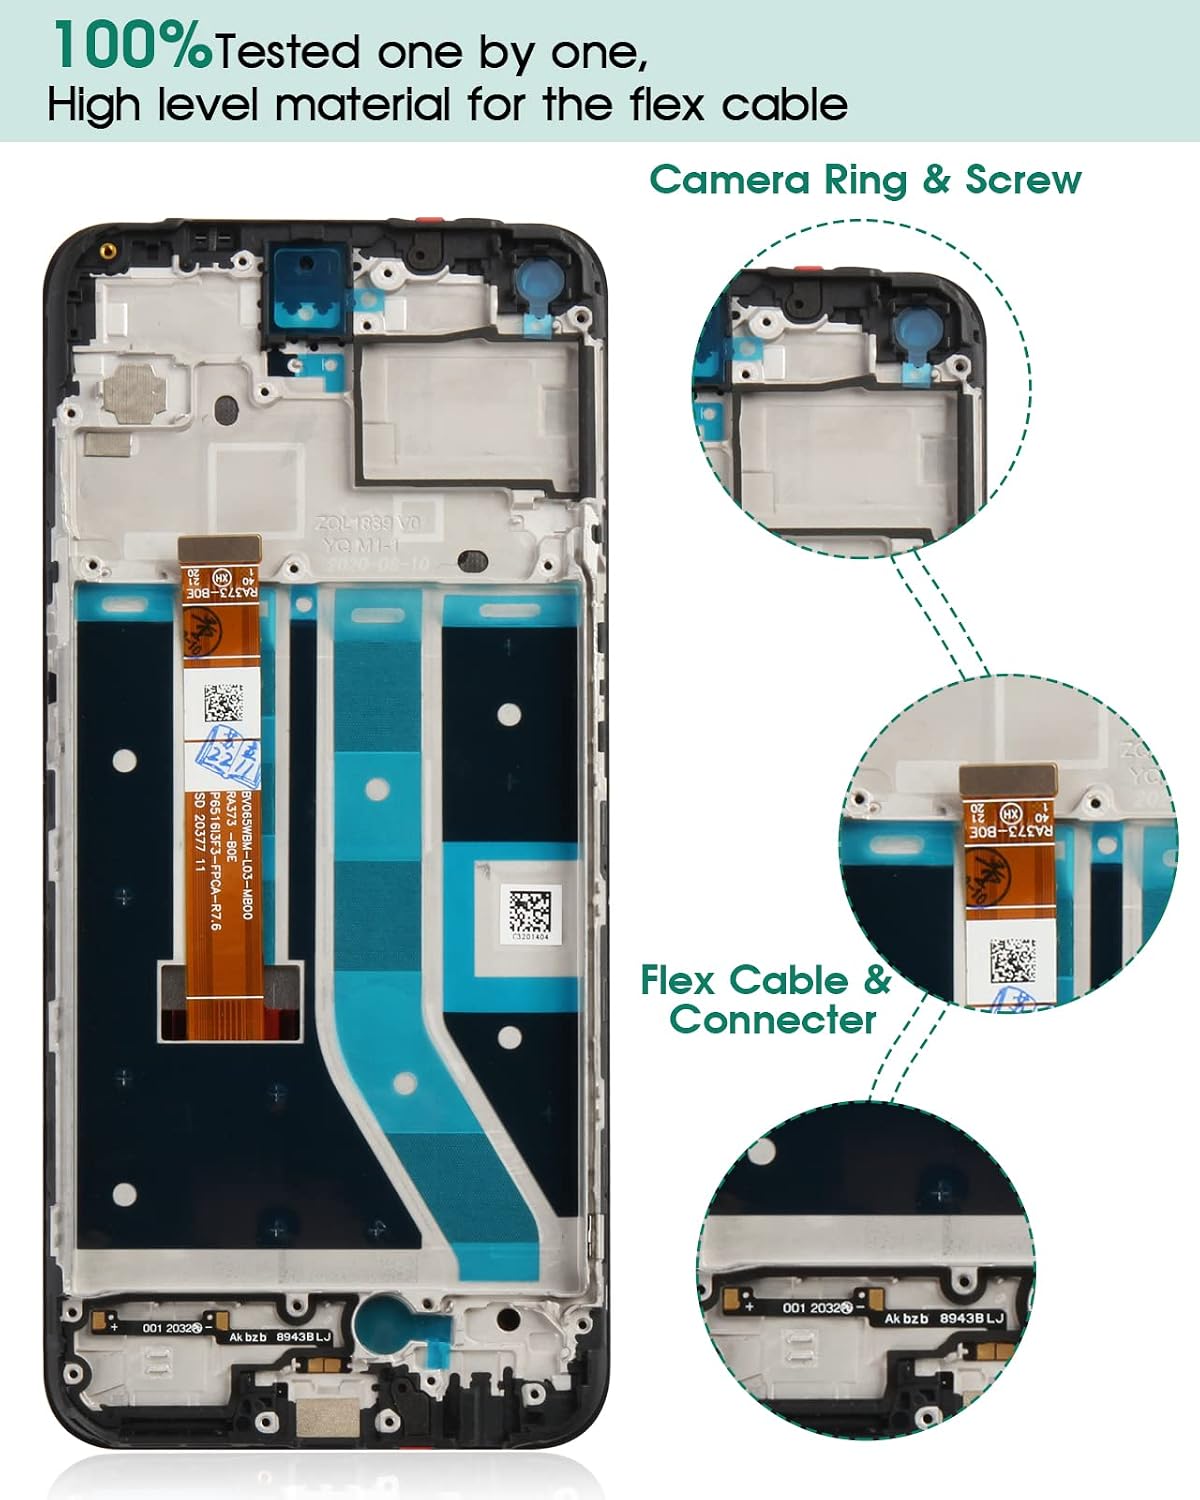
Figure 2: Close-up of the replacement frame highlighting the flex cable and connector areas, along with the camera ring and screw points for component installation.
5.3 Product Overview Video
This video provides a visual overview of the SRJTEK OnePlus Nord N100 LCD screen replacement with frame. While not a step-by-step installation guide, it showcases the product's components and build quality.
Video 1: SRJTEK OnePlus Nord N100 BE2013 Showcase. This video displays the screen and frame assembly from various angles.
6. Operating (Post-Installation)
After successful installation, power on your OnePlus Nord N100 and perform the following checks:
- Display Test: Check for any dead pixels, discoloration, or uneven backlighting across the entire screen.
- Touch Functionality: Test the touch response across all areas of the screen. Drag an app icon around the screen to ensure consistent touch sensitivity.
- Brightness Adjustment: Verify that the screen brightness can be adjusted correctly.
- Other Functions: Test the front camera, earpiece speaker, and proximity sensor if they are integrated with the screen assembly or were affected by the repair.

Figure 3: Visual comparison illustrating the display quality of the SRJTEK screen versus other alternatives.

Figure 4: Illustration of the screen's high touch sensitivity and smooth responsiveness, similar to the original screen.
7. Maintenance
To ensure the longevity and optimal performance of your new screen:
- Cleaning: Use a soft, lint-free cloth, slightly dampened with water or a screen cleaner, to gently wipe the screen. Avoid harsh chemicals or abrasive materials.
- Protection: Apply the provided tempered film or another high-quality screen protector to guard against scratches and minor impacts.
- Avoid Pressure: Do not apply excessive pressure to the screen, especially when carrying the phone in pockets or bags.
- Temperature Extremes: Avoid exposing your device to extreme temperatures, which can affect screen performance and lifespan.
8. Troubleshooting
If you encounter any issues after installation, consider the following:
- Screen Not Turning On: Double-check all flex cable connections to ensure they are securely seated. Ensure the battery is properly connected and charged.
- Touch Not Responding: Re-check the digitizer flex cable connection. A factory reset (after backing up data) can sometimes resolve software-related touch issues.
- Display Anomalies (Lines, Flickering): This often indicates a loose display flex cable connection or potential damage during installation. Re-seat the display cable carefully.
- Ghost Touch/Random Inputs: Ensure no debris is trapped between the screen and the frame. Re-check connections.
If troubleshooting steps do not resolve the issue, please contact our customer service team for further assistance.
9. Specifications
| Feature | Specification |
|---|---|
| Product Type | LCD with Touch Screen and Digitizer Assembly (with Frame) |
| Compatible Models | OnePlus Nord N100 (BE2011, BE2012, BE2013, BE2015) |
| Screen Size | 6.52 Inches |
| Resolution | 720 x 1600 pixels |
| Package Dimensions | 7.56 x 4.06 x 1.26 inches |
| Item Weight | 6 ounces |
| Manufacturer | SRJTEK |
10. Warranty and Support
SRJTEK provides a 6-month warranty for this product. This warranty covers non-human-made or physical damages. If the screen fails to work normally due to manufacturing defects within this period, we will provide an exchange.
For any issues regarding your order, product installation, or quality concerns, please do not hesitate to contact our customer service team. You can reach us through Amazon or via the contact information provided in the outer packaging. We are committed to providing satisfactory solutions within 24 hours.