
Introduction
This manual provides comprehensive instructions for the safe operation, setup, maintenance, and troubleshooting of your APEX AT-149 Scratch Coding Drone. Please read this manual thoroughly before operating the drone to ensure proper use and to maximize your flying experience.
The APEX AT-149 is a lightweight and compact drone designed for educational programming and aerial photography. It features a 720P HD camera, Scratch programming capabilities, and user-friendly controls, making it suitable for beginners and enthusiasts alike.
Package Contents
Verify that all items are present in your package:
- APEX AT-149 Drone
- Remote Controller
- Spare Propellers (4 pieces)
- Propeller Guards (4 pieces)
- USB Charging Cable
- Rechargeable Lithium Polymer Batteries (2 included, 1000mAh each)
- User Manual

Image: APEX AT-149 drone, remote controller, spare propellers, propeller guards, USB charging cable, and two batteries.
Setup
1. Charging the Drone Battery
- Insert the drone battery into the charging cable.
- Connect the USB charging cable to a 5V/1A USB power adapter (not included).
- The indicator light on the charging cable will show charging status. Refer to the charging cable's specific instructions for light indications.
- Charging typically takes approximately 60-90 minutes. Do not overcharge.
2. Installing Propeller Guards
Gently attach the propeller guards to each motor arm of the drone. Ensure they are securely fastened to prevent detachment during flight.
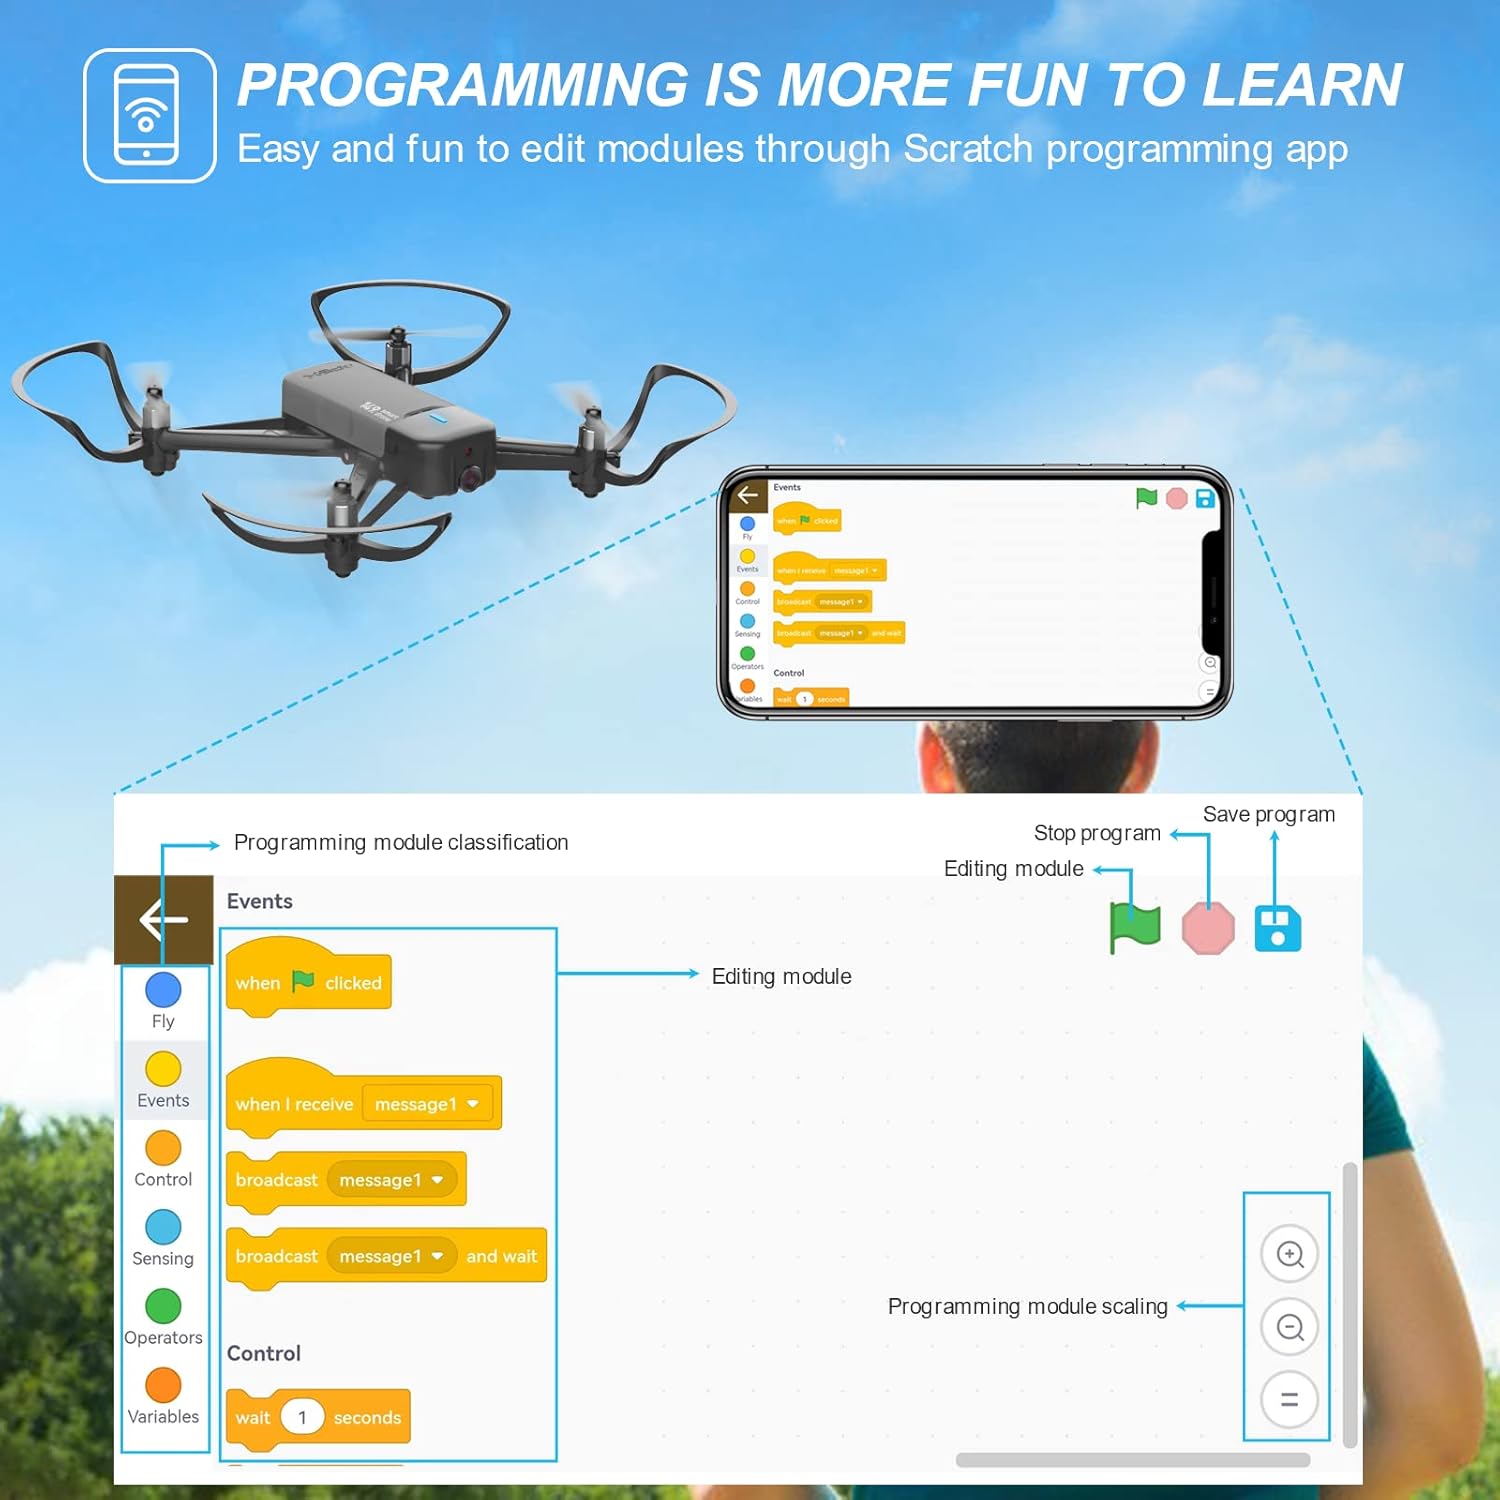
Image: The APEX AT-149 drone with propeller guards attached, ready for flight.
3. Installing Remote Controller Batteries
Open the battery compartment on the back of the remote controller and insert two AAA batteries (not included), observing polarity.
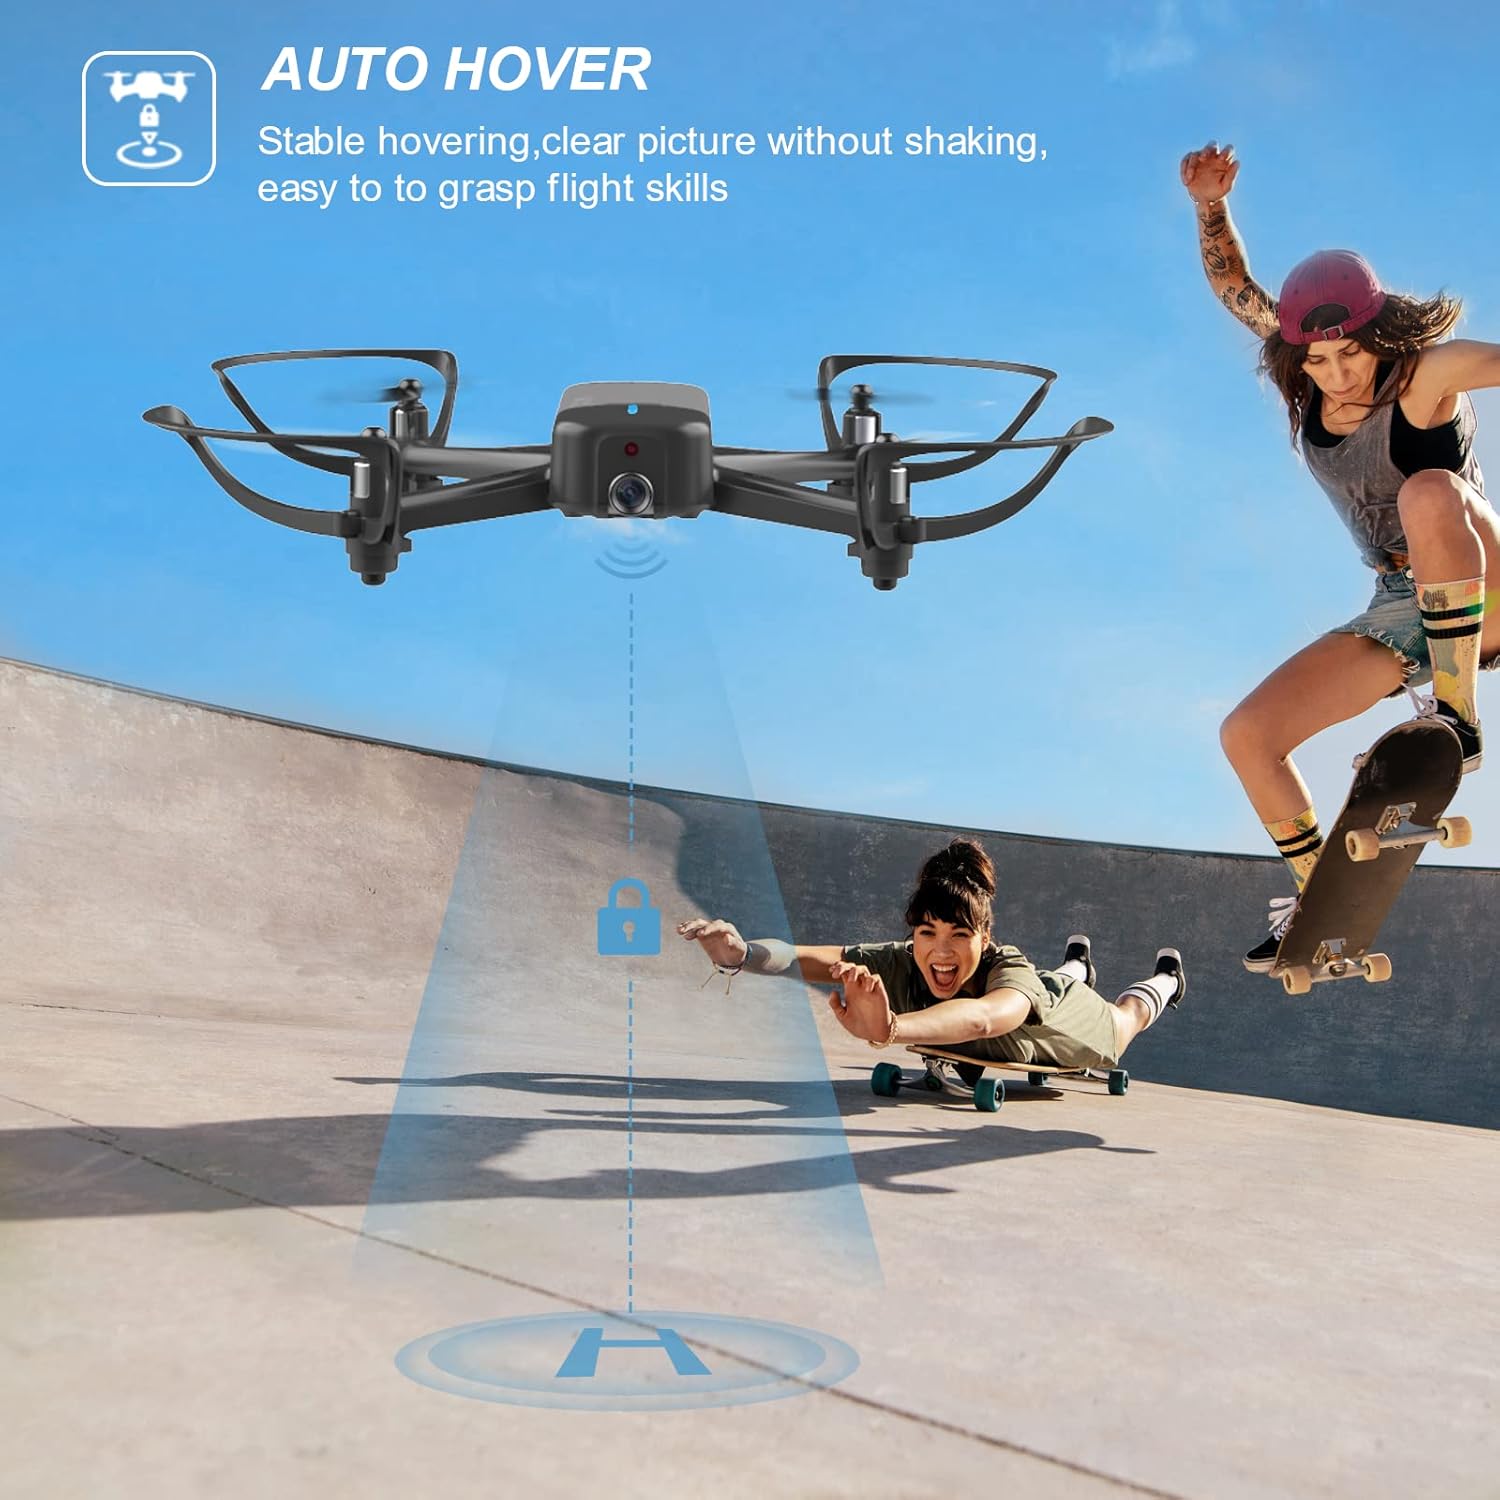
Image: Diagram of the APEX AT-149 remote controller, showing various buttons and levers including the power button and control sticks.
4. Downloading the Companion App
For full functionality, including 720P HD camera view and Scratch programming, download the official APEX drone app from your device's app store. Search for "APEX Drone" or scan the QR code provided in the quick start guide (if applicable).
Operating Instructions
1. Pairing the Drone and Remote Controller
- Place the drone on a flat, level surface.
- Turn on the drone's power switch. The indicator lights will flash.
- Turn on the remote controller.
- Push the left joystick (throttle lever) fully up, then fully down. The drone's lights will become solid, indicating successful pairing.
2. Basic Flight Controls
Familiarize yourself with the remote controller's functions:
- Throttle Lever (Left Joystick):
- Push Up: Ascend
- Push Down: Descend
- Push Left/Right: Rotate Left/Right (Yaw)
- Direction Lever (Right Joystick):
- Push Up: Fly Forward
- Push Down: Fly Backward
- Push Left: Fly Left (Strafe)
- Push Right: Fly Right (Strafe)
- One-Key Take-off/Landing Button: Press to automatically take off or land.
- Headless Mode Button: Activates headless mode, where the drone's orientation is relative to the pilot.
- Speed Switch: Adjusts flight speed (low, medium, high).
- Photo/Video Button: Short press for photo, long press for video.
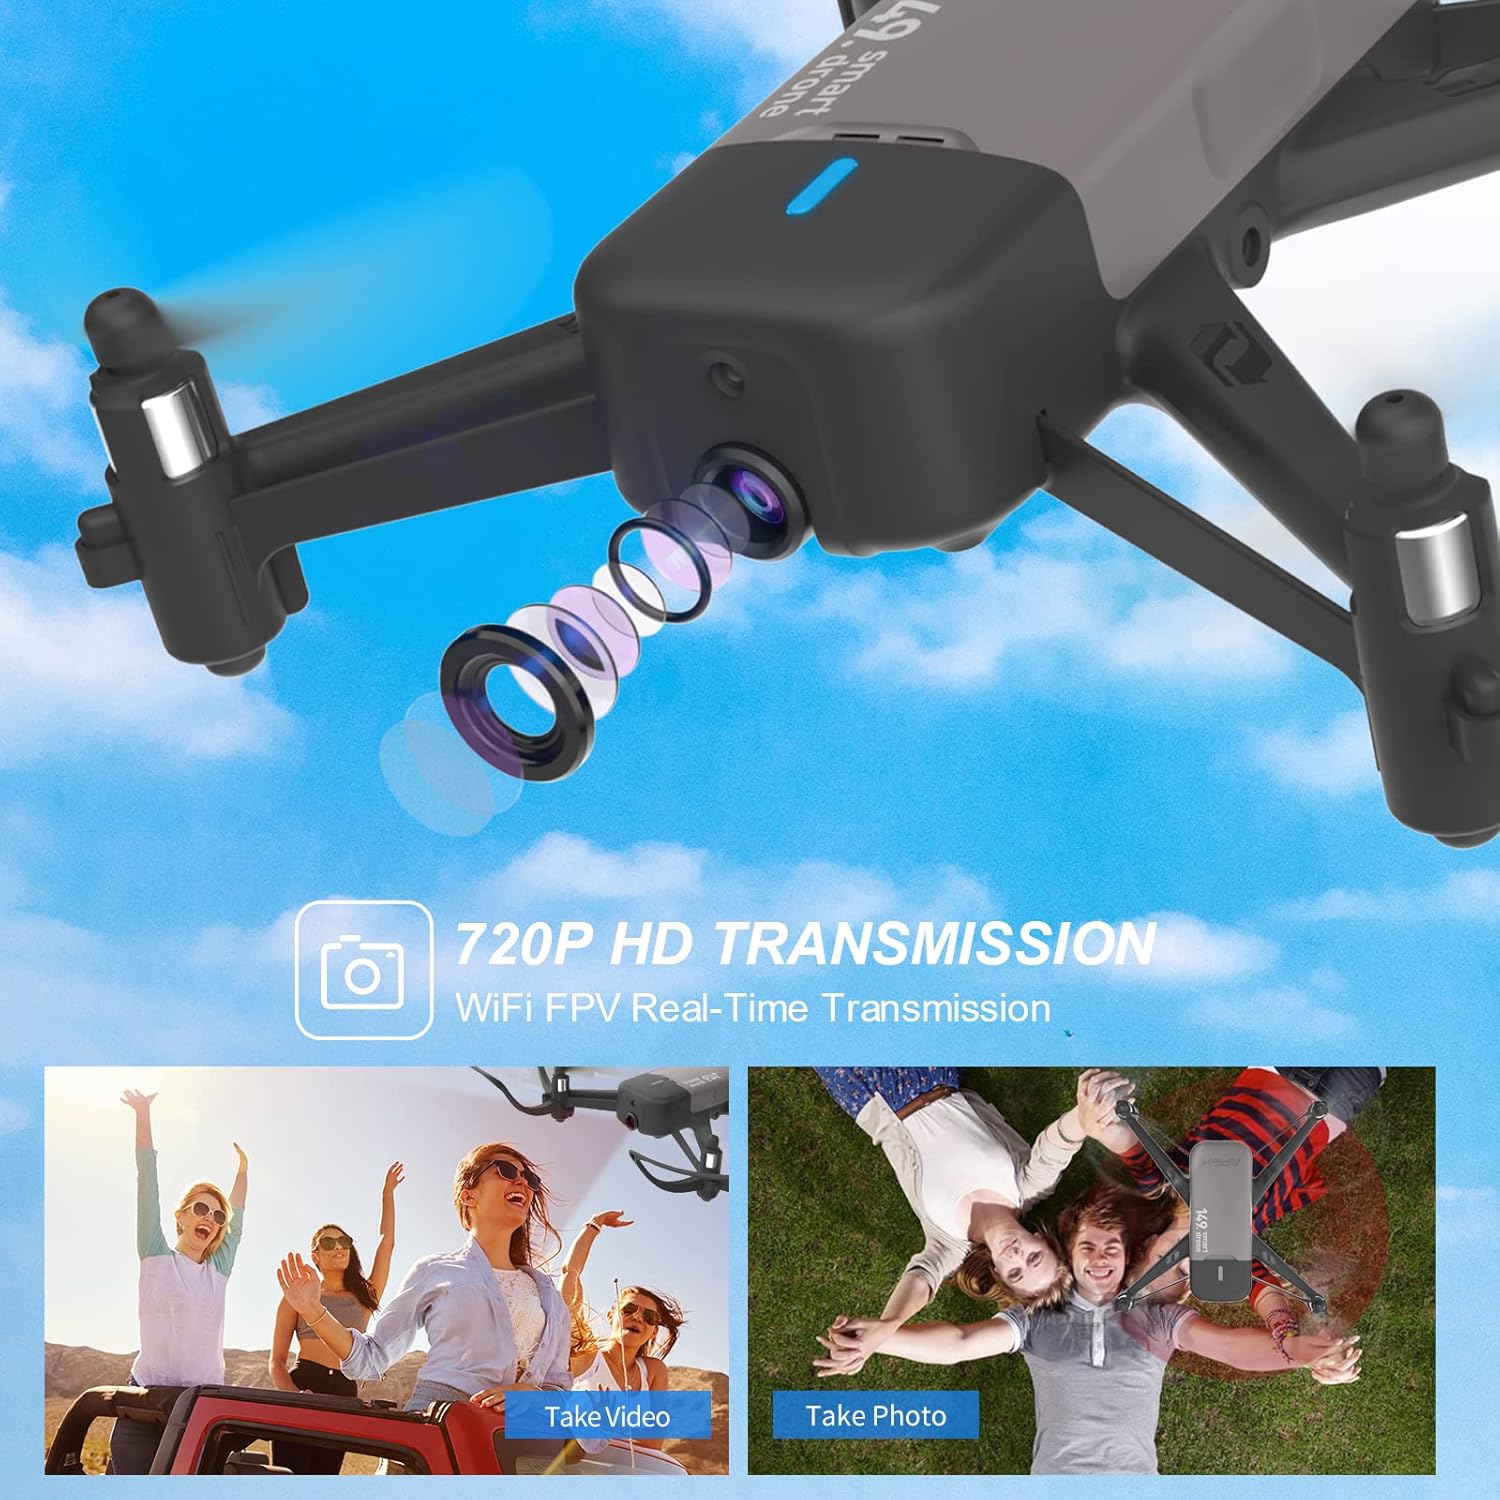
Image: The APEX AT-149 drone flying outdoors, demonstrating its agility and ease of control.
3. Advanced Features
720P HD Camera and FPV
The drone is equipped with a 720P HD camera for real-time video transmission (FPV) to your smartphone via the companion app. This allows you to capture photos and videos from the drone's perspective.

Image: Close-up of the APEX AT-149 drone's 720P HD camera lens, highlighting its capability to capture aerial footage.
Scratch Programming Mode
Utilize the Scratch programming interface within the app to create custom flight paths and maneuvers. This block-based coding system is ideal for learning basic programming concepts.

Image: Screenshot of the Scratch programming interface within the APEX drone app, showing drag-and-drop code blocks for flight commands.
App Gravity Control
Control the drone's movement by tilting your smartphone when using the app's gravity control feature. This provides an intuitive way to steer the drone.

Image: Illustration of a user controlling the APEX AT-149 drone by tilting a smartphone, demonstrating the app's gravity control feature.
Auto Hover and Altitude Hold
The drone features auto hover for stable flight and altitude hold, allowing it to maintain a consistent height without constant throttle input.

Image: The APEX AT-149 drone hovering stably in the air, illustrating its auto-hover capability.
Maintenance
1. Propeller Replacement
If propellers are damaged, replace them with spare parts. Ensure correct propeller (A or B) is installed on the corresponding motor arm as indicated on the drone.
2. Battery Care
- Always use the provided charging cable.
- Do not overcharge or over-discharge the batteries.
- Store batteries in a cool, dry place away from direct sunlight.
- If not used for extended periods, charge batteries to approximately 50% capacity.
3. Cleaning
Wipe the drone and remote controller with a soft, dry cloth. Do not use harsh chemicals or immerse in water.
Troubleshooting
| Problem | Possible Cause | Solution |
|---|---|---|
| Drone does not respond to remote controller. | Not paired; low battery; interference. | Re-pair drone and controller; charge drone battery; replace controller batteries; move to an area with less interference. |
| Drone drifts during flight. | Not calibrated; wind interference. | Perform gyroscope calibration (refer to quick start guide); fly in calm conditions. |
| Camera feed is choppy or disconnected. | Weak Wi-Fi signal; app issue. | Ensure strong Wi-Fi connection between phone and drone; restart app and drone; try a different device. |
| Drone does not take off. | Low battery; propellers blocked; not paired. | Charge drone battery; check for obstructions around propellers; re-pair drone. |
Specifications
- Model: AT-149
- Brand: APEX
- Dimensions: 17.2 x 17.2 x 3.2 cm
- Weight: 222 g
- Camera: 720P HD
- Battery: 1000mAh Lithium Polymer (included)
- Flight Time: Approximately 10 minutes per battery (2 batteries included for 20 minutes total flight time)
- Control Range: Not specified, typically up to 50-80 meters for mini drones.
- Special Features: Scratch Programming, Obstacle Avoidance, One-Key Take-off/Landing, Headless Mode, Altitude Hold, App Gravity Control.
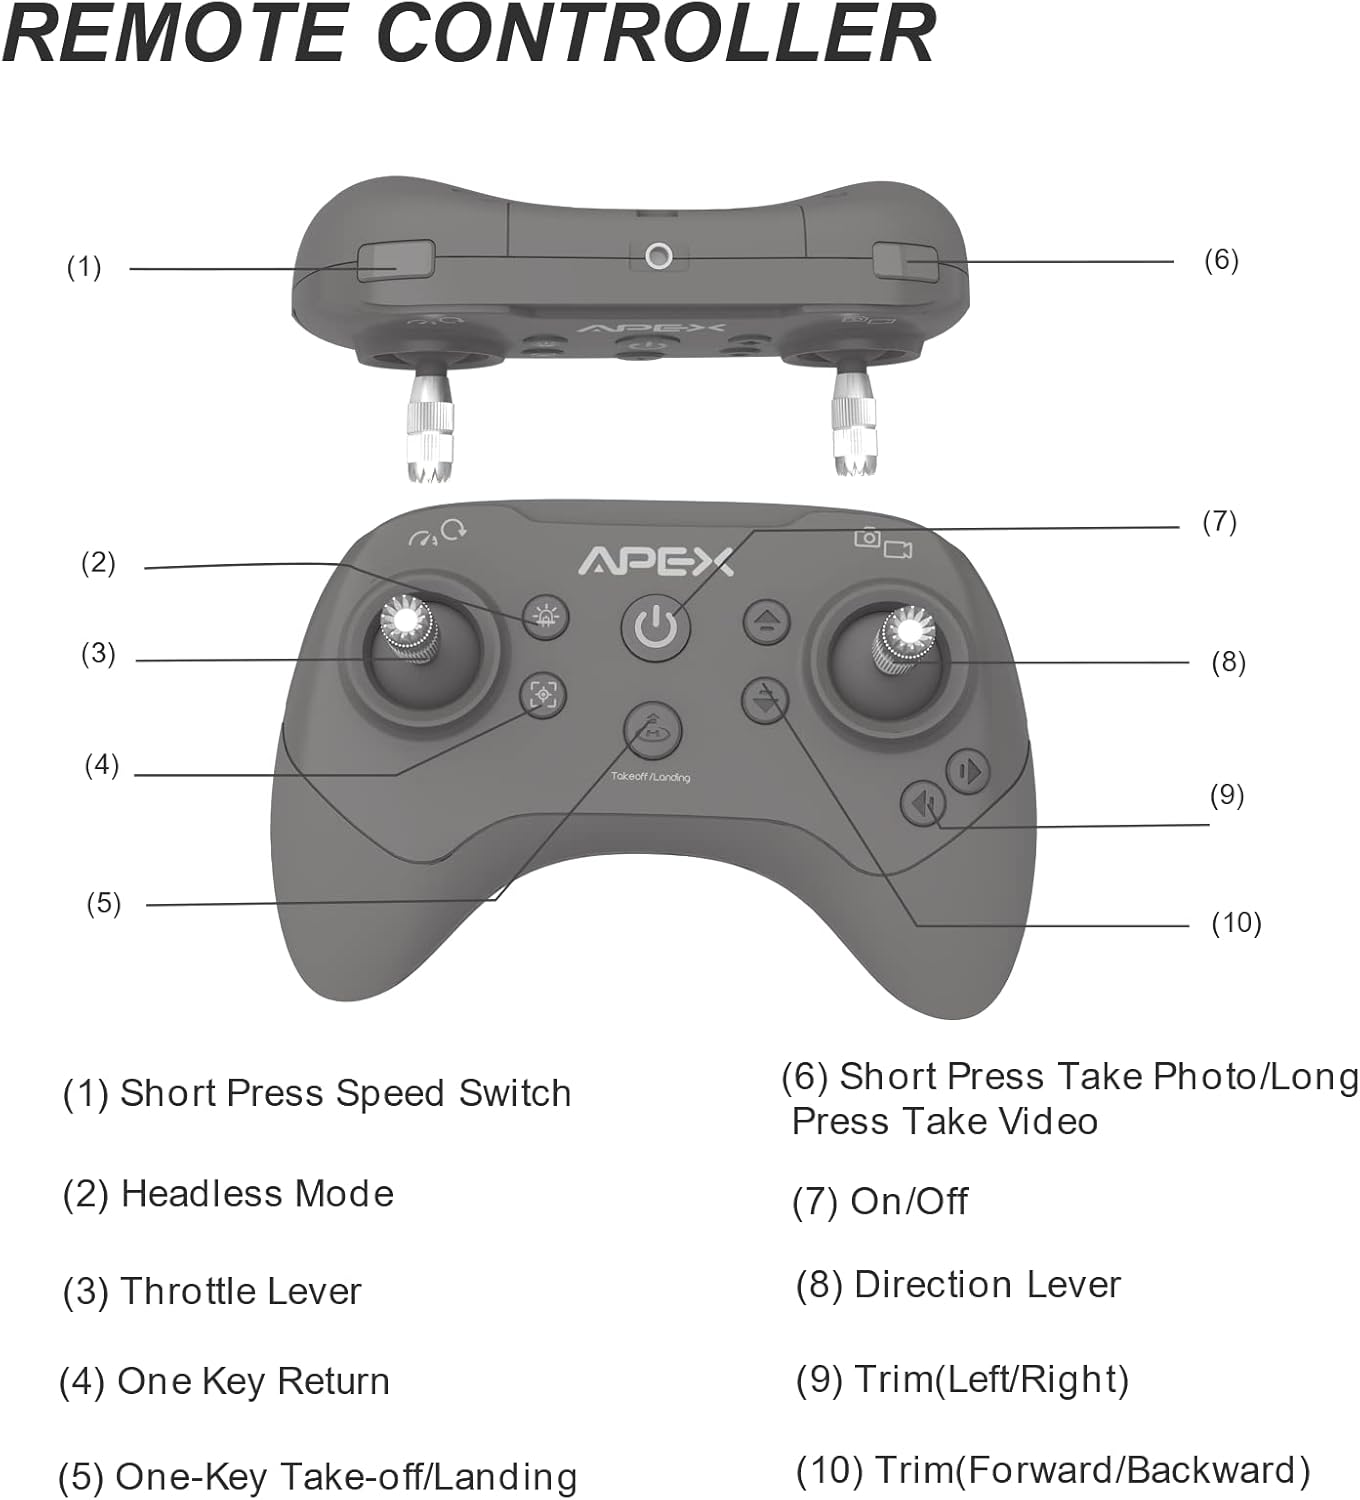
Image: The APEX AT-149 drone highlighting its modular battery design, indicating 2x10 minute flight time for a total of 20 minutes.
Safety Guidelines
Always operate the drone responsibly and safely. Adhere to local regulations regarding drone operation. Avoid flying near people, animals, or obstacles. Do not fly in strong winds or adverse weather conditions.
Warranty and Support
For warranty information and technical support, please refer to the contact details provided on the product packaging or the official APEX website. Keep your purchase receipt as proof of purchase.
For common questions and further assistance, you may visit the APEX support page or contact customer service directly.