
Introduction
Welcome to the world of imaginative play with your new ROBUD Vintage Wooden Play Kitchen. This manual provides essential information for assembly, safe operation, maintenance, and troubleshooting to ensure a delightful and durable play experience for children aged 3 and up.
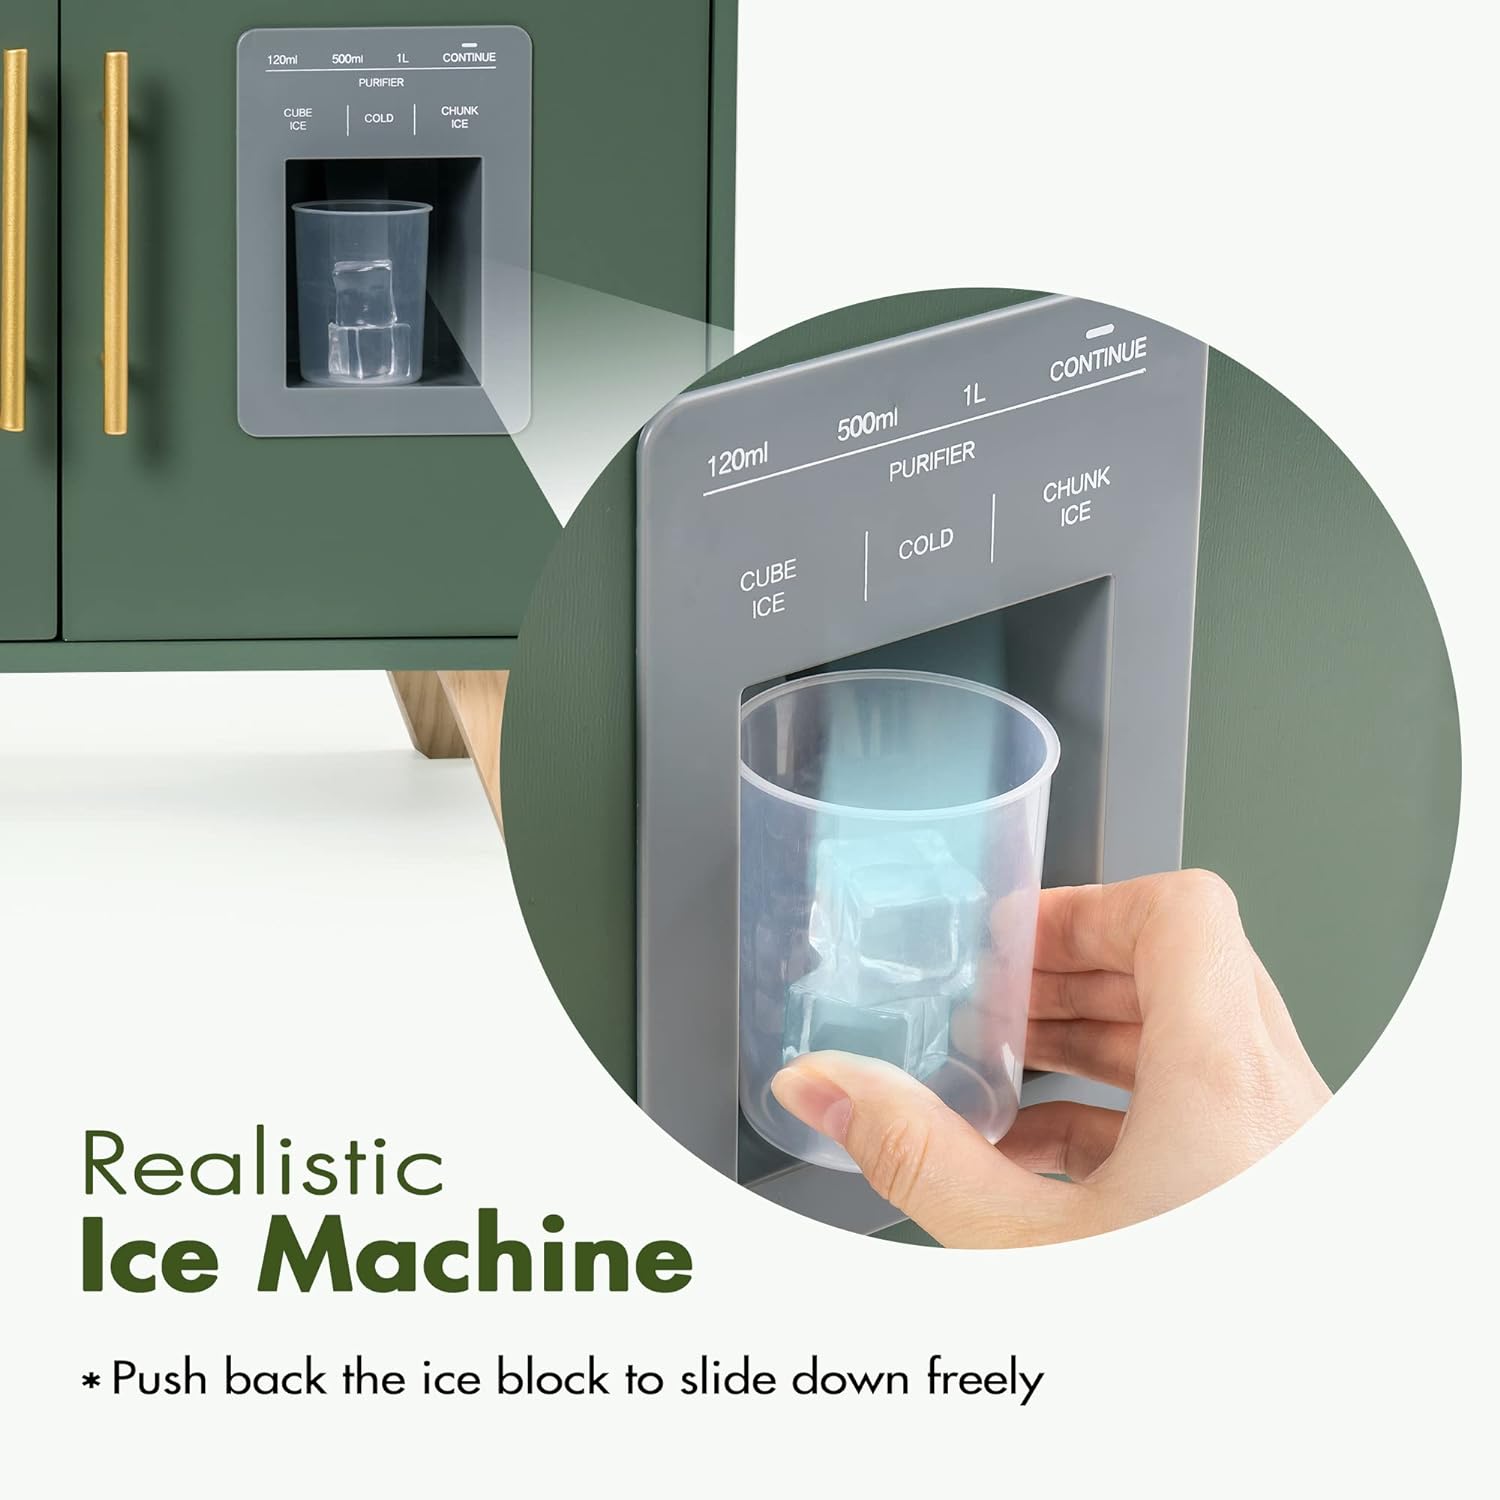
Image: Front view of the assembled ROBUD Vintage Wooden Play Kitchen.
Important Safety Information
Please read all instructions carefully before assembly and use. Keep this manual for future reference.
- Adult Assembly Required: This product contains small parts and requires adult assembly.
- Choking Hazard: Small parts may be present before assembly. Keep away from children under 3 years of age.
- Stability Warning: Ensure the play kitchen is placed on a flat, stable surface. To prevent tipping, especially if children may climb on it, consider securing it to a wall using appropriate hardware (not included) if necessary. Adult supervision is recommended for children under 2 years of age.
- Material Safety: Made from wood. Inspect regularly for any loose parts, splinters, or damage. Discontinue use if damaged.
- Cleaning: Use a damp cloth for cleaning. Avoid harsh chemicals or abrasive cleaners.
Parts List
Before beginning assembly, ensure all components are present and undamaged. Refer to the assembly diagram for visual identification.
- Main Kitchen Unit (various wooden panels)
- Sink Basin (plastic)
- Faucet and Knobs (wooden)
- Microwave Door and Handle (wooden)
- Stove Knobs (wooden)
- Ice Dispenser Unit (plastic/wooden)
- Wooden Ice Cubes (2-3 pieces)
- Pots and Utensils (as specified below)
- Assembly Hardware (screws, dowels, etc.)
Included Accessories:
- 1 x Pot with Lid
- 1 x Pan
- 3 x Wooden Utensils (spatula, slotted turner, knife)
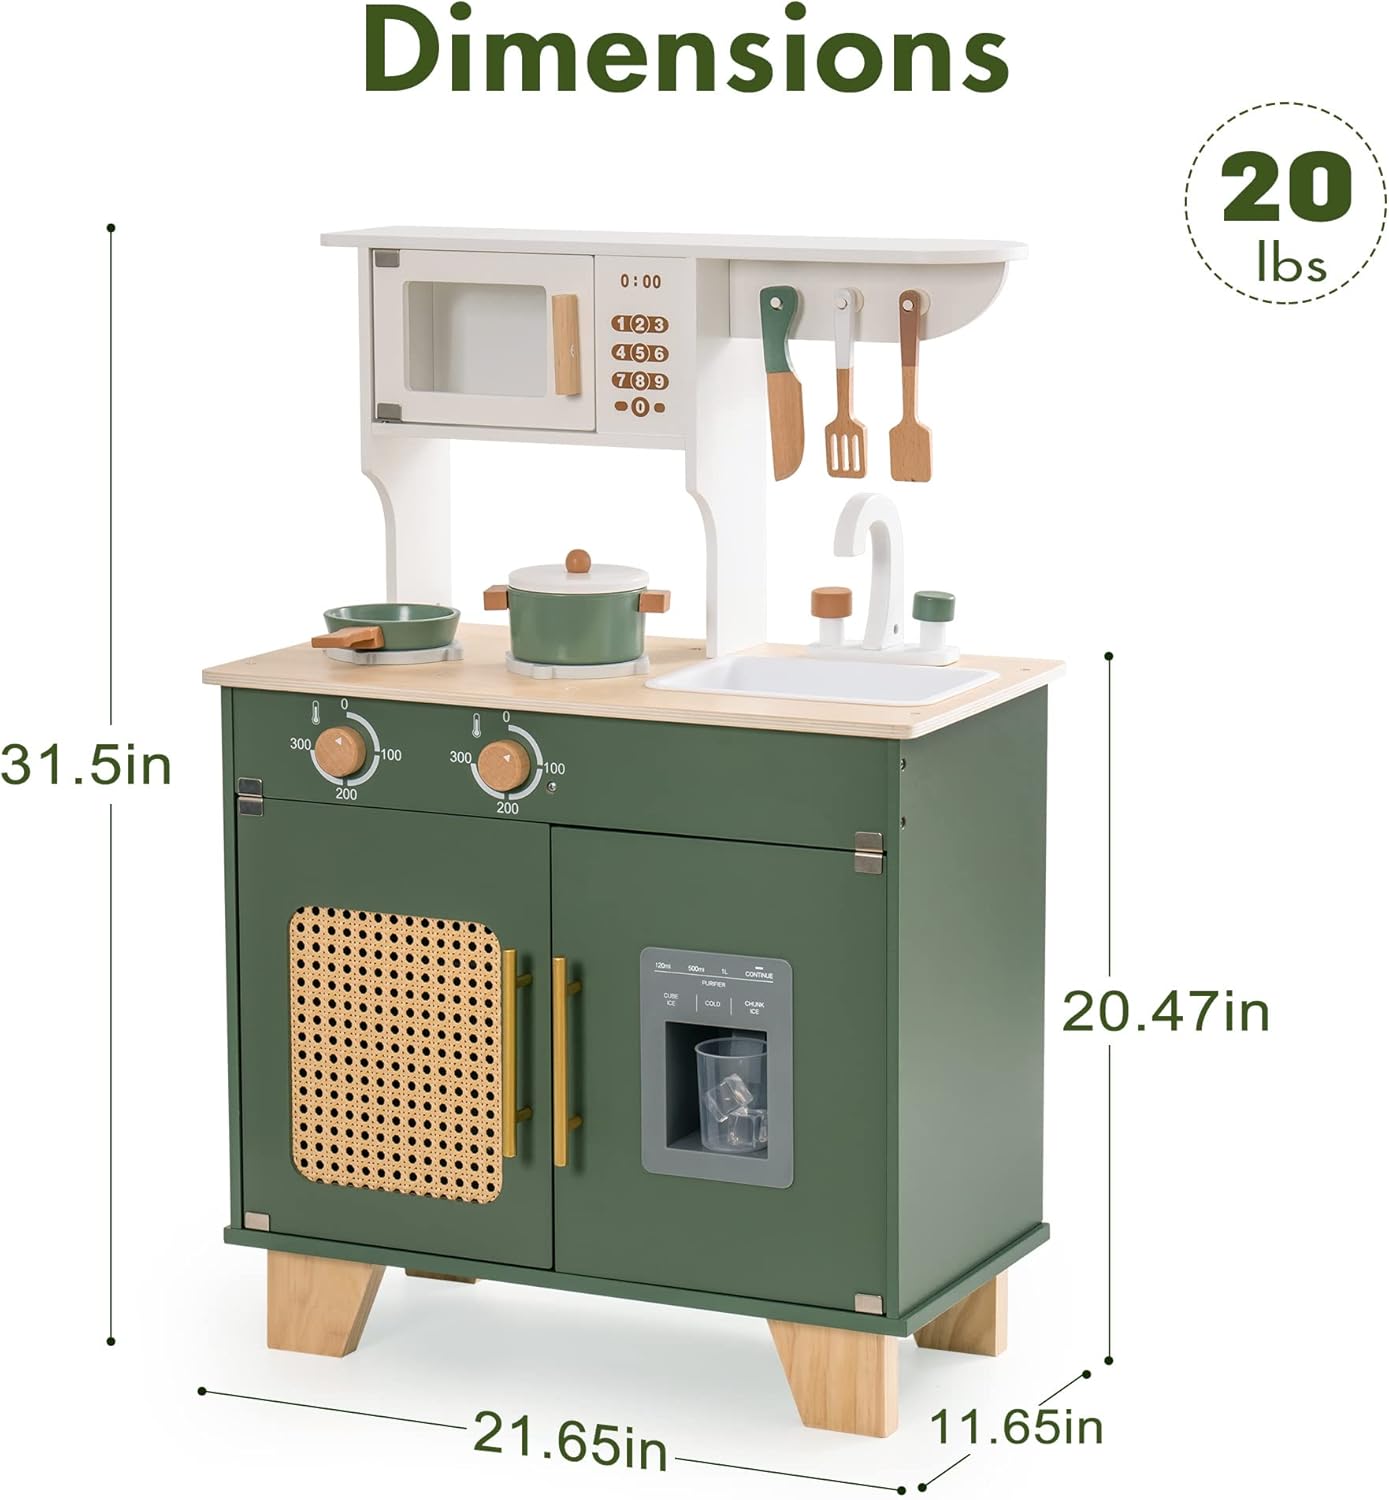
Image: Included pots, pan, and utensils on the play kitchen countertop.
Assembly Instructions
Follow these steps carefully for proper assembly. A Phillips head screwdriver is required (not included).
- Unpack and Organize: Lay out all parts and hardware. Identify each piece using the provided parts list and diagrams.
- Assemble Base Unit: Attach the side panels to the bottom panel using the designated screws and dowels. Ensure all connections are secure.
- Install Back Panel: Slide or screw the back panel into place, reinforcing the structure.
- Attach Countertop: Secure the main countertop to the assembled base.
- Mount Upper Shelf and Microwave: Assemble the upper shelf unit and attach the microwave door. Secure this unit to the main countertop.
- Install Sink and Faucet: Place the plastic sink basin into the cutout on the countertop. Assemble and attach the wooden faucet and knobs.
- Attach Doors: Install the cabinet doors and the ice dispenser door using the provided hinges and screws. Ensure they open and close smoothly.
- Add Handles and Knobs: Attach all decorative handles and stove knobs. The stove knobs are designed to click when turned.
- Place Ice Dispenser: Insert the ice dispenser mechanism and wooden ice cubes into the designated slot.
- Final Check: Verify all screws are tightened and all components are securely in place.

Image: Interior view of the play kitchen cabinets, demonstrating storage space.
Operating Instructions
Ice Dispenser:
The realistic ice dispenser allows for interactive play. Place the included wooden ice cubes into the top compartment of the dispenser. When the lever is pressed, an ice cube will drop into the cup below.

Image: Detailed view of the ice dispenser in action.
Stove Knobs:
Turn the stove knobs to simulate cooking. Each knob produces a satisfying clicking sound as it rotates, enhancing the play experience.
Microwave:
The microwave door opens and closes, allowing children to place play food inside for pretend heating. The buttons on the microwave are for decorative purposes.
Sink and Faucet:
The faucet handles can be turned. The sink basin is removable for easy cleaning.
Video: A demonstration of the ROBUD Wooden Play Kitchen's features, including the ice machine, stove, and sink.
Maintenance and Care
- Cleaning: Wipe surfaces with a soft, damp cloth. Avoid using abrasive cleaners, solvents, or harsh chemicals, as these can damage the finish.
- Inspection: Periodically check all screws and fasteners to ensure they are tight. Re-tighten if necessary.
- Storage: Store the play kitchen in a dry environment away from direct sunlight or extreme temperatures to prevent warping or fading.
- Damage: If any part becomes broken or damaged, discontinue use immediately and contact customer support for replacement parts or guidance.
Troubleshooting
| Problem | Possible Cause | Solution |
|---|---|---|
| Ice cubes not dispensing | Ice cubes are jammed or not loaded correctly. | Ensure ice cubes are placed individually and not stacked. Gently push the lever to dislodge any stuck cubes. |
| Doors do not close properly | Hinges are loose or misaligned. | Check and tighten all hinge screws. Ensure the magnetic catches are aligned. |
| Play kitchen feels wobbly | Loose assembly screws or uneven surface. | Re-tighten all assembly screws. Place the kitchen on a level surface. Consider wall anchoring for added stability. |
Specifications
- Model: RB-2-WCF04
- Brand: ROBUD
- Material: Wood
- Color: Vintage Green
- Item Dimensions (D x W x H): 11.65"D x 21.65"W x 31.5"H
- Item Weight: 9.66 Kilograms
- Recommended Age: 36 Months and Up

Image: Dimensions of the play kitchen.
Warranty and Support
ROBUD products are designed for quality and durability. For warranty information, replacement parts, or customer support, please refer to the contact information provided with your purchase or visit the official ROBUD website. Please retain your proof of purchase.
