
1. Introduction
Thank you for choosing the VASAGLE ULNT118B22 70-inch console table. This versatile furniture piece is designed to enhance your living space with its functional design, including a hidden charging station. This manual provides detailed instructions for assembly, operation, maintenance, and safety to ensure optimal use and longevity of your product.

Image: The VASAGLE 70-inch console table, black finish, positioned behind a sofa in a modern living room, showcasing its slim profile and functional top surface with a laptop and decorative items.
2. Safety Information
Please read and understand all safety warnings and instructions before assembly and use. Failure to follow these instructions may result in injury or damage to the product.
- Anti-Tip Kit: For safety reasons, always secure this table to the wall using the included anti-tip kit to prevent accidental tipping.
- Corner Protectors: Utilize the provided corner protectors to safeguard against bumps and potential injuries, especially in households with children.
- Children Safety: Children are not permitted to climb or play on this console table.
- Weight Capacity: Do not exceed the maximum static load capacity of the tabletop (180 lb / 81.5 kg) and the shelf (20 lb / 9.1 kg).
- Electrical Safety: Ensure the power strip is used in a dry environment. Do not overload the outlets.

Image: Anti-Tip Kit installation detail.

Image: Corner Protectors for safety.
3. Package Contents
Before beginning assembly, please verify that all parts listed below are present and undamaged. If any parts are missing or damaged, contact customer support.
- 1 x Slim Console Table (disassembled components)
- 1 x Assembly Bag (containing screws, hex key, etc.)
- 1 x Anti-Tip Kit
- 1 x Instructions Manual
4. Assembly Instructions
Assembly typically requires two people and approximately 30-60 minutes. Tools recommended for assembly include a hex key (provided) and a screwdriver (not provided). Follow the step-by-step diagrams in the included Assembly Guide for detailed instructions.
- Unpack Components: Carefully remove all parts from the packaging and lay them out on a clean, soft surface to prevent scratches.
- Identify Parts: Match each component with the corresponding labels in the Assembly Bag and the instruction manual.
- Assemble Frame: Attach the metal frame components using the provided screws and hex key. Ensure all connections are secure.
- Attach Shelves: Secure the particleboard shelves to the assembled frame.
- Install Charging Station: Place the power strip into its designated compartment on the tabletop.
- Final Tightening: Once all parts are in place, gently tighten all screws to ensure stability. Do not overtighten.
- Attach Safety Features: Install the anti-tip kit to the wall and apply corner protectors as desired.
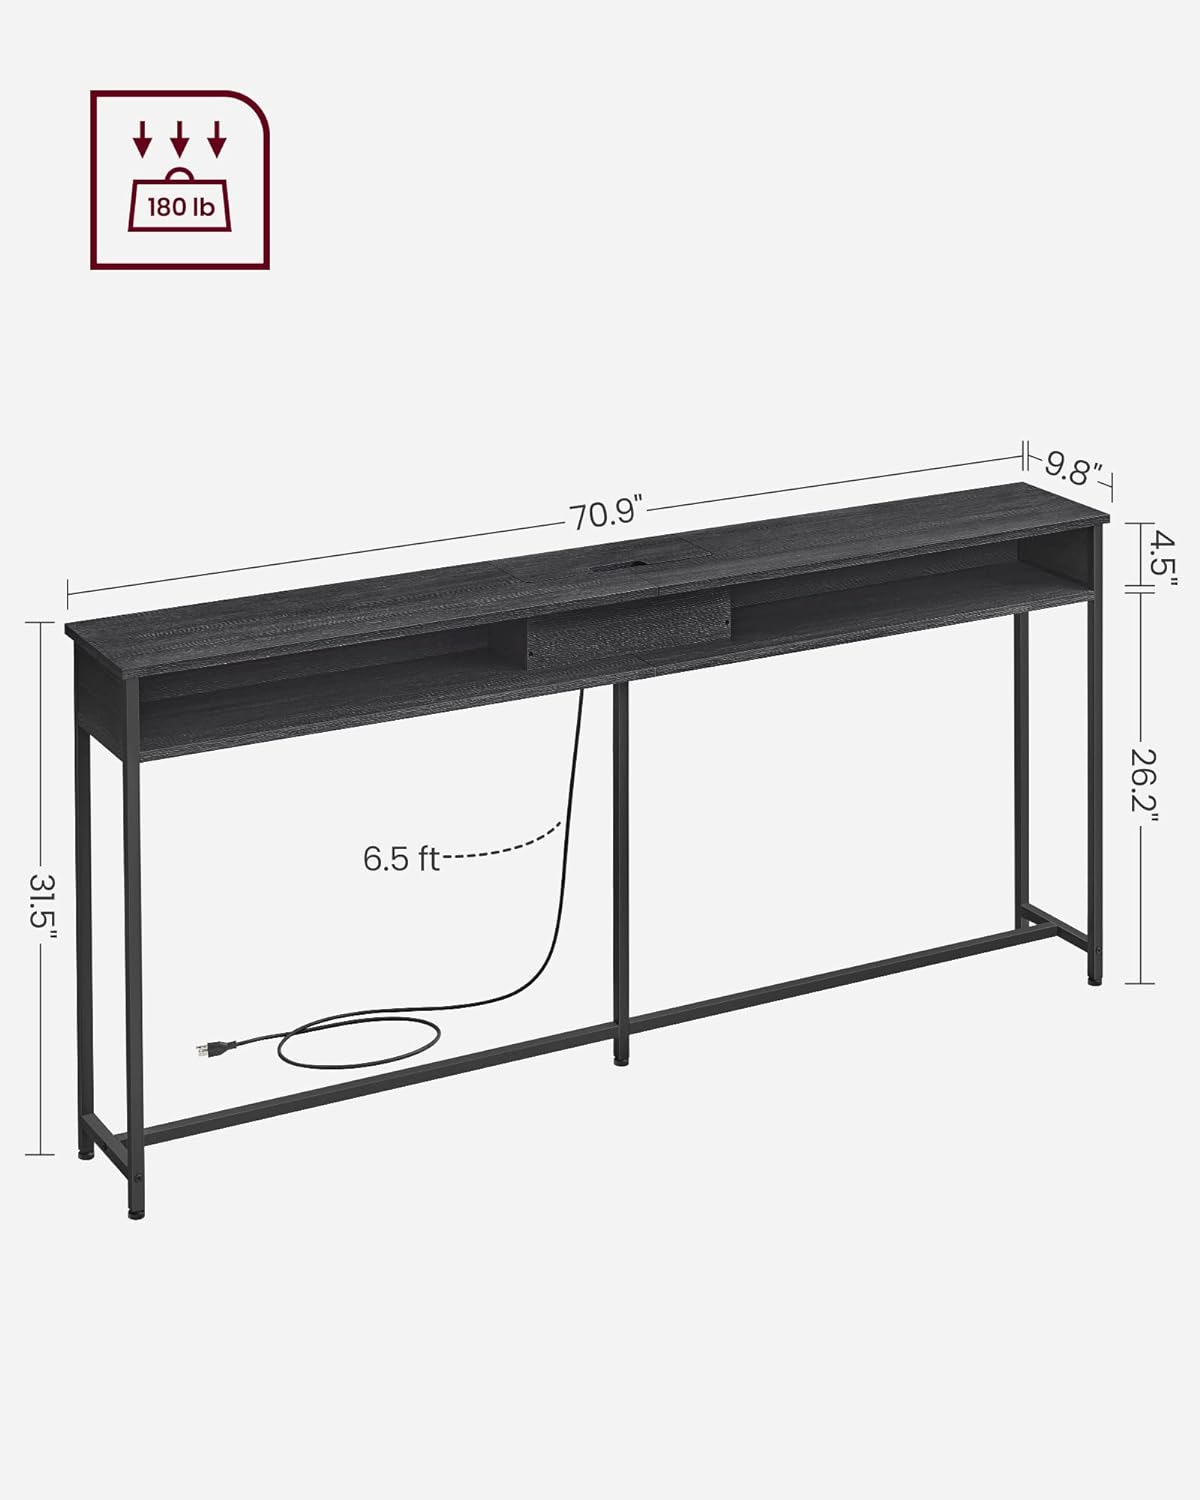
Image: Detailed dimensions of the console table, including the 70.9-inch width, 9.8-inch depth, and 31.5-inch height, along with the 6.5 ft power cord length.
5. Operating Instructions (Hidden Charging Station)
The console table features a convenient hidden charging station to keep your devices powered and your tabletop tidy.
- Accessing the Charging Station: Gently lift the hinged section of the tabletop to reveal the integrated power strip.
- Connecting Devices:
- The power strip includes 2 AC outlets (120V/12A) for standard electrical devices.
- It also features 2 USB ports (5V/2A) for charging smartphones, tablets, and other USB-powered devices.
- Cable Management: Utilize the rear cable hole to guide charging cables from the hidden compartment to your devices on the tabletop, maintaining an organized appearance.
- Closing the Compartment: Once charging is complete or devices are disconnected, carefully lower the hinged tabletop section to conceal the power strip and cables.

Image: Hidden charging station with lid open, revealing two AC outlets and two USB ports.

Image: Rear cable hole for organized cable routing.
6. Maintenance
Proper care will help maintain the appearance and functionality of your console table.
- Cleaning: Wipe the surfaces with a damp cloth, then immediately wipe dry with a clean, dry cloth. Avoid abrasive cleaners or harsh chemicals.
- Spills: Promptly clean up any spills to prevent staining or damage to the engineered wood surface.
- Heat and Moisture: Avoid placing hot items directly on the surface. Use coasters for drinks to prevent moisture rings.
- Tighten Fasteners: Periodically check and tighten all screws and fasteners to ensure the table remains stable.
7. Troubleshooting
If you encounter any issues with your console table, refer to the following common solutions:
| Problem | Possible Cause | Solution |
|---|---|---|
| Table is wobbly. | Loose fasteners or uneven floor. | Check and tighten all screws. Adjust the adjustable feet on the bottom of the legs to level the table. |
| Charging station not working. | Power cord not plugged in, overloaded circuit, or faulty device. | Ensure the table's power cord is securely plugged into a working wall outlet. Check if the device being charged is functional. Avoid overloading the power strip. |
| Parts do not align during assembly. | Incorrect orientation or missing steps. | Review the assembly instructions carefully, ensuring each part is oriented correctly before tightening screws. Do not fully tighten screws until all parts are loosely assembled. |
8. Specifications
| Feature | Detail |
|---|---|
| Model Number | ULNT118B22 |
| Brand | VASAGLE |
| Color | Black |
| Materials | Steel, Engineered Wood (Particleboard) |
| Product Dimensions (D x W x H) | 9.8" x 70.9" x 31.5" (24.9 x 180.1 x 80 cm) |
| Product Weight | 32.6 lb (14.8 kg) |
| Max. Static Load Capacity (Tabletop) | 180 lb (81.5 kg) |
| Max. Static Load Capacity (Shelf) | 20 lb (9.1 kg) |
| AC Outlets | 2 (120V/12A) |
| USB Ports | 2 (5V/2A) |
| Power Cord Length | 6.5 ft |
| Special Features | Hidden Charging Station, Easy Assembly, Storage, USB Port, Anti-Tip Kit, Corner Protectors, Adjustable Feet |
9. Warranty and Support
For warranty information or customer support, please refer to the contact details provided with your purchase or visit the official VASAGLE website. Keep your purchase receipt for any warranty claims.