
1. Introduction
This manual provides essential instructions for the safe and efficient operation, setup, maintenance, and troubleshooting of your Moonshan Industrial Bag Closing Machine, model GS7-017. This machine is designed for industrial packaging applications, specifically for closing bags made from materials such as non-woven fabrics, rice bags, hard carpets, cowhide composite bags, leather, towels, paper bags, and flour bags. It is not intended for household sewing tasks.

Figure 1: Moonshan Industrial Bag Closing Machine GS7-017.
2. Safety Instructions
- Always ensure the machine is unplugged before performing any maintenance, cleaning, or when changing needles.
- Keep hands and loose clothing away from moving parts, especially the needle and presser foot area, during operation.
- Operate the machine on a stable, level surface.
- Do not operate the machine in wet conditions or near flammable materials.
- Use only approved power cords and ensure the power supply matches the machine's requirements (110V).
- Keep children and unauthorized personnel away from the operating machine.
- Wear appropriate personal protective equipment (PPE) such as safety glasses if necessary.
3. Package Contents
Verify that all items listed below are included in your package:
- Moonshan Industrial Bag Closing Machine GS7-017
- Hexagon wrench
- Wrench for needle
- Oil pot
- Synchronous belt
- Blades of thread cutter
- User manual (this document)
- FAQ instruction
- Elastic rope for needle threader
- 10 pcs * Needle
- Power cord
- Needle threader

Figure 2: Contents included in the package.
4. Setup
4.1 Unpacking
Carefully remove the machine and all accessories from the packaging. Inspect for any signs of damage during transit. Retain packaging for future storage or transport.
4.2 Power Connection
Connect the provided power cord to the machine's power input and then to a standard 110V electrical outlet. Ensure the connection is secure.
4.3 Thread Installation
Follow the threading path indicated on the machine. Ensure the thread is correctly routed through all guides and tension discs before passing it through the needle eye. Use the needle threader for assistance.
4.4 Initial Oiling
Before first use, and periodically thereafter, apply a few drops of sewing machine oil into the designated oil holes on the machine body. This ensures smooth operation and extends the machine's lifespan.

Figure 3: Location of oil holes for maintenance.
5. Operation
5.1 General Use
Hold the machine firmly by its ergonomic handle. Position the bag opening under the presser foot. Press the power switch to begin sewing. The machine operates at a fixed speed of 2600 stitches per minute, capable of closing a bag in approximately 2 seconds.

Figure 4: Ergonomic handle and switch for comfortable operation.
5.2 Adjusting Stitch Length and Tension
- Needle Bar Controller: Rotate this controller to adjust the height of the needle bar, accommodating different material thicknesses.
- Adjustable Thread Tension: Use the thread crimper to fine-tune the thread tension, which affects the appearance and strength of your stitch.
- Adjustable Pressing Force: Rotate the screw clockwise to increase pressing force of the presser foot, or counter-clockwise to decrease it.
The stitch length is adjustable between 7-10mm, allowing for fine stitches that create a firm seal, preventing contents from falling out.
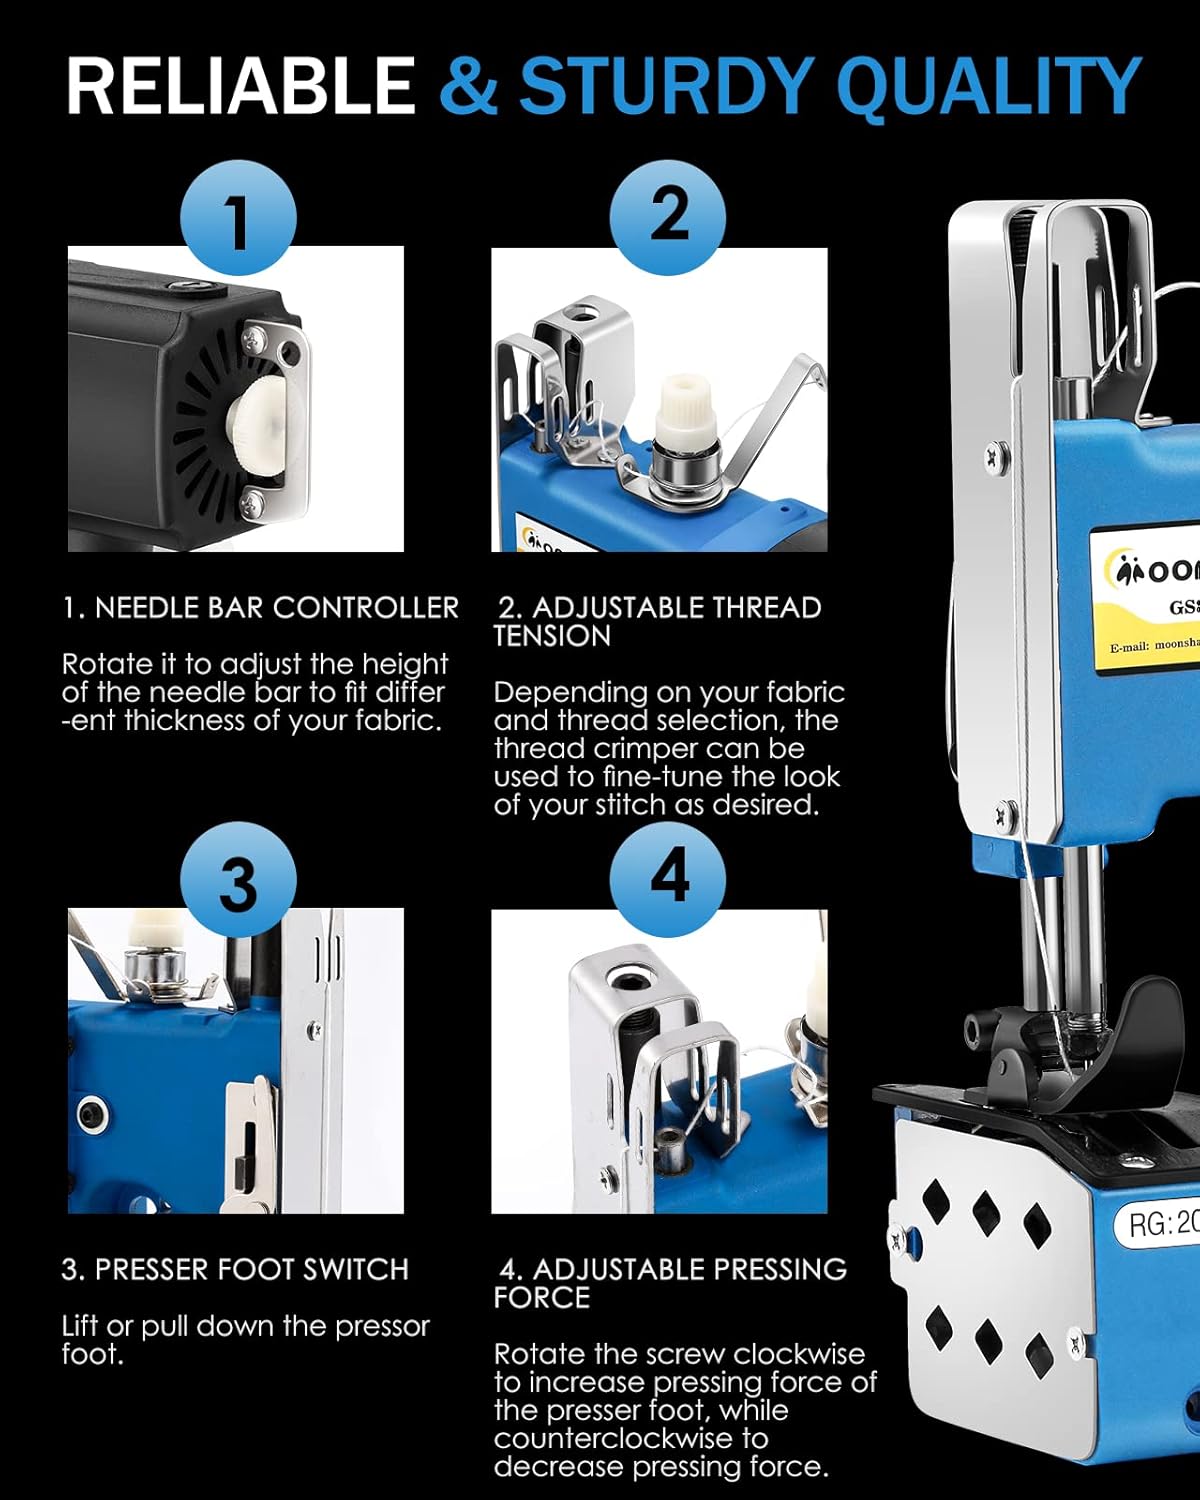
Figure 5: Key adjustable components for stitch quality.
5.3 Automatic Thread Cutting
After completing a seam, guide the sewing thread into the cutting slot. The machine will automatically cut the thread, eliminating the need for manual cutting and improving workflow efficiency.
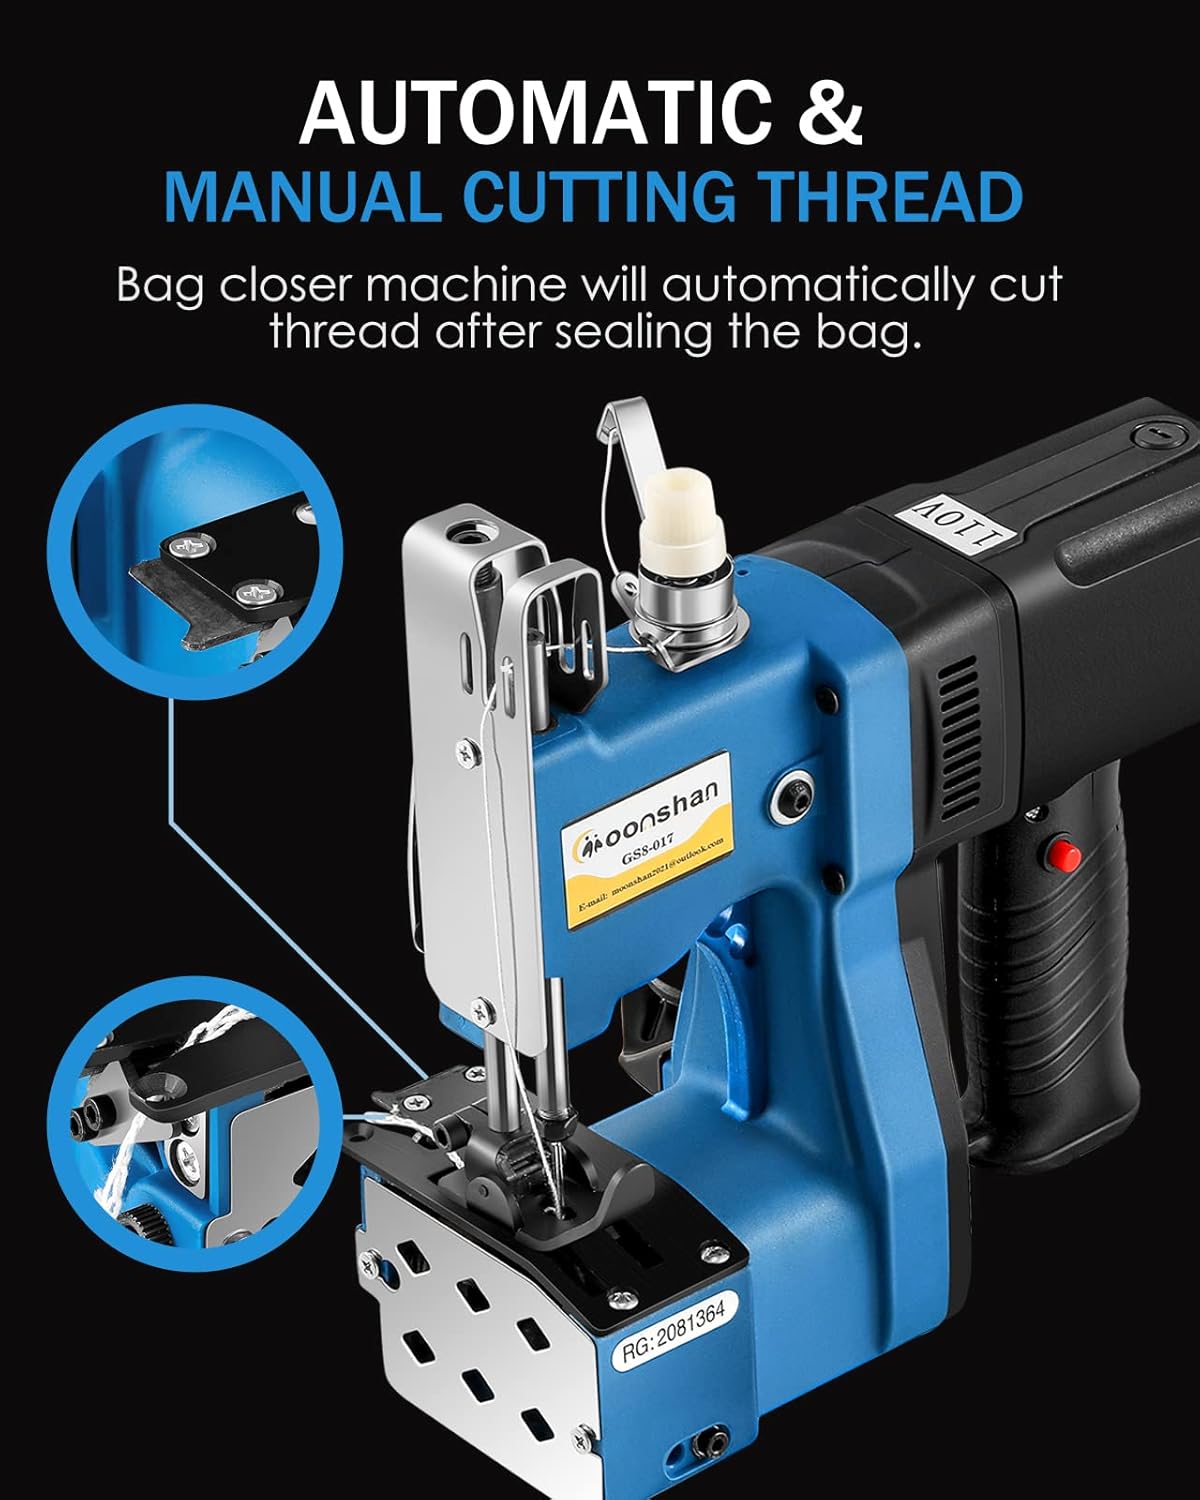
Figure 6: Automatic thread cutting feature.
5.4 Material Compatibility
This machine is suitable for various bag materials with a recommended thickness of 0.3-5 mm. Examples include:
- Sandbags (2-12 layers)
- Non-woven fabric (2-12 layers)
- Rice bags (2-14 layers)
- Hard carpet (2 layers / 3mm)
- Leather (2 layers / 2-3.5mm)
- Cowhide composite bags (2-10 layers)
- Paper bags (2-10 layers)
- Towels (2 layers / 3.5mm)
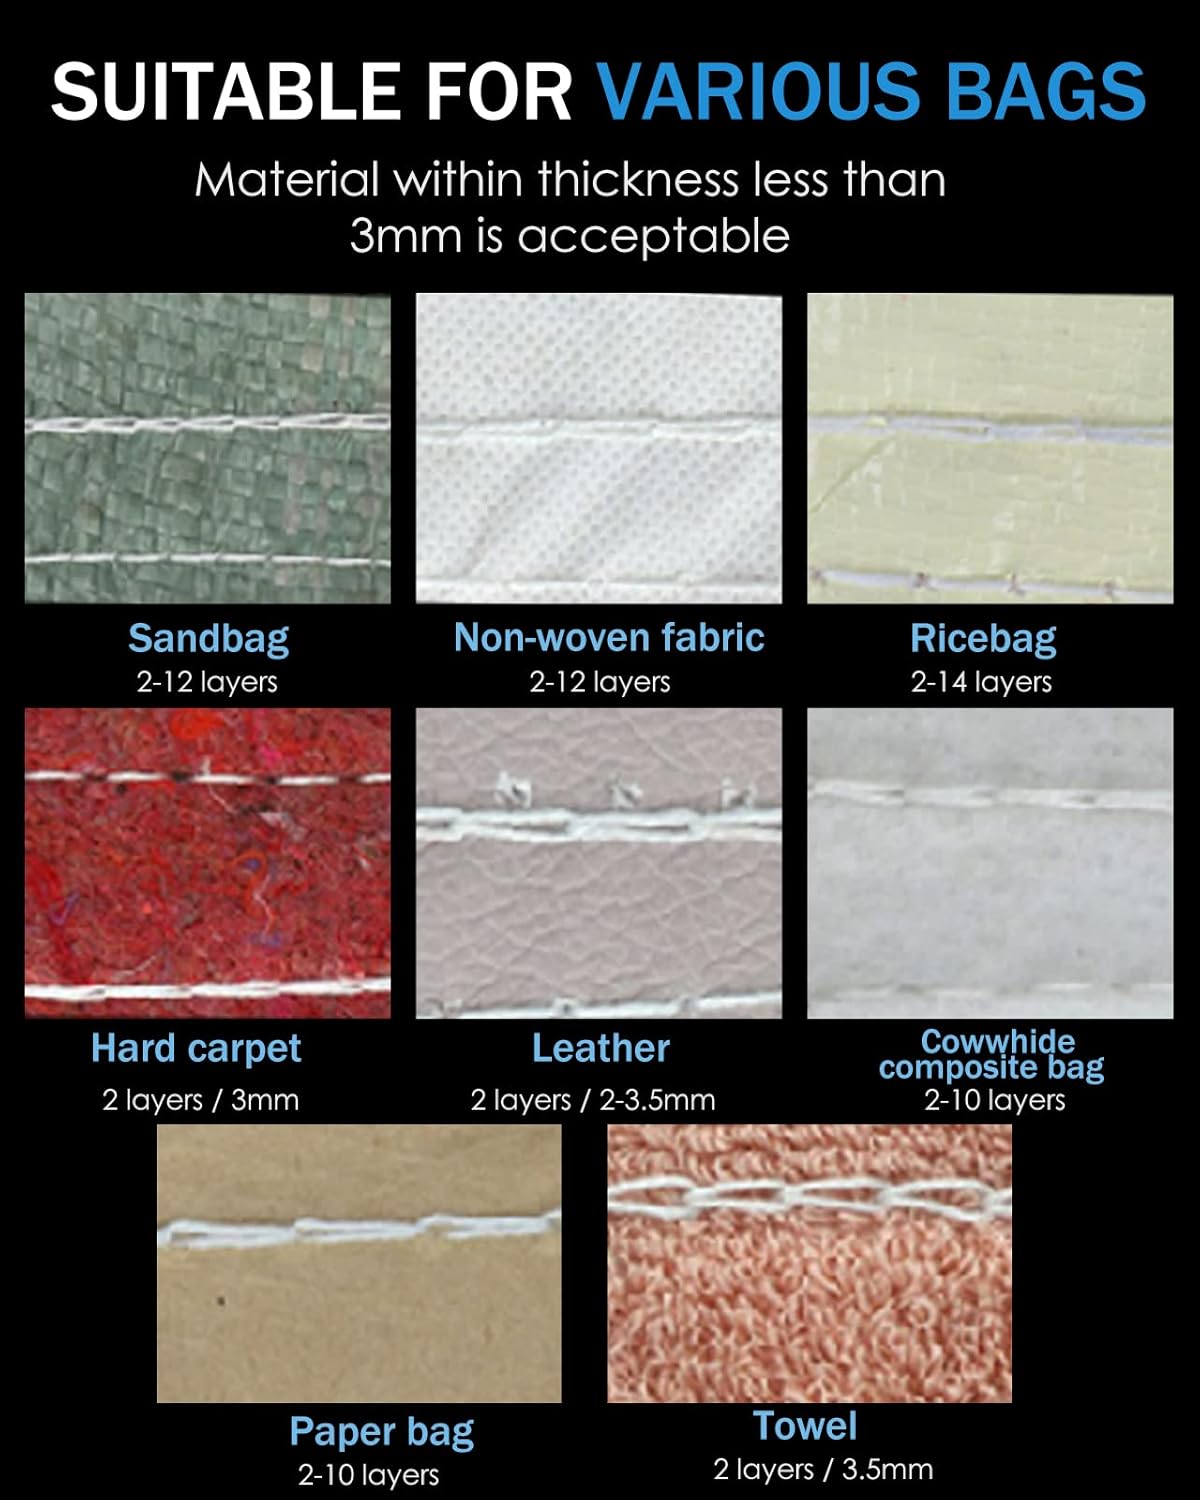
Figure 7: Various materials compatible with the machine.
6. Maintenance
6.1 Regular Oiling
Consistent lubrication is crucial for the machine's longevity and smooth operation. Apply sewing machine oil to all designated oiling points before and after each use, or as frequently as needed based on usage intensity.
6.2 Cleaning
Regularly clean lint, dust, and thread fragments from the needle area, presser foot, and feed dogs. Use a soft brush or compressed air. Ensure the machine is unplugged before cleaning.
6.3 Needle Replacement
Replace needles regularly, especially if they become bent, dull, or broken. Using a damaged needle can affect stitch quality and potentially harm the machine. Refer to the 'Wrench for needle' included in the package for assistance.
7. Troubleshooting
- Excessive Noise: Due to the high-speed motor (11000 rpm), some operational noise is unavoidable. However, if noise levels increase significantly or unusual sounds occur, check for proper oiling and ensure no parts are loose or obstructed.
- Skipped Stitches or Poor Stitch Quality: Verify that the needle is correctly installed and not bent or dull. Check thread tension and ensure the thread is properly routed through all guides. Adjust the needle bar height according to material thickness.
- Thread Breakage: Inspect the thread path for any snags or sharp edges. Ensure the thread tension is not too high. Use appropriate thread for the material being sewn.
- Machine Not Powering On: Confirm the power cord is securely connected to both the machine and the electrical outlet. Check the outlet for power.
For issues not resolved by these steps, please refer to the FAQ instruction sheet included with your product or contact Moonshan customer support.
8. Specifications
| Feature | Specification |
|---|---|
| Model Number | GS7-017 |
| Brand | Moonshan |
| Power | 90 W |
| Motor Speed | 11000 rpm |
| Sewing Speed | 2600 stitches/min (approx. 2 seconds/bag) |
| Stitch Length | Adjustable 7-10 mm |
| Max. Material Thickness | 0.3-5 mm (depending on material) |
| Product Dimensions | 3"D x 10"W x 10"H (approximate, based on available data) |
| Item Weight | 6.4 pounds |
| Color | Blue |
| UPC | 735279546064 |

Figure 8: The machine features a pure copper motor for efficiency and durability.
9. Warranty and Support
9.1 Warranty Information
Specific warranty details for the Moonshan Industrial Bag Closing Machine GS7-017 are not provided in the product information. Please refer to the warranty card included with your purchase or contact Moonshan customer service for detailed warranty terms and conditions.
9.2 Customer Support
For technical assistance, spare parts, or any other inquiries, please contact Moonshan customer support. Contact information can typically be found on the product packaging, the official Moonshan website, or through your retailer.

