
1. Introduction
Thank you for purchasing the Thomson Soundbar System. This manual provides essential information for setting up, operating, and maintaining your soundbar, subwoofer, and wireless microphones. Please read these instructions carefully before use and retain them for future reference.

Image 1.1: Thomson Soundbar System components including the soundbar, subwoofer, two wireless microphones, and remote control.
2. Package Contents
Verify that all items listed below are included in your package:
- Soundbar (1 unit)
- Subwoofer (1 unit)
- Remote Control (1 unit)
- Wireless Microphones (2 units)
- Power Adapter (1 unit)
- Audio Cable (1 unit)
- Coaxial Cable (1 unit)
- Optical Fiber Cable (1 unit)
- Wall Mounting Kit (includes padlocks, gel column, screws)
- User Manual (this document)
3. Product Overview
3.1 Soundbar
The soundbar features four built-in full-frequency speakers with sound guide enhancement holes for stereo sound. It also includes an LED strip lamp for visual effects.

Image 3.1: Internal structure of the soundbar highlighting the 4 full-range driver speakers, guide holes, and LED strip lamp.
3.2 Subwoofer
The external subwoofer is designed to deliver deep bass. It incorporates a bass diaphragm with high-roll foam surrounds for extended excursion and vibration-absorbing feet for stable performance.
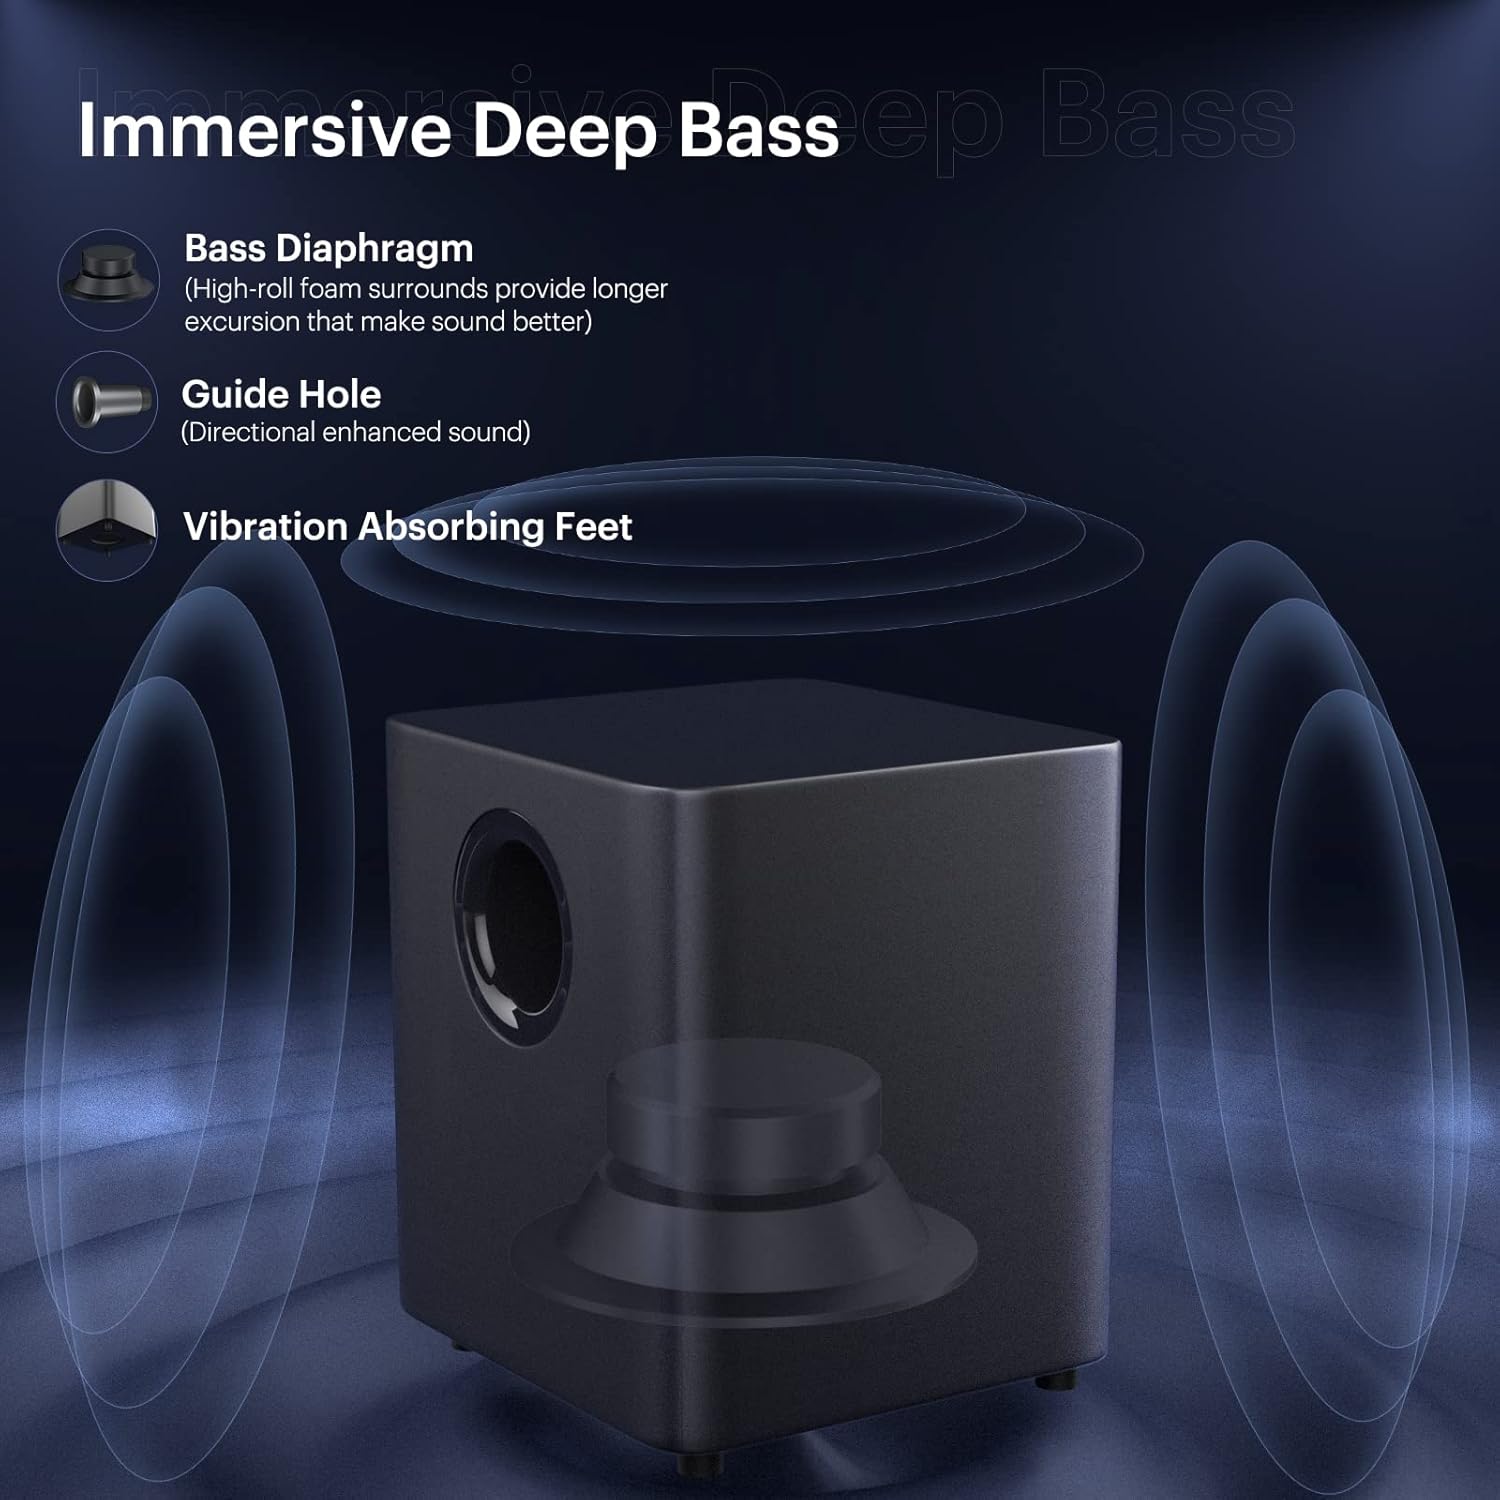
Image 3.2: Subwoofer design elements for immersive deep bass.
3.3 Wireless Microphones
Two wireless microphones are included for vocal applications. They operate on UHF frequencies and feature individual displays.

Image 3.3: Dual wireless microphones.
3.4 Remote Control
The included remote control provides full functionality for operating the soundbar system, including power, input selection, volume, sound modes, and microphone adjustments.
4. Setup
4.1 Placement
Place the soundbar on a stable, flat surface in front of your television or mount it on the wall. Position the subwoofer on the floor near the soundbar for optimal bass performance.
4.2 Connecting the Subwoofer
Connect the subwoofer to the soundbar using the provided SUB OUT cable. Ensure a secure connection.
4.3 Power Connection
Connect the power adapter to the DC IN port on the soundbar and then plug it into a power outlet. Ensure the subwoofer is also connected to a power source if it has a separate power input.
5. Connectivity Options
The soundbar offers various wired and wireless connection methods:

Image 5.1: Available wired and wireless connectivity ports on the soundbar.
5.1 Bluetooth Connection
- Press the 'Bluetooth' button on the remote control or soundbar to select Bluetooth input.
- The soundbar will enter pairing mode, indicated by a flashing LED.
- On your device (smartphone, tablet, computer), search for 'THOMSON Soundbar' in the Bluetooth settings and select it to pair.
- Once connected, the LED indicator will become solid.
5.2 HDMI ARC Connection
Connect an HDMI cable from the HDMI ARC port on the soundbar to the HDMI ARC port on your TV. Select the HDMI ARC input on the soundbar.
5.3 Optical Connection
Connect an optical cable from the OPT port on the soundbar to the optical output port on your TV or audio source. Select the Optical input on the soundbar.
5.4 AUX Connection
Connect a 3.5mm audio cable from the AUX IN port on the soundbar to the audio output port on your device. Select the AUX input on the soundbar.
5.5 USB Playback
Insert a USB drive into the USB port on the soundbar. The soundbar will automatically switch to USB input and begin playing compatible audio files.
6. Operating Instructions
6.1 Power On/Off
Press the 'Power' button on the remote control or the soundbar to turn the system on or off.
6.2 Input Source Selection
Press the 'Input' or corresponding source buttons (e.g., 'Bluetooth', 'HDMI ARC', 'Optical', 'AUX', 'USB') on the remote control to switch between audio sources.
6.3 Volume Control
Use the 'Volume +' and 'Volume -' buttons on the remote control or soundbar to adjust the master volume.
6.4 Sound Modes
The soundbar offers five equalizer modes to optimize audio for different content types:
- Films: Enhanced dialogue and cinematic effects.
- Games: Immersive sound for gaming.
- Music: Balanced audio for music playback.
- Concert: Live performance audio experience.
- News: Clear voice reproduction.
Press the 'Mode' button on the remote control to cycle through these sound modes.

Image 6.1: The five available sound modes for optimized audio.
6.5 Bass and Treble Adjustment
Use the 'Bass+' / 'Bass-' and 'Treble+' / 'Treble-' buttons on the remote control to fine-tune the bass and treble levels.
6.6 Microphone Usage
To use the wireless microphones:
- Ensure the microphones have batteries installed.
- Turn on the microphones. They should automatically pair with the soundbar.
- Adjust microphone volume and echo effects using the dedicated buttons on the remote control.

Image 6.2: Using the wireless microphones for an immersive audio experience.
7. Wall Mounting
The soundbar can be wall-mounted using the included kit. Follow these steps:
- Determine the desired mounting location on the wall, ensuring it is level and structurally sound.
- Mark the positions for drilling using the provided template or by measuring the soundbar's mounting points.
- Drill pilot holes and insert wall anchors if necessary.
- Secure the mounting brackets to the wall using the screws.
- Carefully attach the soundbar to the mounted brackets.
Ensure all cables are connected before mounting if possible, or leave enough slack for connection after mounting.
8. Troubleshooting
If you encounter issues, refer to the following common problems and solutions:
| Problem | Possible Solution |
|---|---|
| No power | Check if the power adapter is securely connected to the soundbar and a working power outlet. |
| No sound | Ensure the correct input source is selected. Check all audio cable connections. Increase the volume on both the soundbar and the connected device. |
| Bluetooth pairing issues | Ensure the soundbar is in Bluetooth pairing mode. Delete 'THOMSON Soundbar' from your device's Bluetooth list and try pairing again. Move devices closer. |
| Microphone not working | Check microphone batteries. Ensure microphones are powered on and within range of the soundbar. |
| Remote control not working | Check remote control batteries. Ensure there are no obstructions between the remote and the soundbar's sensor. |
9. Specifications
- Speaker Type: Soundbar
- Special Feature: Equalizer
- Recommended Uses: For Televisions
- Compatible Devices: Smartphone, Tablet, Television
- Subwoofer Diameter: 5 Inches
- Surround Sound Channel Configuration: 5.1
- Control Method: Remote
- Wireless Communication Technology: Bluetooth
- Soundbar Size: 37 Inches
- Power Source: Corded Electric
- Product Dimensions (Soundbar): 93.6 x 10.97 x 8.76 cm
- Item Weight: 8.91 kg (total system)
- Speaker Maximum Output Power: 100 Watts
- Audio Output Mode: Stereo, Surround
- Mounting Type: Bar Mount, Wall Mount
10. Safety Information
- Do not expose the unit to rain or moisture.
- Do not disassemble the unit. Refer servicing to qualified personnel.
- Ensure proper ventilation around the unit to prevent overheating.
- Keep the unit away from direct sunlight, heat sources, and strong magnetic fields.
- Clean the unit with a soft, dry cloth. Do not use liquid cleaners.
11. Warranty and Support
For warranty information and technical support, please refer to the warranty card included with your product or visit the official THOMSON website. Keep your purchase receipt as proof of purchase.
