
Huhomco 24v-Cordless Grass Trimmer
User Manual: Huhomco 24V Cordless Grass Trimmer
Model: 24v-Cordless Grass Trimmer
Brand: Huhomco
Introduction
Thank you for choosing the Huhomco 24V Cordless Grass Trimmer. This versatile tool is designed for efficient lawn maintenance, offering a powerful 24V lithium-ion battery system and multiple cutting heads for various tasks. This manual provides essential information for safe operation, assembly, maintenance, and troubleshooting to ensure optimal performance and longevity of your grass trimmer.
Important Safety Information
WARNING: Read all safety warnings and instructions before operating this product. Failure to follow the warnings and instructions may result in electric shock, fire, and/or serious injury.
- Always wear appropriate personal protective equipment, including safety glasses or goggles, sturdy footwear, and long trousers, when operating the grass trimmer.
- Ensure the work area is clear of debris, stones, and other objects that could be thrown by the cutting head.
- Keep bystanders, children, and pets at a safe distance (at least 15 meters) from the operating area.
- Do not operate the trimmer in wet conditions or rain.
- Before performing any maintenance, cleaning, or blade changes, always remove the battery pack from the tool.
- Inspect the trimmer for any damage before each use. Do not use if damaged.
- Use only original Huhomco replacement parts and accessories.
- Avoid contact with the cutting blades. Blades remain sharp after use.
What's in the Box
Carefully unpack all items and ensure you have received all components. If any parts are missing or damaged, contact Huhomco customer service.
- 1x Huhomco 24V Cordless Grass Trimmer Unit
- 2x 24V Lithium-ion Batteries (2000mAh)
- 1x Battery Charger
- 2x Metal Circular Saw Blades
- 3x Stainless Steel Blades
- 10x Plastic Blades
- 1x Pair of Protective Gloves
- 1x Pair of Safety Goggles
- 1x Allen Key (for assembly/blade changes)

Image: All components included in the package, laid out clearly.

Image: A visual list detailing "WHAT ARE YOU GOING TO GET" with quantities for each item.
Assembly and Setup
1. Charging the Battery
Before first use, fully charge both 24V lithium-ion batteries. Connect the charger to a power outlet and then connect the battery pack to the charger. The charging indicator light will show the charging status. A full charge typically takes 2-3 hours.
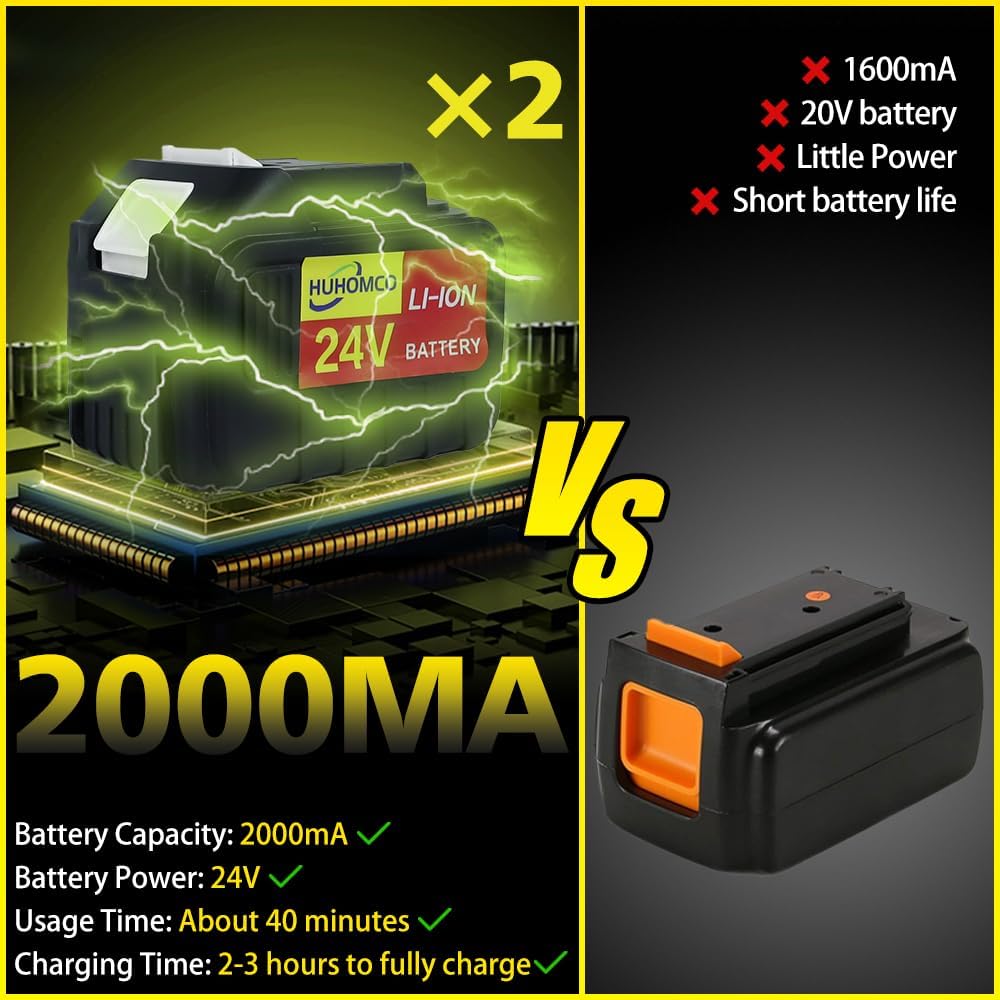
Image: Visual representation of the 24V 2000mAh battery and its specifications.
2. Attaching the Auxiliary Handle
Slide the auxiliary handle onto the main shaft. Adjust its position for comfortable grip and balance, then tighten the securing mechanism.

Image: Labeled diagram of the trimming machine parts, including the auxiliary handle.
3. Selecting and Installing the Cutting Head
The trimmer comes with three types of cutting heads for different applications:
- Plastic Knife Head: Ideal for general lawn trimming and light grass.
- Stainless Steel Blade: Suitable for cutting weeds and more complex terrain.
- Alloy Saw Blade: Designed for cutting and pruning thick branches of bushes and small saplings.
To install a cutting head, ensure the battery is removed. Align the chosen blade with the spindle and secure it using the provided Allen key. Ensure it is firmly attached before use.

Image: Detailed view of the three types of cutter heads and their recommended uses.

Image: Visual representation of the quantity and type of cutting heads included.
4. Adjusting the Telescopic Rod Length
The trimmer features an adjustable telescopic pole, allowing you to set the length from 90 cm to 120 cm. Press the length adjustment button and extend or retract the pole to your desired working height. Release the button to lock the pole in place.
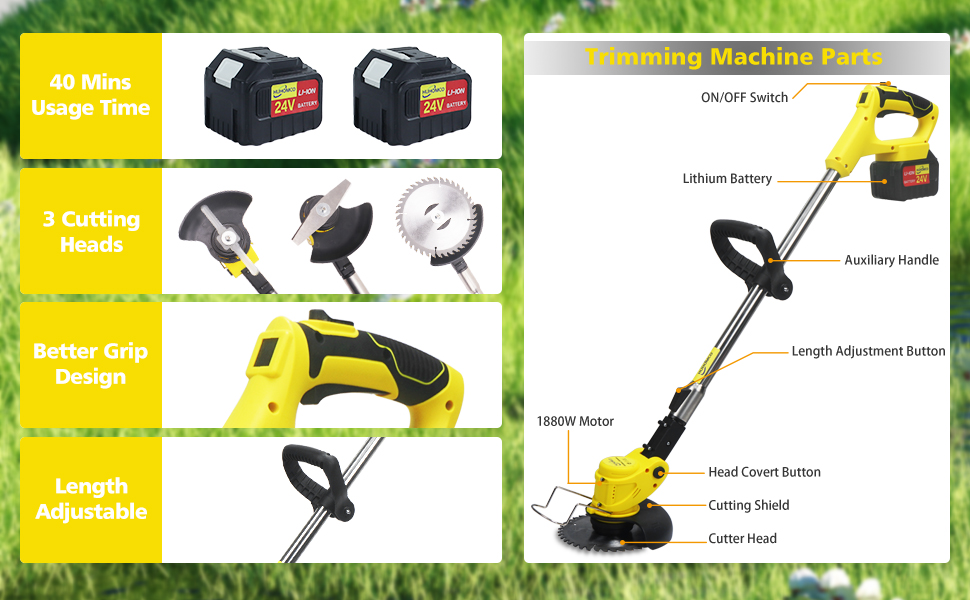
Image: Demonstration of the adjustable length feature and portability.
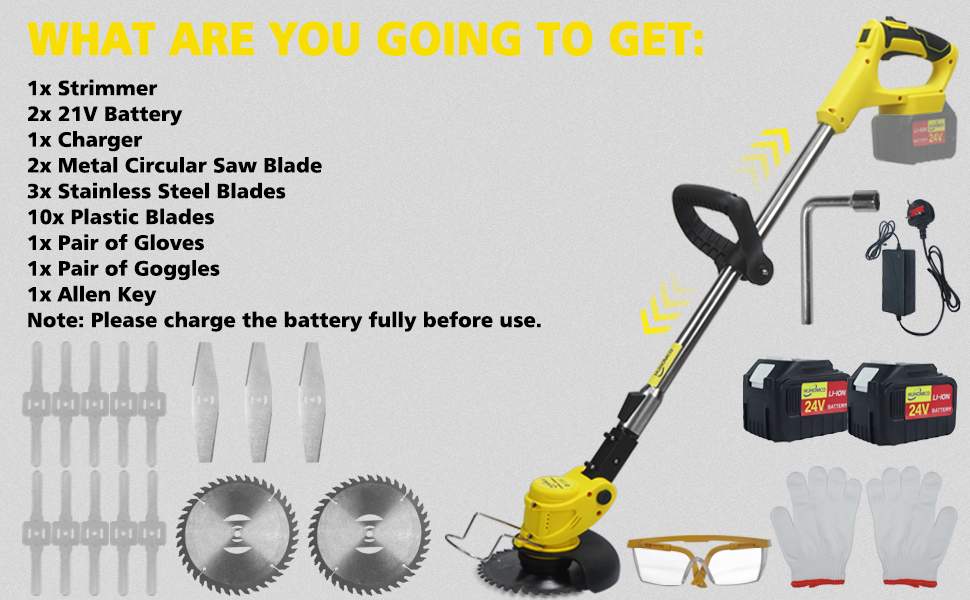
Image: Visual guide for adjusting the trimmer's length.
5. Adjusting the Cutting Head Angle
The machine head can be adjusted up to 90 degrees. This allows for easy trimming of lawn edges, sloped areas, or narrow spaces. Press the head covert button and adjust the angle as needed, then release to lock.

Image: Illustration of the adjustable cutting head angle and its application.
Operating Instructions
1. Starting the Trimmer
Once assembled and the battery is inserted, press the safety switch and then the ON/OFF switch to start the trimmer. Release the ON/OFF switch to stop the trimmer.
2. General Operation
Hold the trimmer firmly with both hands, maintaining a balanced stance. Move the trimmer in a sweeping motion across the area to be cut. Avoid forcing the trimmer through dense vegetation; allow the blades to do the work.
3. Application Scenarios
- Lawn Trimming: Use the plastic knife head for general grass cutting.
- Weed Cutting: Switch to the stainless steel blade for tougher weeds and overgrown areas.
- Brush Cutting/Pruning: For thorny shrubs, small vines, tree saplings, or thick branches, attach the alloy saw blade.
- Edging: Utilize the adjustable head angle to precisely trim lawn edges and around obstacles.
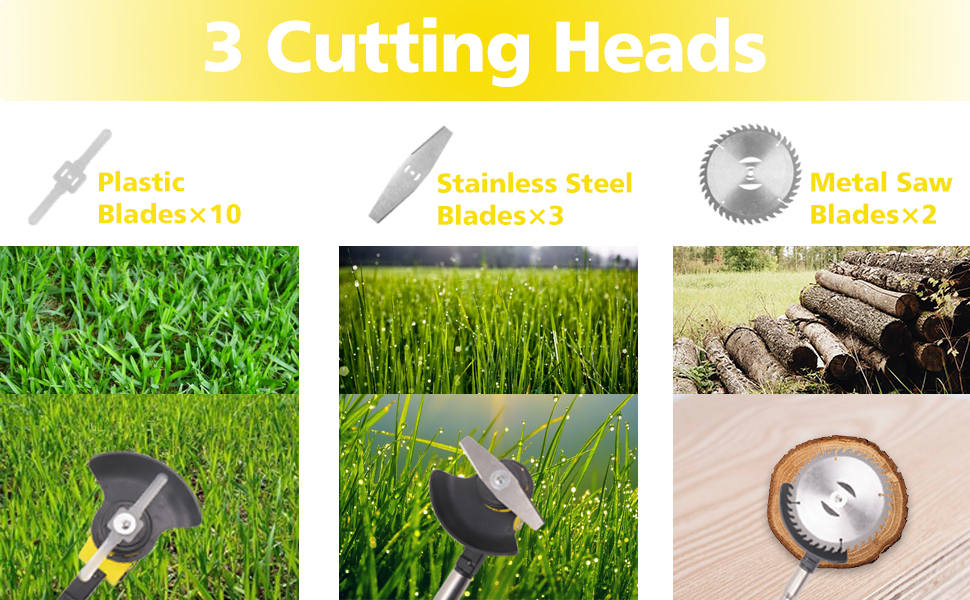
Image: Examples of different uses for the trimmer in various garden settings.
Maintenance
Regular maintenance ensures the longevity and safe operation of your trimmer.
- Cleaning: After each use, remove the battery and clean the cutting head and shield from grass clippings and debris. Use a damp cloth; do not use harsh chemicals or immerse the unit in water.
- Blade Inspection: Regularly inspect all blades for wear, damage, or dullness. Replace worn or damaged blades immediately. Always use genuine Huhomco replacement blades.
- Battery Care: Store batteries in a cool, dry place away from direct sunlight. Do not store fully discharged batteries for extended periods.
- Storage: Store the trimmer in a dry, secure location, out of reach of children. The telescopic rod can be retracted for compact storage.
Troubleshooting
| Problem | Possible Cause | Solution |
|---|---|---|
| Trimmer does not start. | Battery not charged or not inserted correctly. Safety switch not engaged. | Ensure battery is fully charged and properly seated. Press safety switch before ON/OFF switch. |
| Reduced cutting performance. | Blades are dull or damaged. Excessive grass/debris build-up. | Replace blades. Clean cutting head and shield. |
| Trimmer stops during operation. | Battery is low. Overload protection activated. | Recharge battery. Reduce load by cutting smaller sections or less dense material. |
| Excessive vibration. | Blade is bent or improperly installed. | Inspect and replace damaged blades. Reinstall blade correctly. |
Specifications
- Model: 24v-Cordless Grass Trimmer
- Power Source: Battery Powered
- Battery Type: 24V Lithium-ion
- Battery Capacity: 2000mAh
- Usage Time: Approximately 40-60 minutes (depending on load)
- Charging Time: 2-3 hours for full charge
- Motor Power: 1880W (inferred from image)
- Speed: 18000 RPM
- Adjustable Length: 90 cm - 120 cm (35 in - 47 in)
- Cutting Width: 30 cm
- Product Dimensions: 95 x 20 x 12.7 cm
- Item Weight: 2.1 kg
- Color: Yellow
Warranty and Support
For warranty information, technical support, or to purchase replacement parts, please contact Huhomco customer service directly. Refer to the contact information provided with your purchase or visit the official Huhomco website.
Manufacturer: Huhomco
ASIN: B0BJPC6GNK
Date First Available: 19 October 2022
Ask a question about this manual
Ask about setup, troubleshooting, compatibility, parts, safety, or missing instructions. Manuals+ will review the question and use this page’s manual context to help answer it.