
1. Introduction
Thank you for choosing the Habitex H1600 Dehumidifier. This manual provides important information for the safe and efficient operation, maintenance, and troubleshooting of your appliance. Please read it thoroughly before use and keep it for future reference.
Important Safety Instructions
- Always place the unit on a stable, level surface.
- Do not block the air inlet or outlet. Maintain at least 20 cm clearance from walls and furniture.
- Ensure the power supply matches the rating label on the unit.
- Do not operate the unit with a damaged power cord or plug.
- Keep children and pets away from the appliance during operation.
- Unplug the unit before cleaning or performing any maintenance.
- Do not use the dehumidifier in areas where flammable gases or liquids are stored.
2. Product Overview
Familiarize yourself with the components of your Habitex H1600 Dehumidifier.

Figure 2.1: Front view of the Habitex H1600 Dehumidifier, showing the air outlet grille at the top and the Habitex logo on the upper front panel. The unit is white with a textured design.
Control Panel
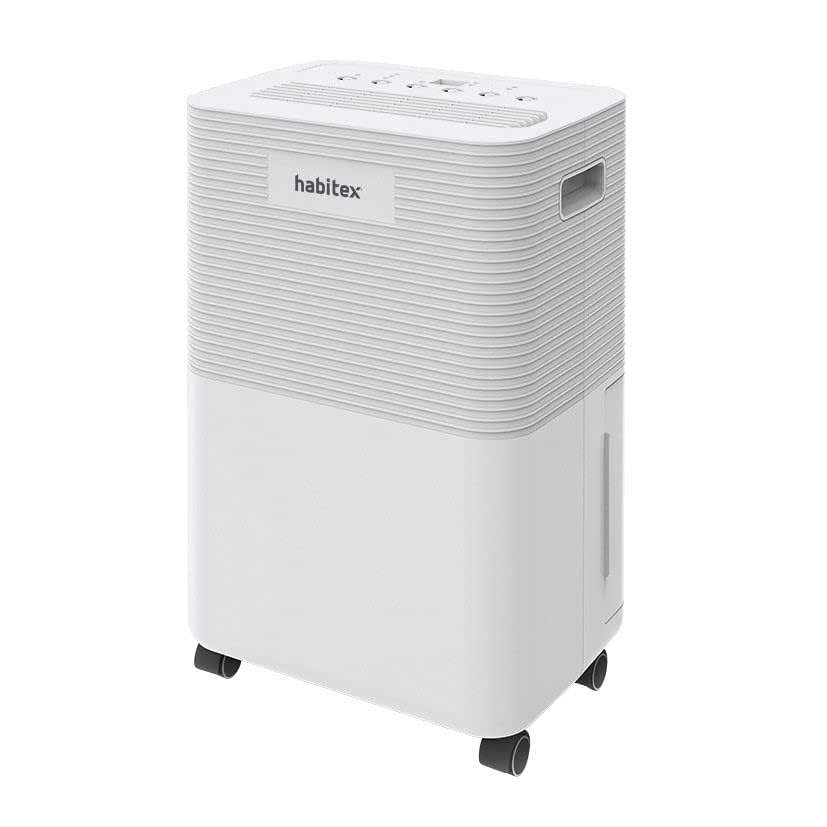
Figure 2.2: Top-down view of the Habitex H1600 Dehumidifier control panel, featuring an LED display in the center and touch-sensitive buttons for Timer, Mode, Humidity adjustment (+/-), Fan Speed, and Power.
- Power Button (U): Turns the unit on or off.
- Mode Button: Cycles through operating modes (e.g., Auto, Continuous, Silent).
- Humidity Adjustment Buttons (+/-): Increases or decreases the desired humidity level.
- Speed Button: Selects fan speed (High/Low).
- Timer Button: Sets the auto-on or auto-off timer (up to 24 hours).
- LED Display: Shows current humidity, set humidity, or timer settings.
3. Setup
Unpacking
- Carefully remove the dehumidifier from its packaging.
- Remove all packing materials, including any tape or protective films.
- Inspect the unit for any signs of damage. If damaged, do not operate and contact your retailer.
Placement
- Place the dehumidifier on a firm, level surface that can support its weight when the water tank is full.
- Ensure there is at least 20 cm (8 inches) of space around the unit for proper airflow. Do not place it against a wall or near curtains that could obstruct the air inlets or outlets.
- Avoid placing the unit in direct sunlight or near heat sources.
- For optimal performance, close all doors and windows in the room where the dehumidifier is operating.
Power Connection
- Plug the power cord into a grounded electrical outlet.
- Ensure the outlet meets the electrical requirements specified on the unit's rating label.
4. Operating Instructions
Power On/Off
- Press the Power button (U) to turn the dehumidifier on. The LED display will light up, showing the current room humidity.
- Press the Power button again to turn the unit off.
Setting Desired Humidity Level
- When the unit is on, press the + or - buttons to adjust the desired humidity level. The setting range is typically between 30% RH and 80% RH.
- The unit will operate until the room humidity reaches the set level, then it will cycle off. It will restart automatically if the humidity rises above the set level.
Mode Selection
- Press the Mode button to cycle through available operating modes. Common modes include:
- Auto Mode: The unit automatically adjusts its operation based on the ambient humidity.
- Continuous Dehumidification: The unit runs continuously regardless of the humidity level until the water tank is full.
- Silent Mode: Operates at a lower fan speed to reduce noise, suitable for nighttime use.
Fan Speed Adjustment
- Press the Speed button to switch between High and Low fan speeds.
- High speed provides faster dehumidification, while Low speed offers quieter operation.
Timer Function
- Press the Timer button to set an auto-on or auto-off time (from 1 to 24 hours).
- Use the + or - buttons to adjust the desired time.
- The timer indicator will light up when the timer is active.
Anti-freeze Protection
The unit is equipped with an anti-freeze protection system. If the coil temperature drops too low, the compressor will temporarily stop, and the fan will continue to run to defrost the coils. This prevents ice buildup and ensures efficient operation in cooler environments.
5. Maintenance
Regular maintenance ensures optimal performance and extends the lifespan of your dehumidifier.
Emptying the Water Tank

Figure 5.1: A user demonstrating the removal of the water collection tank from the side of the Habitex H1600 Dehumidifier for emptying.
- When the water tank is full, the unit will automatically stop operating, and an indicator light will illuminate.
- Carefully pull out the water tank from the side of the unit.
- Empty the collected water.
- Slide the empty water tank back into its position until it clicks securely. The unit will resume operation.
Cleaning the Air Filter
- The air filter should be cleaned every two weeks or more frequently depending on usage.
- Turn off and unplug the unit.
- Locate and remove the air filter (usually at the back or side).
- Wash the filter with warm, soapy water. Rinse thoroughly and allow it to air dry completely before reinserting.
- Do not operate the dehumidifier without the filter.
Cleaning the Unit Exterior
- Wipe the exterior with a soft, damp cloth.
- Do not use harsh chemicals, abrasives, or solvents, as these can damage the surface.
Long-term Storage
- Empty the water tank and clean the air filter.
- Allow the unit to run for a few hours in a dry room to ensure the internal components are dry.
- Unplug the power cord and coil it neatly.
- Store the unit upright in a cool, dry place, away from direct sunlight and extreme temperatures.
6. Troubleshooting
Before contacting customer service, please refer to the following troubleshooting guide for common issues.
| Problem | Possible Cause | Solution |
|---|---|---|
| Unit does not turn on. | No power supply. Power cord not plugged in. | Check power connection. Ensure outlet is functional. |
| No dehumidification. | Air filter clogged. Room temperature too low. Humidity setting too high. | Clean the air filter. Ensure room temperature is above 5°C. Lower the desired humidity setting. |
| Water tank full indicator is on, but tank is not full. | Water tank not properly seated. Float switch malfunction. | Remove and reinsert the water tank correctly. Check float switch for obstructions. |
| Unusual noise during operation. | Unit not on a level surface. Obstruction in fan. | Place unit on a flat, stable surface. Check for and remove any obstructions. |
If the problem persists after trying these solutions, please contact customer support.
7. Specifications
| Feature | Specification |
|---|---|
| Model Name | H1600 |
| Dehumidification Capacity | 16 Liters/Day |
| Power Consumption | 350 W |
| Water Tank Volume | 2 Liters |
| Maximum Noise Level | 43 dB |
| Airflow Capacity | 150 m³/h |
| Refrigerant | R290 |
| Maximum Application Area | 30 m² |
| Dimensions (WxDxH) | 28.2 x 28.4 x 43 cm |
| Number of Speeds | 2 |
| Special Features | Anti-freeze protection, Humidity selector, LED Display, Transport handles and wheels, 24-hour timer, Silent mode |
8. Warranty and Support
For warranty information, technical support, or service inquiries, please refer to the warranty card included with your product or contact your retailer or the manufacturer directly. Keep your proof of purchase for warranty claims.
Manufacturer: HABITEX_2018

