
1. Introduction and Safety Information
This manual provides essential information for the correct installation, safe operation, and proper maintenance of your Itatiaia ESS 5Q TC 5-burner cooktop. Please read all instructions carefully before using the appliance and keep this manual for future reference.
1.1 Product Overview
The Itatiaia ESS 5Q TC cooktop features a durable tempered glass surface and five high-performance gas burners, including a triple flame burner for faster cooking. It is designed for stability with individual enameled grates and offers easy cleaning with its smooth surface and removable control knobs. The cooktop includes super-automatic ignition for convenient use.
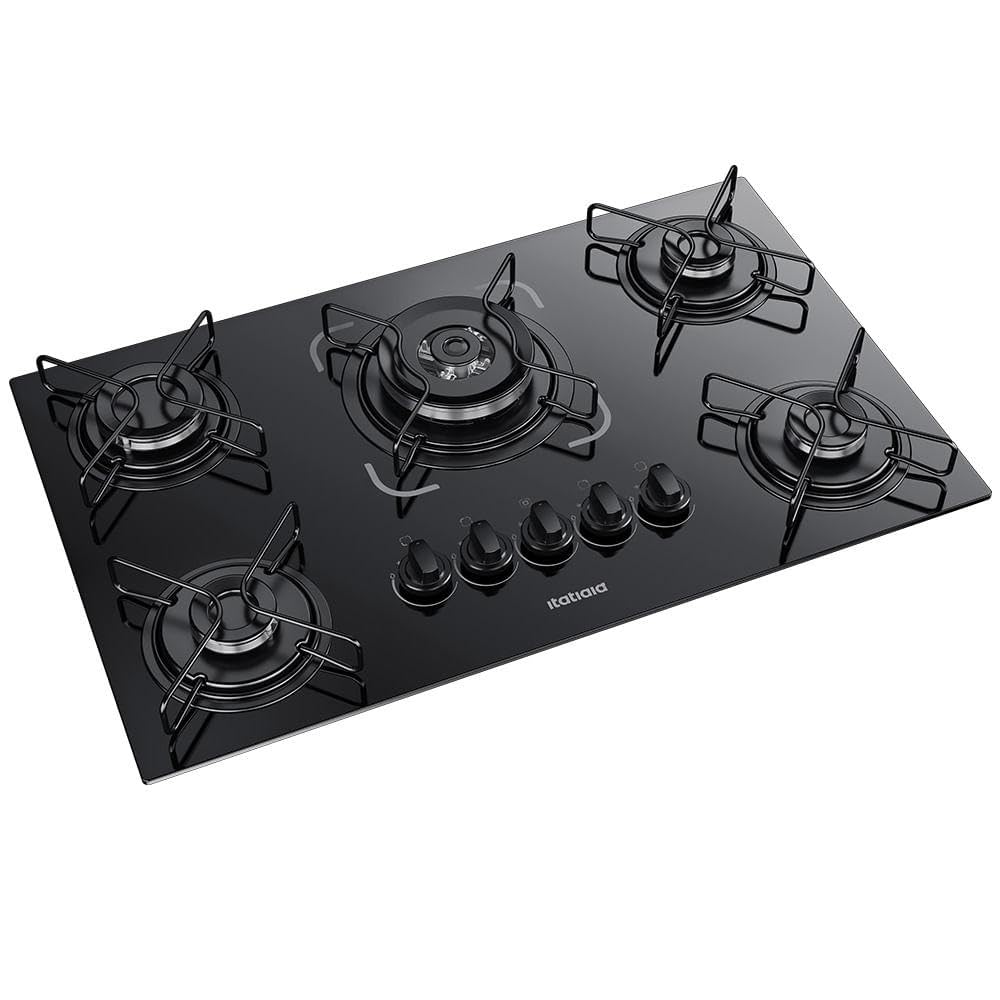
Figure 1.1: Itatiaia ESS 5Q TC 5-Burner Cooktop. This image shows the Itatiaia ESS 5Q TC cooktop, featuring a sleek black tempered glass surface and five gas burners. The control knobs are located at the front, and individual enameled grates are visible over each burner.
1.2 General Safety Warnings
- Gas Safety: Ensure proper ventilation. Do not store flammable materials near the cooktop. In case of a gas leak, turn off the gas supply, open windows, and do not operate electrical switches.
- Electrical Safety: Connect the appliance to a properly grounded outlet. Do not use extension cords.
- Burn Hazard: Cooktop surfaces and grates become hot during use. Use oven mitts and avoid touching hot surfaces.
- Children and Pets: Keep children and pets away from the cooktop during operation and while it is cooling down.
- Installation: Installation and maintenance must be performed by qualified personnel in accordance with local regulations.
- Ventilation: Ensure adequate ventilation in the kitchen area to prevent the accumulation of combustion products.
2. Setup and Installation
Proper installation is crucial for the safe and efficient operation of your cooktop. It is highly recommended that installation be performed by a certified technician.
2.1 Unpacking
- Carefully remove the cooktop from its packaging.
- Inspect the appliance for any damage. Do not install if damaged.
- Ensure all components are present: cooktop unit, grates, burner caps, control knobs, and instruction manual.
2.2 Countertop Preparation
- Cut an opening in the countertop according to the dimensions provided in the technical specifications (refer to Section 5).
- Ensure the countertop material is heat-resistant.
- Maintain adequate clearance from adjacent walls and cabinets.
2.3 Gas Connection
This cooktop is designed to operate with GLP (Liquefied Petroleum Gas) or GN (Natural Gas). Ensure the appliance is configured for your specific gas type. If conversion is needed, contact a qualified technician.
- Connect the cooktop to the gas supply using a flexible gas hose approved for your region.
- Check all connections for leaks using a soapy water solution. Do not use an open flame.
- Ensure the gas pressure is within the recommended range for optimal performance.
2.4 Electrical Connection
The cooktop requires an electrical connection for the automatic ignition system. It operates on 110V/220V.
- Connect the power cord to a dedicated, grounded electrical outlet.
- Verify that the voltage of your electrical supply matches the cooktop's requirements.
- Do not use adapters or extension cords, as this can pose a fire hazard.
3. Operating Instructions
Familiarize yourself with the cooktop's controls before first use.
3.1 Burner Components
Each burner consists of a burner base, a flame spreader, and a burner cap. Ensure these components are correctly positioned before use.
3.2 Automatic Ignition
- Place a suitable cooking vessel on the desired burner grate.
- Press down and turn the corresponding control knob counter-clockwise to the maximum flame setting.
- The automatic igniter will spark, and the burner will light.
- Once lit, release the knob and adjust the flame to the desired intensity.
- If the burner does not light within a few seconds, release the knob, wait a moment, and repeat the process.
3.3 Flame Adjustment
- Turn the control knob towards the minimum setting for a smaller flame.
- Turn the control knob towards the maximum setting for a larger flame.
- Ensure the flame is stable and blue. Yellow or flickering flames may indicate an issue with gas supply or burner components.
3.4 Turning Off a Burner
To turn off a burner, turn the control knob clockwise until it clicks into the "off" position.
4. Maintenance and Cleaning
Regular cleaning and maintenance will prolong the life of your cooktop and ensure safe operation. Always ensure the cooktop is cool before cleaning.
4.1 Cleaning the Glass Surface
- Use a soft cloth or sponge with mild detergent and warm water.
- For stubborn stains, use a non-abrasive glass cooktop cleaner.
- Avoid abrasive cleaners, scouring pads, or harsh chemicals that can scratch the glass.
- Dry the surface thoroughly to prevent water spots.
4.2 Cleaning Burner Grates and Caps
- Remove the individual enameled grates and burner caps when cool.
- Wash them with warm soapy water. For baked-on food, soak them before cleaning.
- Ensure all parts are completely dry before reassembling them on the cooktop.
4.3 Cleaning Control Knobs
- The control knobs are removable for easy cleaning. Pull them straight off.
- Wash with warm soapy water and dry thoroughly.
- Do not use abrasive cleaners.
- Reattach the knobs, ensuring they are correctly aligned with their respective shafts.
5. Troubleshooting
Before contacting customer service, refer to the following table for common issues and their solutions.
| Problem | Possible Cause | Solution |
|---|---|---|
| Burner does not ignite. | No gas supply, power outage, dirty igniter, burner components incorrectly placed. | Check gas valve. Verify power supply. Clean igniter and burner parts. Ensure burner caps and flame spreaders are correctly seated. |
| Flame is yellow or uneven. | Dirty burner ports, incorrect gas pressure, burner components incorrectly placed. | Clean burner ports. Contact a qualified technician to check gas pressure. Reassemble burner components correctly. |
| Gas smell detected. | Gas leak. | Immediately turn off gas supply. Open windows. Do not operate electrical switches. Contact emergency services and a qualified technician. |
| Cooktop surface scratches easily. | Use of abrasive cleaners or improper cookware. | Use only non-abrasive cleaners and appropriate cookware. Avoid dragging pots across the surface. |
If the problem persists after attempting these solutions, please contact Itatiaia customer support or a qualified service technician.
6. Specifications
| Brand | Itatiaia |
| Model Number | 3700000194 |
| Product Dimensions (L x W x H) | 78.5 x 50.5 x 20 cm (approximately 30.9 x 19.9 x 7.9 inches) |
| Weight | 10.09 kg (approximately 22.24 lbs) |
| Material | 6mm Tempered Glass |
| Number of Burners | 5 |
| Burner Type | Gas (GLP/GN) |
| Ignition Type | Automatic Ignition |
| Voltage | 110V/220V (Bivolt) |
| Color | Black |
| Installation Type | Built-in / Independent |
| Energy Efficiency | A |
7. Warranty and Support
Your Itatiaia ESS 5Q TC cooktop comes with a manufacturer's warranty. Additionally, extended warranty options may be available.
- Standard Warranty: Refer to the warranty card included with your product for specific terms and duration.
- Extended Warranty: An extended warranty against failures and defects for 24 months may be available for purchase. Please check with your retailer for details.
- Customer Support: For technical assistance, spare parts, or warranty claims, please contact Itatiaia customer service. Contact information can typically be found on the manufacturer's website or your purchase documentation.
- Proof of Purchase: Always retain your proof of purchase for warranty purposes.
