
BIHUI Bu-llg12
BIHUI LLG12 Laser Level with 12 Lines User Manual
Model: Bu-llg12
1. Introduction
This user manual provides comprehensive instructions for the safe and effective operation, maintenance, and troubleshooting of your BIHUI LLG12 Laser Level. Please read this manual thoroughly before using the device to ensure optimal performance and to prevent damage or injury.
2. Safety Instructions
Always adhere to the following safety guidelines when operating the BIHUI LLG12 Laser Level:
- Laser Radiation: Do not stare directly into the laser beam. Avoid direct eye exposure. The laser level emits Class 2 laser radiation.
- Protective Eyewear: Use the provided laser enhancement glasses (if included) to improve visibility of the laser lines, but note they do not offer eye protection against direct laser exposure.
- Children: Keep the device out of reach of children.
- Environment: Do not operate the laser level in explosive atmospheres, such as in the presence of flammable liquids, gases, or dust.
- Modifications: Do not attempt to modify or disassemble the laser level. Repairs should only be performed by authorized service personnel.
- Battery Safety: Follow all battery manufacturer instructions for charging, handling, and disposal. Do not expose batteries to excessive heat or fire.
- Storage: Store the device in a dry, cool place when not in use.
3. Product Overview
The BIHUI LLG12 Laser Level is designed for precise leveling and alignment tasks. It projects 12 bright green laser lines (4 horizontal, 8 vertical) for comprehensive coverage.

Figure 3.1: The BIHUI LLG12 Laser Level with its complete set of accessories, including the main unit, carrying case, magnetic bracket, mini tripod, and laser enhancement glasses.
Key Components:
- Laser Emitter: Projects the green laser lines.
- Control Panel: Buttons for power, mode selection (horizontal/vertical lines), and pulse mode.
- Battery Compartment: Houses the rechargeable battery.
- Pendulum Lock: Secures the pendulum for transport and manual mode operation.
- Mounting Thread: For attaching to a tripod or magnetic bracket.
- Magnetic Bracket: Allows attachment to metal surfaces.
- Mini Tripod: Provides a stable base for precise adjustments.
- Laser Enhancement Glasses: Improve visibility of laser lines in bright conditions.
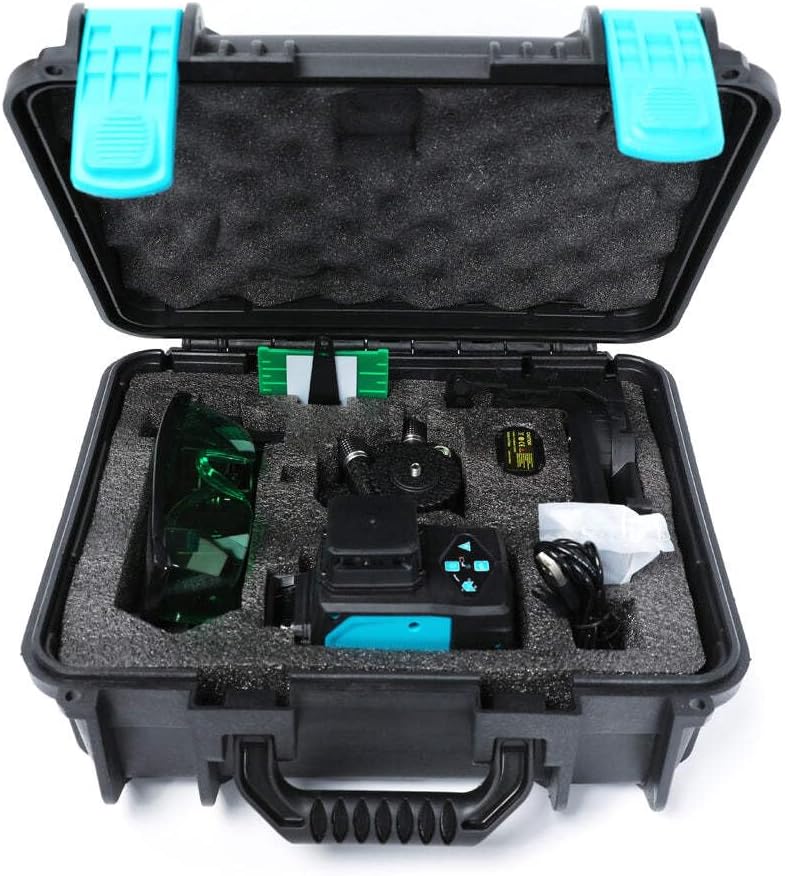
Figure 3.2: The BIHUI LLG12 Laser Level and its accessories neatly organized within the custom-fit protective carrying case, ensuring safe transport and storage.
4. Setup
- Unpacking: Carefully remove the laser level and all accessories from the carrying case. Inspect for any signs of damage.
- Battery Installation: Open the battery compartment and insert the rechargeable battery, ensuring correct polarity. Close the compartment securely. Charge the battery fully before first use.
- Placement: Place the laser level on a stable, level surface. For elevated or precise positioning, attach it to the mini tripod or magnetic bracket using the mounting thread. Ensure the pendulum lock is in the unlocked position for self-leveling mode.
- Environment: Ensure the working area is free from obstructions and that the ambient light conditions allow for clear visibility of the laser lines.
5. Operating Instructions
The BIHUI LLG12 offers multiple operating modes for various applications.
- Power On/Off:
- To power on, slide the pendulum lock switch to the unlocked position. The laser level will automatically enter self-leveling mode and project horizontal and vertical lines.
- To power off, slide the pendulum lock switch back to the locked position. This also secures the pendulum for transport.
- Self-Leveling Mode:
- When the pendulum lock is unlocked, the device will self-level within its specified range (typically ±3°). If the device is outside this range, the laser lines will flash rapidly to indicate it cannot self-level. Adjust the position of the device until the lines become stable.
- Manual Mode (Slope Function):
- To activate manual mode, power on the device with the pendulum lock in the locked position. The laser lines will be projected but will not self-level, allowing you to project lines at any angle.
- This mode is useful for tasks like installing handrails or decorative patterns that require non-level lines.
- Line Selection:
- Press the 'H' button to cycle through horizontal line combinations (e.g., one horizontal, two horizontal, all horizontal).
- Press the 'V' button to cycle through vertical line combinations (e.g., one vertical, two vertical, all vertical).
- Press both 'H' and 'V' buttons to activate all 12 lines.
- Pulse Mode (Outdoor Mode):
- Press the pulse mode button (often indicated by a 'P' or a receiver icon) to activate pulse mode. This mode is used when working with a laser receiver (not included) for extended working ranges or in bright outdoor conditions. The laser lines will appear dimmer to the naked eye in this mode.
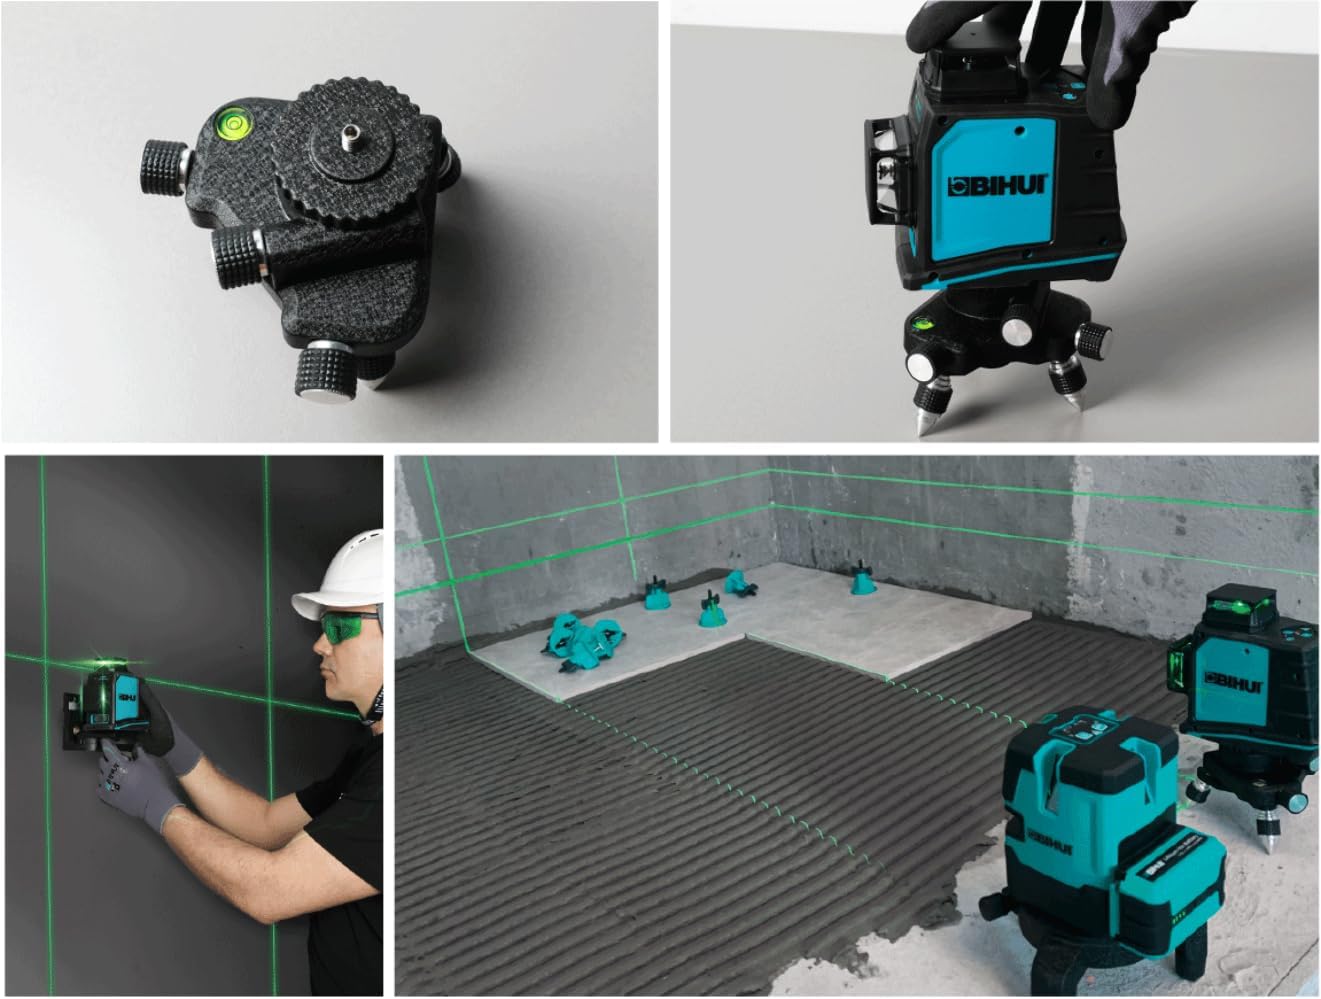
Figure 5.1: Examples of the BIHUI LLG12 Laser Level in use for different construction and DIY applications, demonstrating its versatility for precise alignment on walls and floors.
6. Maintenance
Proper maintenance ensures the longevity and accuracy of your laser level.
- Cleaning: Use a soft, damp cloth to clean the device. Do not use abrasive cleaners or solvents. Keep the laser emission windows clean for optimal beam clarity.
- Storage: Always engage the pendulum lock before storing or transporting the device. Store the laser level in its protective carrying case in a dry, cool place, away from direct sunlight and extreme temperatures.
- Battery Care: If the device will not be used for an extended period, remove the battery to prevent leakage. Recharge the battery periodically to maintain its health.
- Calibration: While the device is factory-calibrated, extreme impacts or prolonged use may affect its accuracy. If you suspect calibration issues, contact authorized service personnel.
7. Troubleshooting
Refer to the following table for common issues and their solutions:
| Problem | Possible Cause | Solution |
|---|---|---|
| Laser lines are flashing rapidly. | Device is out of self-leveling range. | Place the device on a more level surface or adjust its position until the lines stabilize. |
| Laser lines are not visible or very dim. |
|
|
| Device does not power on. |
|
|
| Laser lines are not straight or accurate. |
|
|
8. Specifications
The following are the technical specifications for the BIHUI LLG12 Laser Level:
| Feature | Detail |
|---|---|
| Model Number | Bu-llg12 |
| Dimensions | 25 x 15 x 0.1 cm |
| Item Weight | 800 grams |
| Number of Lines | 12 (4 Horizontal, 8 Vertical) |
| Laser Class | Class 2 (typical for consumer laser levels) |
| Self-Leveling Range | Typically ±3° (common for self-leveling lasers) |
| Power Source | Rechargeable Battery (type not specified, assumed standard) |
Note: Specific performance metrics like accuracy, working range, and battery life may vary based on environmental conditions and usage.
Related documentsBu-llg12


Ask a question about this manual
Ask about setup, troubleshooting, compatibility, parts, safety, or missing instructions. Manuals+ will review the question and use this page’s manual context to help answer it.