1. Introduction
This manual provides essential information for the safe and efficient operation of your Sharp ES-NFW612CWB-DE front-load washing machine. Please read these instructions carefully before using the appliance and retain them for future reference.
Your Sharp washing machine is designed for household use, offering a 6 kg capacity and a maximum spin speed of 1200 revolutions per minute (rpm). It features an advanced Inverter Motor for quiet and efficient performance, 15 wash programs including a 15-minute quick wash and a steam function, and AquaStop technology for enhanced safety.
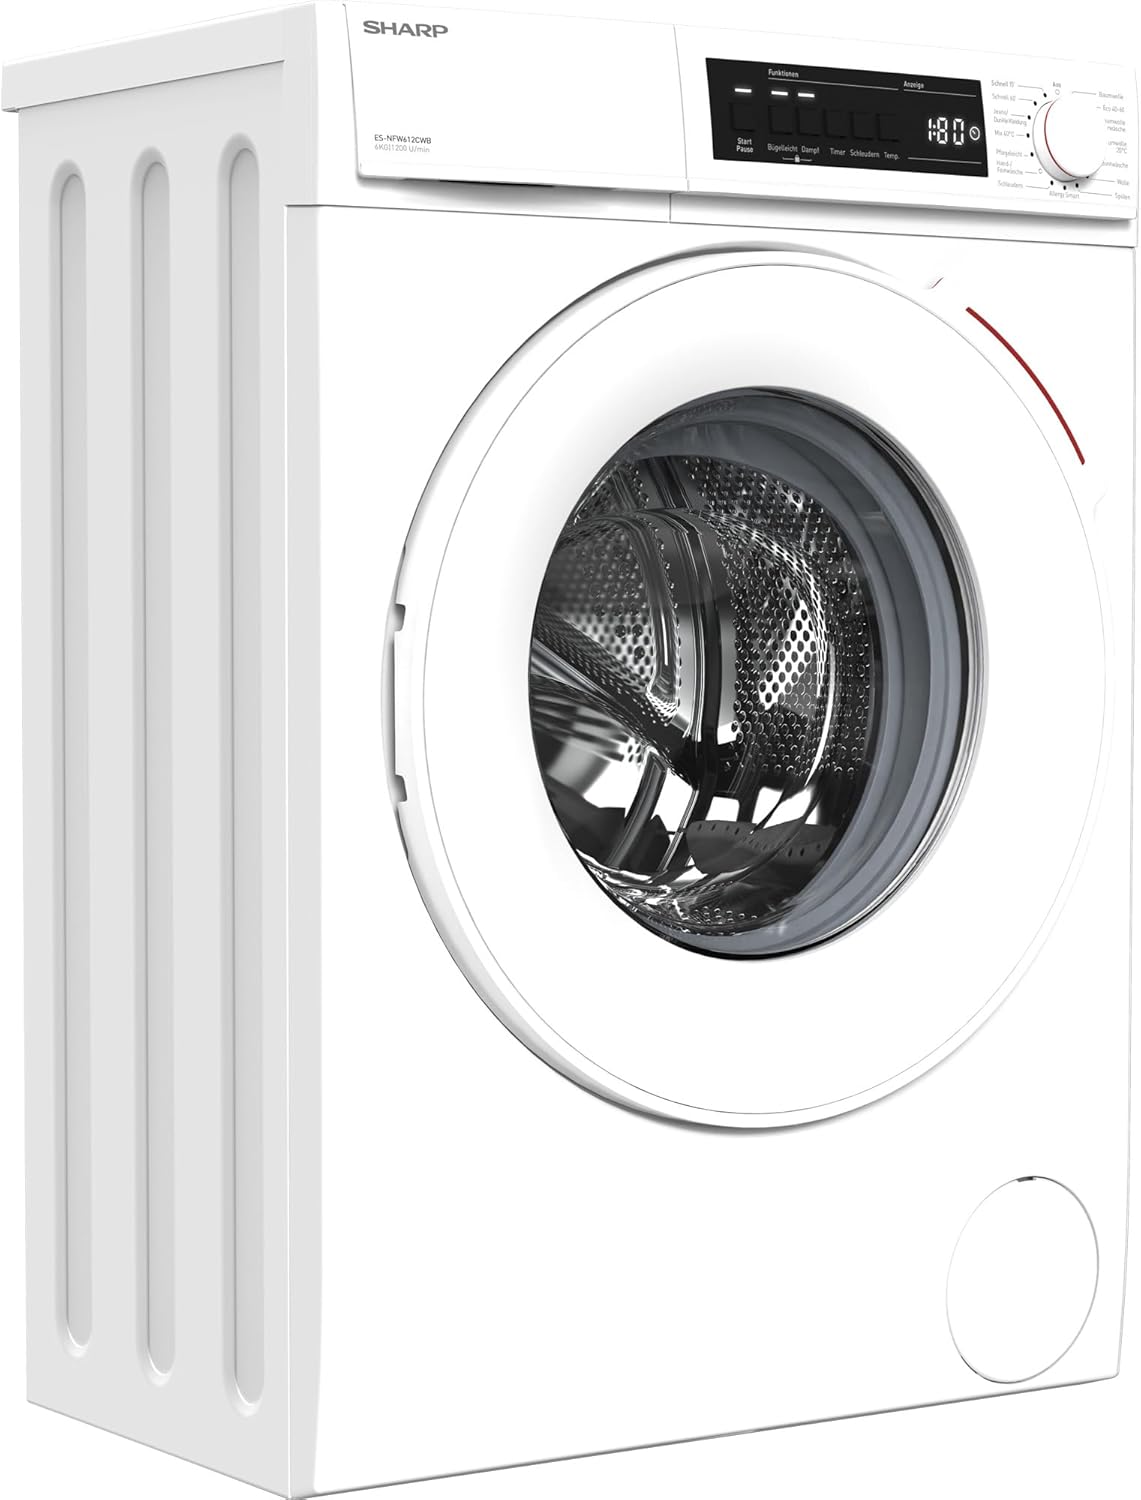
Figure 1: Front-angled view of the Sharp ES-NFW612CWB-DE washing machine. This image shows the white exterior, the front-loading door, and the control panel with a program dial and LED display.
2. Important Safety Instructions
Always follow basic safety precautions when using electrical appliances to reduce the risk of fire, electric shock, or injury to persons.
- Read all instructions before using the appliance.
- Ensure the appliance is properly grounded.
- Do not operate the washing machine if it is damaged or malfunctioning.
- Keep children and pets away from the appliance during operation.
- Do not wash items that have been cleaned in, washed in, soaked in, or spotted with combustible or explosive substances.
- Unplug the appliance from the power supply before cleaning or performing any maintenance.
- Do not install or store the appliance where it will be exposed to the weather or freezing temperatures.
- The AquaStop system provides protection against water leaks. However, always turn off the water supply when the machine is not in use for extended periods.
3. Setup and Installation
3.1 Unpacking
Carefully remove all packaging materials. Ensure all components are present and undamaged. Keep packaging materials out of reach of children.
3.2 Removing Transport Bolts
Before using the washing machine, you must remove the transport bolts located at the rear of the appliance. These bolts secure the drum during transit and must be removed to prevent damage during operation.
- Locate the transport bolts on the rear panel.
- Using an appropriate wrench, loosen and remove all bolts.
- Insert the plastic caps provided into the holes.

Figure 2: Rear view of the washing machine, highlighting the locations where transport bolts need to be removed before installation.
3.3 Leveling the Appliance
It is crucial for the washing machine to be perfectly level to ensure stable operation and prevent excessive vibration. Adjust the adjustable feet at the bottom of the machine until it is stable and level on all sides.
3.4 Water Connection
- Connect the inlet hose to a cold water tap with a 3/4-inch thread. Ensure the connection is tight to prevent leaks.
- Position the drain hose into a standpipe or over the edge of a sink, ensuring it is securely fixed to prevent displacement during draining.
3.5 Electrical Connection
Plug the power cord into a grounded electrical outlet. Ensure the voltage and frequency match the specifications on the appliance rating plate (220 Volts).
4. Operating Instructions
4.1 Control Panel Overview

Figure 3: Close-up of the washing machine's control panel, showing the program selection dial on the right and the digital display with function buttons on the left.
The control panel consists of a program selection dial, a digital display, and various function buttons (e.g., Start/Pause, Temperature, Spin Speed, Delay Timer, Steam).
4.2 Loading Laundry
- Open the washing machine door.
- Load laundry loosely into the drum, ensuring not to overload. The maximum capacity is 6 kg.
- Close the door firmly until it clicks.

Figure 4: Front view of the washing machine with the door open, revealing the stainless steel drum ready for laundry loading.
4.3 Adding Detergent and Additives
Pull out the detergent dispenser drawer located on the top left of the control panel.

Figure 5: Close-up of the detergent dispenser drawer, showing compartments for pre-wash, main wash detergent, and fabric softener.
- Compartment I: For pre-wash detergent.
- Compartment II: For main wash detergent.
- Compartment III (Flower symbol): For fabric softener or conditioner.
Refer to your detergent packaging for recommended dosages. Close the drawer gently after adding detergent.
4.4 Program Selection
Turn the program selection dial to choose one of the 15 available programs. The selected program will be indicated on the LED display.
Available Programs include:
- Cotton
- Eco 40-60
- Cotton Pre-wash
- Cotton 20°C
- Synthetics
- Wool
- Rinse
- Allergy Smart
- Spin
- Hand/Delicate Wash
- Mix 40°C
- Dark Garments/Jeans
- Quick 60'
- Quick 15'
- Steam Function (available on select programs)
4.5 Adjusting Options
After selecting a program, you can adjust options such as temperature, spin speed, or delay start using the corresponding buttons on the control panel. The LED display will show the current settings.
4.6 Starting a Wash Cycle
Press the Start/Pause button to begin the selected wash cycle. The machine will automatically proceed through the wash, rinse, and spin phases.
4.7 Ending a Wash Cycle
Once the program is complete, the machine will signal with an audible alert (if enabled) and the display will show "End". Open the door and remove your laundry. Turn the program dial to "Off" and unplug the machine from the power outlet.
5. Maintenance and Cleaning
Regular maintenance ensures optimal performance and extends the lifespan of your washing machine.
5.1 Cleaning the Detergent Dispenser
Periodically remove the detergent dispenser drawer and rinse it under running water to remove any detergent residue. Use a brush if necessary to clean stubborn deposits.
5.2 Cleaning the Drum
Run a maintenance wash cycle (e.g., a hot cotton cycle without laundry and with a descaling agent) every few months to clean the drum and remove any build-up.
5.3 Cleaning the Door Seal
Wipe the rubber door seal after each wash to prevent mold and mildew growth. Ensure no small items are trapped in the seal.
5.4 Cleaning the Water Inlet Filter
If you notice reduced water flow, the inlet filter may be clogged. Turn off the water supply, disconnect the inlet hose, and clean the filter mesh with a brush.
5.5 Cleaning the Drain Pump Filter
The drain pump filter should be cleaned regularly to prevent blockages. Refer to the full user manual for specific instructions on accessing and cleaning this filter.
6. Troubleshooting
Before contacting customer service, please refer to the following table for common issues and their solutions.
| Problem | Possible Cause | Solution |
|---|---|---|
| Machine does not start | Power cord not plugged in; door not closed properly; program not selected; Start/Pause button not pressed. | Check power connection; ensure door is latched; select a program; press Start/Pause. |
| No water intake | Water tap closed; inlet hose kinked; water inlet filter clogged. | Open water tap; straighten hose; clean inlet filter. |
| Machine vibrates excessively | Transport bolts not removed; machine not level; uneven load. | Remove transport bolts; adjust feet to level machine; redistribute laundry. |
| Water leaks | Hose connections loose; detergent drawer overflowing; door seal damaged. | Tighten hose connections; do not overfill detergent drawer; inspect door seal. |
| Laundry not spinning | Uneven load; drain pump filter clogged; drain hose kinked. | Redistribute laundry; clean drain pump filter; straighten drain hose. |
7. Technical Specifications
| Feature | Detail |
|---|---|
| Brand | Sharp |
| Model Number | ES-NFW612CWB-DE |
| Type | Front-Load Washing Machine |
| Capacity | 6 Kilograms |
| Maximum Spin Speed | 1200 rpm |
| Energy Efficiency Class | B (A to G scale) |
| Noise Level (Spin) | 75 dB |
| Motor Type | Inverter Motor |
| Programs | 15 (including 15 min quick wash, steam function) |
| Safety Features | AquaStop |
| Voltage | 220 Volts |
| Weight | 70.5 Kilograms |
| Material | Plastic (control panel), Steel (casing), Enamel-coated metal (drum) |
8. Warranty and Customer Support
Your Sharp ES-NFW612CWB-DE washing machine comes with a manufacturer's warranty. Please refer to the warranty card included with your purchase for specific terms and conditions, including the warranty period and coverage details.
For technical assistance, spare parts, or to schedule a service appointment, please contact Sharp customer support. You can typically find contact information on the Sharp official website or in the documentation provided with your appliance.
When contacting support, please have your model number (ES-NFW612CWB-DE) and serial number ready. The serial number is usually located on a label inside the door frame or on the rear of the appliance.


