
1. Introduction
This manual provides essential information and instructions for installing the A-MIND LCD screen replacement for Xiaomi Redmi Note 7 and Redmi Note 7 Pro. This product is designed to repair issues such as broken screens, liquid crystal ruptures, dead pixels, touch inactivity, and display problems. Please read all instructions carefully before proceeding with installation.
Important Note: This product does not come with a printed manual. Installation tutorials are available on platforms like YouTube. Professional installation is highly recommended, especially for individuals without prior experience in phone repair.
2. Compatibility
This screen replacement is compatible with the following Xiaomi Redmi Note 7 and Redmi Note 7 Pro models (6.3 inch):
- M1901F7G
- M1901F7H
- M1901F7I
- M1901F7S
Please verify your phone's model number before purchase and installation to ensure compatibility.

Image 1: A-MIND LCD screen replacement for Xiaomi Redmi Note 7/7 Pro, showing screen size (6.3"), resolution (1080*2340), pixel density (409ppi), and model number (M1901F7G).
3. Package Contents
The package includes:
- 1 x LCD Touch Digitizer Assembly (Black with Frame)
- 1 x Set of basic repair tools
The provided toolset is uniform and may not be suitable for opening all phone models. Additional specialized tools may be required.
4. Pre-Installation Checks
Before attempting installation, perform the following checks:
- Verify Malfunction Source: Ensure your phone's issue is caused by the LCD or touch panel, not other internal components.
- Visual Inspection: Upon receipt, carefully inspect the product for any broken, damaged, or missing items. Do not install if any damage is observed. Contact customer service immediately with photos.
- Simulation Test:
- Do not remove any protective films or labels during testing.
- Address static electricity: Ground yourself using an ESD (Electrostatic Discharge) wrist strap to prevent damage to electronic components.
- Disconnect the battery cable connector.
- Temporarily connect the new LCD display's flex cable to the motherboard.
- Plug in the charging cable and power on the phone to check if the screen functions normally (display, touch response).
- If any abnormality occurs during this test, contact customer service with video or photo evidence. Do not proceed with full installation.

Image 2: Close-up view of the screen corners, indicating a smooth finish and proper fit within the frame.
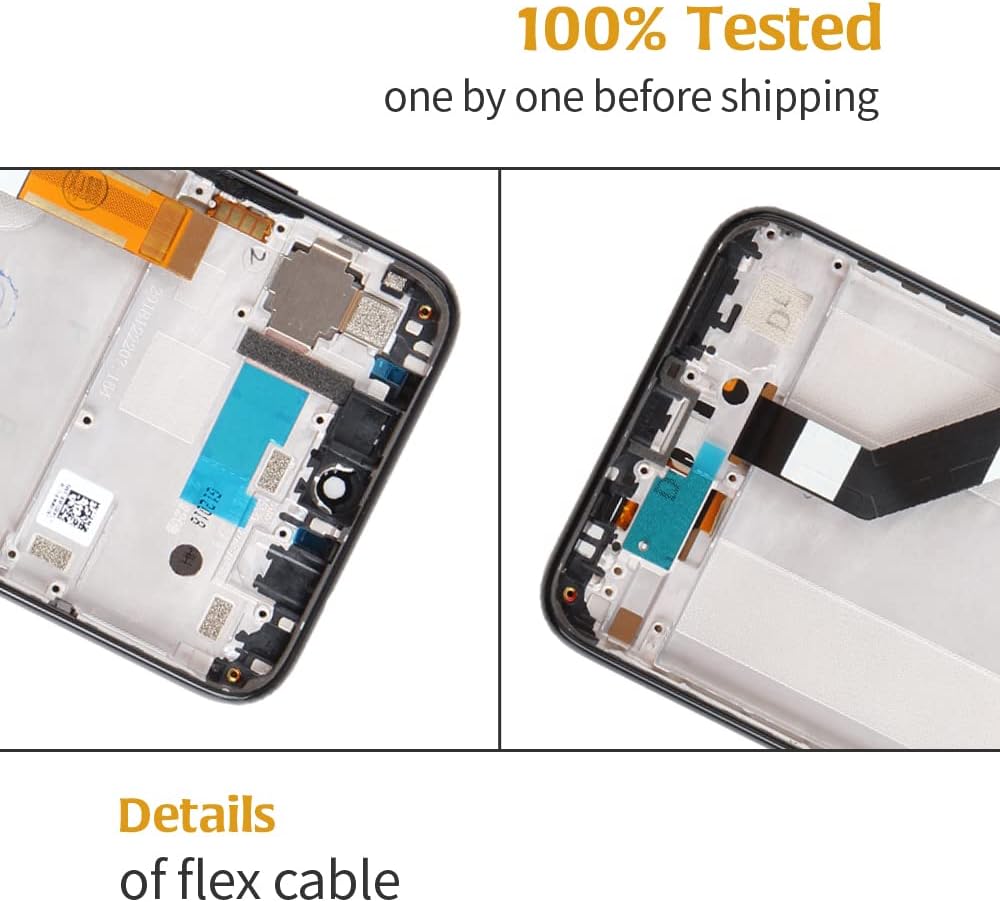
Image 3: Detailed view of the flex cable and its connection points on the screen assembly.
5. Installation Instructions (Setup)
Installation of a phone screen requires specific techniques and equipment. For optimal results and to avoid damage, it is strongly recommended to seek professional service or refer to detailed video tutorials.
5.1 General Steps (Refer to Video Tutorials for Details):
- Power off your device completely.
- Remove the SIM card tray.
- Carefully open the phone's back cover.
- Disconnect the battery and other relevant flex cables from the motherboard.
- Remove the old, damaged screen assembly.
- Clean any adhesive residue from the phone frame.
- Perform the Pre-Installation Simulation Test with the new screen.
- If the test is successful, apply new adhesive to the frame (if not pre-applied on the new screen).
- Carefully install the new screen assembly, ensuring all flex cables are properly connected.
- Reconnect the battery and other components.
- Reassemble the phone.
5.2 Important Installation Precautions:
- Fragile Component: The LCD is a fragile component. Handle with extreme care.
- Flex Cables: Do not fold or strongly pull the flex cables. Damage to these cables can render the screen inoperable.
- Screen Edges and Corners: Avoid pressing hard on the screen edges and four corners during installation.
- Chip Area: Do not press hard on the chip located under the screen.
- Static Electricity: Continue to take anti-static precautions throughout the installation process.
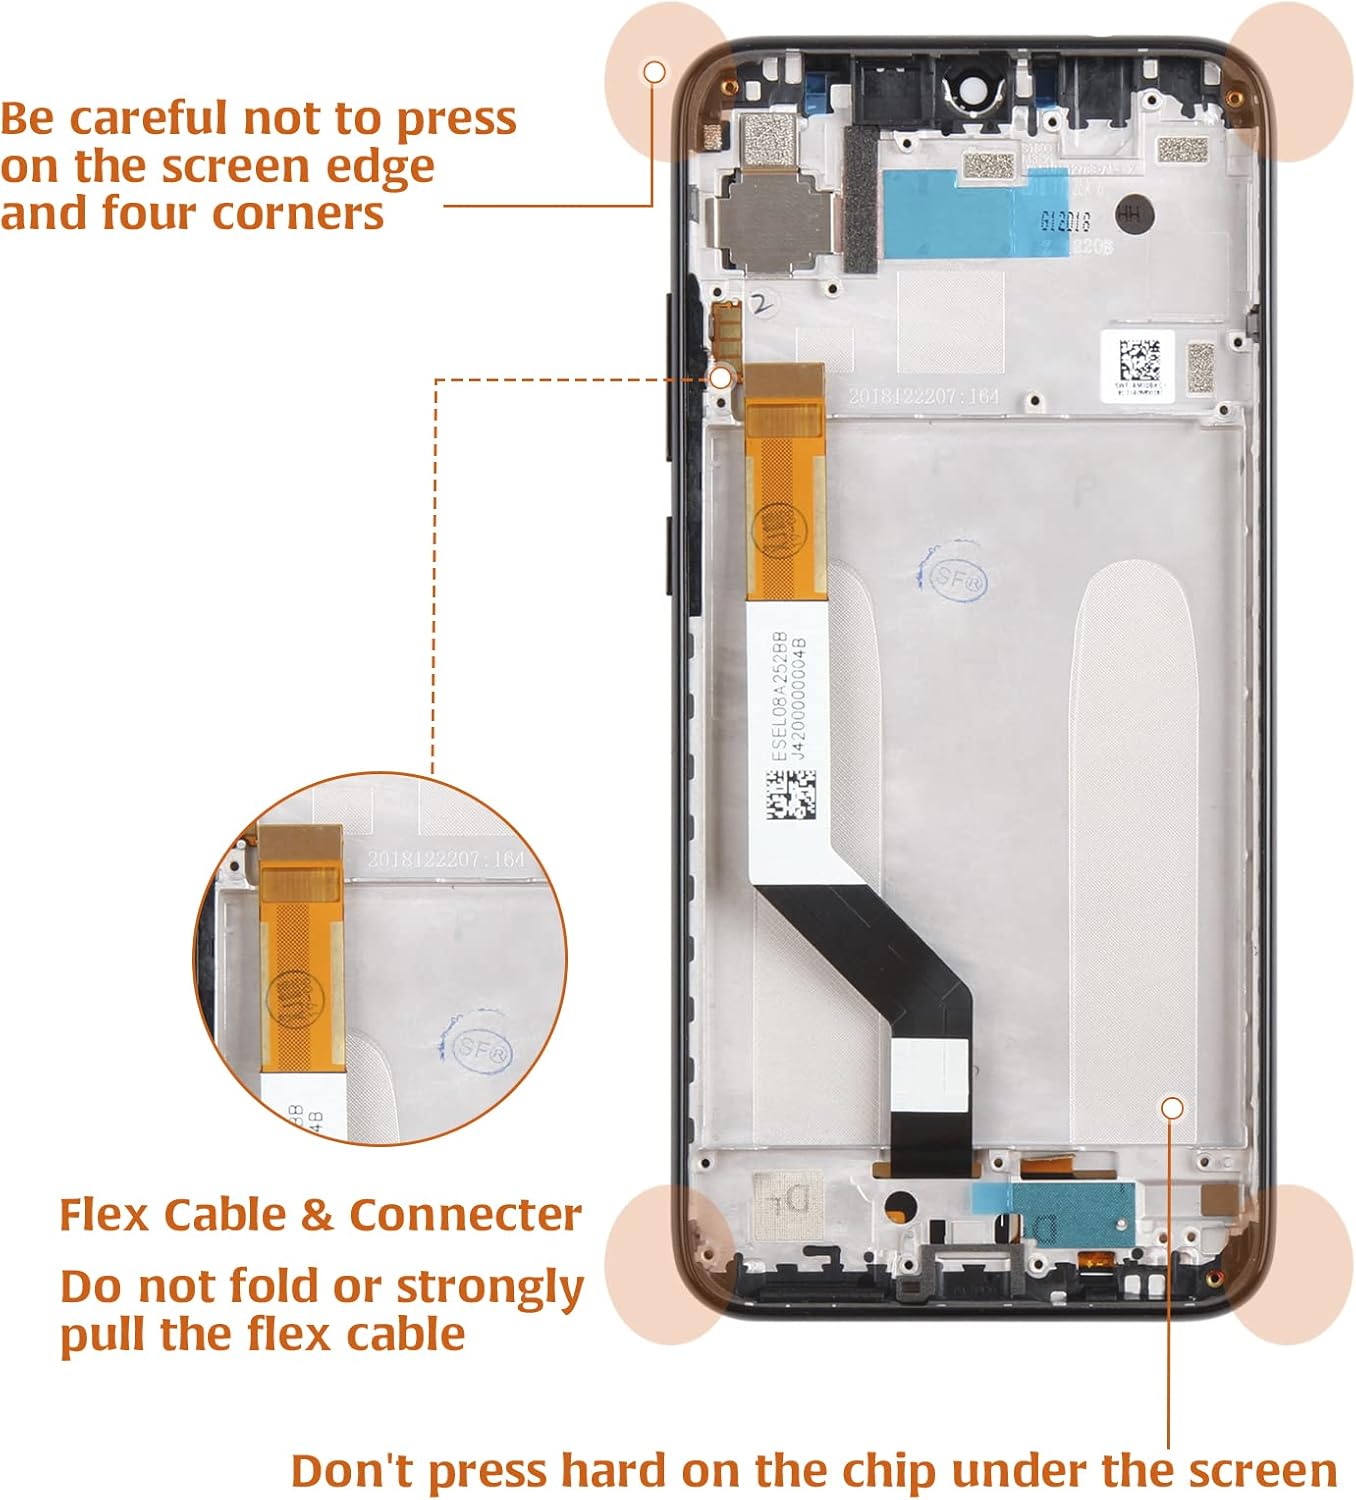
Image 4: Diagram illustrating critical areas to avoid pressure (screen edges, corners, chip) and a warning against folding or pulling the flex cable.
5.3 Official Installation Video:
Video 1: An official video from the seller (wytek) demonstrating the screen replacement process for Xiaomi Redmi Note 7. This video provides visual guidance for installation.
6. Troubleshooting
If you encounter issues after installation, consider the following:
- Screen Goes Dark During Calls: One reported issue is the screen going dark when a call is answered. This may indicate a problem with the proximity sensor or its connection. Recheck the sensor area and connections.
- Display or Touch Issues: If the screen does not display correctly or touch functionality is impaired, re-verify all flex cable connections. Ensure they are securely seated and not damaged.
- General Malfunctions: If any abnormality persists, do not force the installation or attempt further repairs without proper knowledge. Contact customer service with detailed descriptions, videos, or photos of the issue.
7. Specifications
| Feature | Detail |
|---|---|
| Package Dimensions | 7.56 x 4.02 x 1.3 inches |
| Item Weight | 6.2 ounces |
| Item Model Number | M1901F7G, M1901F7H, M1901F7I, M1901F7S |
| Other Display Features | Wireless |
| What's in the Box | Phone screen replacement, tool kit |
| Manufacturer | A-MIND |
| Date First Available | September 23, 2022 |
8. Warranty and Support
A-MIND offers a 3-month free replacement or refund policy for non-human product damage or faults. This warranty does not cover damages or malfunctions caused by incorrect installation.
Contacting Support:
- If the product is broken, damaged, or missing items upon receipt, do not install it. Please email our service team immediately with attached photos.
- For any further assistance or questions regarding your product, please email our service team.
Please note that installation is at your own risk. We are not responsible for damage caused during the installation process.