
Sharper Image 1013311
Sharper Image Projection Alarm Clock User Manual
Model: 1013311
Introduction
Thank you for purchasing the Sharper Image Projection Alarm Clock. This device combines a full-function digital alarm clock with soothing soundscapes and relaxing visual projections to enhance your sleep environment. Please read this manual thoroughly to ensure proper use and care of your new alarm clock.
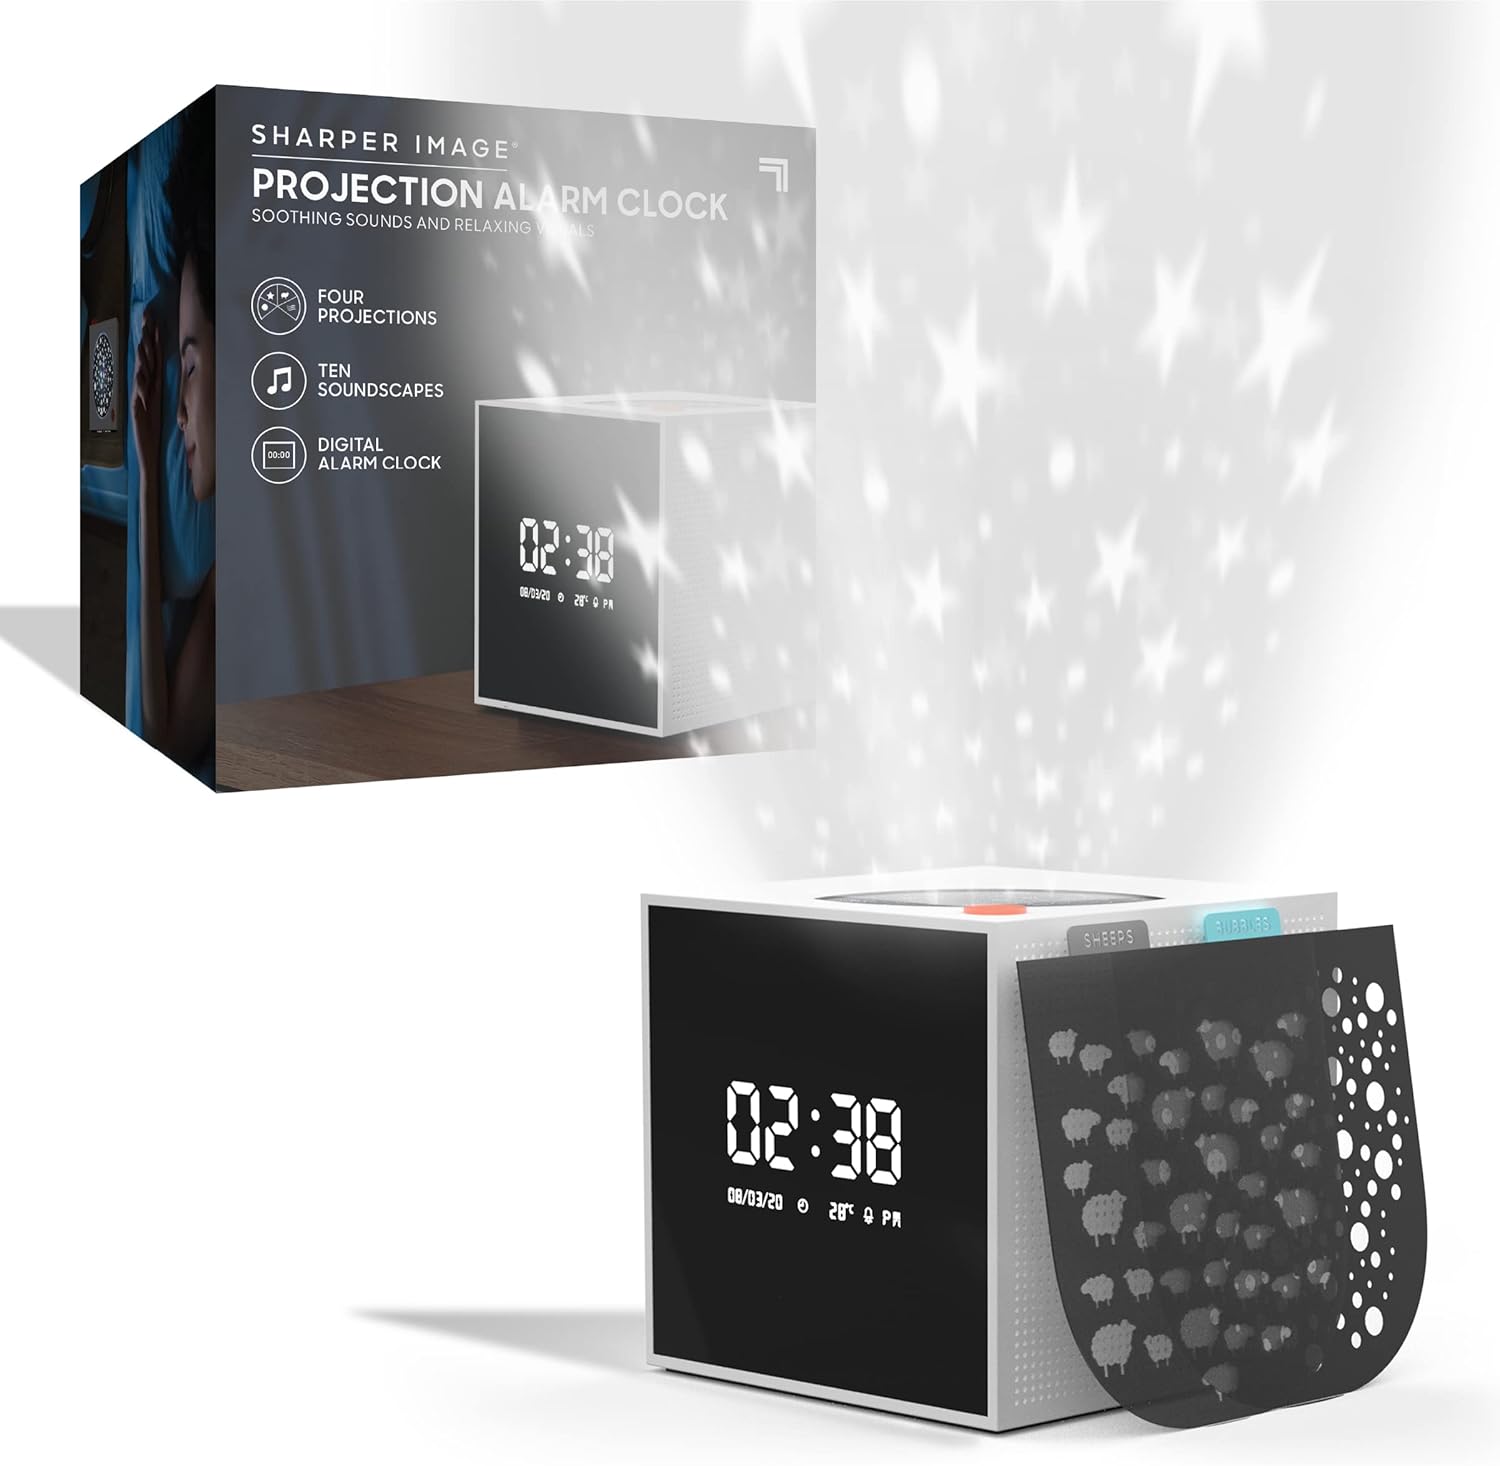
Image: The Sharper Image Projection Alarm Clock shown with its packaging, highlighting its features like four projections, ten soundscapes, and digital alarm clock functionality.
Product Features
- Image Projection: Projects color-changing imagery such as waves, sheep, stars, and bubbles across walls and ceilings.
- 10 Soothing Soundscapes: Offers a selection of pre-programmed peaceful sounds to aid relaxation and sleep.
- Full-Function Digital Alarm Clock: Displays time, allows alarm setting, and includes a snooze function.
- Battery Powered: Cordless design for flexible placement and portability.
- Stylish Design: Compact and sleek cube design that complements various home decors.

Image: A visual representation of the alarm clock's key features, including projection, soundscapes, digital clock, battery power, and stylish design.
Setup Guide
- Battery Installation:
Locate the battery compartment on the bottom or back of the unit. Insert 3 AA 1.5V batteries, ensuring correct polarity (+/-). Close the battery compartment securely.

Image: The alarm clock with its battery compartment open, showing the required AA batteries, and also displaying the interchangeable projection lenses.
- Initial Power On:
Once batteries are installed, the digital display should illuminate. If not, check battery placement or replace with fresh batteries.
- Setting Time and Date:
Refer to the controls on the unit (usually buttons labeled "SET", "MODE", "+", "-"). Press "SET" or "MODE" to cycle through time, date, and alarm settings. Use "+" and "-" buttons to adjust values. Press "SET" or "MODE" again to confirm each setting.
- Inserting Projection Lenses:
The alarm clock comes with multiple projection lenses (e.g., stars, sheep, waves, bubbles). Select your desired lens and gently slide it into the designated slot on the top or side of the unit until it clicks into place.
Operating Instructions
Using the Digital Clock
- Viewing Time/Date: The current time and date are continuously displayed on the front LED screen.
- Setting Alarm: Press the "ALARM" button (or similar) to enter alarm setting mode. Use the "+" and "-" buttons to set the desired alarm time. Press "ALARM" again to confirm. Ensure the alarm icon is visible on the display to indicate it is active.
- Snooze Function: When the alarm sounds, press the "SNOOZE" button (often a large button on top) to temporarily silence the alarm for a few minutes. The alarm will sound again after the snooze period.
- Turning Off Alarm: To turn off the alarm completely, press the "ALARM" button again or a dedicated "OFF" button.
Using Projection
- Activating Projection: Press the "PROJECTION" button (or a dedicated light button) to turn on the visual projection.
- Changing Projection Patterns: If multiple lenses are inserted, some models allow cycling through patterns by pressing the "PROJECTION" button repeatedly. Ensure the correct lens is inserted for the desired visual.
- Adjusting Focus/Angle: Some models may have a focus dial or adjustable head to sharpen the projected image or change its angle on the wall/ceiling.

Image: The alarm clock displaying the time and projecting a pattern of stars onto a nearby surface, demonstrating its primary function.

Image: A bedroom scene at night, showing the Sharper Image Projection Alarm Clock on a nightstand, casting a starry projection onto the ceiling above a sleeping person.
Using Soundscapes
- Playing Soundscapes: Press the "SOUND" or "SOUNDSCAPE" button to begin playing the pre-programmed sounds.
- Cycling Through Sounds: Press the "SOUND" button repeatedly to cycle through the 10 available soundscapes.
- Adjusting Volume: Use the volume control buttons (often "+" and "-") to increase or decrease the soundscape volume.
- Turning Off Soundscapes: Press the "SOUND" button until the sound turns off, or press a dedicated "OFF" button if available.
Maintenance
- Cleaning:
Wipe the exterior of the alarm clock with a soft, dry cloth. Do not use abrasive cleaners or solvents, as they may damage the finish. Keep the projection lens clean for clear images.
- Battery Replacement:
When the display dims or functions become erratic, it's time to replace the batteries. Always replace all batteries at once with new ones of the same type (3 AA 1.5V). Dispose of old batteries responsibly.
- Storage:
If storing the unit for an extended period, remove the batteries to prevent leakage and damage.
Troubleshooting
| Problem | Possible Cause | Solution |
|---|---|---|
| Display is blank or dim. | Batteries are low or incorrectly installed. | Replace batteries with new ones, ensuring correct polarity. |
| Projection is blurry or not visible. | Lens is dirty, incorrectly inserted, or focus needs adjustment. Room is too bright. | Clean the projection lens. Ensure the lens is fully inserted. Adjust focus dial if available. Use in a dark room for best results. |
| Soundscapes are not playing. | Volume is too low or soundscape function is not activated. | Increase volume using the '+' button. Press the "SOUND" button to activate soundscapes. |
| Alarm does not sound. | Alarm is not set or not activated. Volume is too low. | Verify alarm time is set and the alarm icon is displayed. Increase alarm volume. |
Specifications
| Feature | Detail |
|---|---|
| Brand | Sharper Image |
| Model Number | 1013311 |
| Colour | White |
| Product Dimensions | 8.89 x 3.81 x 8.89 cm (3.5 x 1.5 x 3.5 inches) |
| Item Weight | 408 g |
| Special Features | Alarm, Image Projection, Soundscapes |
| Display Type | Digital |
| Power Source | Battery Powered (Requires 3 AA 1.5V batteries) |

Image: The Sharper Image Projection Alarm Clock shown with its physical dimensions (3.5 inches by 3.5 inches by 4 inches) clearly indicated.
Warranty and Support
For warranty information or technical support, please contact Sharper Image customer service. Retain your proof of purchase for any warranty claims.
You can typically find contact information on the product packaging or by visiting the official Sharper Image website: www.sharperimage.com
Related documents1013311


Ask a question about this manual
Ask about setup, troubleshooting, compatibility, parts, safety, or missing instructions. Manuals+ will review the question and use this page’s manual context to help answer it.