
1. Important Safety Instructions
Please read and follow all safety instructions carefully to prevent injury or damage to the product and your aquatic environment. Failure to do so may result in electric shock, fire, or other serious hazards.
- Always ensure the heater is fully submerged in water before connecting it to a power source. Operating the heater out of water can cause overheating and damage.
- Disconnect the power supply before performing any maintenance, cleaning, or handling the heater.
- Do not operate the heater if the cord or plug is damaged.
- This appliance is intended for indoor use only, within an aquarium or similar aquatic environment.
- Keep out of reach of children and pets.
- Ensure the power outlet is equipped with a Ground Fault Circuit Interrupter (GFCI) for added safety.
- Avoid placing the heater in areas with strong currents that could dislodge it.
- The heater is designed with anti-scald protection, but caution should still be exercised when handling.

Image 1.1: Heater displaying an E1 error, indicating it is not fully submerged. Ensure full submersion to prevent damage.
2. Product Overview
The JULIAQUA GUI-50W Aquarium Heater is designed to maintain a stable and optimal temperature for your aquatic pets. It features a clear digital temperature display and an external controller for easy adjustment. The compact design ensures minimal intrusion into your aquarium's space.
2.1 Key Features
- Smart Temperature Control: Adjustable thermostat ranging from 68°F–95°F (20°C–35°C).
- Digital Display: Real-time temperature monitoring for accuracy.
- Auto Shut-off: Heater automatically powers off upon reaching the set temperature, conserving energy.
- Safety Features: Automatic power-off and error display (E1/E2) if not fully submerged, preventing dry-run damage.
- Compact Design: Slim profile to maximize swimming space and plant growth area.
- Durable Construction: Made with shatterproof materials and precision temperature control for long-term reliability.

Image 2.1: The JULIAQUA GUI-50W Aquarium Heater and its external temperature controller.
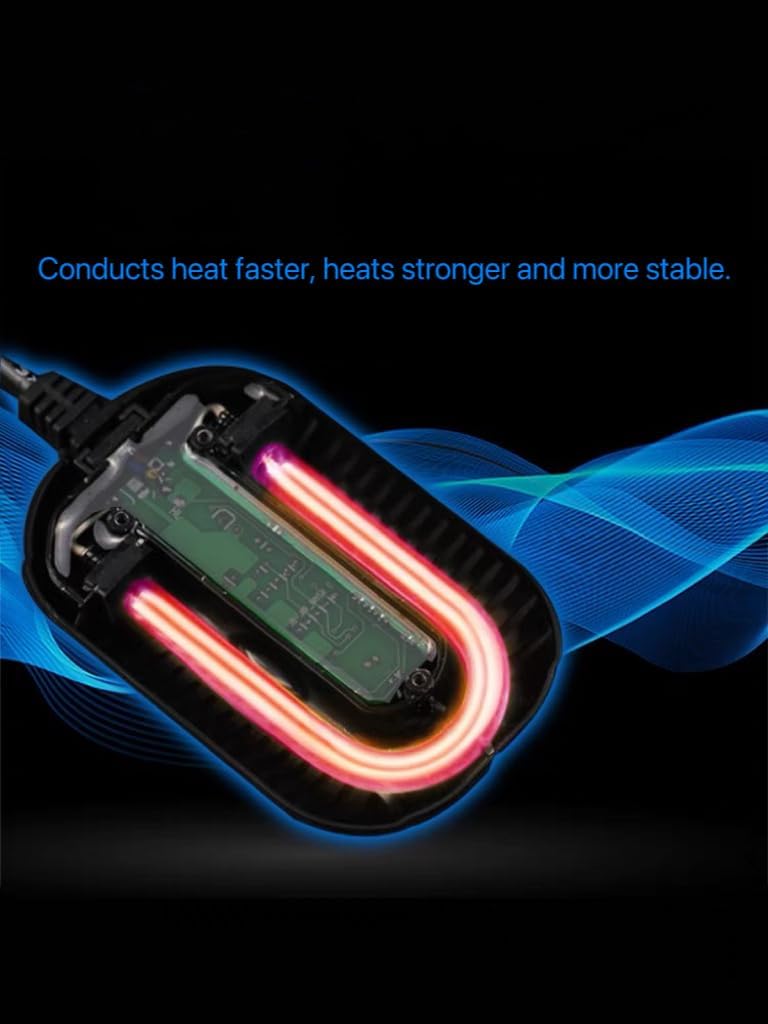
Image 2.2: Internal view of the heater, highlighting the heating element and anti-scald protection.
3. Setup and Installation
Proper installation is crucial for the heater's performance and safety.
- Unpack: Carefully remove the heater and all components from the packaging. Inspect for any visible damage.
- Placement: Position the heater fully submerged within your aquarium. For optimal and even heat distribution, place it near the water outlet or filter flow. This ensures circulating water is heated efficiently. The heater can be installed horizontally or vertically.
- Secure: Use the provided suction cups to firmly attach the heater to the inside wall of your aquarium. Ensure it is stable and cannot be easily dislodged by aquatic inhabitants.
- Connect Controller: Ensure the external temperature controller is connected to the heater and placed in an easily accessible location outside the aquarium.
- Power Connection: Once the heater is fully submerged and secured, connect the power plug to a suitable electrical outlet.

Image 3.1: Proper installation of the heater inside an aquarium, with the external controller positioned for easy access.

Image 3.2: The heater's back with suction cups for secure attachment to the aquarium wall.
4. Operating Instructions
The JULIAQUA GUI-50W heater features an intuitive external controller for temperature adjustment.
- Power On: After connecting to power, the digital display on the heater will illuminate, showing the current water temperature.
- Set Temperature: Use the "SET" button on the external controller to adjust the desired temperature. Each press will cycle through the available temperature range (68°F–95°F / 20°C–35°C).
- Monitoring: The heater's display will show the current water temperature. Once the set temperature is reached, the heater will automatically turn off. It will reactivate when the water temperature drops below the set point.
- Temperature Unit: Note that the display may show temperature in Fahrenheit or Celsius depending on the version. The product specifications indicate a US version typically displays Fahrenheit.

Image 4.1: Adjusting the desired temperature using the external controller's SET button.
5. Maintenance
Regular maintenance ensures the longevity and efficient operation of your aquarium heater.
- Cleaning: Periodically clean the heater's surface to remove algae or mineral buildup. Always unplug the heater and allow it to cool completely before removing it from the water for cleaning. Use a soft brush or cloth and aquarium-safe cleaning solutions if necessary.
- Inspection: Regularly inspect the power cord, plug, and heater body for any signs of damage, cracks, or wear. If any damage is observed, discontinue use immediately.
- Water Changes: During water changes, ensure the heater remains fully submerged. If the water level drops below the heater, unplug it immediately and allow it to cool before refilling the tank.
6. Troubleshooting
Refer to this section for common issues and their solutions.
| Problem | Possible Cause | Solution |
|---|---|---|
| Heater displays "E1" or "E2" error. | Heater is not fully submerged in water. | Unplug the heater, ensure it is fully submerged, then plug it back in. |
| Water temperature is not reaching the set point. |
|
|
| Heater is not turning on. |
|
|
| Temperature reading is inaccurate compared to an external thermometer. | Sensor calibration difference or external thermometer inaccuracy. | While the heater has precision control, minor variations can occur. If the discrepancy is significant (e.g., more than 2-3°F), ensure the heater is placed in an area with good water flow and consider recalibrating your external thermometer. If the issue persists, contact support. |
7. Specifications
Detailed specifications for the JULIAQUA GUI-50W Aquarium Heater.
| Feature | Detail |
|---|---|
| Model | GUI-50W |
| Brand | JULIAQUA |
| Power | 50W |
| Recommended Tank Size | Less than 14 gallons (approx. 11.00 Gallons for 50W) |
| Temperature Range | 68°F–95°F (20°C–35°C) |
| Dimensions (Heater Body) | Approx. 2.56 x 4.13 x 0.98 inches (65 x 105 x 25 mm) |
| Cable Length | Approx. 4.92 ft (1.5 meters) |
| Item Weight | 7 ounces |
| Compatibility | Freshwater and Saltwater Aquariums, Turtle Tanks |

Image 7.1: Detailed specifications for different wattage models, including dimensions and recommended tank sizes.
8. Warranty and Support
JULIAQUA is committed to providing high-quality products and customer satisfaction. If you have any questions, concerns, or require assistance with your aquarium heater, please do not hesitate to contact our aquatic specialists. Refer to your purchase documentation or the seller's information for specific warranty details and contact methods.
Our team is ready to help ensure your aquatic environment remains stable and healthy.