
1. Introduction
This manual provides comprehensive instructions for the installation, operation, and maintenance of your Gigabyte X670E AORUS XTREME ATX Motherboard. Designed for AMD Ryzen 7000 Series processors, this motherboard offers advanced features including DDR5 memory support, PCIe 5.0 connectivity, 10G LAN, and Wi-Fi 6E. Please read this manual thoroughly before proceeding with installation to ensure proper setup and optimal performance.
2. Safety Information
- Always disconnect the power cord from the wall outlet before touching any components inside the computer case.
- Wear an anti-static wrist strap or frequently touch a grounded metal object to discharge static electricity before handling components.
- Handle the motherboard by its edges to avoid damaging sensitive components.
- Ensure proper ventilation within the computer case to prevent overheating.
- Keep the motherboard and components away from moisture and extreme temperatures.
- Refer to the safety guidelines provided with other components (CPU, RAM, GPU, PSU) for additional precautions.
3. Package Contents
Verify that all items listed below are present in your motherboard package. If any items are missing or damaged, contact your retailer.
- Gigabyte X670E AORUS XTREME ATX Motherboard
- User Manual and Quick Installation Guide
- SATA Data Cables
- Wi-Fi Antenna
- M.2 Screws and Standoffs
- Driver CD/USB Drive (or download instructions)
- Other accessories (e.g., RGB extension cables, temperature sensors)

Image 3.1: Gigabyte X670E AORUS XTREME Motherboard and its retail packaging. The motherboard features a black PCB with heatsinks and RGB lighting elements. The box displays the AORUS logo and product model.
4. Motherboard Layout
Familiarize yourself with the key components and connectors on the motherboard before installation.
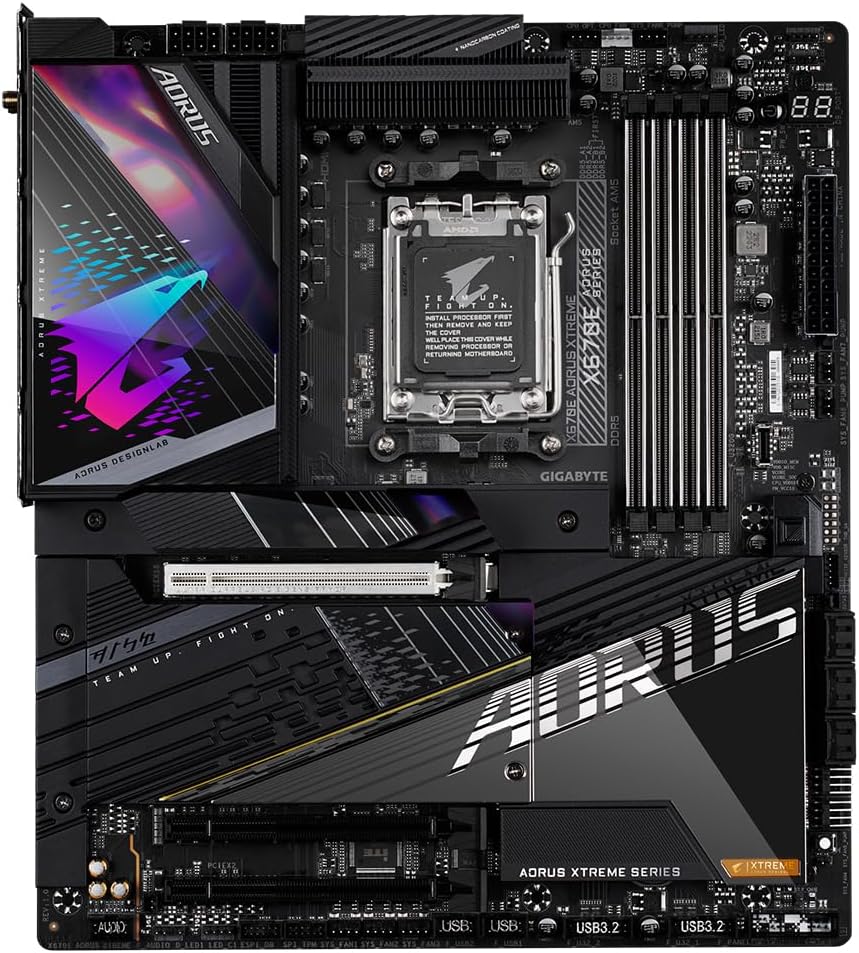
Image 4.1: Top-down view of the Gigabyte X670E AORUS XTREME Motherboard. This image highlights the central AM5 CPU socket, four DDR5 DIMM slots to the right, and various heatsinks covering the VRM, chipset, and M.2 slots. The primary PCIe 5.0 x16 slot is visible below the CPU area.
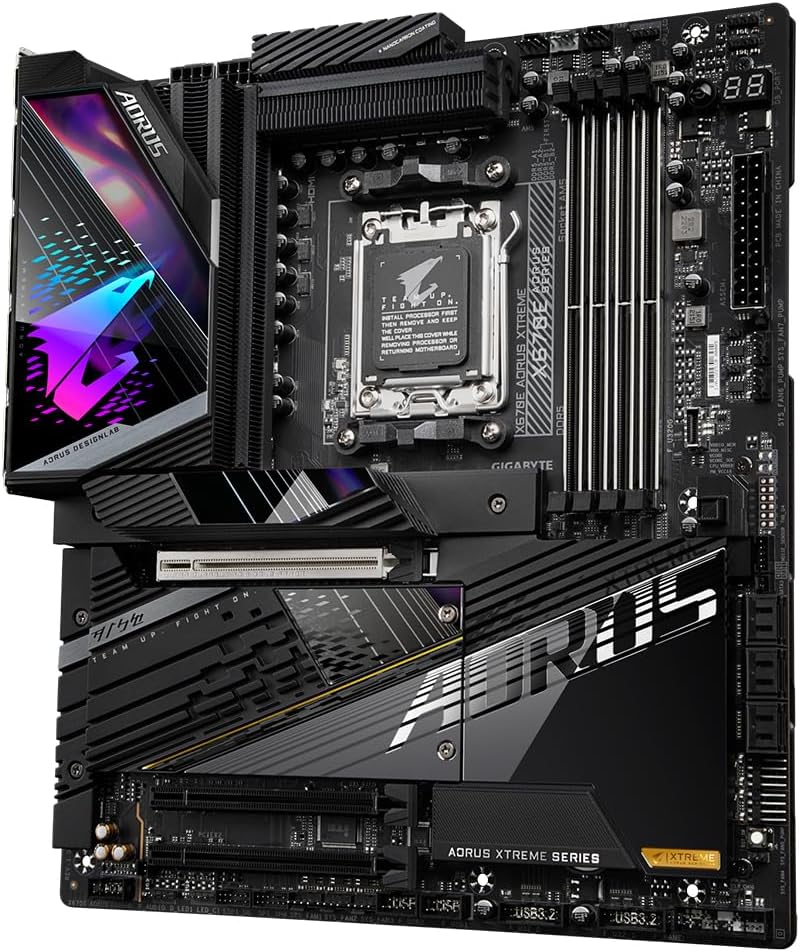
Image 4.2: Angled view of the Gigabyte X670E AORUS XTREME Motherboard, emphasizing the robust VRM heatsinks, the AM5 CPU socket, and the upper portion of the PCIe 5.0 x16 slot. This perspective also shows some of the integrated RGB lighting elements.
4.1. CPU Socket (AM5)
The central socket supports AMD Ryzen 7000 Series processors. Ensure the CPU is correctly oriented before installation.
4.2. DDR5 DIMM Slots
Four DDR5 DIMM slots are provided for dual-channel memory configurations, supporting up to 128GB of RAM with speeds up to 6400(OC) MHz.
4.3. PCIe Expansion Slots
- One PCIe 5.0 x16 slot for high-performance graphics cards.
- One PCIe 4.0 x16 slot (operates at x4 mode) for additional expansion cards.
4.4. M.2 Connectors
The motherboard features four PCIe 5.0 x4 M.2 connectors for high-speed NVMe SSDs, covered by M.2 Thermal Guard III heatsinks.
4.5. Rear I/O Panel
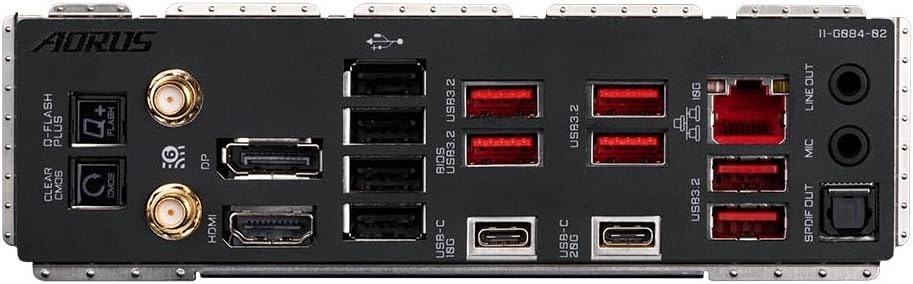
Image 4.3: Detailed view of the rear I/O panel on the Gigabyte X670E AORUS XTREME Motherboard. This panel includes multiple USB ports (USB 3.2 Gen 2x2 Type-C, USB 3.2 Gen 2 Type-A), a 10G LAN port, Wi-Fi 6E antenna connectors, audio jacks (including S/PDIF Out), HDMI, DisplayPort, and Q-Flash Plus/Clear CMOS buttons.
The rear I/O panel provides extensive connectivity:
- USB Ports: Various USB 3.2 Gen 2x2 Type-C, USB 3.2 Gen 2 Type-A, and USB 2.0/1.1 ports.
- LAN Port: One 10 Gigabit Ethernet port.
- Wireless: Wi-Fi 6E and Bluetooth via external antenna connectors.
- Audio Jacks: Line Out, Mic In, and S/PDIF Out.
- Display Outputs: HDMI and DisplayPort (for integrated graphics, if supported by CPU).
- Buttons: Q-Flash Plus and Clear CMOS buttons for convenient system management.
5. Setup and Installation
Follow these steps carefully to install your motherboard and other components.
5.1. Preparing the Case
- Ensure your computer case is compatible with ATX motherboards.
- Install the I/O shield into the case's rear opening.
- Install the necessary standoffs in the case for the ATX form factor.
5.2. Installing the CPU
- Open the CPU socket lever and remove the protective cover.
- Carefully align the CPU with the socket, matching the golden triangle on the CPU to the triangle on the socket.
- Gently place the CPU into the socket without applying force.
- Close the socket lever to secure the CPU.
5.3. Installing the CPU Cooler
Follow the instructions provided with your specific CPU cooler for installation. Apply thermal paste if not pre-applied.
5.4. Installing RAM
- Open the clips on both ends of the DIMM slots.
- Align the notch on the DDR5 memory module with the notch in the DIMM slot.
- Press down firmly on both ends of the memory module until the clips snap into place.
- For dual-channel operation, refer to the motherboard manual for recommended slot population.
5.5. Installing M.2 SSDs
- Unscrew and remove the M.2 Thermal Guard heatsink from the desired M.2 slot.
- Insert the M.2 SSD into the slot at an angle.
- Gently push down the SSD and secure it with the provided M.2 screw/standoff.
- Reattach the M.2 Thermal Guard heatsink.
5.6. Installing Graphics Card
- Open the latch on the PCIe 5.0 x16 slot.
- Align your graphics card with the slot and press down firmly until it clicks into place.
- Secure the graphics card to the case with screws.
- Connect any necessary PCIe power cables from your power supply to the graphics card.
5.7. Connecting Power Supply
- Connect the 24-pin ATX main power connector to the motherboard.
- Connect the 8-pin (or 4+4 pin) CPU power connector(s) to the motherboard.
- Connect SATA power cables to SATA devices (if any).
5.8. Connecting Front Panel Headers
Connect the power button, reset button, HDD LED, power LED, and front panel USB/audio connectors to their respective headers on the motherboard. Refer to the motherboard diagram for exact locations.
5.9. Connecting Peripherals
Connect your monitor, keyboard, mouse, and other peripherals to the rear I/O panel.
6. Operating Instructions
6.1. First Boot and BIOS/UEFI Setup
- After assembling all components, connect the power cord and turn on the power supply.
- Press the power button on your case.
- During POST (Power-On Self-Test), repeatedly press the DEL key to enter the BIOS/UEFI setup utility.
- In the BIOS/UEFI, you can configure boot order, enable/disable features, adjust fan curves, and manage overclocking settings. Save changes before exiting.
6.2. Driver Installation
After installing your operating system, install the necessary drivers for the motherboard chipset, LAN, Wi-Fi, audio, and other integrated devices. Drivers can be found on the Gigabyte support website for your specific motherboard model.
6.3. Software Utilities
Gigabyte provides various software utilities to enhance your system's performance and customization, such as Gigabyte Control Center (GCC) for system monitoring, fan control, and RGB lighting effects. Download these from the official Gigabyte website.
7. Maintenance
- Cleaning: Regularly clean dust from inside your computer case, especially from heatsinks and fans, using compressed air. Ensure the system is powered off and unplugged before cleaning.
- BIOS Updates: Periodically check the Gigabyte website for BIOS/UEFI updates. Updates can improve stability, compatibility, and performance. Follow the provided instructions carefully when updating the BIOS.
- Driver Updates: Keep your drivers updated to ensure optimal performance and compatibility with new software and hardware.
8. Troubleshooting
If you encounter issues, refer to the following common troubleshooting steps:
- No Power: Ensure all power cables (24-pin ATX, 8-pin CPU, GPU PCIe) are securely connected. Check the power supply switch and wall outlet.
- No Display: Verify that the monitor is connected to the graphics card (or motherboard if using integrated graphics) and powered on. Reseat the graphics card and RAM modules.
- POST Code Errors: The motherboard may have a debug LED display showing POST codes. Refer to the full Gigabyte manual for the meaning of specific codes.
- System Instability: Check RAM compatibility and seating. Ensure CPU cooler is properly installed. Update BIOS and drivers.
- Clear CMOS: If the system fails to boot after making BIOS changes, use the Clear CMOS button on the rear I/O panel or short the CLR_CMOS pins on the motherboard to reset BIOS settings to default.
For further assistance, consult the comprehensive Gigabyte user manual available on their official website or contact Gigabyte technical support.
9. Specifications
| Feature | Detail |
|---|---|
| Brand | Gigabyte |
| Model | X670E AORUS XTREME |
| CPU Socket | Socket AM5 |
| Compatible Processors | AMD Ryzen 7000 Series |
| Chipset | AMD X670E |
| RAM Technology | DDR5 |
| Memory Slots | 4 (Dual Channel) |
| Max RAM Capacity | 128 GB |
| PCIe Slots | 1x PCIe 5.0 x16, 1x PCIe 4.0 x16 (x4 mode) |
| M.2 Connectors | 4x PCIe 5.0 x4 |
| LAN | 10 Gigabit Ethernet |
| Wireless | Wi-Fi 6E, Bluetooth |
| USB Ports (Total) | 12 (Rear I/O) + Front Panel Headers |
| Form Factor | ATX |
| Dimensions | 30.5 x 26.9 cm (approx.) |
10. Warranty and Support
For detailed warranty information, please refer to the warranty card included with your product or visit the official Gigabyte website. Technical support, driver downloads, and BIOS updates are available on the Gigabyte support page. Please have your product model and serial number ready when contacting support.
Official Gigabyte Support: https://www.gigabyte.com/support