
1. Introduction
This manual provides detailed instructions for the installation, operation, and maintenance of your AMANSON H6 ATX Mid Tower PC Case. Please read this manual thoroughly before beginning assembly to ensure proper setup and to maximize the performance and longevity of your system components. This case is designed for gaming enthusiasts, offering a panoramic view with tempered glass and robust cooling capabilities.
2. Product Features
- Panoramic Tempered Glass Design: Equipped with tempered glass on the front and left side, providing a clear view of internal components and RGB lighting (fans not included).
- Broad Motherboard Compatibility: Supports ATX, Micro-ATX, and Mini-ITX motherboards.
- Extensive Cooling Support: Accommodates up to 10 x 120mm fans (fans not included) for optimal airflow. Supports top-mounted 360mm, 280mm, or 240mm integrated water cooling radiators.
- Spacious Interior: Maximum graphics card length of 360mm and CPU cooler height of 155mm.
- Flexible Storage Options: Features 1 x 3.5" HDD bay and 4 x 2.5" SSD bays.
- Convenient Front I/O Panel: Includes 1 x USB 3.0 port, 1 x Type-C port, and HD audio jacks for easy peripheral connectivity.
- Efficient Cable Management: Designed with ample space behind the motherboard tray and a dust filter for a clean build and improved airflow.
3. Specifications
| Feature | Specification |
|---|---|
| Model | H6 |
| Case Type | Mid Tower |
| Dimensions (L x W x H) | 420mm x 272.5mm x 399mm (Case Body) |
| Material | Steel, Tempered Glass |
| Motherboard Support | ATX, Micro-ATX, Mini-ITX |
| Expansion Slots | 7 |
| 3.5" Drive Bays | 1 |
| 2.5" Drive Bays | 4 |
| I/O Ports | 1 x USB 3.0, 1 x Type-C, HD Audio (Mic & Headphone) |
| Maximum GPU Length | 360mm |
| Maximum CPU Cooler Height | 155mm |
| Fan Support (120mm) | Top: 3, Front: 3, Side: 3, Bottom: 3, Rear: 1 (Total up to 10 fans) |
| Radiator Support | Top: 360mm / 280mm / 240mm |
| Weight | 7.87 kg (Product) |
Note: Fan and ARGB components are not included with the case. Actual external dimensions may vary slightly due to feet or protrusions.

Figure 1: An illustration of the AMANSON H6 PC case, highlighting its overall external dimensions for reference.
4. Package Contents
Please verify that all items listed below are present in your package:
- AMANSON H6 ATX Mid Tower PC Case (1 unit)
- Accessory Box (containing screws, standoffs, cable ties, etc.)
- User Manual (this document)
Note: Cooling fans and ARGB components are sold separately and are not included with the case.
5. Setup Guide
Follow these steps for proper installation of your PC components into the AMANSON H6 case.
5.1. Preparing the Case
Before installing any components, ensure the case is placed on a stable, flat surface. Remove the side panels to gain access to the interior.

Figure 2: The AMANSON H6 features hinged tempered glass side panels for easy access to internal components. Gently open the side panel to begin assembly.
5.2. Motherboard Installation
- Identify the correct standoff positions for your ATX, Micro-ATX, or Mini-ITX motherboard. The case comes with pre-installed standoffs for standard ATX. Adjust or install additional standoffs as needed using the provided tools.
- Carefully place your motherboard onto the standoffs, aligning the screw holes.
- Secure the motherboard with the appropriate screws from the accessory box. Do not overtighten.

Figure 3: This diagram illustrates the compatible motherboard sizes (ITX, M-ATX, ATX) and potential fan/radiator mounting locations within the AMANSON H6 case, highlighting its versatile space system.
5.3. Storage Device Installation (HDD/SSD)
The AMANSON H6 supports 1 x 3.5" HDD and 4 x 2.5" SSDs.
- Locate the drive bays behind the motherboard tray and in the PSU shroud area.
- For 3.5" HDDs, slide the drive into the designated cage and secure it with screws.
- For 2.5" SSDs, mount them onto the dedicated brackets using screws.
- Connect SATA data and power cables to your installed drives.
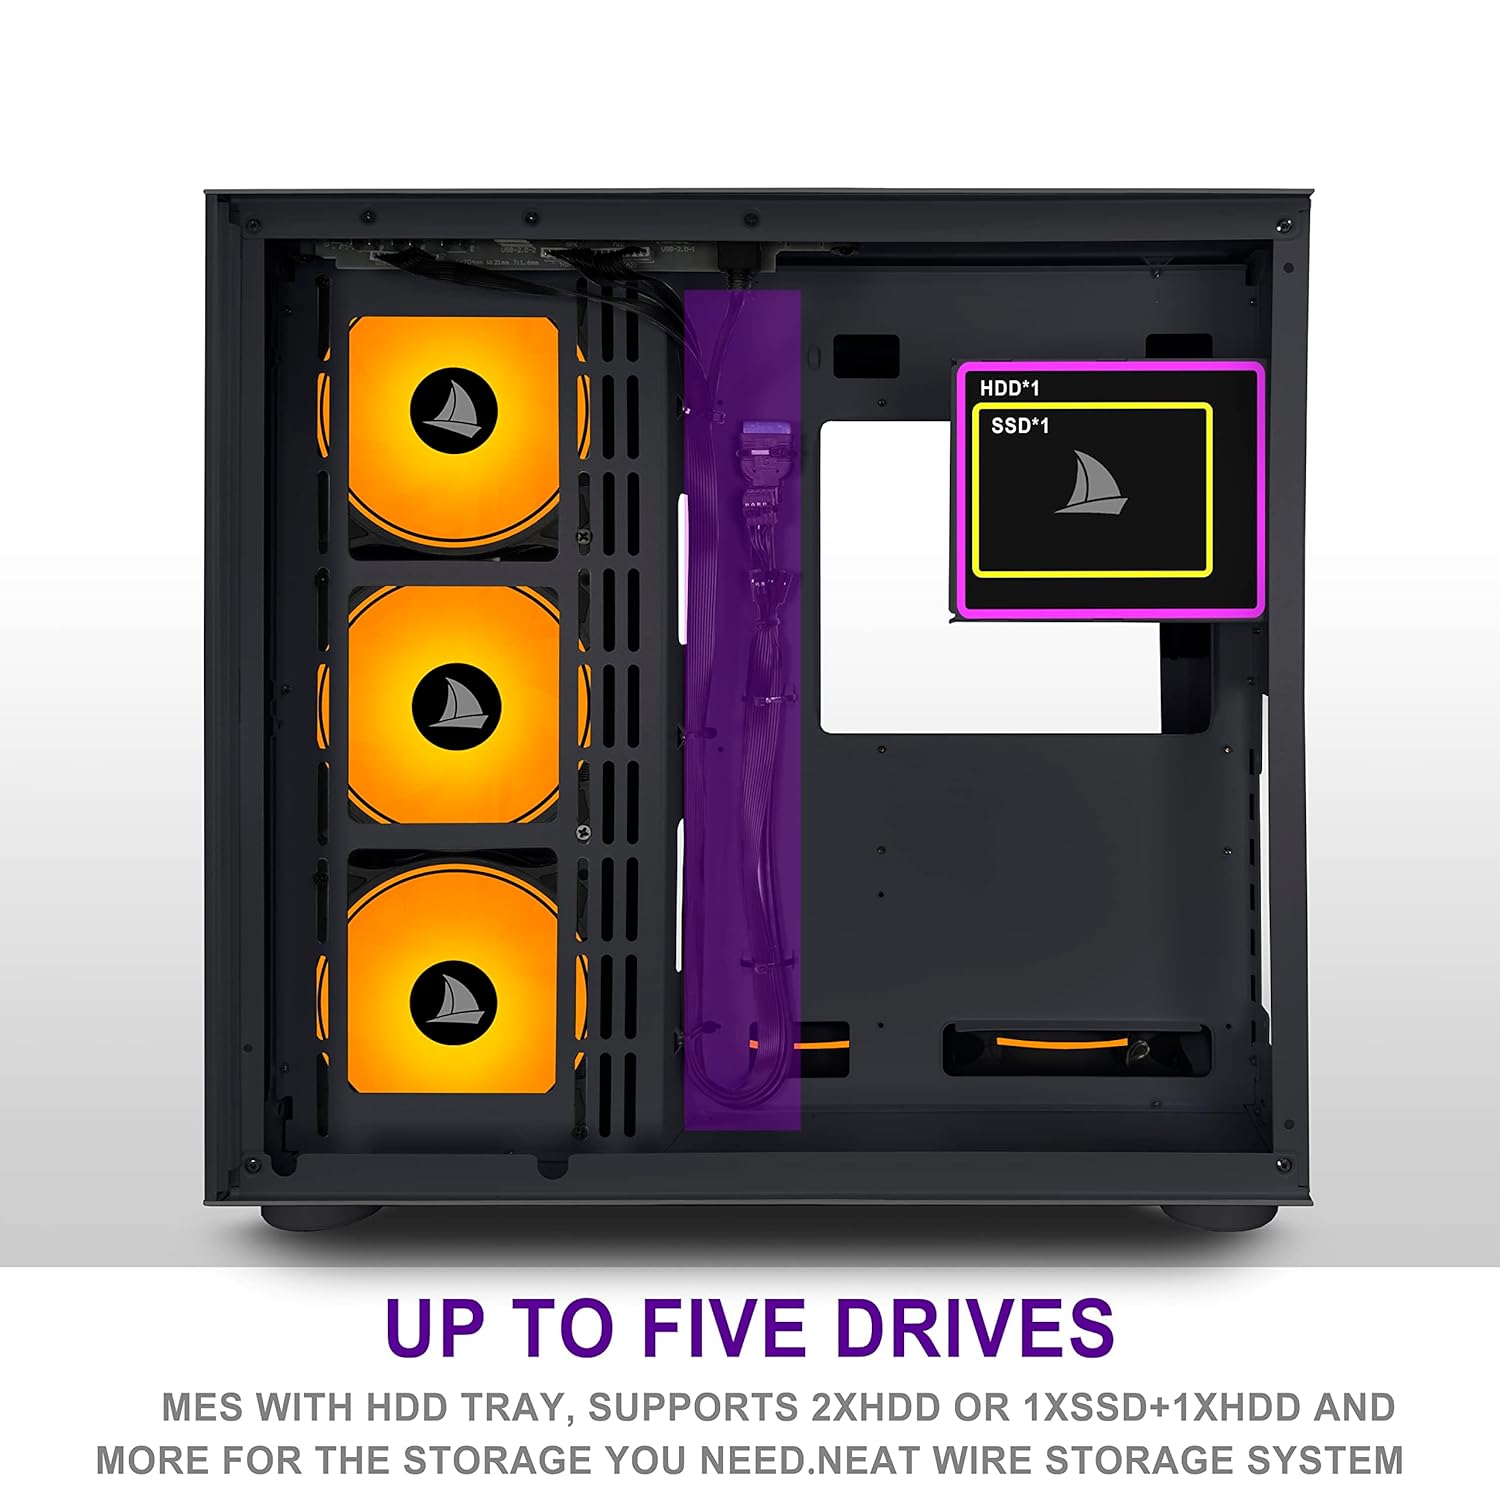
Figure 4: This image highlights the locations for installing up to five storage drives (1x HDD, 4x SSDs) within the AMANSON H6 case, facilitating a neat wire storage system.
5.4. Graphics Card Installation
- Remove the necessary expansion slot covers from the rear of the case.
- Insert your graphics card into the appropriate PCIe slot on your motherboard, ensuring it is fully seated.
- Secure the graphics card to the case with screws.
- Connect any required PCIe power cables from your power supply to the graphics card.
5.5. Power Supply Installation
- Position your ATX power supply unit (PSU) into the dedicated compartment at the bottom rear of the case.
- Secure the PSU to the case with screws from the rear.
- Route the necessary power cables through the cable management cutouts to reach your motherboard, graphics card, and storage devices.
5.6. Cable Management
The AMANSON H6 offers ample space behind the motherboard tray for cable routing. Utilize the cable tie points and included cable ties to organize and secure cables, improving airflow and aesthetics.
5.7. Fan and Radiator Installation
The case supports extensive cooling configurations. Fans are not included.
- Fan Placement: Install 120mm fans in the designated locations: Top (3), Front (3), Side (3), Bottom (3), Rear (1).
- Radiator Placement: A 360mm, 280mm, or 240mm radiator can be mounted at the top of the case.
- Ensure fans are oriented correctly for optimal airflow (intake or exhaust) based on your cooling strategy.

Figure 5: The zoning design concept of the AMANSON H6 case, viewed from the front, illustrates the internal layout optimized for component separation and efficient cooling.
6. Operating Instructions
Once all components are installed and cables are connected, close the side panels. Connect your monitor, keyboard, mouse, and power cable to the system. Press the power button on the front I/O panel to start your computer.
6.1. Front I/O Panel
- Power Button: Turns the system on or off.
- USB 3.0 Port: For high-speed data transfer with compatible devices.
- Type-C Port: Modern reversible connector for various peripherals.
- HD Audio Jacks: Connect headphones and microphones.
7. Maintenance
Regular maintenance helps ensure optimal performance and longevity of your PC components.
- Dust Cleaning: Periodically clean dust filters (if applicable) and the interior of the case using compressed air or a soft brush. Dust accumulation can hinder airflow and lead to overheating.
- Exterior Cleaning: Wipe the exterior surfaces, especially the tempered glass panels, with a soft, lint-free cloth and a mild glass cleaner (avoid abrasive materials).
- Cable Check: Ensure all internal cables remain securely connected and are not obstructing airflow.
8. Troubleshooting
If you encounter issues, consider the following basic troubleshooting steps:
- System Not Powering On:
- Ensure the power cable is securely connected to both the PSU and the wall outlet.
- Check that the PSU switch is in the "ON" position.
- Verify all power connections to the motherboard and components are secure.
- Confirm the front panel power switch cable is correctly connected to the motherboard header.
- No Display Output:
- Ensure your monitor is connected to the graphics card (not the motherboard's integrated graphics ports, unless you are using integrated graphics).
- Reseat the graphics card in its PCIe slot.
- Check all power cables to the graphics card.
- Overheating Issues:
- Verify all case fans are spinning and oriented correctly for optimal airflow.
- Clean any dust accumulation from fans, radiators, and filters.
- Ensure CPU cooler is properly seated and making good contact with the CPU.
For more complex issues, consult the manuals for your individual components (motherboard, GPU, PSU) or seek professional assistance.
9. Warranty and Support
The AMANSON H6 PC Case comes with a standard manufacturer's warranty. Please refer to the warranty policy provided at the time of purchase or contact your retailer for specific details regarding warranty coverage and duration.
For technical support or inquiries, please contact AMANSON customer service through the official website or your point of purchase. When contacting support, please have your product model (H6) and purchase information readily available.

