
NAILGIRLS Fresa ELettrica
NAILGIRLS Electric Nail Drill Instruction Manual
Model: Fresa ELettrica
Introduction
This manual provides comprehensive instructions for the safe and effective operation and maintenance of your NAILGIRLS Electric Nail Drill. Designed for both professional nail technicians and DIY enthusiasts, this tool offers precision and versatility for various nail care needs, including acrylic nails, gel nails, dip powder nails, callus removal, manicure, pedicure, and polishing. Please read this manual thoroughly before first use and keep it for future reference.
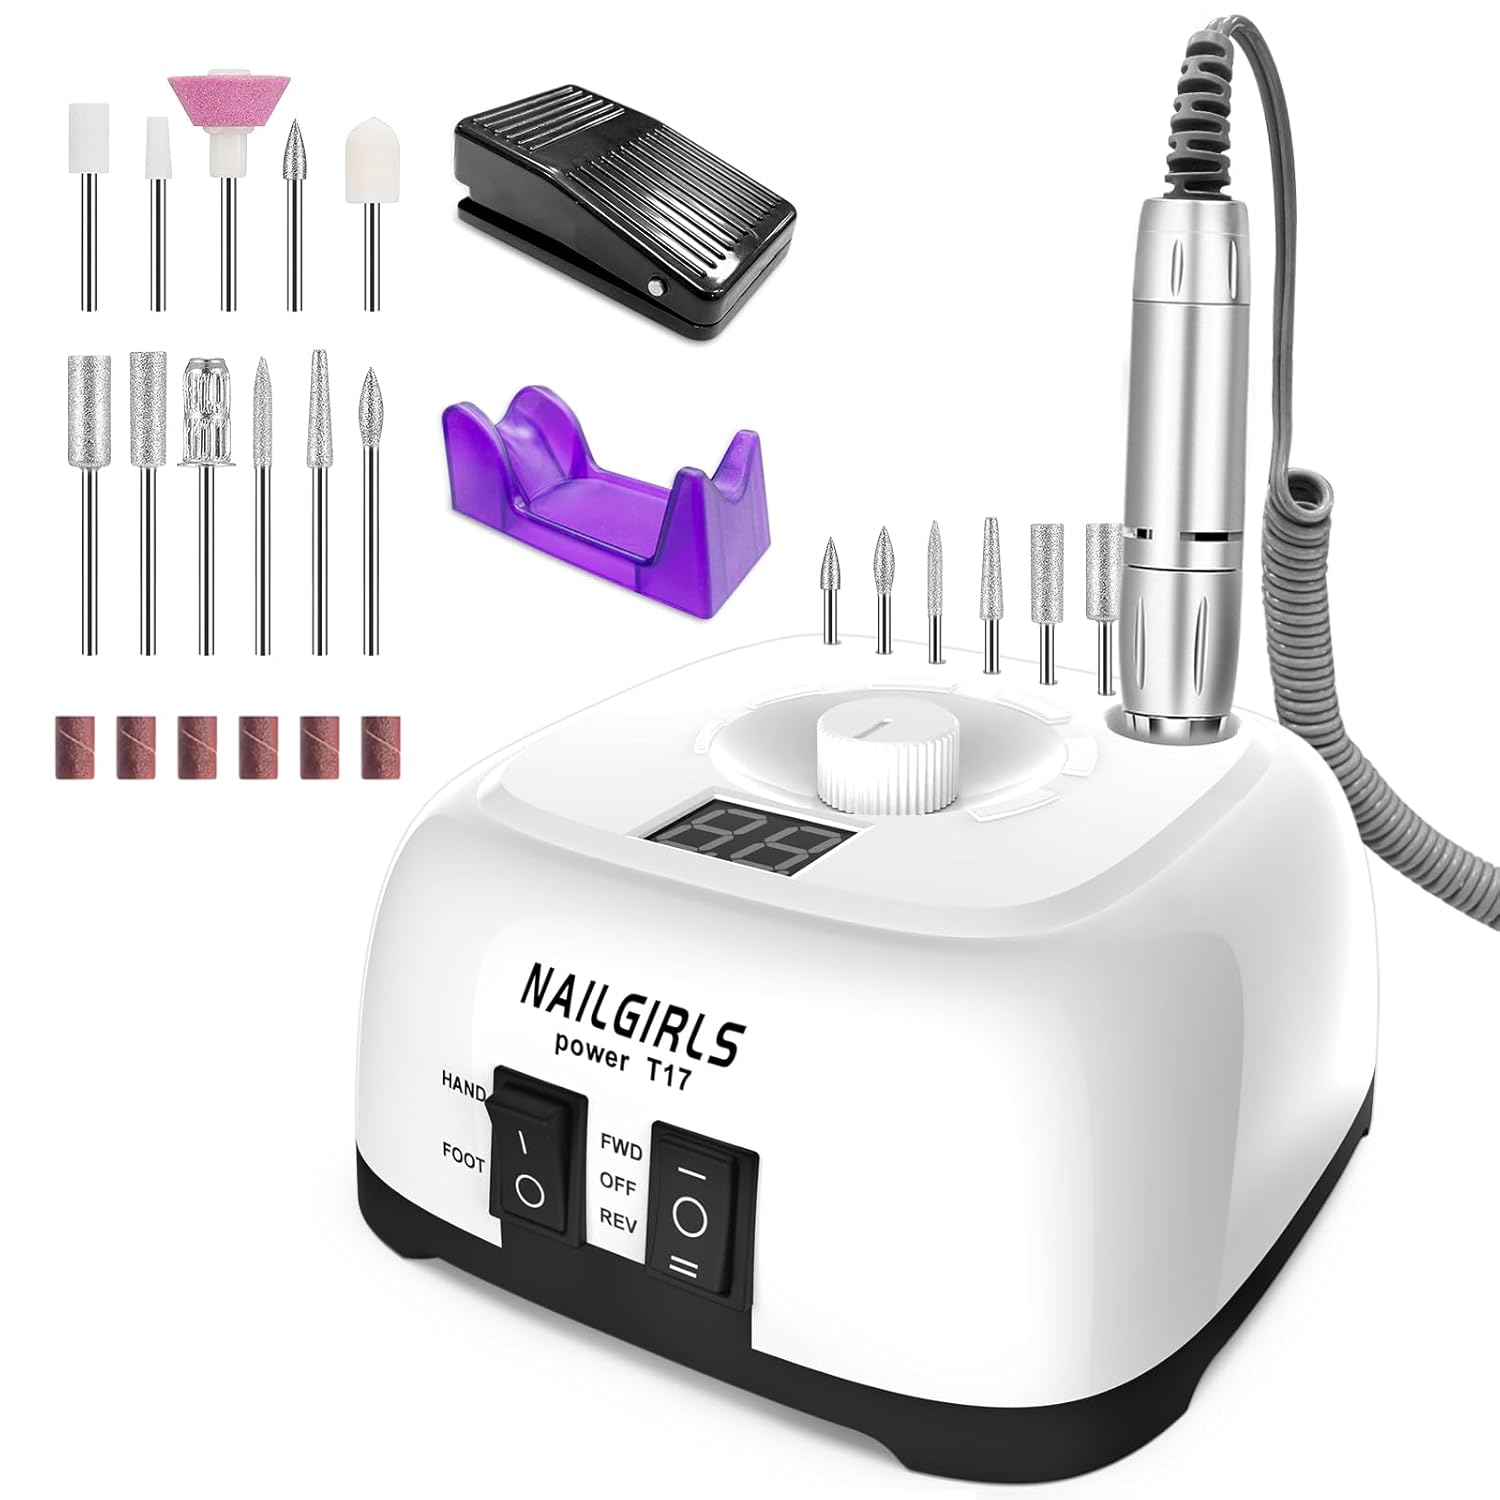
Image: The NAILGIRLS Electric Nail Drill unit, showing the main control box, handpiece, foot pedal, and a variety of included drill bits and sanding bands.
Safety Information
Warning: Always use protective eyewear to prevent eye injury from flying debris or dust. Do not touch the rotating bit or motor to avoid burns. Keep out of reach of children. Store in a cool, dry place.
Product Components
The NAILGIRLS Electric Nail Drill system includes the main control unit, a lightweight handpiece, a foot pedal, and a comprehensive set of drill bits.
- Main Control Unit: Features an LCD display, speed knob, hand/foot control switch, and forward/reverse direction switch.
- Handpiece: Crafted from high-quality aluminum alloy, designed for comfortable grip, low noise, and low vibration.
- Foot Pedal: Allows for hands-free operation, providing convenient control over the drill.
- Drill Bits: 11 different nail drill bits and 6 sanding bands are included for various applications.

Image: Detailed diagram showing the main control unit with labels for the speed knob, LED display, hand/foot switch, direction switch, foot pedal connecting port, handpiece connecting port, heat dissipation design, nail drill bit collector, and handpiece holder.
Setup Instructions
- Place the main control unit on a stable, flat surface.
- Connect the handpiece cable to the Handpiece Connecting Port on the main unit.
- If using the foot pedal, connect its cable to the Foot Pedal Connecting Port.
- Ensure the power switch on the main unit is in the "OFF" position before plugging into a power outlet.
- Select and insert the desired drill bit into the handpiece. To do this, turn the handpiece collar left to unlock, insert the bit, then turn right to lock it securely. Refer to the "Easy to Replace Drill Bits" section for visual guidance.

Image: A four-step visual guide demonstrating how to unlock, remove, insert, and lock a drill bit in the handpiece using the twist-lock system.
Operating Instructions
Power On and Mode Selection
Plug the power adapter into a suitable electrical outlet. Turn the main power switch to "ON".
You can operate the nail drill in two modes: Hand Control or Foot Control.
- Hand Control: Press the "HAND" button on the main unit.
- Foot Control: Press the "FOOT" button on the main unit. Ensure the foot pedal is connected.
Adjusting Speed and Direction
The electric nail drill offers adjustable speed from 1000 to 35,000 RPM. Rotate the speed knob on the main unit to adjust the rotation speed. The current speed will be displayed on the LCD.
The Forward/Reverse switch allows for easy switching between clockwise (FWD) and counterclockwise (REV) rotation, making it ideal for both right-handed and left-handed users. The drill may pause for 2 seconds to protect the motor when switching settings.

Image: Visual explanation of how the foot pedal works (release to stop, continuous press to start) and the two rotation directions (FWD and REV) with the corresponding switch on the unit.
Using the Foot Pedal
When in Foot Control mode, use the foot pedal to control the rotation of the drill bit. Press the pedal to start and release to stop. This provides hands-free operation, which can be convenient during detailed work.
Recommended Speeds for Different Uses
- For Beginners (0-15000 RPM): Use low speed for gently filing natural nails and removing dead skin and cuticles. High speeds may damage the nail surface without proper guidance.
- For Professional Nail Techs (15000-35000 RPM): Use high speed for removing gel or acrylic nails and creating intricate nail art with efficiency.

Image: A visual guide illustrating recommended RPM ranges for beginners and professional nail technicians, along with examples of tasks suitable for each speed range.
Official Product Video
Watch this official product video for a visual demonstration of the NAILGIRLS Electric Nail Drill in use, showcasing its features and applications.
Video: A demonstration of the NAILGIRLS Electric Nail Drill, highlighting its ease of use for various nail care tasks.
Maintenance
- Cleaning: After each use, gently wipe the handpiece and main unit with a soft, dry cloth to remove dust and debris. Do not use harsh chemicals or abrasive cleaners.
- Bit Storage: Store drill bits in the provided slots on the main unit or in a clean, dry container to prevent damage and maintain sharpness.
- Handpiece Care: Avoid dropping the handpiece, as this can damage the internal motor. Do not over-tighten or force drill bits into the chuck.
- Ventilation: Ensure the ventilation holes on the unit are not blocked during operation to allow for proper heat dissipation.
Troubleshooting
| Problem | Possible Cause | Solution |
|---|---|---|
| Drill not turning on | Power cord not properly connected; Power switch off; Outlet issue. | Check power connections; Ensure switch is ON; Try a different outlet. |
| Handpiece not rotating | Handpiece cable loose; Bit not inserted correctly; Mode not selected. | Secure handpiece cable; Re-insert bit firmly and lock; Select Hand or Foot mode. |
| Excessive vibration or noise | Bit not inserted properly; Damaged bit; Handpiece issue. | Ensure bit is fully inserted and locked; Replace damaged bit; Contact support if issue persists. |
| Foot pedal not working | Foot pedal cable loose; Unit not in Foot mode. | Secure foot pedal cable; Switch unit to Foot mode. |
Specifications
| Feature | Detail |
|---|---|
| Brand | NAILGIRLS |
| Model Name | T17 |
| Item Model Number | Fresa ELettrica |
| Speed Range | 1000-35000 RPM |
| Material | Aluminum, Acrylonitrile Butadiene Styrene (ABS) |
| Product Dimensions | 7 x 3 x 10 inches (7"L x 3"W x 10"H) |
| Item Weight | 2.58 Pounds (1.17 Kilograms) |
| UPC | 785034903502 |
Warranty and Support
NAILGIRLS is committed to providing high-quality products and excellent customer service. Your NAILGIRLS Electric Nail Drill comes with dedicated after-sales support. If you encounter any issues or have questions regarding your product, please do not hesitate to contact our support team. We are always ready to assist, ensuring your complete peace of mind.
For further assistance, please refer to the official NAILGIRLS store: NAILGIRLS Store
Related documentsFresa ELettrica


Ask a question about this manual
Ask about setup, troubleshooting, compatibility, parts, safety, or missing instructions. Manuals+ will review the question and use this page’s manual context to help answer it.