
Important Safety Information
- Always turn off the power supply at the main circuit breaker before installation or servicing.
- Consult a qualified electrician if you are unsure about the installation process.
- Use only bulbs that meet the specified wattage and base type (E26, 60W MAX).
- Do not exceed the maximum wattage.
- Ensure all electrical connections are secure and comply with local codes.
- This fixture is rated for outdoor use and is waterproof (IP65).
- Handle glass components with care to prevent breakage.
Package Contents
Verify that all components are present before beginning installation.
- Pia Ricco Outdoor Wall Light Fixture (2 units)
- Mounting Hardware (screws, wire nuts)
- Clear Glass Shades
- Instruction Manual (this document)
Note: Bulbs are not included and must be purchased separately.
Specifications
| Feature | Detail |
|---|---|
| Brand | Pia Ricco |
| Model Name | A-12151-2Pack |
| Size | 14 Inch |
| Color | Matte Black |
| Material | Metal, Glass |
| Power Source | Corded Electric |
| Voltage | 120 Volts (AC) |
| Wattage | 60 Watts Max |
| Bulb Base | E26 |
| Light Source Type | LED, Incandescent, Halogen, Fluorescent |
| Indoor/Outdoor Usage | Outdoor |
| Special Feature | Waterproof |
| Certification | ETL Listed |
| Product Dimensions | 7.6"L x 15.3"W x 13"H |
| Item Weight | 8.88 pounds (for 2 units) |
Installation Instructions
Follow these steps to install your Pia Ricco Outdoor Wall Light fixture.
- 1. Prepare for Installation:
- Turn off power at the circuit breaker.
- Ensure the mounting surface is clean and dry.
- Gather necessary tools: screwdriver, wire strippers, electrical tape, safety glasses.
- 2. Attach Mounting Plate:
Secure the mounting plate to the junction box using the provided screws. Ensure it is firmly attached.

Image description: A diagram illustrating the components of the light fixture, including the mounting plate, wiring, and dimensions. It shows the backplate with wiring connections and measurements.
- 3. Wire Connections:
- Connect the black wire from the fixture to the black (live) wire from the junction box.
- Connect the white wire from the fixture to the white (neutral) wire from the junction box.
- Connect the ground wire from the fixture to the ground wire from the junction box.
- Secure all connections with wire nuts and electrical tape.
- 4. Mount the Fixture:
Carefully align the fixture with the mounting plate and secure it using the provided screws. Ensure the fixture is flush against the wall.
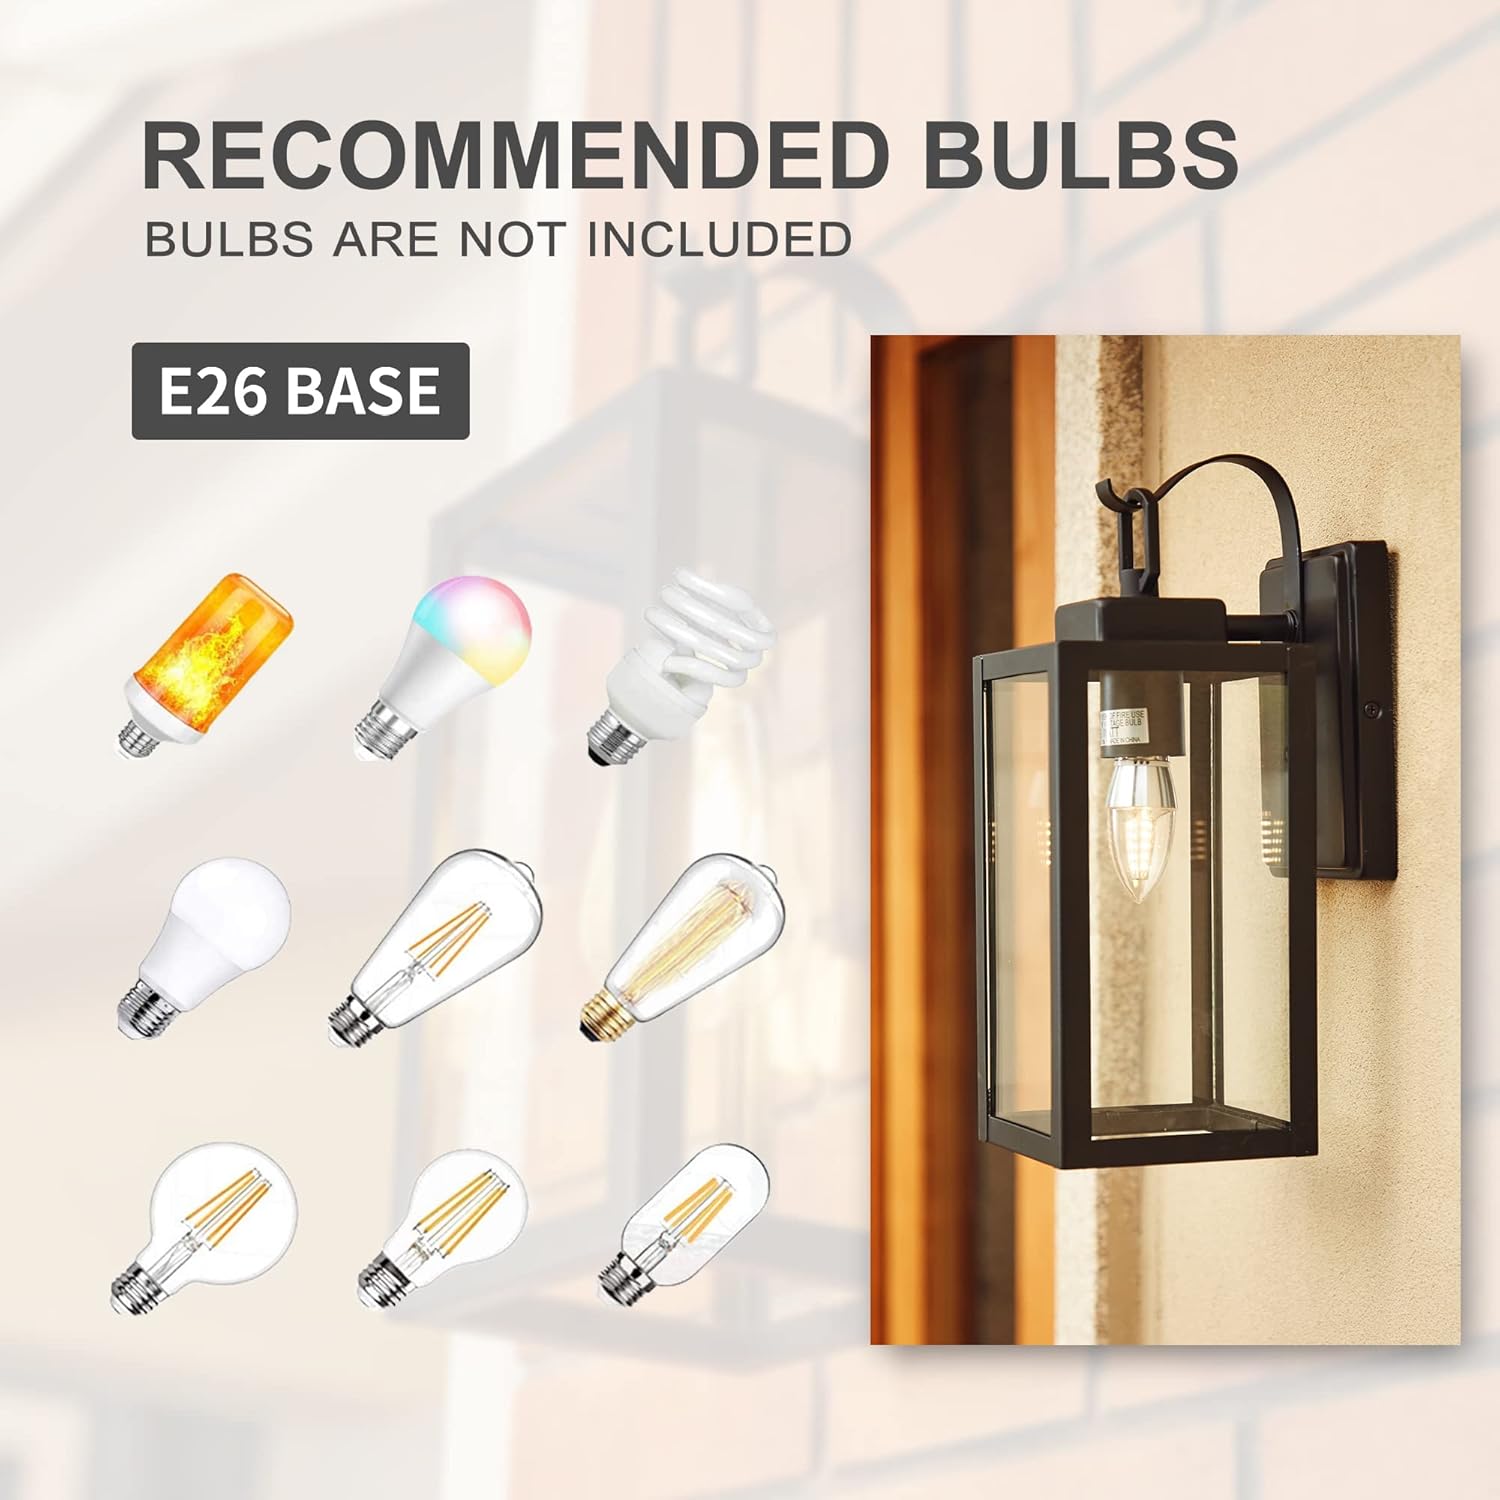
Image description: A close-up view of the Pia Ricco outdoor wall light fixture installed on a white exterior wall, demonstrating its flush mounting.
- 5. Install Bulb and Glass Shade:
- Insert an E26 base bulb (not included) into the socket. Do not exceed 60W.
- Carefully place the clear glass shade into the fixture and secure it according to the design.

Image description: A graphic displaying various types of E26 base bulbs (LED, incandescent, halogen, fluorescent) that are compatible with the Pia Ricco outdoor wall light, with a note that bulbs are not included.
- 6. Restore Power:
Once installation is complete and all components are secure, turn the power back on at the circuit breaker.
Operating Instructions
The Pia Ricco Outdoor Wall Light is designed for simple operation.
- Power On/Off: Control the light fixture using your existing wall switch.
- Bulb Type: This fixture is compatible with E26 base bulbs, including LED, Incandescent, Halogen, and Fluorescent types, up to 60 watts.
- Outdoor Use: The fixture is waterproof and designed to withstand various outdoor weather conditions (sunproof, windproof, snowproof, rainproof).

Image description: A Pia Ricco outdoor wall light fixture mounted on the exterior of a house, showcasing its modern design and how it illuminates the area.
Maintenance
- Cleaning: To clean the fixture, ensure the power is off. Wipe the metal parts with a soft, damp cloth. Clean the glass shades with a glass cleaner. Avoid abrasive cleaners or solvents.
- Bulb Replacement:
- Turn off power at the circuit breaker.
- Allow the old bulb to cool completely before touching.
- Carefully remove the glass shade.
- Unscrew the old bulb and screw in a new E26 base bulb (max 60W).
- Reattach the glass shade.
- Restore power.
- Inspection: Periodically inspect the fixture for any signs of wear, damage, or loose connections. Address any issues promptly.
Troubleshooting
| Problem | Possible Cause | Solution |
|---|---|---|
| Light does not turn on | No power to the fixture; Loose wiring; Faulty bulb; Faulty wall switch | Check circuit breaker; Verify wire connections; Replace bulb; Test wall switch |
| Light flickers | Loose bulb; Loose wiring; Incompatible bulb type | Tighten bulb; Check wire connections; Ensure bulb is compatible |
| Glass shade is loose | Improperly secured shade | Re-secure the glass shade according to installation steps |
| Rust or corrosion | Exposure to harsh elements or damage to finish | Clean regularly; Apply protective coating if necessary. Contact support if severe. |
Warranty and Support
Pia Ricco provides a 36-month warranty for this product, covering defects in materials and workmanship under normal use.
For warranty claims, technical assistance, or any questions regarding your Pia Ricco Outdoor Wall Lights, please contact Pia Ricco customer support.
Contact Information: Please refer to the product packaging or the official Pia Ricco website for the most current customer support contact details.
Online Resources: Visit the official Pia Ricco store for additional product information and support: Pia Ricco Store.


