
SinoTrack TK-300
SinoTrack Car Battery Charger User Manual
Model: TK-300
Brand: SinoTrack
Introduction
The SinoTrack 6-Amp, 12V Smart Fully Automatic Battery Charger Maintainer Trickle Charger is designed for charging and maintaining various 12V lead-acid batteries, including those found in cars, trucks, motorcycles, lawn mowers, and marine vehicles. It features an intelligent charging control system, multiple battery mode settings, and integrated safety functions to ensure efficient and safe battery management.
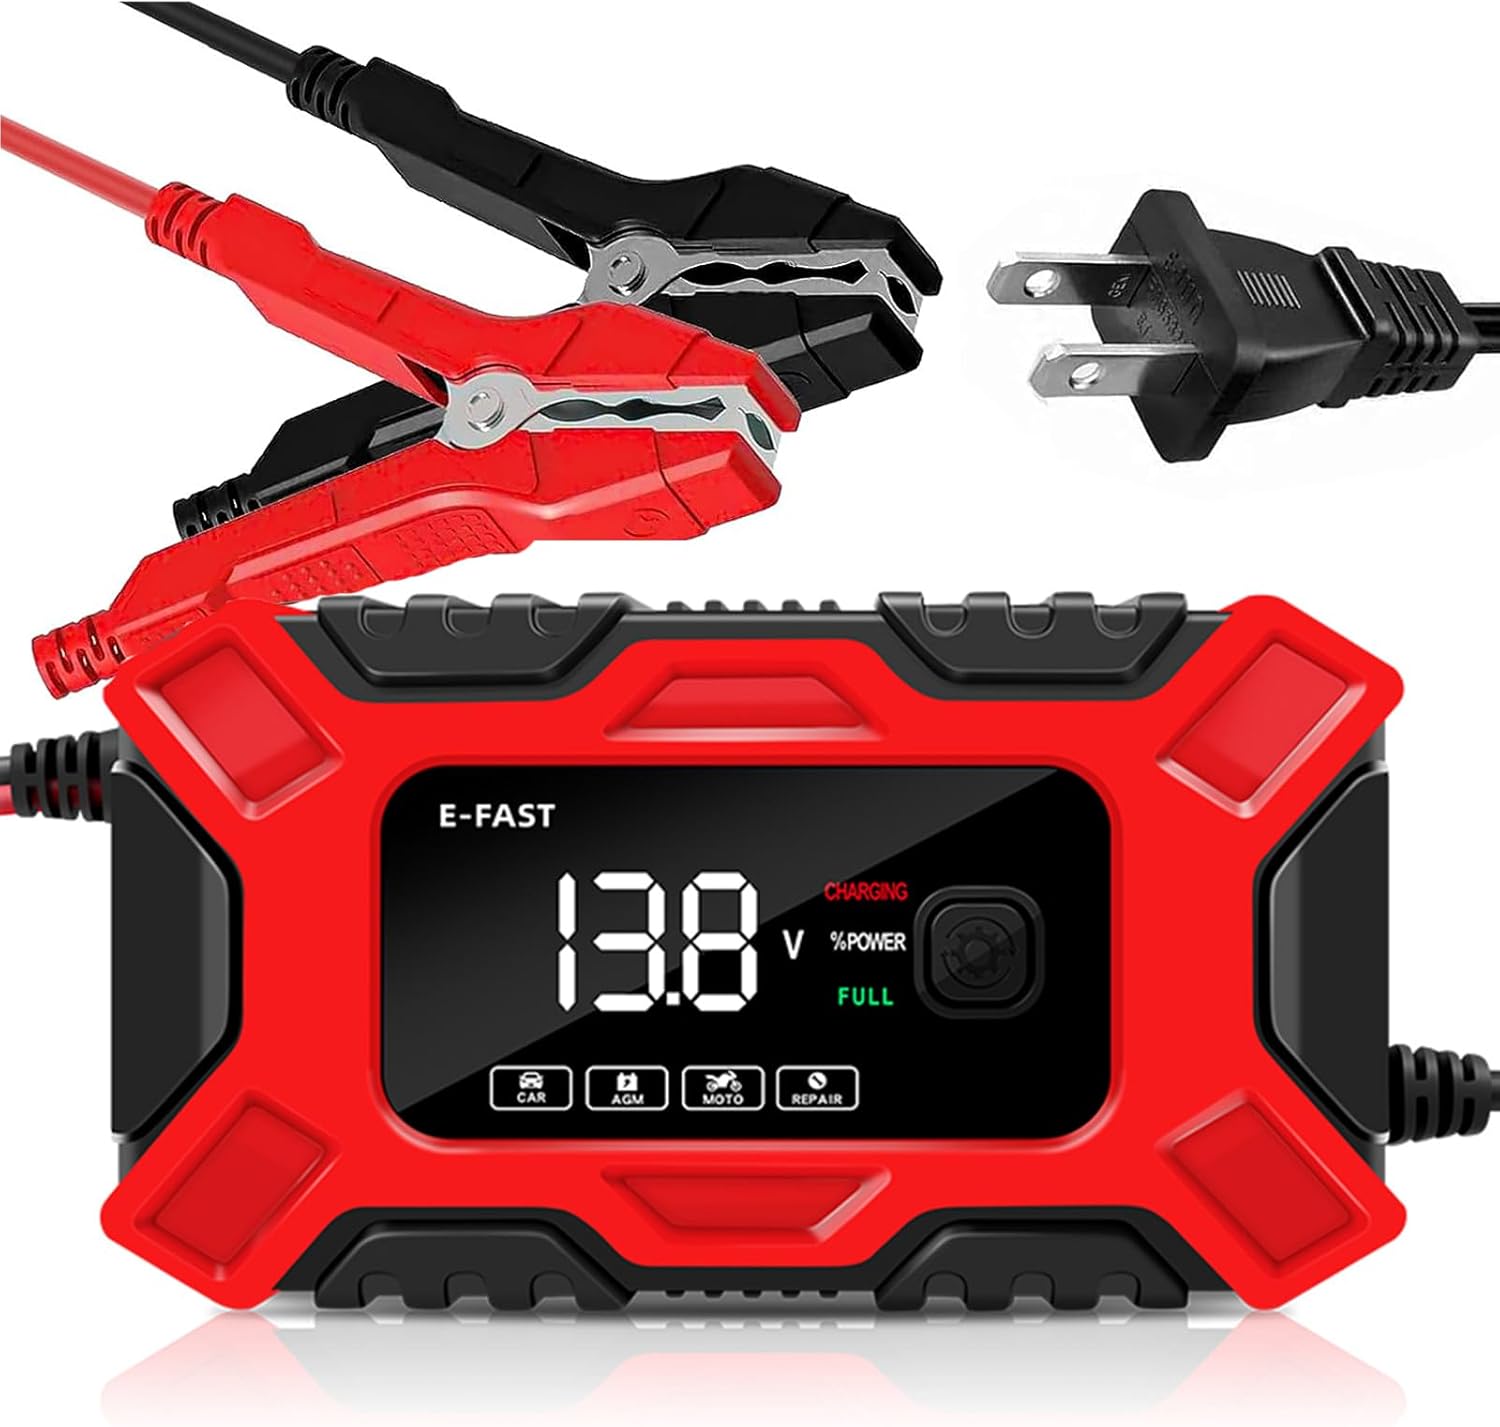
Image: The SinoTrack 6-Amp 12V Smart Fully Automatic Battery Charger with its cables and display.
Safety Information
Please read and understand all safety information before using this product. Failure to follow these instructions may result in electric shock, fire, or serious injury.
- Indoor Use Only: This charger is designed for indoor use. Do not expose to rain or snow.
- Ventilation: Ensure adequate ventilation during charging. Do not operate in a confined area or restrict ventilation.
- Battery Type: Use only with 12V lead-acid batteries. Do not attempt to charge dry-cell batteries or lithium batteries.
- Connection Order: Always connect the charger to the battery terminals first, then plug the charger into the AC power outlet. When disconnecting, unplug from AC power first, then disconnect from battery terminals.
- Polarity: Ensure correct polarity. Connect the red (+) clamp to the positive battery terminal and the black (-) clamp to the negative battery terminal. Reverse connection will trigger an "ERO" error on the LCD.
- Damaged Cables: Do not operate the charger with damaged cords or clamps.
- Children: Keep out of reach of children.
Product Overview
Key Features:
- 12V Intelligent Plus Repair Charger: Optimized charging and discharging curves for DC12V lead-acid batteries.
- Friendly Use for Beginners: Automatic detection of battery power and ambient temperature.
- Safety and Effective: Multiple protection functions (reverse connection, short circuit, overcharge, over temperature, over current).
- Pulse Repair Function: Repairs and activates lead-acid batteries with mild sulfation.
- Visual LCD Screen Display: Shows charging progress, percentage, voltage, current, and error codes.

Image: The charger's large digital display showing charging status.
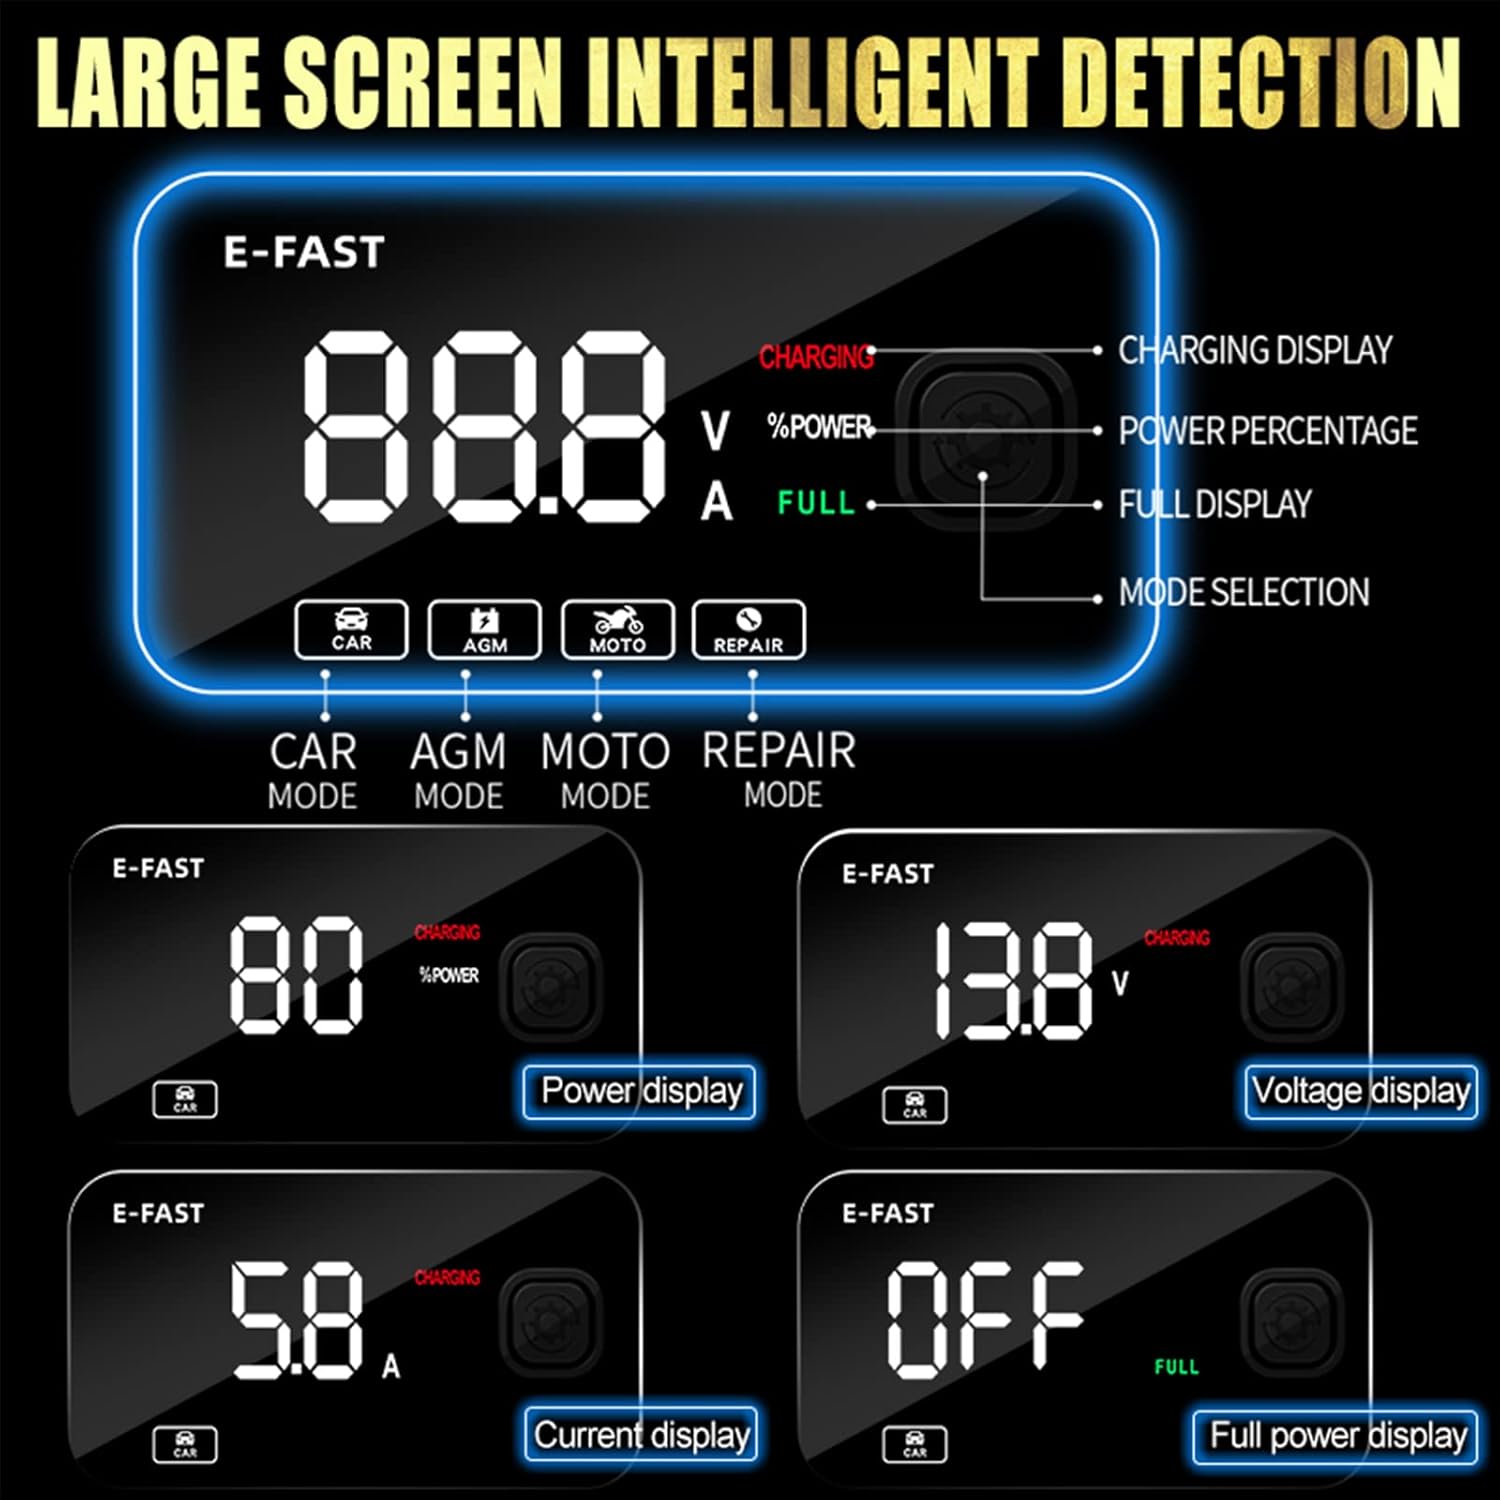
Image: Detailed view of the intelligent detection display, showing voltage, power, and mode selection.
Components:
- SinoTrack Battery Charger Unit
- AC Power Cord
- Battery Clamps (Red for positive, Black for negative)
Setup and Connection
Follow these steps to safely connect your SinoTrack battery charger:
- Prepare the Battery: Ensure the battery terminals are clean and free of corrosion. If necessary, clean them with a wire brush and baking soda solution.
- Connect to Battery: First, connect the red (+) positive clamp to the positive battery terminal. Then, connect the black (-) negative clamp to the negative battery terminal. Ensure a secure connection.
- Connect to AC Power: Plug the charger's AC power cord into a standard 120V AC wall outlet.
- Power On: The charger will automatically detect the battery and begin charging. The LCD screen will display the charging status.
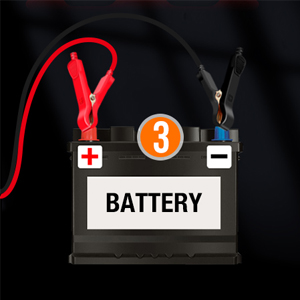
Image: Step 3 - Connecting the red and black clamps to the battery terminals.
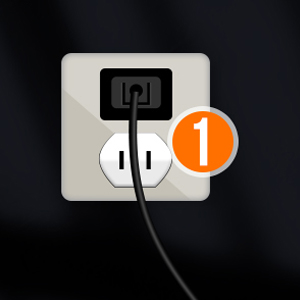
Image: Step 1 - Plugging the charger into a wall outlet.

Image: Step 2 - The charger unit connected and ready to operate.
Operating Instructions
The SinoTrack charger features multiple charging modes for different battery types and conditions. The charger automatically detects the battery and selects the appropriate mode, but you can manually switch modes if needed.
Mode Selection:
Press the "Mode" button (often indicated by a gear icon or similar) on the charger to cycle through the available modes:
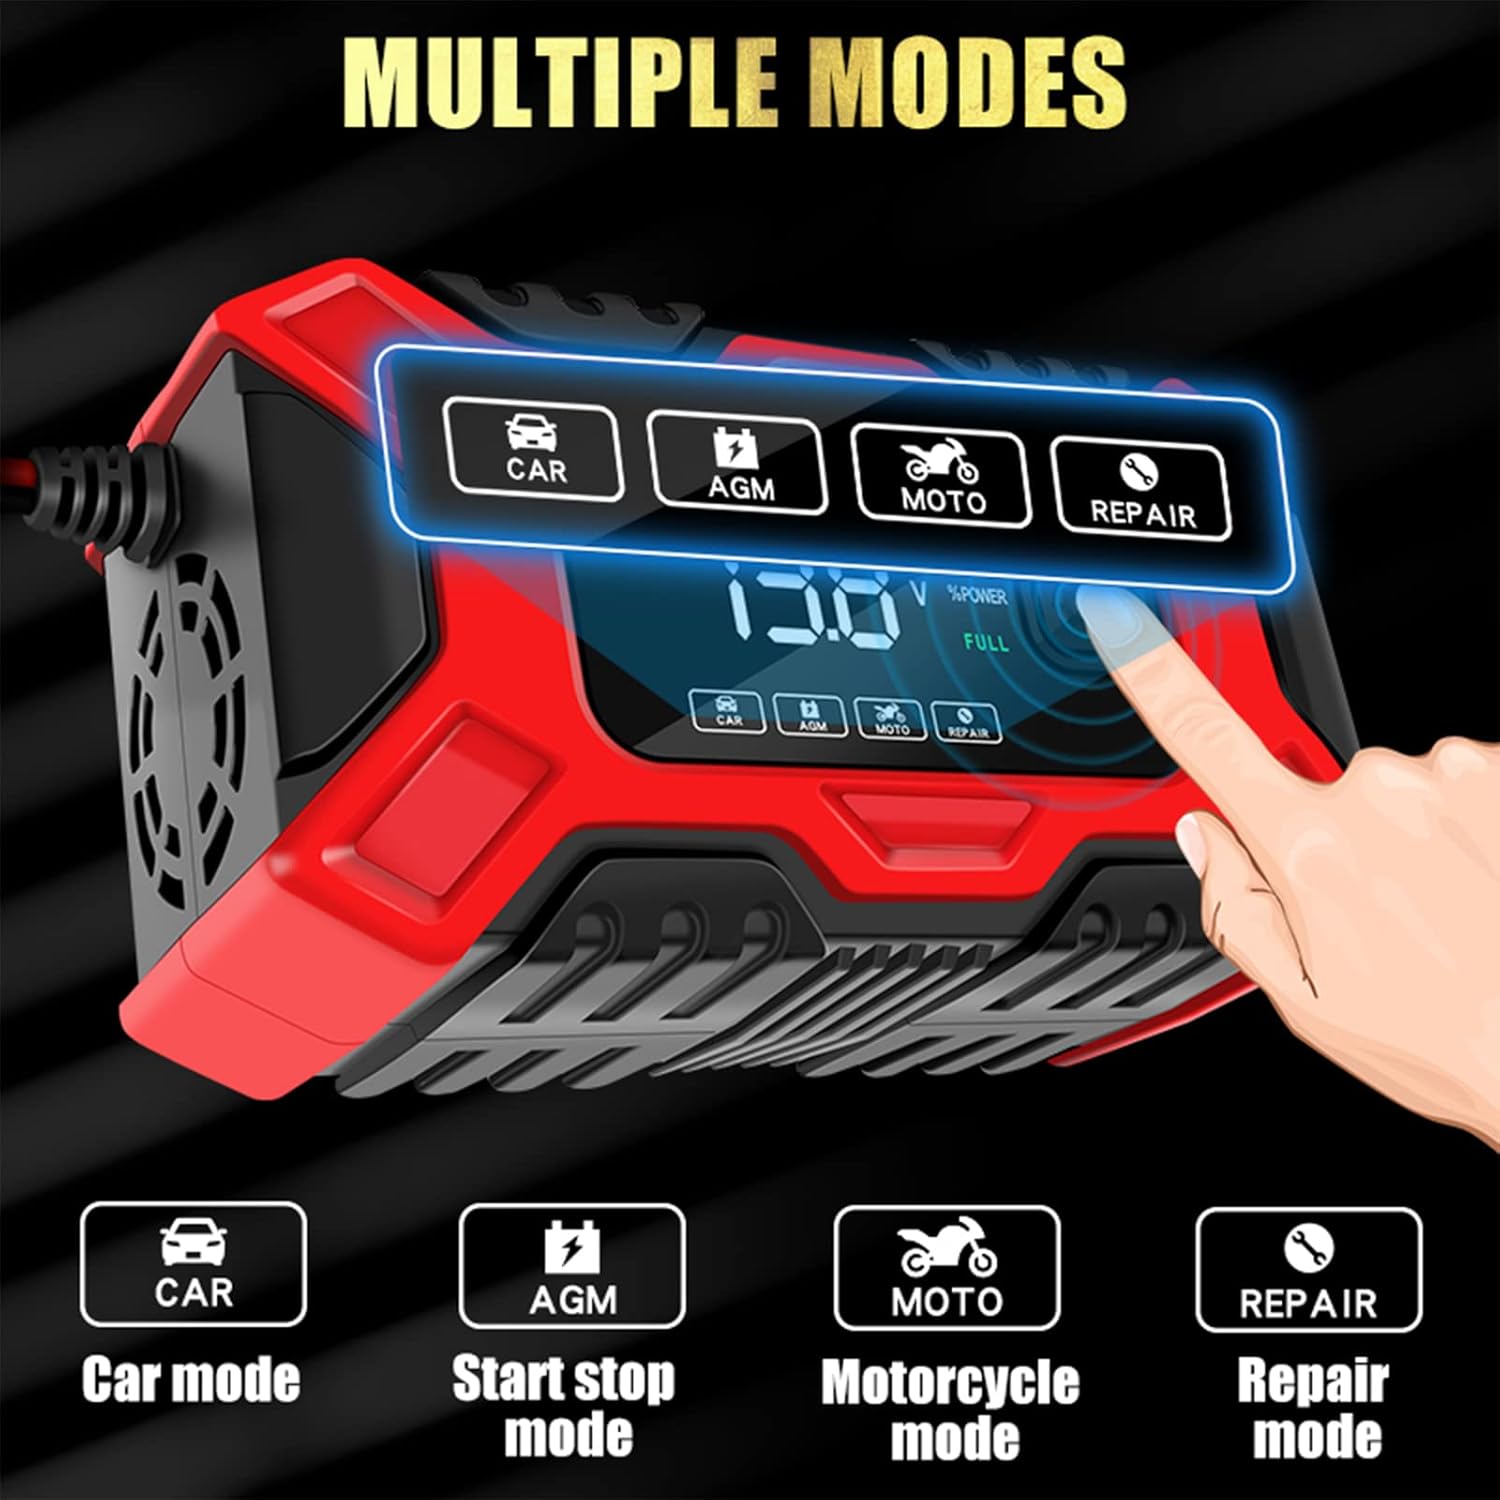
Image: The charger's display showing the different mode icons (Car, AGM, Moto, Repair) and the mode selection button.
- Car Mode: For standard 12V automotive lead-acid batteries.
- AGM/GEL Mode: Specifically for AGM (Absorbent Glass Mat) and GEL batteries.
- Motorcycle Mode: For 12V motorcycle batteries, typically with a lower charging current.
- Repair Mode: For desulfation and activation of lead-acid batteries that are unable to hold a charge due to mild sulfation. This mode applies positive pulse voltage.
Charging Process:
Once connected and a mode is selected (or automatically detected), the charger will begin its 3-stage smart charging process:
- Desulfation/Soft Start: If needed, the charger will attempt to desulfate the battery.
- Bulk Charge: Charges the battery at its maximum current until it reaches approximately 80% capacity.
- Absorption Charge: Charges at a decreasing current until the battery is fully charged.
- Float Charge: Maintains the battery at full charge with a small, constant voltage.
The LCD screen will show the charging progress as a percentage. When the battery is fully charged, the display will show "100%" and "FULL". The charger will automatically stop charging when the battery is full.

Image: Visual representation of the 3-stage smart charging process and key features.
Pulse Repair Function:
The pulse repair mode is designed to help restore lead-acid batteries that have lost capacity due to sulfation. To use this function:
- Connect the charger to the battery as described in the Setup section.
- Select the "Repair" mode using the mode button.
- Allow the charger to operate in repair mode for 15-16 hours.
- After repair, switch back to a charging mode (Car, AGM, or Moto) to see if the battery can now be charged normally. If the battery still cannot be charged after 1-2 repair cycles, it may need to be replaced.

Image: Diagram illustrating the battery repair process and common battery issues it addresses.
Maintenance
- Cleaning: Disconnect the charger from both AC power and the battery before cleaning. Wipe the exterior with a soft, dry cloth. Do not use harsh chemicals or abrasives.
- Storage: Store the charger in a cool, dry place when not in use. Keep cables neatly coiled.
- Cooling Fan: The charger is equipped with a low-noise cooling fan. Ensure the fan vents are not obstructed during operation to prevent overheating.

Image: Close-up of the charger's cooling fan, highlighting its low noise and heat dissipation features.
Troubleshooting
| Problem | Possible Cause | Solution |
|---|---|---|
| LCD displays "ERO" | Output short circuit, reverse battery connection, or reverse polarity. | Check battery clamp connections for correct polarity (red to +, black to -) and ensure no short circuits. Disconnect and reconnect. |
| Charger not charging / No display | No AC power, loose connections, or battery voltage too low. | Ensure charger is securely plugged into a live AC outlet. Check all connections. If battery voltage is below 7.0V, the charger may not initiate charging. |
| Battery not fully charged after extended time | Battery heavily sulfated or damaged. | Try the "Repair" mode. If the issue persists after 1-2 repair cycles, the battery may need replacement. |
| Charger feels warm during operation | Normal operation, especially during bulk charging. | Ensure adequate ventilation around the charger. If it becomes excessively hot or emits smoke, disconnect immediately and contact support. |
| Charger automatically stops charging | Battery is fully charged, or a safety protection (overcharge, over temperature) has activated. | This is normal if the battery is full. If not, check for overheating or other fault conditions. |
Specifications
| Parameter | Value |
|---|---|
| Model Number | TK-300 |
| Input Voltage | 100-240V AC, 50/60Hz |
| Output Voltage | 12V DC |
| Output Current | 6A Max |
| Minimum Start Volt | >7.0V |
| Input Power with Load | Max. 96W |
| Input Power Under No Load | 2.6W |
| Cooling | Fan |
| Net Weight | 430 Grams (15.2 ounces) |
| Dimensions (L*W*H) | 150*82*63mm (5.9 x 3.2 x 2.5 inches approx.) |
| Approval | CE/FCC |
Note: Some parameters are measured manually and may have slight variations.
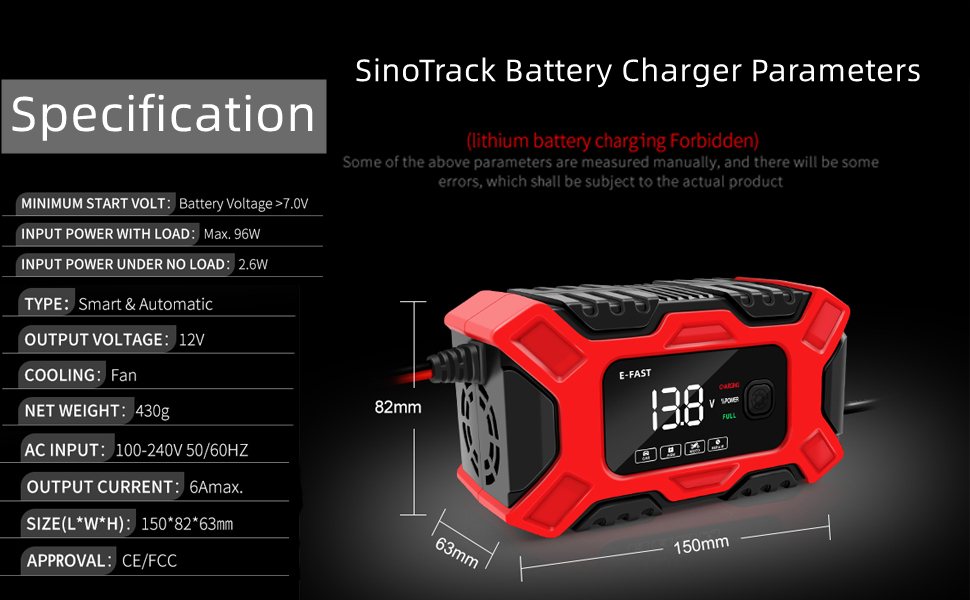
Image: Diagram showing key specifications and dimensions of the SinoTrack battery charger.
Official Product Video
Video: An official product video from SinoTrack demonstrating the features and usage of the Smart Fully Automatic 12V Battery Charger. This video showcases the charger's design, connection process, mode selection, and internal components, providing a visual guide to its operation and capabilities.
Warranty and Support
For warranty information, technical support, or any inquiries regarding your SinoTrack Car Battery Charger, please refer to the official SinoTrack store or contact their customer service.
You can visit the official SinoTrack Store on Amazon for more information and support: SinoTrack Store
A PDF version of the user manual is also available for download: User Manual (PDF)
Related documentsTK-300

Ask a question about this manual
Ask about setup, troubleshooting, compatibility, parts, safety, or missing instructions. Manuals+ will review the question and use this page’s manual context to help answer it.