Introduction
This manual provides essential instructions for the safe and efficient operation, maintenance, and troubleshooting of your Hoover HF910H Cordless Stick Vacuum Cleaner. Please read this manual thoroughly before first use and keep it for future reference.
The Hoover HF910H is a powerful cordless stick vacuum designed for versatile cleaning across various surfaces. It features a robust motor, long-lasting battery, LED display, Anti-Twist brush technology, and convenient accessories for a comprehensive cleaning experience.
Safety Information
Always follow basic safety precautions when using electrical appliances to reduce the risk of fire, electric shock, or injury.
- Do not use the appliance outdoors or on wet surfaces.
- Do not allow children to play with the appliance.
- Use only as described in this manual.
- Do not use with a damaged cord or plug.
- Do not pull or carry by cord, use cord as a handle, close a door on cord, or pull cord around sharp edges or corners.
- Keep hair, loose clothing, fingers, and all parts of body away from openings and moving parts.
- Do not pick up anything that is burning or smoking, such as cigarettes, matches, or hot ashes.
- Do not use without dust cup and/or filters in place.
- Turn off all controls before unplugging.
- Use extra care when cleaning on stairs.
- Do not use to pick up flammable or combustible liquids, such as gasoline, or use in areas where they may be present.
Product Components
Familiarize yourself with the components of your Hoover HF910H vacuum cleaner.
- Main Unit (Motor, Dustbin, Handle with LED Display)
- Extension Tube
- Motorized Floor Nozzle with Anti-Twist Brush and LED Lights
- Battery Pack
- Charger
- Crevice Tool
- 2-in-1 Multi-Surface Tool (Dusting Brush and Upholstery Nozzle)
- Wall Mount

Image: The Hoover HF910H vacuum cleaner disassembled, showing the main unit, extension tube, floor nozzle, and various accessories like the crevice tool and 2-in-1 tool.
Setup
1. Assembly
- Attach the Extension Tube: Insert the extension tube into the main unit until it clicks securely into place.
- Attach the Floor Nozzle: Connect the motorized floor nozzle to the other end of the extension tube until it clicks.
- Install the Battery: Slide the battery pack into the designated slot on the main unit until it locks.
2. Initial Charging
Before first use, fully charge the battery. The battery can be charged while installed in the vacuum or separately.
- Connect the charger to a power outlet.
- Connect the charger cable to the charging port on the battery or the main unit.
- The LED display will indicate charging status. A full charge takes approximately 3.5 hours.

Image: Close-up view of the Hoover HF910H battery being charged, showing the charging cable connected to the battery pack.
3. Wall Mount Installation (Optional)
The included wall mount allows for convenient storage and charging. Choose a suitable location near a power outlet. Secure the wall mount to the wall using appropriate screws and anchors (not included).

Image: The Hoover HF910H vacuum cleaner with its accessories, including a wall mount for storage.
Operating Instructions
1. Power On/Off and Mode Selection
Press the power button on the handle to turn the vacuum on. The LED display will show the current battery level and operating mode. Press the mode selection button to switch between standard and Turbo modes. Turbo mode provides maximum suction for tough dirt but reduces battery runtime.

Image: A hand operating the Hoover HF910H cordless vacuum, with the LED display clearly visible showing battery percentage and "TURBO" mode engaged.
2. Using the Motorized Floor Nozzle
The motorized floor nozzle is equipped with an Anti-Twist brush bar and LED lights. The LED lights illuminate the cleaning path, making dirt more visible. The Anti-Twist technology helps prevent hair and pet fur from tangling around the brush bar, ensuring consistent performance.

Image: A person using the Hoover HF910H cordless vacuum on a wooden floor, highlighting the Anti-Twist technology of the floor nozzle.
3. Using Accessories
Detach the extension tube or floor nozzle to use the vacuum in handheld mode with the specialized accessories:
- Crevice Tool: Ideal for cleaning tight spaces, corners, and edges.
- 2-in-1 Multi-Surface Tool: Use the dusting brush for delicate surfaces like shelves and keyboards, or slide it back to use the upholstery nozzle for furniture and fabrics.
4. Parking Position
The Hoover HF910H features a convenient parking position. When you need to pause cleaning, simply place the vacuum in its upright position, and it will stand independently. To release, press the quick-release pedal.
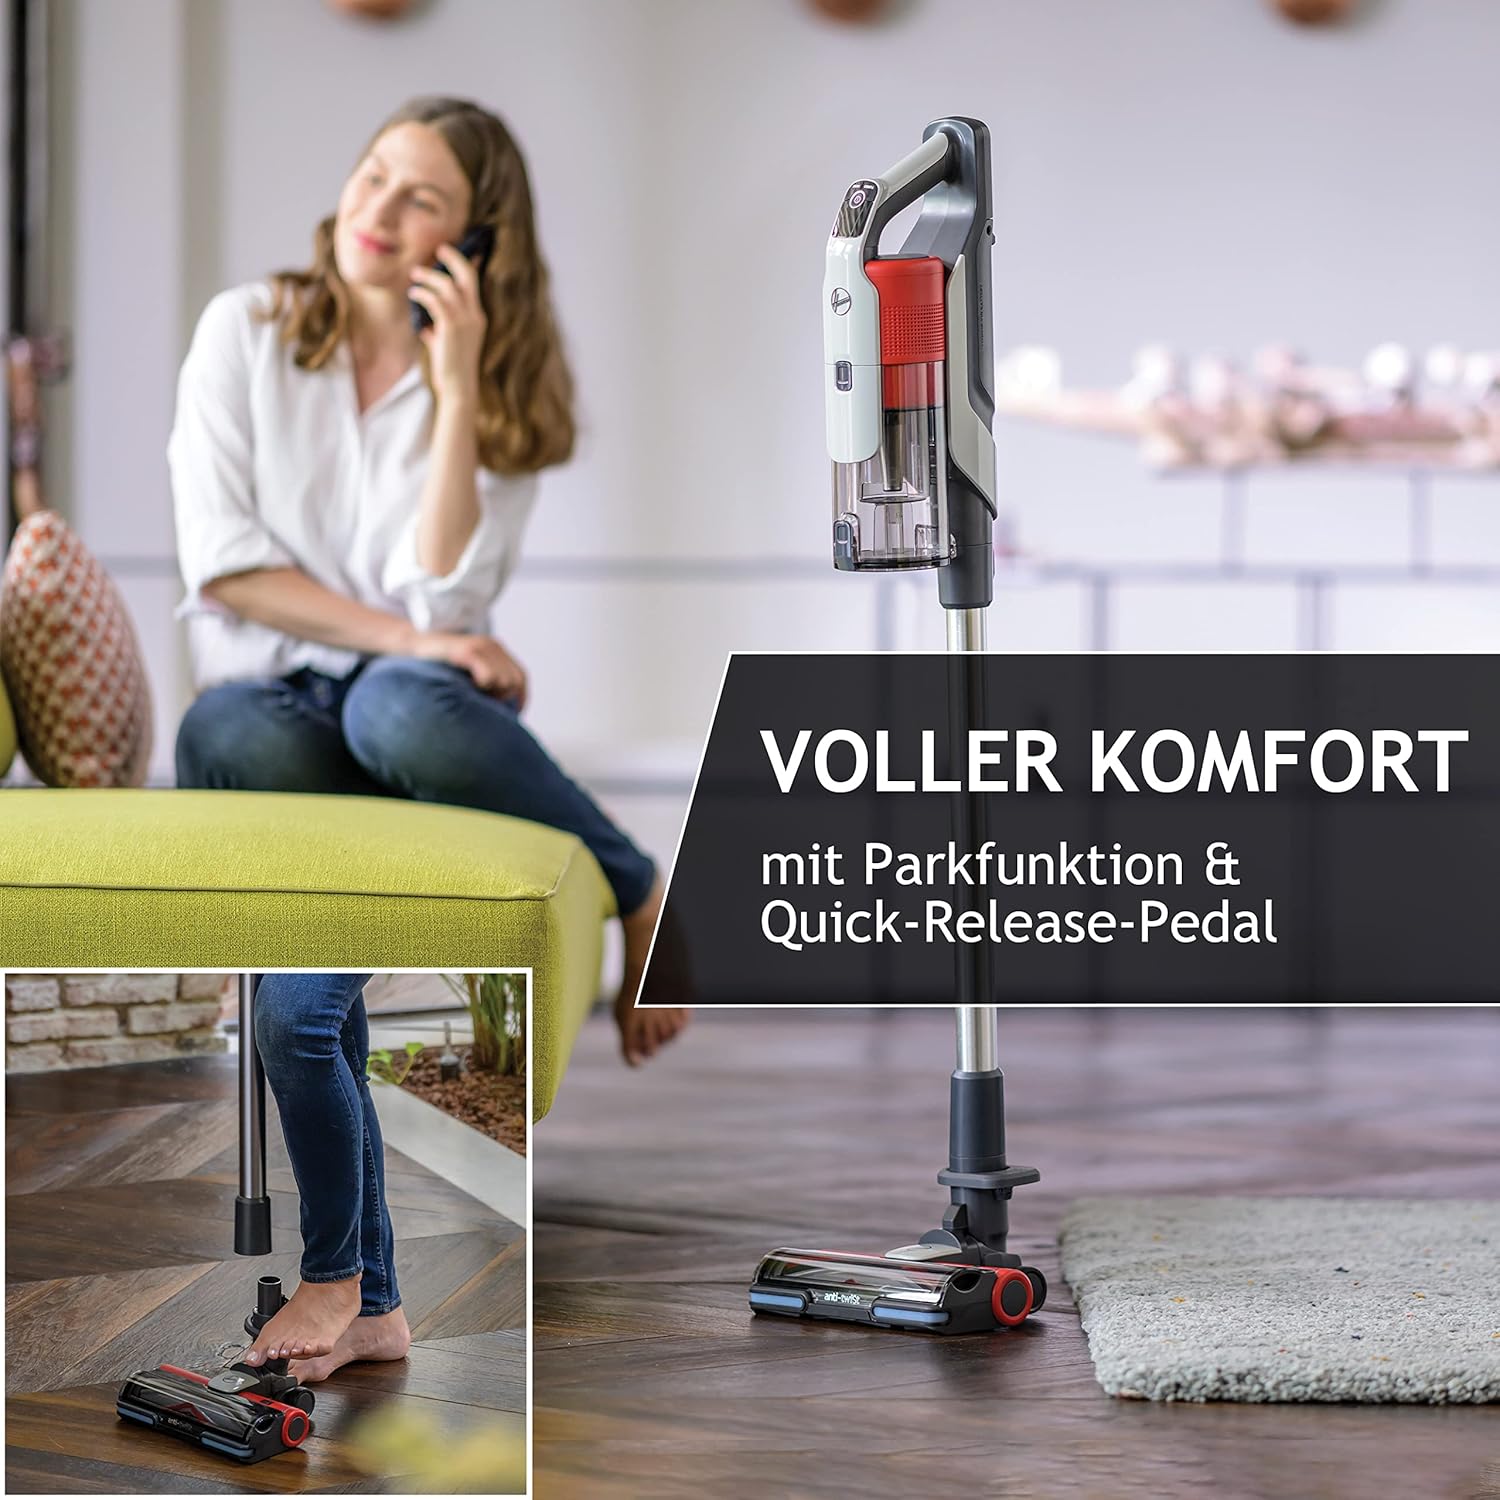
Image: The Hoover HF910H vacuum cleaner standing upright in its parking position, demonstrating stability.
Maintenance
Regular maintenance ensures optimal performance and extends the lifespan of your vacuum cleaner.
1. Emptying the Dustbin
- Ensure the vacuum is turned off.
- Press the dustbin release button and remove the dustbin from the main unit.
- Open the dustbin lid and empty the contents into a waste bin.
- Close the dustbin lid and reattach it to the main unit.
2. Cleaning the Filters
The Hoover HF910H uses a HEPA filter system. Clean the filters regularly to maintain suction power.
- Remove the dustbin.
- Locate and remove the pre-motor filter and the HEPA filter.
- Tap the filters gently to remove loose dust. For a deeper clean, rinse them under cold running water.
- Allow filters to air dry completely for at least 24 hours before reinserting. Do not use a dryer or heat to dry.
3. Cleaning the Brush Bar
Thanks to the Anti-Twist technology, hair tangles are minimized. However, occasional cleaning of the brush bar may still be necessary.
- Turn off the vacuum and detach the floor nozzle.
- Locate the brush bar release mechanism (usually a latch or screw on the side of the nozzle).
- Remove the brush bar.
- Use scissors to cut away any tangled hair or debris.
- Clean the brush bar housing.
- Reinsert the brush bar and secure it.
4. Battery Care
- Always use the original Hoover charger.
- Do not store the battery in extreme temperatures.
- If the vacuum will not be used for an extended period, charge the battery to approximately 50% before storage.
Troubleshooting
If you encounter issues with your Hoover HF910H, refer to the following common problems and solutions:
| Problem | Possible Cause | Solution |
|---|---|---|
| Vacuum does not turn on. | Battery is not charged or not properly installed. | Ensure battery is fully charged and correctly inserted. |
| Loss of suction. | Dustbin is full, filters are clogged, or blockage in the nozzle/tube. | Empty dustbin, clean filters, check for and remove blockages. |
| Brush bar not rotating. | Brush bar is jammed with debris or not properly installed. | Turn off vacuum, remove debris from brush bar, ensure it is correctly reinstalled. |
| Short battery runtime. | Battery not fully charged, or operating in Turbo mode excessively. | Ensure battery is fully charged. Use standard mode for longer cleaning sessions. |
If the problem persists after attempting these solutions, please contact Hoover customer support.
Specifications
| Feature | Detail |
|---|---|
| Model Number | 39401000 |
| Power | 350 Watts |
| Voltage | 21.6 Volts |
| Runtime | Up to 30 minutes |
| Noise Level | 86 Decibels |
| Weight | 3.36 Kilograms |
| Dimensions (L x W x H) | 21.3 x 26 x 111 cm |
| Filter Type | HEPA Filter |
| Special Features | Cordless, LED Display, Anti-Twist Brush, Parking Position |
Warranty and Support
Warranty Information
Your Hoover HF910H Cordless Stick Vacuum Cleaner comes with a 5-year free warranty. To activate this warranty, you must register your product within 30 days of purchase on the official Hoover website.
Register your product for warranty here
Terms and conditions apply. Please refer to the website for full details.
Customer Support
For further assistance, technical support, or spare parts information, please visit the official Hoover website or contact their customer service department. Contact details can typically be found on the Hoover website or on your product packaging.


