
Introduction
This instruction manual provides essential information for the safe and effective use of your LEIPUT Ear Wax Removal Tool. This device integrates a 1080P HD camera with 6 LED lights and a 360° wide-angle lens, offering a clear view for inspecting and cleaning the ear canal, nose, mouth, and throat. Please read this manual thoroughly before first use and retain it for future reference.
Safety Information
- Always use the device gently. Avoid inserting the ear scoop too deeply into the ear canal to prevent injury.
- Do not immerse the entire otoscope body in water. The lens is waterproof and can be cleaned, but the main unit is not.
- Keep out of reach of children. This is not a toy.
- Consult a medical professional if you experience pain, discomfort, or have a pre-existing ear condition before using this device.
- Statements regarding dietary supplements have not been evaluated by the FDA and are not intended to diagnose, treat, cure, or prevent any disease or health condition. This device is for personal hygiene and inspection.
Package Contents
Verify that all items are present in your package:
- Otoscope (Ear Camera) x 1
- Charging Cable (Type-C) x 1
- Silicone Ear Picks x 8 (various sizes/arcs)
- Storage Base x 1
- Ear Wax Removal 8-piece set (black metal tools) x 1
- Pimple Push Tool x 1 (for alternative use)
- User Manual x 1

Image: Assortment of silicone ear picks and metal ear wax removal tools included in the kit.
Setup
1. Charge the Otoscope
Before first use, fully charge the otoscope. Connect the provided Type-C charging cable to the otoscope's charging port and a suitable USB power source. The built-in 350mAh rechargeable battery provides up to 90 minutes of continuous use on a full charge and up to 30 days of standby time.

Image: Close-up of the otoscope showing the Type-C charging port.
2. Download the App
The earwax removal tool is compatible with both Android and iOS devices. Search for the dedicated application in your device's app store (e.g., Apple App Store for iOS, Google Play Store for Android) and install it. Refer to the packaging or quick start guide for the specific app name.
3. Connect via WiFi
- Power on the otoscope by pressing and holding the power button.
- On your smartphone or tablet, go to your WiFi settings.
- Locate and connect to the otoscope's offline WiFi network. This network will typically have a name related to 'LEIPUT' or 'Otoscope' followed by a series of numbers or letters. No internet connection is required for this step.
- Open the downloaded application. The app should automatically detect the connected otoscope and display a real-time image from the camera.

Image: The LEIPUT otoscope with its charging base, demonstrating compatibility with iOS (iPhone, iPad) and Android devices.
4. Attach an Ear Scoop
Select a silicone ear scoop (low, medium, or high arc) that is appropriate for your ear canal size and comfort. Firmly place the chosen silicone ear scoop onto the metal tip of the otoscope. Ensure it is securely tightened to prevent it from falling off during use.

Image: Illustration of the three types of silicone ear scoops (low, middle, high arc) and how they attach to the otoscope.
Operating Instructions
1. Power On and View
Press the power button to turn on the otoscope. Open the app on your connected device. The 1080P HD camera with 6 LED lights will provide a clear, real-time view of the area you are examining.

Image: A visual comparison showing the superior clarity of 1080P HD resolution from the LEIPUT otoscope on a smartphone screen, highlighting the ear canal view.
2. Ear Wax Removal
Carefully insert the otoscope with the attached silicone ear scoop into the ear canal while observing the live feed on your device. Gently maneuver the scoop to dislodge and remove earwax. Always proceed with caution and avoid any forceful movements.
3. Multiple Applications
Beyond ear cleaning, the otoscope can be used for daily check-ups of the nose, mouth, and throat. The camera provides a clear view for general inspection of these areas.

Image: Demonstrates various applications of the otoscope, including ear inspection, nose inspection, and oral cavity examination.
4. Power Off
After use, press and hold the power button to turn off the otoscope.
Maintenance
Cleaning the Lens and Ear Scoops
The otoscope lens is waterproof. After each use, remove the silicone ear scoop and clean both the scoop and the lens with water or wipe them with alcohol. Ensure the lens is dry before storage. Do not submerge the entire otoscope body.
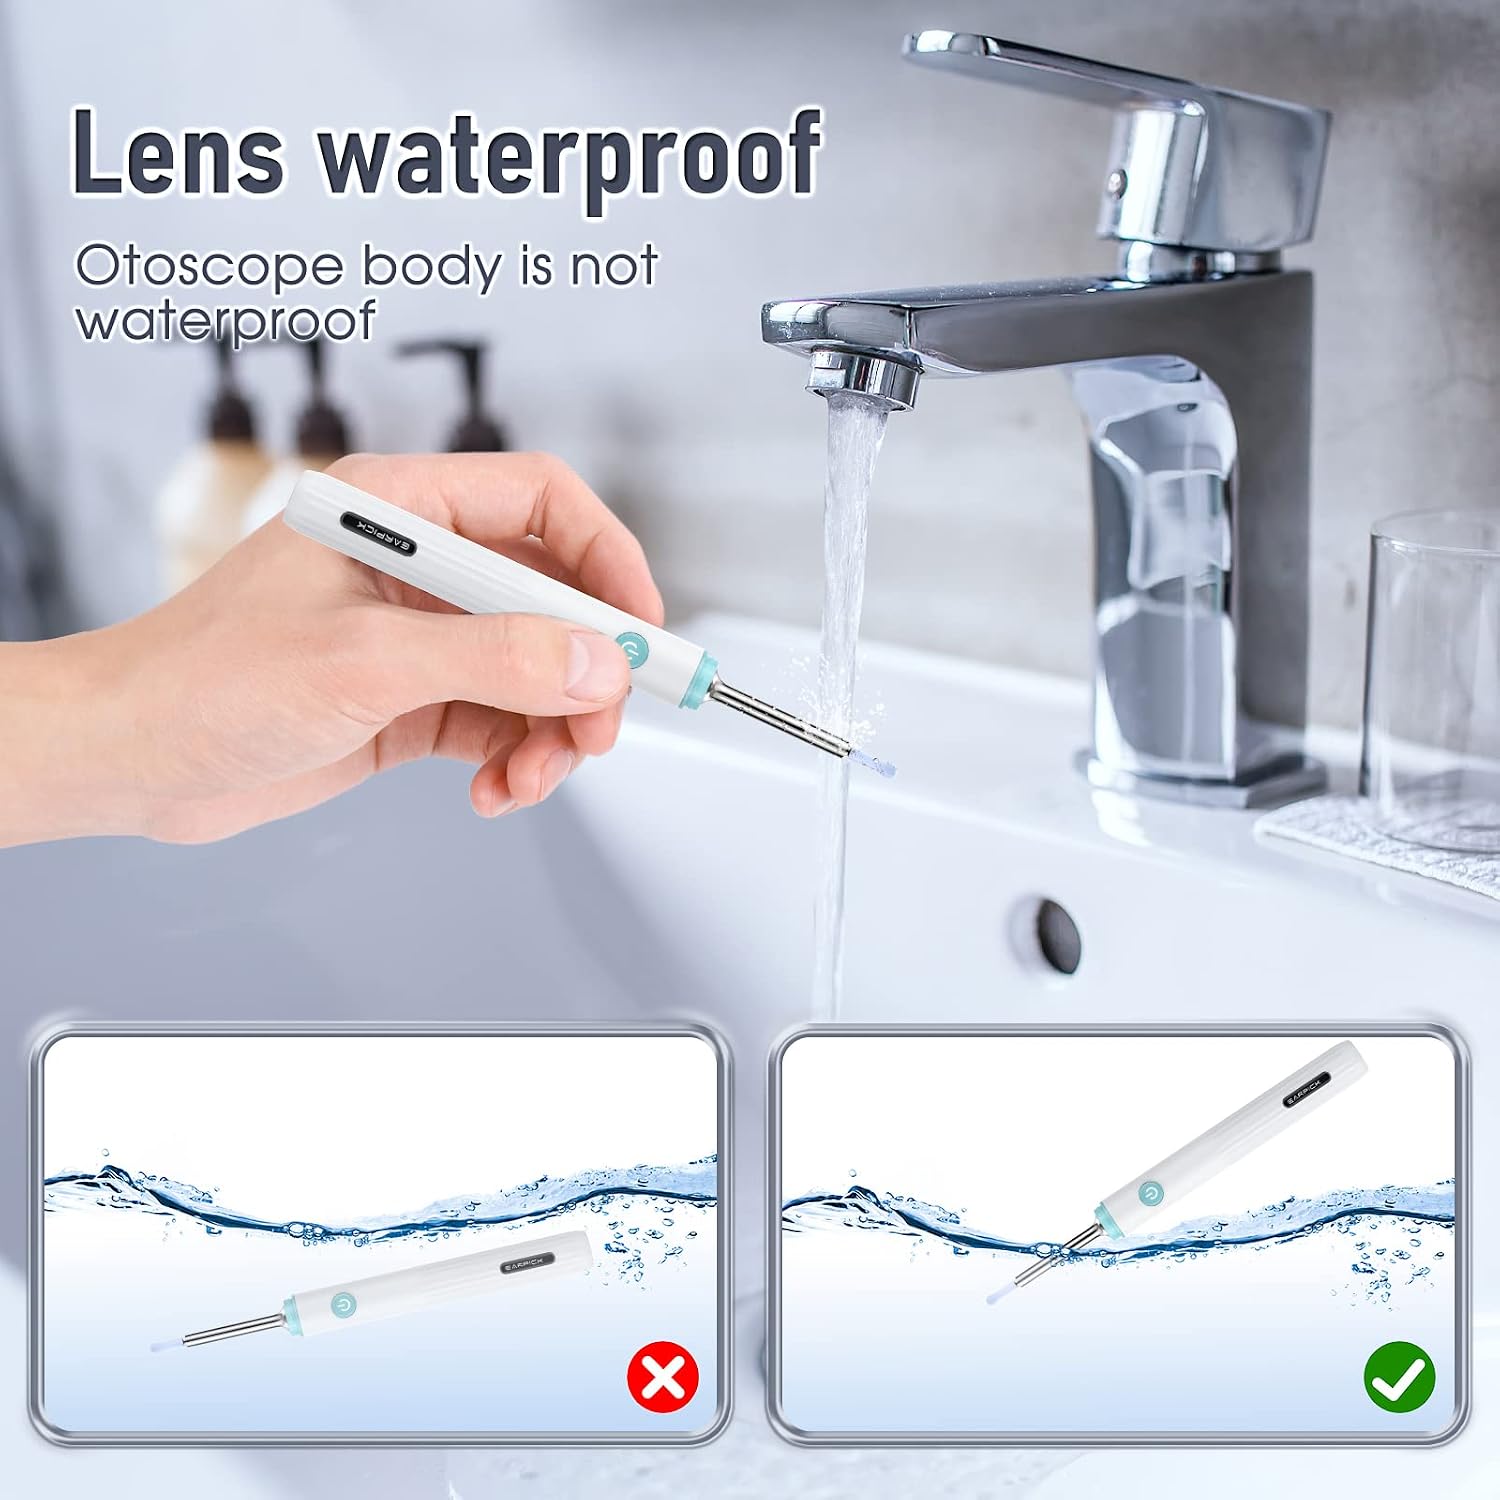
Image: Demonstrates that the otoscope lens is waterproof and can be cleaned with water, while emphasizing that the main body should not be submerged.
Storage
Store the otoscope and its accessories in the provided storage base or a clean, dry place when not in use. This helps protect the device from dust and damage.
Troubleshooting
- No Image on App: Ensure the otoscope is powered on and your device is connected to its specific WiFi network (not your home internet). Restart both the otoscope and the app if necessary.
- Poor Image Quality: Check if the lens is clean. Ensure there is sufficient light (the otoscope has built-in LED lights).
- Device Not Charging: Verify the Type-C cable is securely connected to both the otoscope and the power source. Try a different charging cable or power adapter.
- Ear Scoop Falls Off: Ensure the silicone ear scoop is firmly pressed onto the metal tip and tightened before use.
- App Crashing/Freezing: Close and reopen the app. Ensure your device's operating system is up to date.
Specifications
| Model Number | FIND A Pro |
| Camera Resolution | 1080P HD |
| LED Lights | 6 |
| Field of View | 360° Wide-Angle |
| Connectivity | WiFi (Offline Network) |
| Battery Capacity | 350mAh Lithium Polymer |
| Battery Life | Up to 90 minutes (continuous use) |
| Standby Time | Up to 30 days |
| Lens Waterproof Rating | Yes (main body not waterproof) |
| Compatibility | iOS, Android |
| Package Dimensions | 6.85 x 4.25 x 0.87 inches |
| Item Weight | 4.66 ounces |
Warranty and Support
For warranty information or technical support, please refer to the contact details provided on the product packaging or the official LEIPUT website. Keep your purchase receipt as proof of purchase.