Introduction
Thank you for choosing the MUSEHIFI M3. This manual provides detailed instructions for the proper use, setup, and maintenance of your M3 Curved Designed DAC and Headphone Amplifier. Please read this manual thoroughly before operating the device to ensure optimal performance and longevity.
Product Overview
The MUSEHIFI M3 is a high-performance portable Digital-to-Analog Converter (DAC) and headphone amplifier, engineered for superior audio quality. It features a premium ES9038Q2M DAC chip, independent amplification, and dual headphone outputs (3.5mm and 4.4mm balanced) to deliver a clean, powerful, and detailed sound experience.

This image displays the MUSEHIFI M3 device, highlighting its sleek, curved design and compact size. The device is black with subtle branding.
Key Features
- Premium ES9038Q2M DAC chip for high-resolution audio decoding (32-bit PCM, DSD256).
- Independent ES9603Q amplifier chip for powerful output.
- Dual headphone outputs: 3.5mm single-ended and 4.4mm balanced.
- 60-level volume adjustment with memory function.
- Seven in-built digital filters for sound customization.
- Driver-free operation for most devices.
- SA9227 USB Master for reliable connectivity.
- Charming, elegant arc-shaped portable design with five-axis CNC machined carvings.
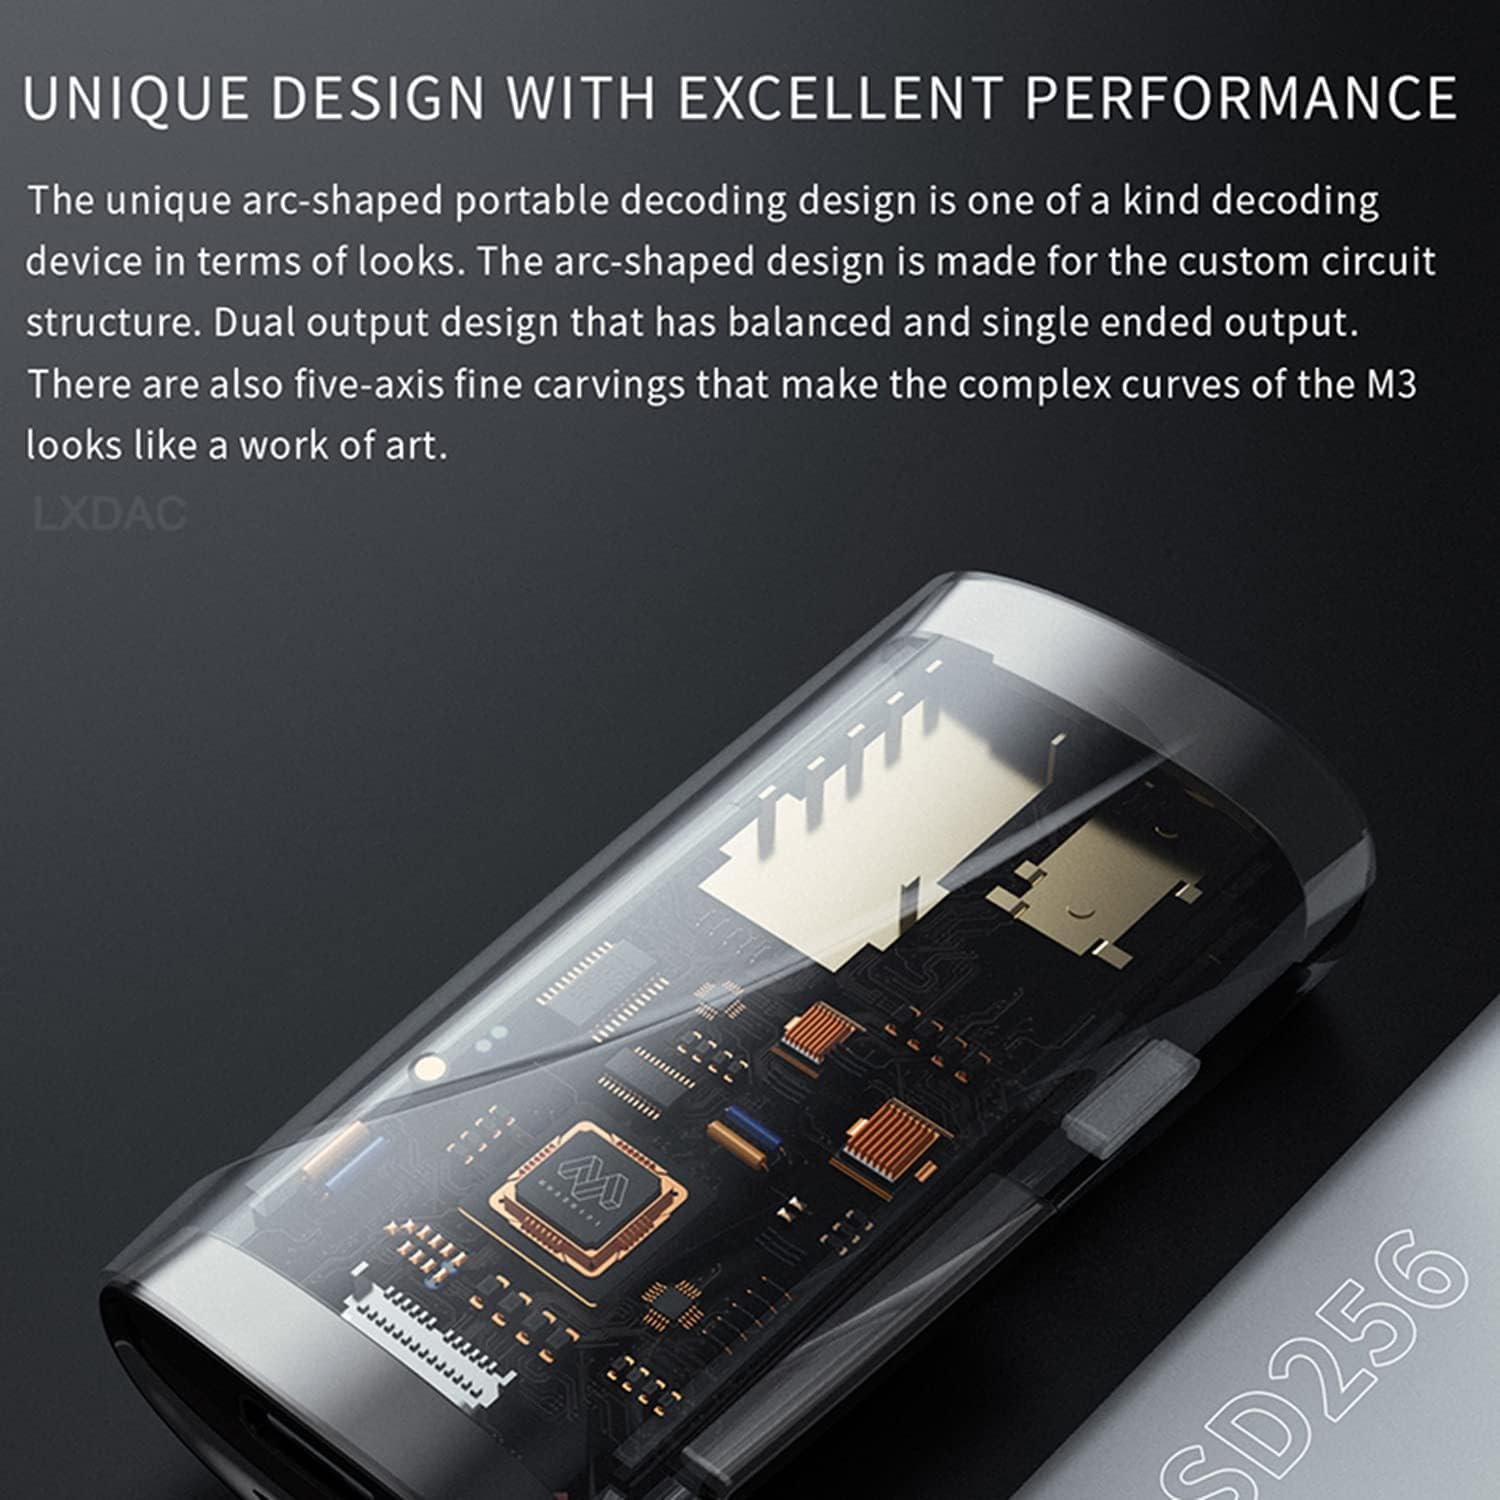
A detailed view of the MUSEHIFI M3's internal circuitry, visible through a transparent section, illustrating the unique arc-shaped design and custom circuit structure. This image emphasizes the intricate engineering within the device.

This image provides a close-up view of the ES9038Q2M DAC chip integrated into the MUSEHIFI M3's circuit board, highlighting its central role in audio processing.
Setup Instructions
Connecting to a Source Device
- Identify the Type-C USB input port on your MUSEHIFI M3.
- Connect the M3 to your source device (e.g., smartphone, tablet, computer) using a compatible USB-C cable. The M3 is designed for driver-free operation with most modern operating systems.
- Ensure the M3 receives power from the source device. An indicator light may illuminate upon successful connection.
Connecting Headphones
- The M3 features two headphone output ports: a 3.5mm single-ended output and a 4.4mm balanced output.
- Select the appropriate headphone cable for your headphones. For balanced headphones, use the 4.4mm output. For standard headphones, use the 3.5mm output.
- Insert your headphone connector firmly into the chosen output port.
Operating Instructions
Volume Adjustment
The MUSEHIFI M3 features physical volume keys for a 60-level volume adjustment. Press the '+' button to increase volume and the '-' button to decrease volume. The device remembers the volume level independently for both 3.5mm and 4.4mm outputs.
Digital Filter Switching
The M3 offers 7 pre-built digital filter settings to customize the audio output. To access and switch between these filters:
- Press and hold the main button on the M3.
- The LED indicator light will flash to indicate the current filter setting. For example, if you switch to the fourth type, it will flash 4 times.
- Release the button when the desired filter is indicated.
- Rapid roll-off of linear phase (Fast Roll-Off, Linear Phase Filter): Low-order reverb, neutral tone, naturally suitable for strong and fast songs.
- Slow roll-off of linear phase (Slow Roll-Off, Linear Phase Filter): Low-order reverb, neutral tone, good details, belongs to the monitoring style.
- Linear phase fast cutting (Apodizing, Fast Roll-Off, Linear Phase Filter): Medium-level reverberation, strong music texture, suitable for fast-paced songs.

This image details the seven digital filter options of the MUSEHIFI M3, explaining their characteristics and suitable music genres. It also shows the device's indicator light.
Maintenance and Care
- Keep the device clean by wiping it with a soft, dry cloth. Avoid using harsh chemicals or abrasive materials.
- Protect the M3 from extreme temperatures, direct sunlight, and moisture.
- Avoid dropping or subjecting the device to strong impacts.
- When not in use, store the M3 in a safe place to prevent damage.
Troubleshooting
No Sound Output
- Ensure the M3 is properly connected to both the source device and headphones.
- Check the volume level on both the M3 and your source device.
- Verify that the correct audio output is selected on your source device (e.g., USB DAC).
- Test with different headphones or a different USB cable.
Distorted Sound
- Reduce the volume level on both the M3 and your source device.
- Ensure your audio files are not corrupted or of low quality.
- Check for any loose connections.
Device Not Recognized by Computer
- Try connecting to a different USB port on your computer.
- Restart your computer.
- Ensure your operating system is up to date.
- If issues persist, consult the MUSEHIFI support website for potential driver updates (though typically driver-free).
Technical Specifications
| Feature | Detail |
|---|---|
| Model | M3 |
| DAC Chip | ESS ES9038Q2M |
| AMP Chip | ESS ES9603Q |
| USB Controller | SA9227 |
| Output Interfaces | 3.5mm Single-Ended, 4.4mm Balanced |
| Input Interface | Type-C USB |
| Max PCM Decoding | 32-bit/384kHz |
| DSD Decoding | DSD256 |
| THD+N (Single-Ended) | 0.0008% |
| THD+N (Balanced) | 0.0007% (1kHz 32Ω) |
| Signal-to-Noise Ratio | 122dB (1kHz 32Ω) |
| Volume Adjustment | 60-level, with power-off memory |
| Weight | Approx. 50g |
| Dimensions (L x W x H) | 59.5mm x 29.5mm x 15.5mm |

This image presents a comprehensive list of the MUSEHIFI M3's technical specifications, such as the DAC and AMP chips used, output types, decoding capabilities, and physical dimensions.
Warranty and Support
For warranty information and technical support, please refer to the official MUSEHIFI website or contact your authorized dealer. Keep your purchase receipt as proof of purchase for warranty claims.
For further assistance, you may visit the HiFiGo Store at HiFiGo Store.


