
Niyama BT-802
Niyama BT-802 Thermal Receipt Printer User Manual
Model: BT-802
1. Introduction and Overview
The Niyama BT-802 is a next-generation portable thermal receipt printer designed for various applications including restaurants, retail, and sales. Its compact and lightweight design makes it highly mobile, suitable for both desktop use and on-the-go printing. This manual provides essential information to help you set up, operate, and maintain your printer effectively.

Image: Angled view of the Niyama BT-802 Thermal Receipt Printer.
Key features include:
- Portable Design: Streamlined appearance, mini size, and lightweight (600 grams) for easy handling and transport.
- Versatile Connectivity: Supports both Bluetooth (BT3.4/BLE4.0) and USB interfaces for flexible connection to Android, iOS, Windows, and Linux devices.
- Efficient Printing: Thermal line printing method with a print width of 70mm and speed of 90mm/s, supporting 80mm paper rolls.
- Long-lasting Battery: Equipped with a 2000mAh/7.4V rechargeable lithium battery for extended use.
- Low Maintenance: Designed for zero maintenance with no ink cartridges or ribbons required, and a printer head life cycle of up to 50 KM.
- Software Support: Compatible with ESC/POS printing commands and offers DLL, SDK, and App demo support for application development.
2. What's in the Box
Upon unboxing your Niyama BT-802 Thermal Receipt Printer, please ensure all the following components are present:
- Niyama BT-802 Thermal Receipt Printer
- Thermal Paper Roll
- Power Adapter
- USB Cable
- User Manual (this document)
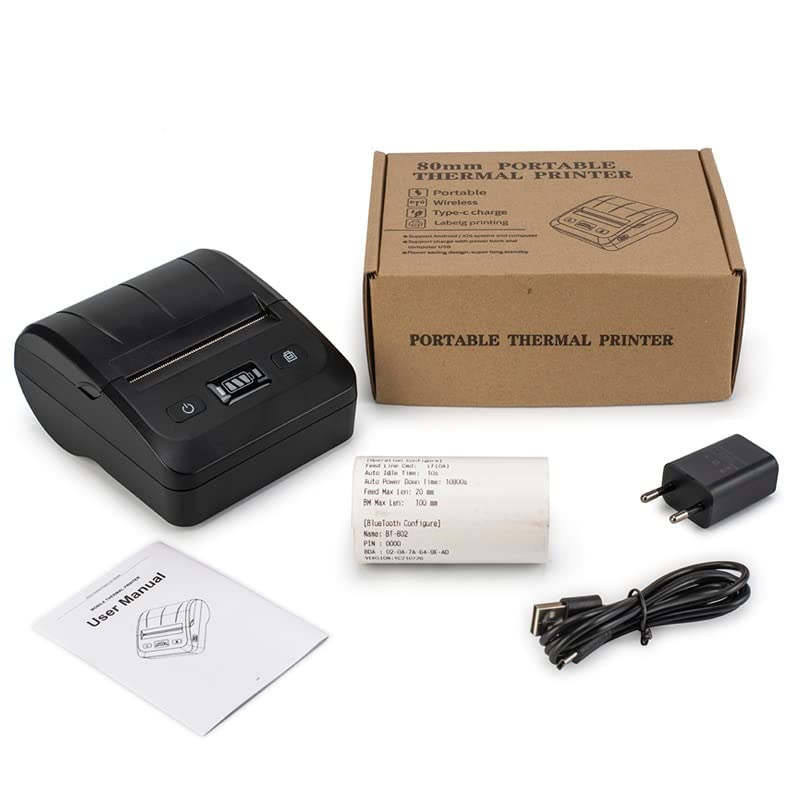
Image: All components included in the Niyama BT-802 package.
3. Specifications
| Feature | Specification |
|---|---|
| Printing Method | Thermal Line Printing |
| Print Width | 70mm |
| Print Density | 384 dot/line |
| Print Speed | 90mm/s |
| Interface | USB + Bluetooth |
| Paper Width | 80mm |
| Roll Diameter | 80mm |
| Paper Thickness | 0.06-0.08mm |
| Print Command | ESC/POS |
| Character Size | 24*24 point |
| Bar Code Type | CODE39, CODE128 |
| Input Buffer | 25K bytes |
| Power Adapter Input | AC220V |
| Power Adapter Output | DC9V/2A |
| Lithium Battery | 2000mAh/7.4V |
| Charging Time | 3 hours |
| Working Environment Temperature | -10°C ~ 50°C |
| Working Environment Humidity | 20%~85% |
| Storage Environment Temperature | -20°C ~ 70°C |
| Storage Environment Humidity | 5% ~ 95% |
| Mechanical Properties (Printer Head Life) | 50KM |
| Operating System Support | Android, iOS, Windows (9X, ME, 2000, NT, XP, Vista, 7, 8), Linux |
| Item Weight | 600 g |
| Package Dimensions | 17.3 x 13.3 x 7.1 cm |
4. Setup
4.1. Charging the Battery
Before first use, fully charge the printer's lithium battery. Connect the provided power adapter to the printer's charging port and plug it into a power outlet. The charging indicator light will show the charging status.
4.2. Loading Thermal Paper
- Gently press the cover open button to open the paper compartment cover.
- Insert the thermal paper roll into the compartment, ensuring the printing side of the paper faces the print head. The paper should feed smoothly from the bottom of the roll.
- Pull a small length of paper out beyond the print head.
- Close the cover firmly until it clicks into place. Ensure the paper is straight and not jammed.
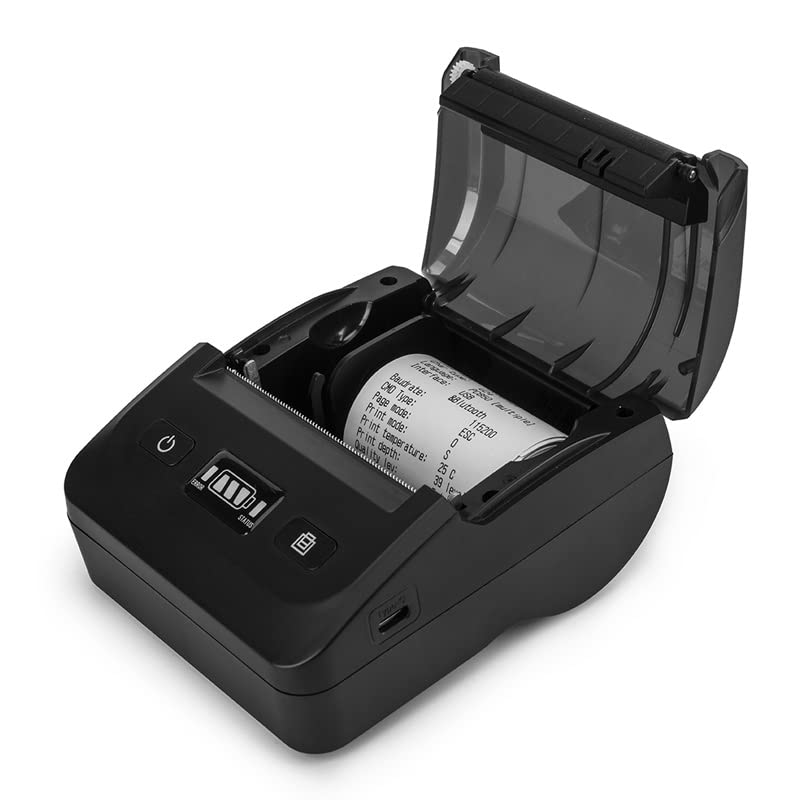
Image: Opening the paper compartment and inserting a thermal paper roll.
4.3. Connecting the Printer
4.3.1. USB Connection
Connect the printer to your computer using the provided USB cable. The printer will typically be recognized as a standard printer device. You may need to install a printer driver, which can usually be found on the manufacturer's website or included software CD (if applicable).
4.3.2. Bluetooth Pairing
To pair the printer with a mobile device (Android/iOS):
- Ensure the printer is powered on and within range of your mobile device.
- Enable Bluetooth on your mobile device.
- Search for available Bluetooth devices. The printer will typically appear as "BT-802" or a similar name.
- Select the printer to pair. If prompted for a PIN, enter "0000" or "1234" (common default PINs).
- Once paired, the printer is ready for use with compatible applications.
Note: This product requires software development skills to integrate with Android and iOS applications. Programming guides (DLL, SDK, App demo) are available to assist with customer application development.
5. Operating Instructions
5.1. Powering On/Off
To power on the printer, press and hold the power button (⏻) until the indicator lights illuminate. To power off, press and hold the power button again until the lights turn off.
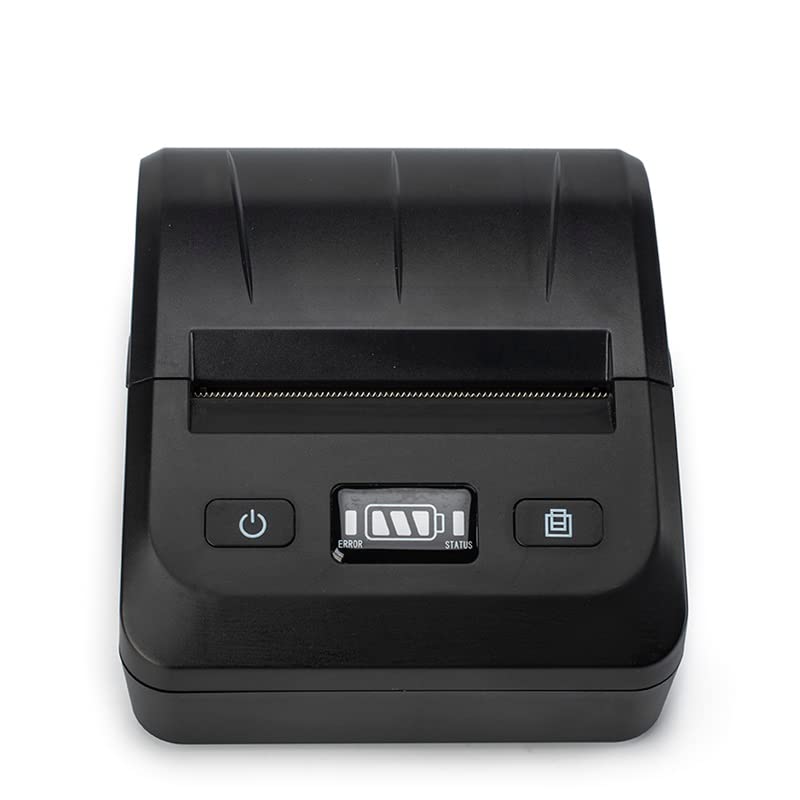
Image: Front view of the printer with power button and indicators.
5.2. Printing a Test Page
After loading paper and powering on, you can print a self-test page to verify printer functionality and check its current settings. The method for printing a test page may vary, but commonly involves holding down a specific button (e.g., the feed button) while powering on, or using a utility from the printer driver.
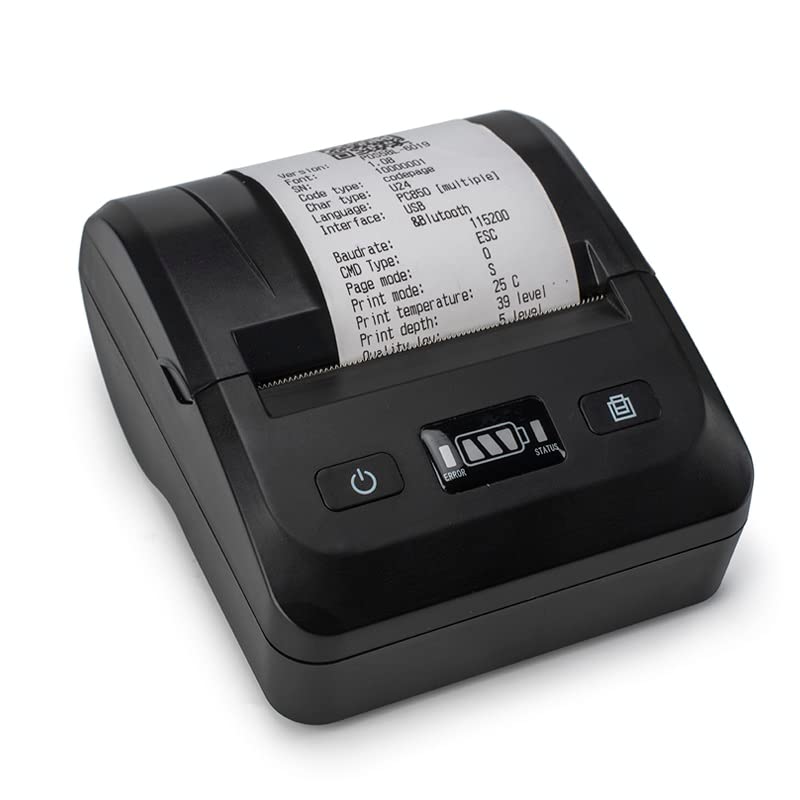
Image: The printer with a sample receipt showing print quality.
5.3. Using with Applications
Once connected via USB or Bluetooth, the printer can be used with compatible point-of-sale (POS) software, billing applications, or custom-developed apps. Ensure your application is configured to send print jobs to the Niyama BT-802 printer.
6. Maintenance
6.1. Cleaning the Print Head
To ensure optimal print quality and extend the life of your printer, regularly clean the thermal print head. Use a soft, lint-free cloth lightly dampened with isopropyl alcohol. Gently wipe the print head surface. Allow it to dry completely before closing the cover and resuming operation.
6.2. Battery Care
To maximize battery life:
- Avoid fully discharging the battery frequently.
- Charge the battery regularly, even if the printer is not in constant use.
- Store the printer in a cool, dry place when not in use for extended periods.
6.3. Paper Handling
Always use high-quality thermal paper to prevent damage to the print head and ensure clear prints. Store thermal paper in a cool, dry place away from direct sunlight and heat sources to preserve its thermal properties.
7. Troubleshooting
This section addresses common issues you might encounter with your Niyama BT-802 printer.
7.1. Printer Not Responding
- Check Power: Ensure the printer is powered on and the battery is charged. Connect the power adapter if the battery is low.
- Check Indicators: Observe the "ERROR" and "STATUS" indicators on the front panel. A red "ERROR" light often indicates a paper jam or out-of-paper condition.
- Restart: Power off the printer, wait a few seconds, and then power it back on.
7.2. No Print Output / Blank Pages
- Paper Orientation: Verify that the thermal paper is loaded correctly with the printing side facing the print head.
- Paper Type: Ensure you are using thermal paper, not regular paper.
- Print Head Cleanliness: A dirty print head can result in faint or blank prints. Refer to Section 6.1 for cleaning instructions.
- Connectivity: For USB, ensure the cable is securely connected and the driver is installed. For Bluetooth, confirm successful pairing and that the device is within range.
7.3. Bluetooth Connection Issues
- Re-pair Device: Delete the printer from your device's Bluetooth settings and attempt to re-pair.
- Interference: Move away from other wireless devices that might cause interference.
- App Compatibility: Ensure your application is designed to work with this specific printer model and Bluetooth version.
8. Warranty and Support
8.1. Warranty Information
The Niyama BT-802 Thermal Receipt Printer comes with a 6-month warranty from the date of purchase. This warranty covers manufacturing defects and malfunctions under normal use. Please retain your purchase receipt as proof of warranty.
8.2. Technical Support
For technical assistance, troubleshooting beyond this manual, or warranty claims, please contact Niyama Enterprises directly.
Manufacturer Contact: Niyama Enterprises
Contact Number: 8079073186
Please note: Integration with Android and iOS applications requires software development skills. Programming guides (DLL, SDK, and App demo) are available to support customer application development.
Ask a question about this manual
Ask about setup, troubleshooting, compatibility, parts, safety, or missing instructions. Manuals+ will review the question and use this page’s manual context to help answer it.