
1. Introduction
Thank you for choosing the Ganiza GJ10 Cold Press Slow Masticating Juicer. This manual provides essential information for the safe and efficient operation, assembly, maintenance, and troubleshooting of your new juicer. Please read all instructions carefully before first use and retain this manual for future reference.
2. Important Safety Instructions
- Read all instructions before operating the appliance.
- Ensure the appliance is unplugged before assembling, disassembling, or cleaning.
- Do not immerse the motor base in water or other liquids.
- Keep hands and utensils out of the feed chute during operation to prevent injury. Use the pusher provided.
- Do not operate the appliance if any part is damaged. Contact customer service for assistance.
- This appliance is for household use only. Do not use outdoors.
- Keep the appliance out of reach of children.
- Ensure the cover lid is closed and locked correctly before operation. The juicer will not function if the lid is not properly aligned with the lock symbol.
3. Product Components
The Ganiza GJ10 Juicer comes with several components designed for optimal juicing and ease of use. Familiarize yourself with each part:
- 1. Motor Base: The main unit containing the motor and control knob.
- 2. Juicer Chamber: The main body where juicing occurs.
- 3. Feeding Cup: The top container for feeding fruits and vegetables.
- 4. Pusher: Used to gently guide ingredients into the juicer chamber.
- 5. Spiral Auger: The component that crushes and presses ingredients.
- 6. Filter Frame: Holds the juicing filters.
- 7. Juicing Filters (3 types): Different mesh sizes for various fruits and vegetables (e.g., for harder fruits, more fibrous fruits, less fibrous fruits).
- 8. Juice Cup: Collects the extracted juice.
- 9. Pulp Cup: Collects the separated pulp.
- 10. Cleaning Brush: For easy cleaning of components.

Image: The Ganiza GJ10 Cold Press Juicer with its main components, including the motor base, juicing chamber, feeding cup, pulp and juice cups, and various filters.

Image: Detailed diagram illustrating all included components in the Ganiza GJ10 Juicer package.

Image: The three detachable cold press juicer filters, designed for different types of fruits and vegetables based on their fiber content and firmness.
4. Assembly Instructions
Follow these steps to correctly assemble your Ganiza GJ10 Juicer:
- Step 1: Set up the Juicing Bowl. Place the juicer chamber onto the motor base, ensuring it is securely seated.
- Step 2: Insert the Spiral Auger. Place the spiral auger into the center of the juicing chamber.
- Step 3: Insert the Filter. Select the appropriate filter for your ingredients (refer to the recipe book or filter guide for mesh selection) and insert it into the filter frame. Then, place the combined filter and frame into the juicing chamber, ensuring it is pressed down completely to the bottom.
- Step 4: Insert the Feeding Cup. Place the feeding cup on top of the juicing chamber. Align the guide mark on the feeding cup with the lock symbol on the juicer chamber and turn clockwise until it locks into place. The juicer will not operate unless properly locked.
- Step 5: Position Cups. Place the juice cup under the juice spout and the pulp cup under the pulp spout.

Image: Visual guide for assembling the Ganiza GJ10 Juicer, showing the placement of the juicing bowl, spiral auger, filter, and feeding cup.
Video: Official Ganiza video demonstrating the assembly process of the Cold Press Juicer Machine.
5. Operating Instructions
Before juicing, ensure all components are correctly assembled and locked. Plug the juicer into a power outlet.
- Prepare Ingredients: Wash fruits and vegetables thoroughly. For best results, remove large seeds or hard pits. The 4.3-inch wide feed chute allows for whole fruits and vegetables without pre-cutting in many cases.
- Start Juicing: Turn the control knob to the "ON" position. The juicer will begin operating.
- Feed Ingredients: Slowly feed ingredients into the feed chute. Use the pusher to gently guide them down. Do not force ingredients or overload the juicer.
- Reverse Function: If ingredients become clogged, turn the knob to the "REV" (Reverse) position and hold it for a few seconds to clear the blockage. Then, return to "ON" to continue juicing.
- Finish Juicing: Once all ingredients are processed, turn the knob to "0" (Off) and unplug the appliance.

Image: The Ganiza GJ10 Juicer demonstrating its 4.3-inch large feed chute, capable of processing whole fruits and vegetables.
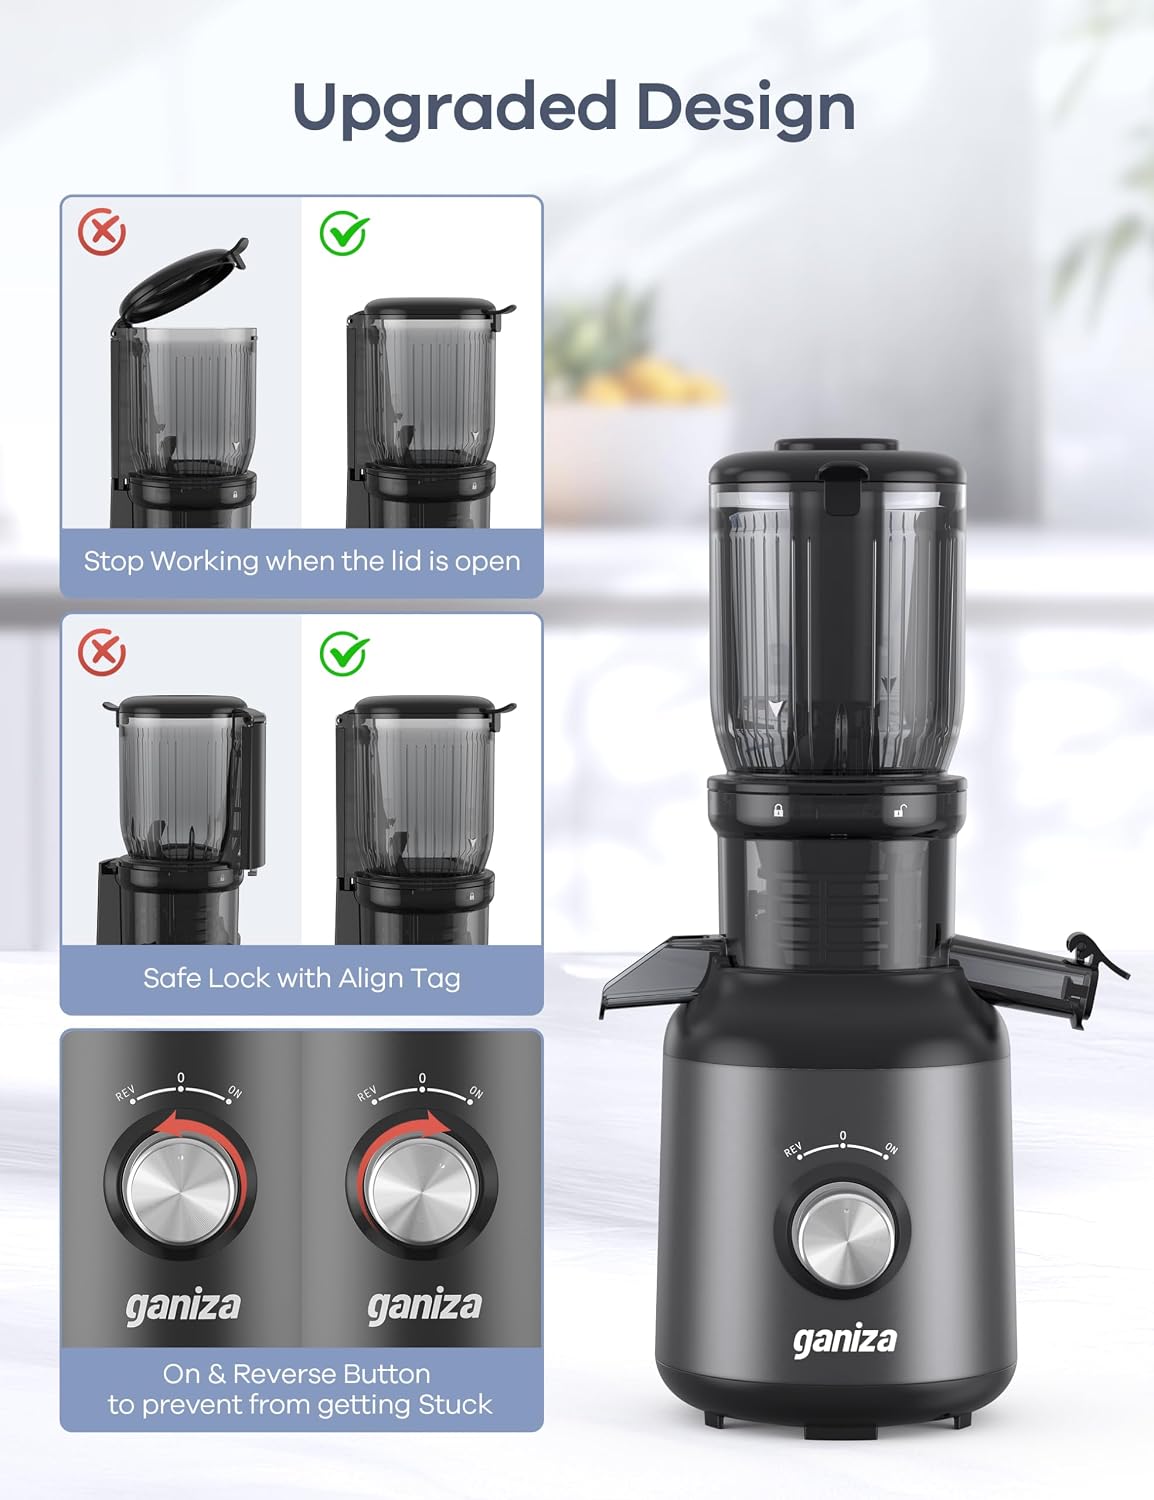
Image: Close-up of the Ganiza GJ10 Juicer's control knob, showing the "ON", "OFF", and "REV" (Reverse) settings, along with safety lock indicators.
Video: Official Ganiza video showcasing the Cold Press Juicer in action, demonstrating its features and juicing various fruits and vegetables.
6. Maintenance and Cleaning
Regular cleaning ensures the longevity and hygiene of your juicer. All detachable parts are easy to clean.
- Disassembly: Turn the control knob to "0" (Off) and unplug the juicer. Rotate the feeding cup counter-clockwise to unlock and remove it. Then, remove the filter frame with the filter, followed by the spiral auger, and finally the juicing chamber from the motor base.
- Cleaning Parts: Rinse all detachable parts (feeding cup, pusher, spiral auger, filter frame, filters, juice cup, pulp cup) under running water. Use the provided cleaning brush to remove any pulp residue from the filters and other intricate areas.
- Motor Base: Wipe the motor base with a damp cloth. Never immerse the motor base in water.
- Drying: Allow all parts to air dry completely before reassembling or storing.

Image: Demonstrating the easy cleaning process of the detachable filter and other components of the Ganiza GJ10 Juicer.

Image: Visual guide for disassembling the Ganiza GJ10 Juicer for cleaning.
Video: Official Ganiza video detailing the assembly, operation, and cleaning of the GJ10 Slow Cold Press Juicer.
7. Troubleshooting
| Problem | Possible Cause | Solution |
|---|---|---|
| Juicer does not turn on. | Not properly assembled or plugged in. | Ensure all parts are correctly locked and the power cord is securely plugged into an outlet. |
| Juicer stops during operation. | Overloaded or clogged with ingredients. | Turn to "REV" to clear blockage. If it persists, disassemble and clean. Avoid forcing ingredients. |
| Excessive pulp in juice. | Incorrect filter used or ingredients not properly prepared. | Ensure the correct filter is used for the type of produce. Pre-cut fibrous ingredients if necessary. |
| Low juice yield. | Ingredients not suitable for juicing or processed too quickly. | Refer to the recipe book for optimal juicing ingredients and processing times. Feed ingredients slowly. |
8. Specifications
- Brand: Ganiza
- Model Name: GJ10
- Special Feature: Masticating
- Product Dimensions: 14"D x 6.65"W x 12"H
- Item Weight: 6 pounds
- Motor Power: Max 350W
- RPM: 64 RPM (Slow Masticating Technology)
- Noise Level: <60dB
- Feed Chute Size: 4.3-inch wide
- Material: BPA-Free, Food-Grade Materials
- Care Instructions: Hand Wash Only (detachable parts are easy to clean)

Image: Internal view of the Ganiza GJ10 Cold Press Juicer, showcasing its 350W motor, 64 RPM slow masticating technology, and quiet operation.
9. Warranty and Customer Support
Ganiza provides a 12-month repair and replacement service for your juicer. For any inquiries, issues, or support needs, please contact our customer service team. We are committed to responding within 24 hours to ensure an excellent service and shopping experience.
For further assistance, please visit the official Ganiza store: Ganiza Store