
Nobsound E6
Nobsound Mini E6 Direct Heated Cathode Vacuum Tube Preamplifier
Instruction Manual
Introduction
Thank you for purchasing the Nobsound Mini E6 Direct Heated Cathode Vacuum Tube Preamplifier. This compact and exquisitely designed preamplifier is engineered to deliver a rich, detailed, and transparent audio experience, significantly enhancing your listening pleasure. Featuring military-grade 2J27p direct heated vacuum tubes, it offers superior control, linearity, and ultra-low distortion. Please read this manual carefully to ensure proper setup, operation, and maintenance of your device.
Product Overview
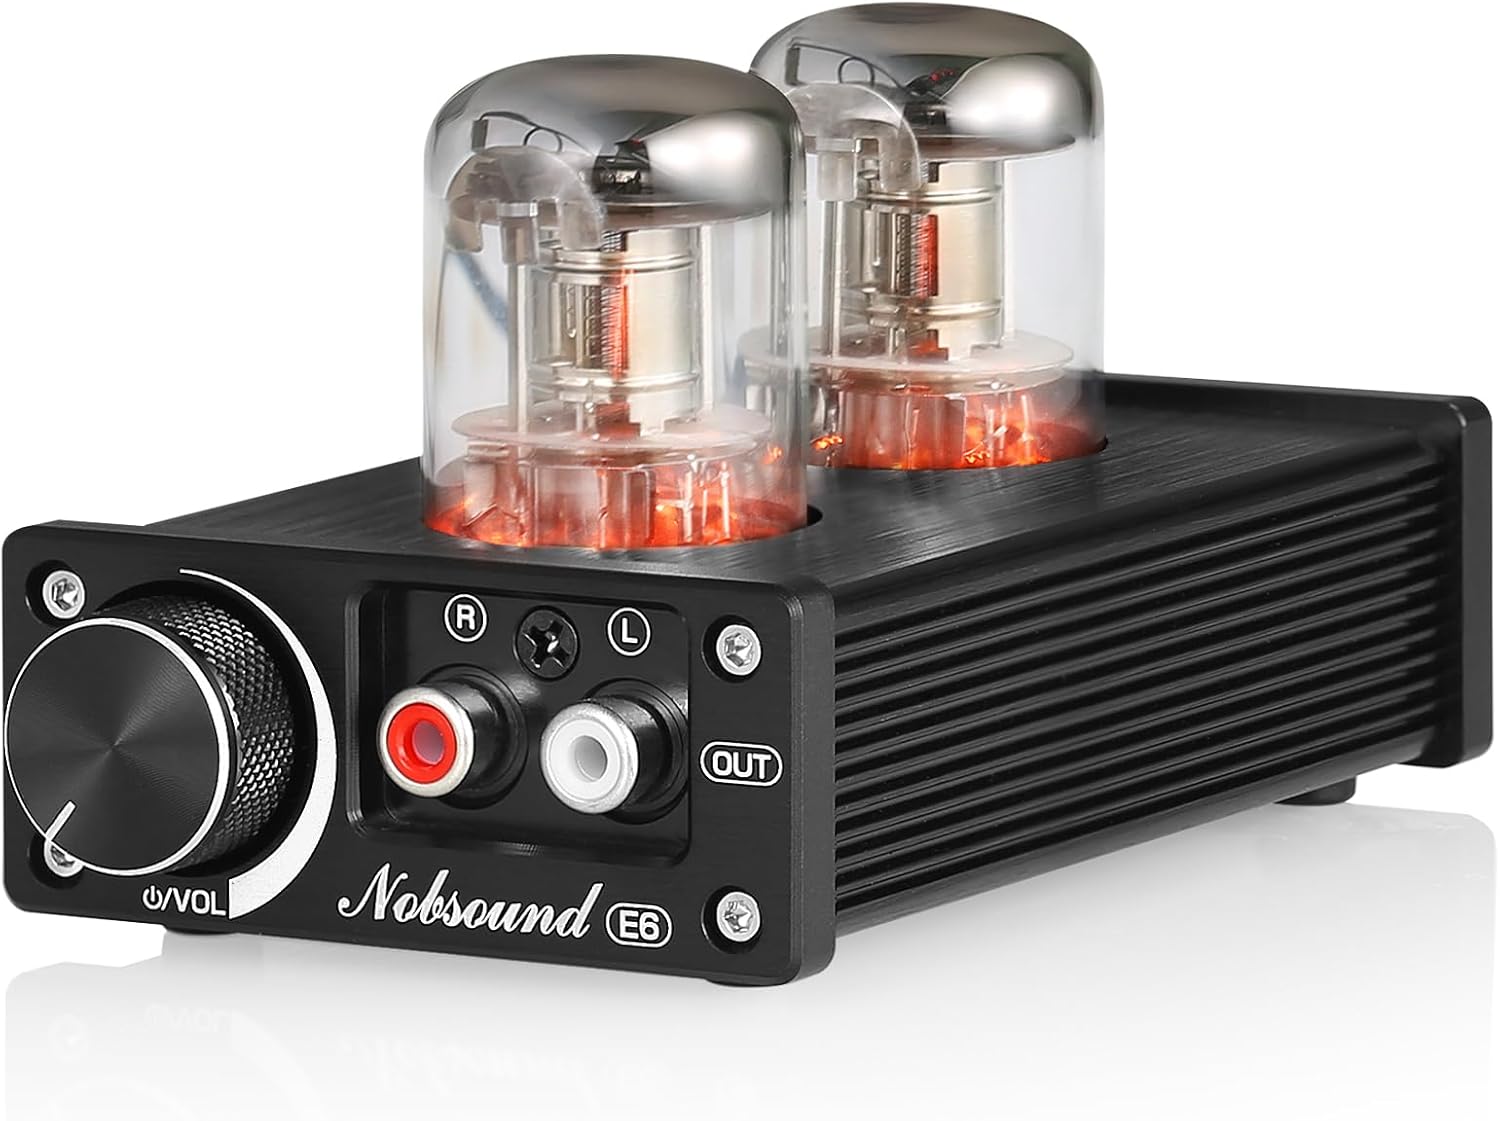
Figure 1: Front view of the Nobsound Mini E6 Preamplifier, showcasing the vacuum tubes, volume knob, and RCA output ports.
Front Panel
- Volume/Power Knob: Rotate to adjust the output volume. Press to power the unit on or off.
- RCA Output (OUT): Connects to your power amplifier, active speakers, or headphone amplifier.
- Vacuum Tubes: Two 2J27p direct heated vacuum tubes, providing the signature warm and detailed audio.
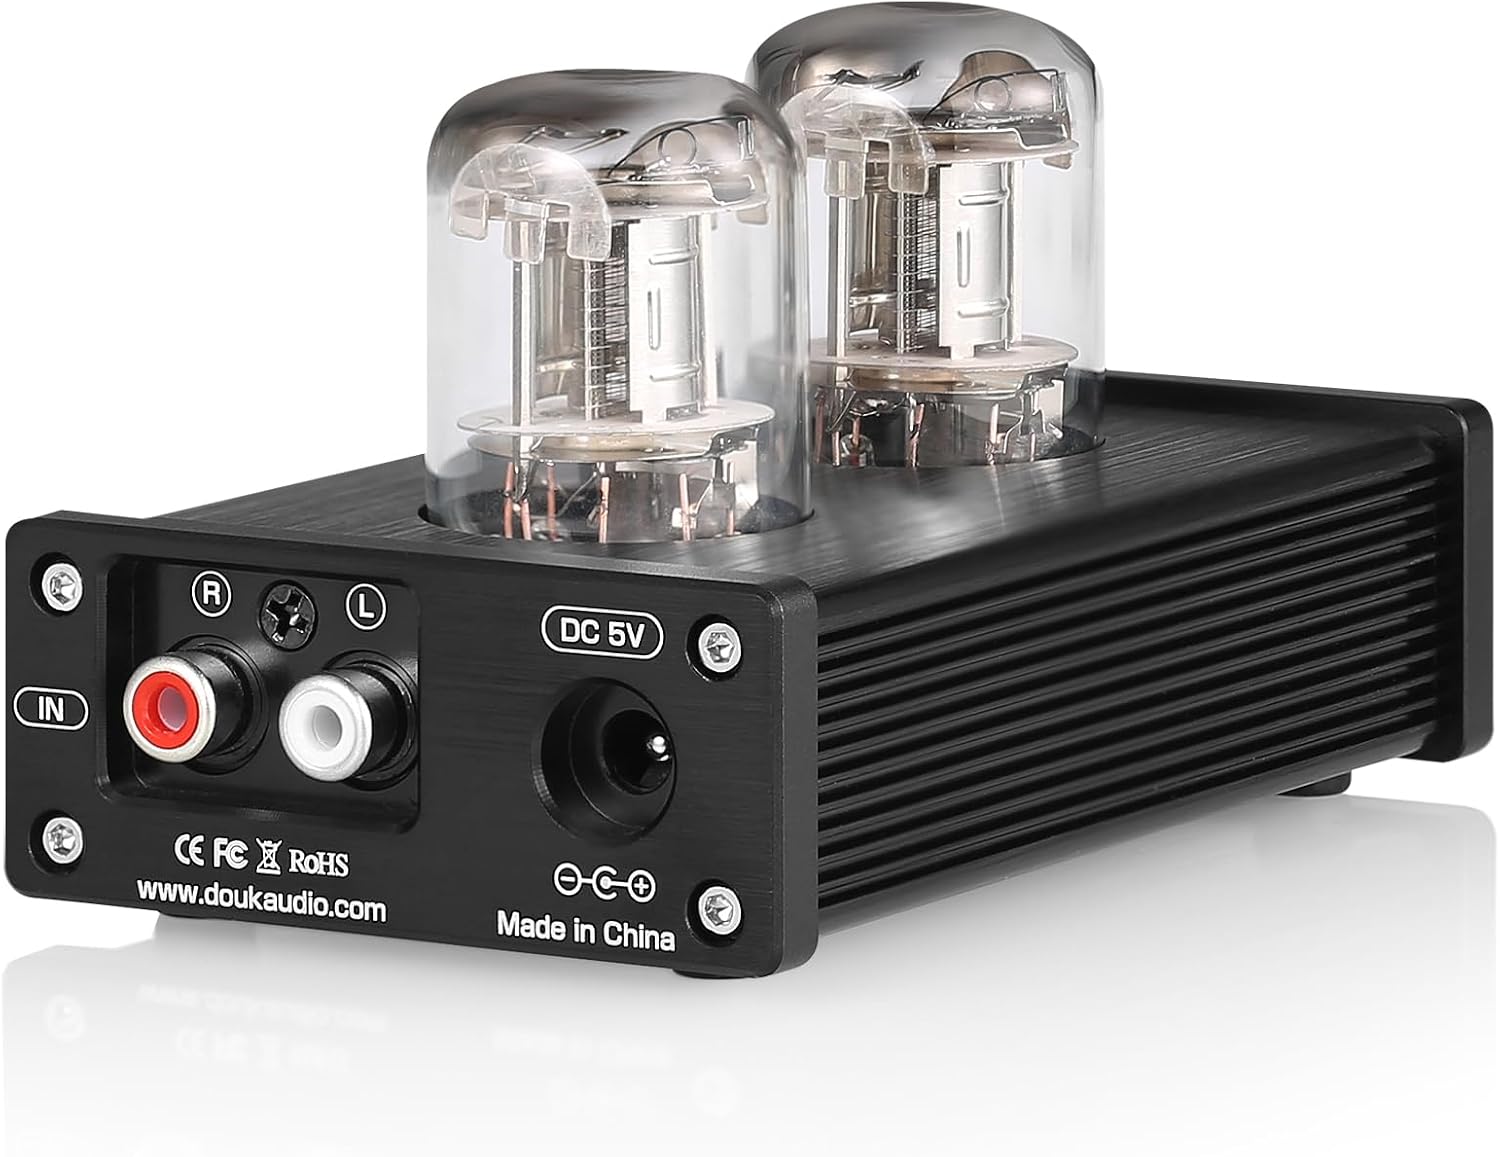
Figure 2: Rear view of the Nobsound Mini E6 Preamplifier, showing the DC 5V power input and RCA input ports.
Rear Panel
- DC 5V Input: Connect the provided USB to DC power cable here.
- RCA Input (IN): Connect your audio source (e.g., smartphone, MP3 player, computer, CD/DVD player) here.
Key Features
- Equipped with 2J27p vacuum tubes, offering significantly improved sound quality over previous models for a deeper, more detailed listening experience.
- Utilizes direct heated cathode vacuum tubes, providing overwhelmingly beautiful sound quality with rich spatial detail, extended and delicate high frequencies, and full, deep mid-frequencies.
- Superior direct heated vacuum tube design ensures higher control performance, linearity, ultra-low distortion, and minimal background noise.
- Vintage replaceable 2J27p vacuum tubes are military-grade quality, featuring pure ceramic tube sockets and anti-oxidation contacts for excellent insulation.
- Compact and exquisite mini-size design with a metal case and thick panel for enhanced shielding performance. The integrated power switch and volume control knob offer convenient operation.

Figure 3: Close-up view of the 2J27p vacuum tubes, highlighting their design and glowing filaments.

Figure 4: The Nobsound Mini E6 connected to a laptop, demonstrating its standard RCA compatibility.
Setup Guide
1. Unpacking
Carefully remove all components from the packaging. Ensure you have the Nobsound E6 Preamplifier, the USB to DC cable, and this user manual.
2. Connecting Your Device
- Connect Audio Source: Use an RCA cable (not included) to connect your audio source (e.g., CD player, DAC, smartphone with adapter) to the RCA IN ports on the rear panel of the E6. Ensure left (L) and right (R) channels are correctly matched.
- Connect Output Device: Use another RCA cable (not included) to connect the RCA OUT ports on the front panel of the E6 to your power amplifier, active speakers, or headphone amplifier. Again, ensure L/R channels are matched.
- Connect Power: Plug the small end of the provided USB to DC cable into the DC 5V input port on the rear panel of the E6. Connect the USB end to a 5V USB power adapter (not included) or a USB port on a computer.

Figure 5: Detailed connection diagram for the Nobsound Mini E6, illustrating RCA input, RCA output, and DC 5V power connections.
Operation
1. Power On/Off
To power on the Nobsound E6, press the volume knob. The vacuum tubes will illuminate, indicating the unit is powered on. To power off, press the volume knob again.
2. Volume Control
Rotate the volume knob clockwise to increase the output volume and counter-clockwise to decrease it. Start with a low volume level on both the E6 and your connected amplifier/speakers to avoid sudden loud sounds.
Maintenance
Cleaning
Wipe the unit with a soft, dry cloth. Do not use liquid cleaners or abrasive materials, as they may damage the finish or internal components.
Vacuum Tube Replacement
The 2J27p vacuum tubes are designed to be replaceable. If a tube fails or you wish to experiment with different tube types (compatible 2J27p variants), ensure the unit is powered off and unplugged before attempting replacement. Gently pull the old tube straight up from its socket and carefully insert the new tube, aligning the pins correctly. Do not force the tube into the socket.
Troubleshooting
| Problem | Possible Cause | Solution |
|---|---|---|
| No sound output. |
|
|
| Distorted sound. |
|
|
| Humming or buzzing noise. |
|
|
Specifications
| Feature | Detail |
|---|---|
| Brand | Nobsound |
| Model | E6 |
| Color | Black |
| Product Dimensions (D x W x H) | 11.6D x 6.8W x 6.5H cm |
| Product Weight | 350 g |
| Connectivity Technology | Bluetooth, RCA |
| Compatible Devices | Smartphone |
| Audio Output Mode | Stereo |
| Number of Channels | 5 |
| Control Method | Remote |
| Accessories Included | 1 * E6 Vacuum Tube Preamplifier, 1 * USB to DC Cable, 1 * User Manual |
Warranty and Support
Nobsound products are designed for reliability and performance. For warranty information and technical support, please refer to the official Nobsound website or contact your local distributor. Keep your purchase receipt as proof of purchase for any warranty claims.
For further assistance, you may visit the Nobsound store on Amazon: Nobsound & Douk Audio Store
Related documentsE6

Ask a question about this manual
Ask about setup, troubleshooting, compatibility, parts, safety, or missing instructions. Manuals+ will review the question and use this page’s manual context to help answer it.