
DIHOOL DHO-AGP-4S-30A
DIHOOL AGP-4S-30A DC PV Circuit Breaker User Manual
Model: DHO-AGP-4S-30A
1. Introduction
This manual provides essential instructions for the installation, operation, and maintenance of the DIHOOL AGP-4S-30A DC PV Circuit Breaker. This device is designed to offer reliable protection against overloads and short circuits in photovoltaic (PV) systems, ensuring the safety and longevity of your solar installations. It is suitable for outdoor PV modules, RVs, electric vehicles, UPS batteries, and inverters, supporting both DC and AC circuit output protection.
2. Safety Information
WARNING: Electrical work should only be performed by qualified and licensed professionals. Failure to follow these safety instructions may result in serious injury, death, or property damage.
- Always disconnect all power sources before installing, servicing, or removing the circuit breaker.
- Ensure proper grounding according to local electrical codes.
- Do not install in flammable or explosive environments.
- Verify that the voltage and current ratings of your system match the specifications of this circuit breaker.
- Wear appropriate personal protective equipment (PPE), including insulated gloves and eye protection.
- The transparent cover allows for visual inspection; however, do not open the enclosure or touch internal components while power is connected.
3. Product Overview
The DIHOOL AGP-4S-30A is a robust DC PV circuit breaker enclosed in an IP67-rated waterproof and dustproof housing. It features a 2-pole design and supports 4 input strings and 4 output strings, making it ideal for multi-string solar panel configurations. The unit provides quick on/off circuit functionality, thermal overload protection, and short circuit protection.
Key Features:
- High Protection Rating: IP67 waterproof and dustproof enclosure for outdoor use.
- Multi-String Support: Designed for 4 input and 4 output strings.
- Comprehensive Protection: Includes thermal overload and short circuit protection.
- Easy Monitoring: Transparent cover allows for quick visual inspection of circuit breaker status.
- Versatile Application: Suitable for various DC and AC applications in solar PV systems, RVs, and electric vehicles.
Components Included:
The package typically includes the DIHOOL AGP-4S-30A DC PV Circuit Breaker, MC4 connectors, mounting screws, and wall plugs for installation.

Image: The DIHOOL AGP-4S-30A DC PV Circuit Breaker shown with its accessories, including MC4 connectors, mounting screws, and wall plugs.
4. Specifications
| Parameter | Value |
|---|---|
| Model | AGP-4S-30A-IP67 |
| Input Strings | 4 |
| Output Strings | 4 |
| Rated Operating Voltage | DC 12V-400V or AC 90-400V |
| Poles | 2 |
| Rated Current | 30A |
| Waterproof & Dustproof Rating | IP67 |
| Breaking Capacity | 4kA Ics=Icu |
| Trip Curve | B (3-5 I/In) |
| Electrical Life | 4000 times |
| Mechanical Life | 10,000 times |
| Standard | IEC60898 / GB10936 |
| Operating Temperature | -30°C to +70°C |
| Product Dimensions (L x W x H) | 25 x 13 x 19 cm |
| Product Weight | 2.04 kg |

Image: Front view of the DIHOOL AGP-4S-30A DC PV Circuit Breaker, illustrating its physical dimensions.
5. Setup and Installation
Follow these steps for safe and correct installation of your DIHOOL AGP-4S-30A DC PV Circuit Breaker.
5.1 Mounting the Enclosure
- Choose a suitable location for mounting, ensuring it is easily accessible for operation and maintenance, and protected from direct mechanical impact.
- Use the provided mounting screws and wall plugs to securely fasten the circuit breaker enclosure to a flat, stable surface. The enclosure is designed for surface mounting.
- Ensure that the mounting surface is capable of supporting the weight of the unit and any connected cables.

Image: Diagram illustrating the mounting points and general installation method for the circuit breaker.
5.2 Wiring Instructions
Proper wiring is crucial for the safe and efficient operation of your PV system. Refer to the wiring diagram below and ensure all connections are tight and secure.
- Cable Selection: For the 30A rated current, it is recommended to use 4mm² (approximately 11AWG) cables. Always ensure that the cable cross-section is appropriate for the maximum expected current and cable length to prevent overheating and voltage drop.
- Current Rating Guideline: The maximum load current should be less than 80% of the circuit breaker's rated current. For this 30A circuit breaker, the continuous load current should not exceed 24A.
- Connecting PV Strings: Connect the positive and negative leads from each PV string to the corresponding input terminals of the circuit breaker using MC4 connectors. Ensure correct polarity.
- Connecting to Inverter/Load: Connect the output terminals of the circuit breaker to your inverter or DC load, again ensuring correct polarity.
- Secure Connections: Double-check all connections to ensure they are firm and properly insulated.

Image: Detailed wiring diagram showing the connection points for 4 PV strings to the 30A circuit breakers within the enclosure, specifying 4mm² cable.
6. Operating Instructions
The DIHOOL AGP-4S-30A DC PV Circuit Breaker is designed for straightforward operation.
- Turning ON: To activate the circuit, push the circuit breaker switch(es) to the 'ON' position.
- Turning OFF: To de-activate the circuit, push the circuit breaker switch(es) to the 'OFF' position. This will isolate the PV strings from the load.
- Status Check: The transparent cover allows for visual confirmation of the circuit breaker's status (ON/OFF) without opening the enclosure.
- Automatic Tripping: In the event of an overload or short circuit, the circuit breaker will automatically trip to the 'OFF' position to protect the system.
- Resetting a Tripped Breaker: If a breaker trips, first identify and resolve the cause of the overload or short circuit. Once the issue is resolved, you can reset the breaker by pushing it firmly to the 'ON' position. If it trips again immediately, do not force it; re-evaluate the system for faults.

Image: The DIHOOL AGP-4S-30A DC PV Circuit Breaker, showing the transparent cover for easy status monitoring.
7. Maintenance
Regular maintenance helps ensure the optimal performance and longevity of your circuit breaker.
- Periodic Inspection: Annually inspect the enclosure for any signs of physical damage, cracks, or corrosion.
- Connection Check: Periodically check all electrical connections (MC4 connectors, terminal screws) to ensure they remain tight and secure. Loose connections can lead to overheating and system inefficiencies.
- Cleaning: Keep the exterior of the enclosure clean and free from dust, dirt, and debris. Use a soft, damp cloth for cleaning. Do not use abrasive cleaners or solvents.
- Environmental Conditions: Ensure the operating environment remains within the specified temperature range (-30°C to +70°C) and that the IP67 rating is not compromised by damage to the enclosure or cable glands.
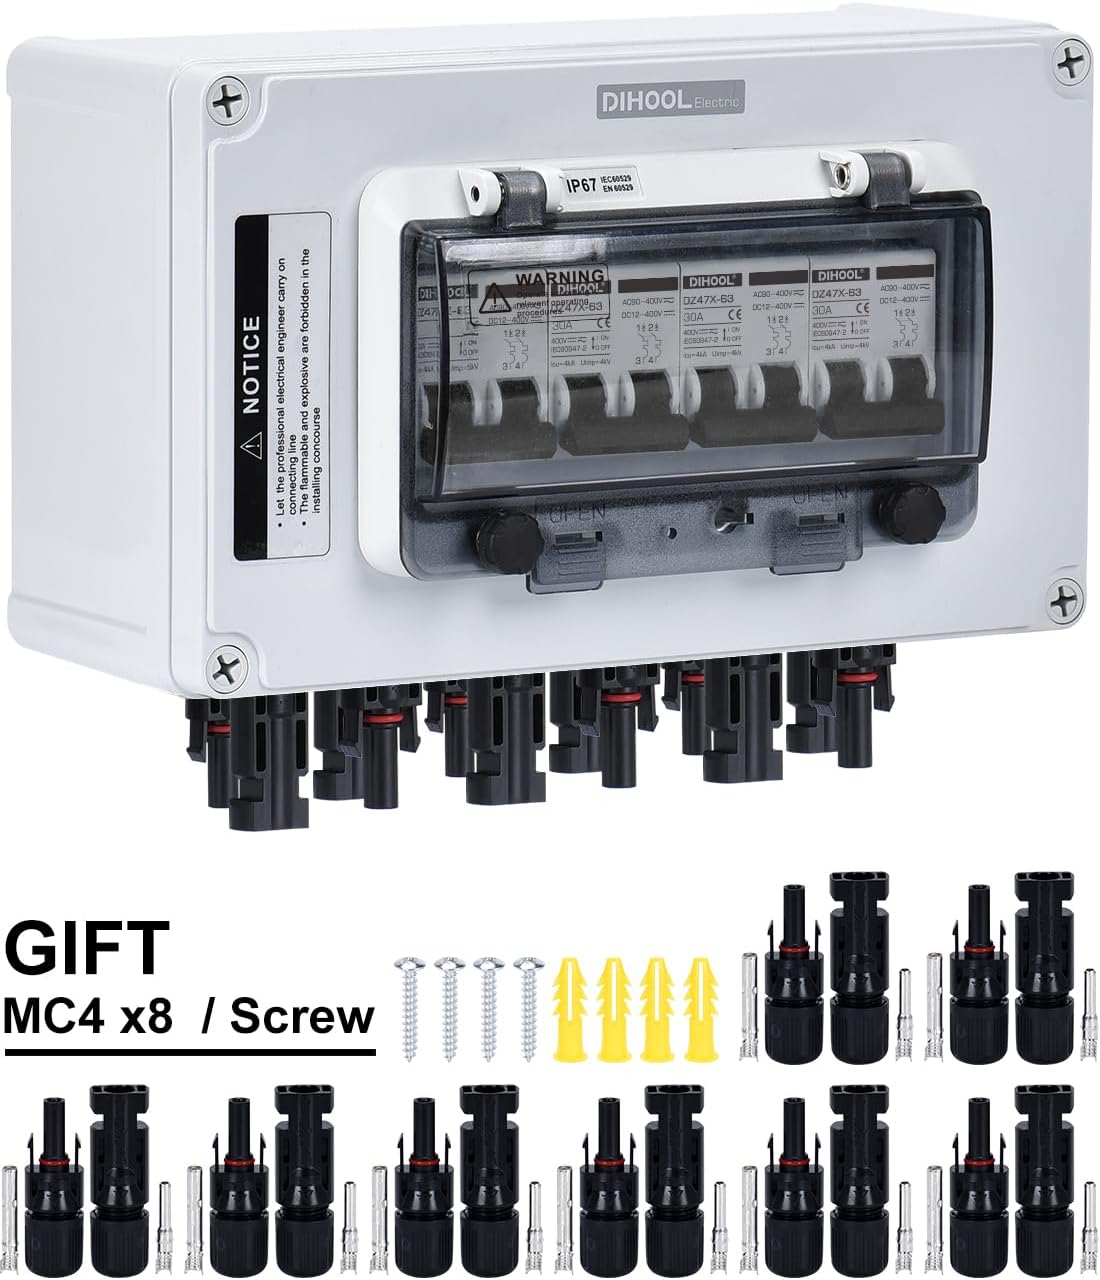
Image: The DIHOOL AGP-4S-30A DC PV Circuit Breaker in an outdoor environment, demonstrating its IP67 waterproof capability and suitability for various ambient temperatures.
8. Troubleshooting
This section addresses common issues you might encounter with your circuit breaker.
| Problem | Possible Cause | Solution |
|---|---|---|
| Circuit breaker trips frequently | Overload, short circuit, or ground fault in the system. | Identify and resolve the cause of the overload or short circuit. Check for damaged cables, faulty components, or excessive load. Ensure the load current does not exceed 80% of the breaker's rating. |
| No power output from the breaker | Breaker is in 'OFF' position, loose connections, or upstream power issue. | Ensure the breaker is switched to 'ON'. Check all input and output wiring connections for tightness. Verify power supply from PV modules. |
| Breaker feels hot to the touch | Overload, loose connections, or undersized wiring. | Immediately disconnect power. Check for overload conditions. Tighten all connections. Verify that cable sizes are appropriate for the current (e.g., 4mm² for 30A). |
| Water ingress in the enclosure | Damaged enclosure, improperly sealed cable glands, or missing seals. | Disconnect power. Inspect the enclosure for damage. Ensure all cable glands are tightened correctly and seals are in place. Replace any damaged components. |
9. Warranty and Support
For warranty information, please refer to the documentation provided at the time of purchase or contact DIHOOL customer service directly. Keep your purchase receipt as proof of purchase.
If you encounter any issues not covered in this manual or require technical assistance, please visit the official DIHOOL website or contact their customer support team. Contact details can typically be found on the product packaging or the manufacturer's website.
Ask a question about this manual
Ask about setup, troubleshooting, compatibility, parts, safety, or missing instructions. Manuals+ will review the question and use this page’s manual context to help answer it.