
Wildgame Innovations Kicker 2.0 Lightsout
WILDGAME Innovations Kicker 2.0 Lightsout Trail Camera User Manual
Model: Kicker 2.0 Lightsout | Brand: Wildgame Innovations
1. Introduction
The Wildgame Innovations Kicker 2.0 Lightsout Trail Camera is a high-performance device designed for capturing images and videos of wildlife in various outdoor environments. With its 18-megapixel photo resolution and 720p HD video capabilities, it provides clear and detailed recordings. The rapid trigger speed ensures that no moment is missed, while the Lightsout technology with invisible IR LEDs allows for discreet operation, especially during nighttime. This manual provides comprehensive instructions for setting up, operating, and maintaining your Kicker 2.0 Lightsout Trail Camera.
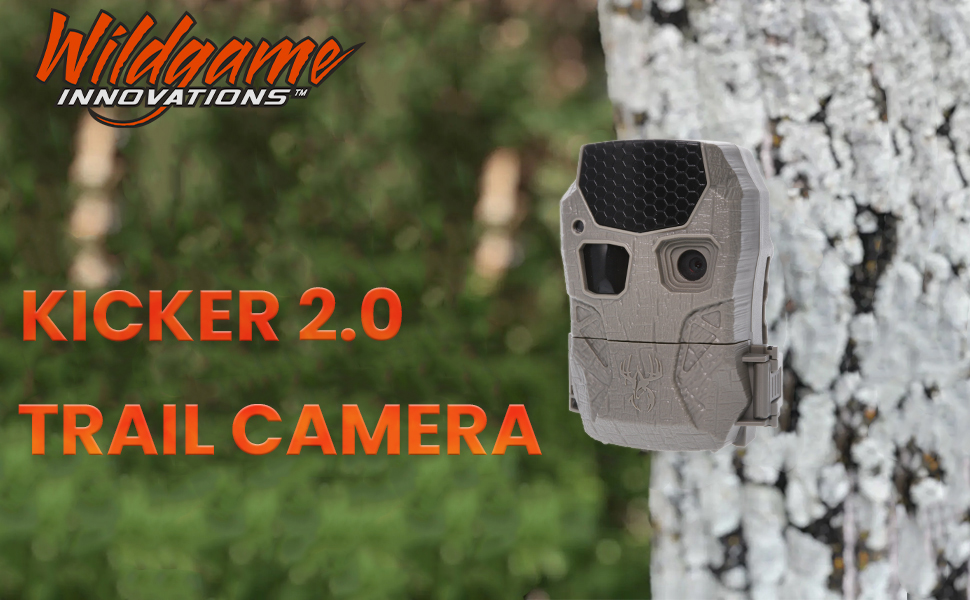
Image: The Kicker 2.0 Lightsout Trail Camera securely mounted to a tree, ready for operation.
2. Product Features
- High Resolution Imaging: Captures 18-megapixel still photos for crisp, detailed images.
- 720p HD Video Recording: Records high-definition video clips up to 15 seconds in length (without audio).
- Rapid Trigger Speed: Activates in under one second to capture fast-moving subjects.
- Lightsout Technology: Features 36 invisible black LEDs for discreet illumination up to 60 feet, ensuring clear nighttime shots without startling wildlife.
- Wide Field of View: 16:9 ratio image format optimized for viewing on computer or television screens.
- Data Stamps: Automatically stamps photos and videos with time, date, and moon phase information.
- Long Battery Life: Designed for extended use with 8 AA batteries (not included).
- Secure Mounting: Includes an adjustable tree strap with alligator-style clips for easy and secure attachment to various tree sizes.
- Theft Deterrent: Cable-lock ready latch for additional security measures (security accessories sold separately).
3. Package Contents
Please verify that all items are present in your package:
- WILDGAME Innovations Kicker 2.0 18MP Trail Camera (Lightsout Model)
- Adjustable Tree Strap with Alligator Clips
- User Manual (this document)
Note: AA batteries and an SD card are required for operation and are not included in the package.
4. Setup
4.1. Battery Installation
The Kicker 2.0 camera requires eight (8) AA batteries for operation. For optimal performance and battery life, it is recommended to use high-quality alkaline or lithium batteries.
- Locate the battery compartment on the bottom of the camera.
- Open the battery compartment door.
- Insert eight AA batteries, ensuring correct polarity (+/-) as indicated inside the compartment.
- Close the battery compartment door securely to ensure a watertight seal.
4.2. SD Card Installation
A compatible SD card (up to 32GB, not included) is required to store photos and videos.
- Locate the SD card slot, typically near the control panel.
- Insert the SD card with the metal contacts facing down until it clicks into place.
- To remove, gently push the SD card in until it springs out.

Image: Internal view of the Kicker 2.0 camera, highlighting the battery and SD card slots.
4.3. Mounting the Camera
The camera comes with an adjustable tree strap for easy mounting.
- Select a sturdy tree or post at the desired height (typically 3-6 feet off the ground).
- Thread the adjustable tree strap through the slots on the back of the camera.
- Wrap the strap around the tree and secure it using the alligator-style clips.
- Adjust the camera's angle to ensure the desired area is within its detection range.
- For added security, utilize the cable-lock ready latch with a compatible security cable (not included).

Image: Proper setup of the trail camera in an outdoor environment.
5. Operating Instructions
5.1. Powering On/Off
To power on the camera, slide the power switch to the 'ON' position. To power off, slide the switch to 'OFF'.
5.2. Mode Selection
The Kicker 2.0 camera typically operates in two primary modes: Photo and Video. These modes are often preset for simplicity.
- Photo Mode: Captures still images when motion is detected.
- Video Mode: Records video clips when motion is detected.
Refer to the camera's internal display and buttons for any available mode adjustments or settings.
5.3. Setting Time, Date, and Moon Phase
The camera allows for easy selection of time, date, and moon phase stamps on your captured media. These settings are crucial for tracking wildlife activity.
- Access the camera's menu or settings interface (usually via dedicated buttons near the display).
- Navigate through the options to find 'Time', 'Date', and 'Moon Phase' settings.
- Adjust each setting using the navigation buttons.
- Save your changes before exiting the settings menu.
5.4. Image and Video Retrieval
To view your captured photos and videos:
- Directly on Camera: Some models may have a small internal screen for basic viewing.
- Via SD Card: Remove the SD card from the camera and insert it into a compatible card reader connected to a computer or a device with an SD card slot.
- Television Viewing: The 16:9 image format is ideal for viewing on television screens. Connect your device to a TV using appropriate cables if supported, or view via an SD card reader on a smart TV.
6. Maintenance
- Cleaning: Use a soft, dry cloth to clean the camera's exterior, especially the lens and IR sensors. Avoid abrasive cleaners or solvents.
- Battery Replacement: Replace all batteries simultaneously when they are low to ensure consistent power. Do not mix old and new batteries.
- SD Card Management: Regularly format your SD card (after backing up data) to maintain optimal performance and prevent data corruption.
- Storage: When not in use, store the camera in a cool, dry place, away from direct sunlight and extreme temperatures. Remove batteries before long-term storage.
7. Troubleshooting
| Problem | Possible Cause | Solution |
|---|---|---|
| Camera not powering on | Low or dead batteries; Incorrect battery polarity; Power switch in OFF position. | Replace all batteries with new ones; Ensure correct battery orientation; Slide power switch to ON. |
| No photos/videos captured | SD card full or corrupted; SD card not inserted correctly; Motion sensor blocked or range too short; Camera in wrong mode. | Format or replace SD card; Reinsert SD card; Clear sensor path, adjust camera position, or check settings; Verify camera mode. |
| Poor image/video quality | Dirty lens; Low light conditions; Subject too far or too close. | Clean the lens; Ensure adequate illumination (IR LEDs for night); Position camera appropriately for subject distance. |
| Short battery life | Low-quality batteries; Frequent triggers; Extreme temperatures. | Use high-quality alkaline or lithium batteries; Adjust trigger sensitivity or delay settings; Operate within recommended temperature range. |
8. Specifications
| Feature | Detail |
|---|---|
| Model Name | WGI-KICK2LO (Kicker 2.0 Lightsout) |
| Effective Still Resolution | 18 MP |
| Effective Video Resolution | 720p HD |
| Trigger Speed | Under 1 second |
| Illumination Range | 60 ft (Invisible Black LEDs) |
| Power Source | 8 AA Batteries (not included) |
| Storage | SD Card (up to 32GB, not included) |
| Image Format | 16:9 Ratio |
| Connectivity Technology | Wireless (Wi-Fi for internal components, not for external connectivity) |
| Mounting Type | Tree Mount |
| Item Weight | 0.82 Pounds |
| International Protection Rating | IP54 |

Image: Visual representation of the Kicker 2.0 camera and its key specifications.
9. Warranty and Support
For warranty information, technical support, or service inquiries regarding your Wildgame Innovations Kicker 2.0 Lightsout Trail Camera, please refer to the manufacturer's official website or contact their customer service department. Keep your purchase receipt as proof of purchase for any warranty claims.
Manufacturer: GSM Outdoors
Brand: Wildgame Innovations
For further assistance, visit the Wildgame Innovations Store on Amazon.
Ask a question about this manual
Ask about setup, troubleshooting, compatibility, parts, safety, or missing instructions. Manuals+ will review the question and use this page’s manual context to help answer it.