
1. Introduction
This manual provides essential information for the safe and efficient operation, maintenance, and care of your Metro Mobility 4 Wheel Foldable Mobility Scooter M1. Please read this manual thoroughly before using the scooter for the first time. Keep it in a safe place for future reference.
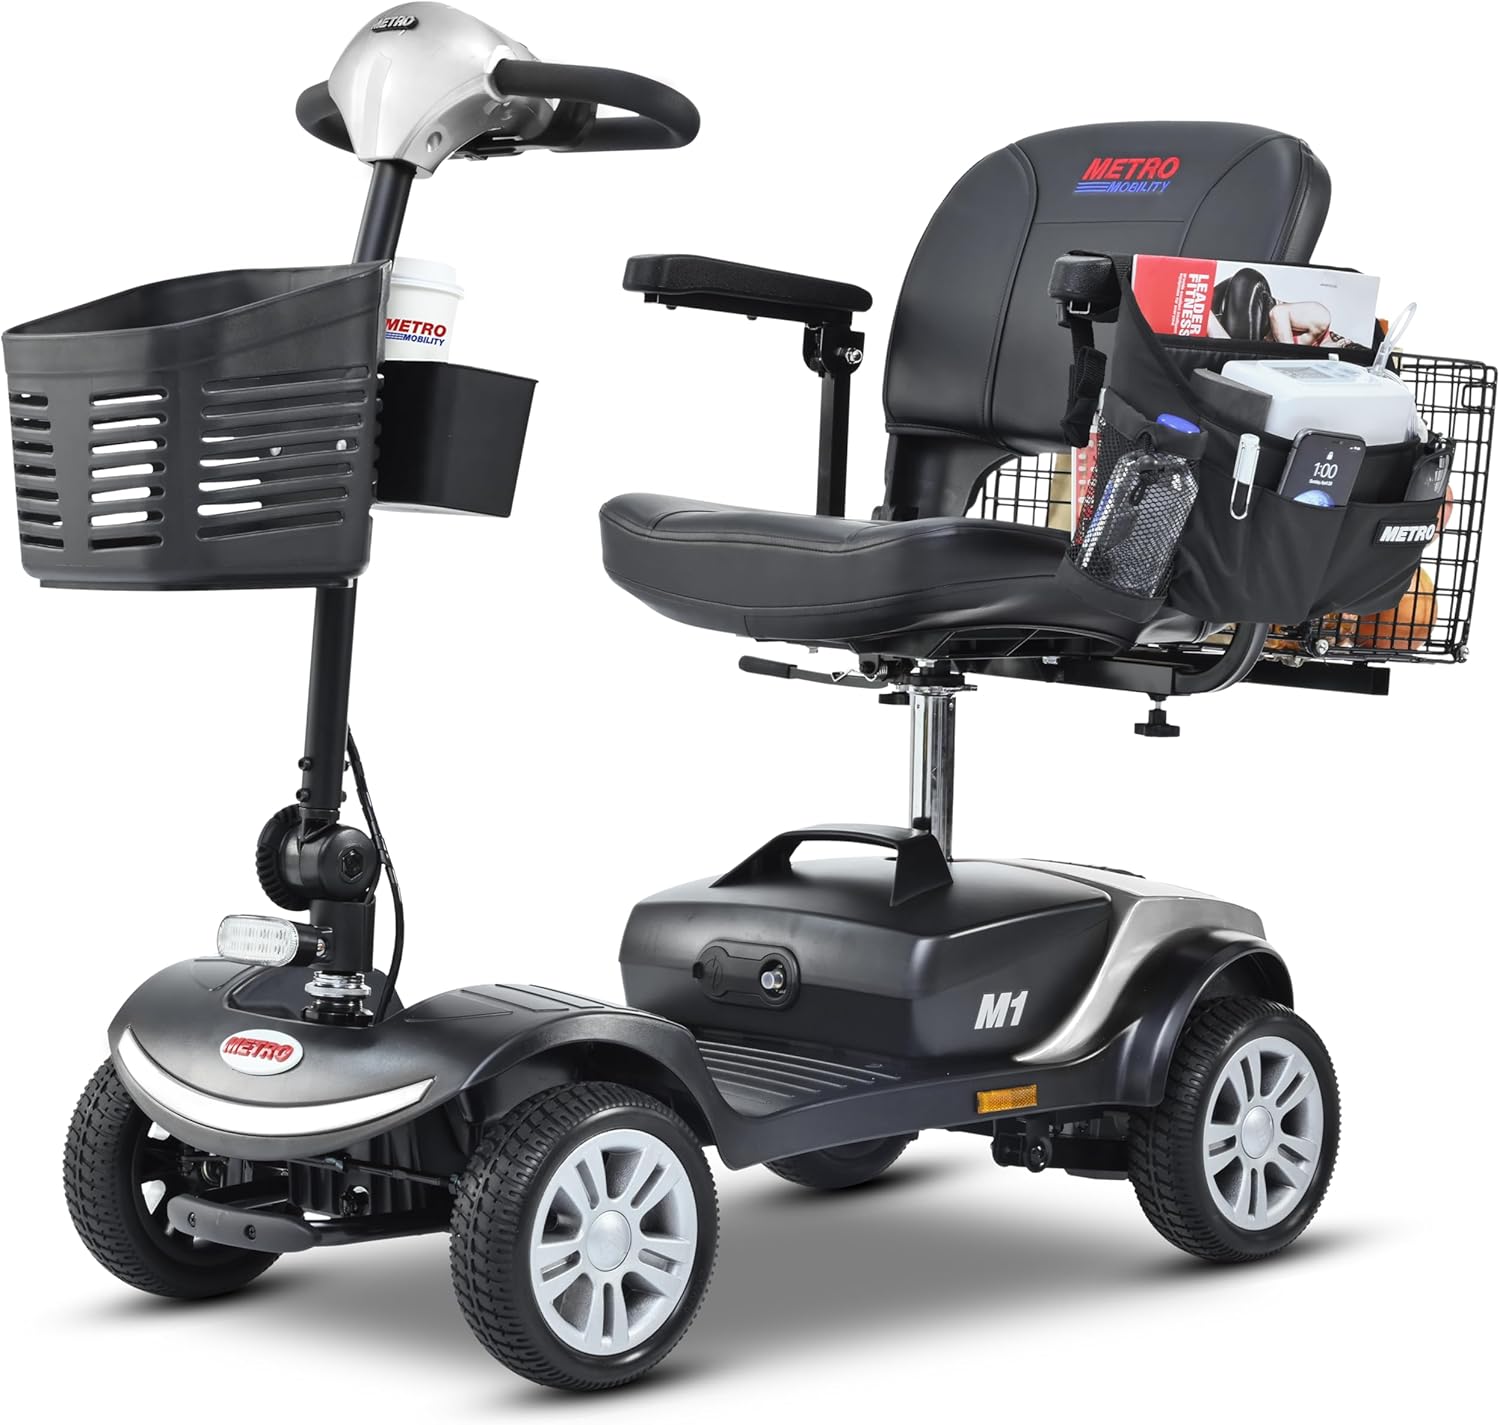
Figure 1: Metro Mobility M1 Scooter Overview
2. Safety Information
Your safety is paramount. Always adhere to the following guidelines:
- Weight Capacity: Do not exceed the maximum weight capacity of 300 pounds.
- Terrain: Operate the scooter on stable, even surfaces. Avoid steep inclines exceeding 8 degrees.
- Visibility: Utilize the headlights and rear brake lights when operating in low-light conditions or at night to ensure visibility to others.
- Battery: Use only the specified 12V batteries (two included) and charger.
- Maintenance: Regularly inspect all components for wear and tear. Do not operate if any part is damaged.

Figure 2: Headlights and Rear Brake Lights for enhanced visibility.
3. Setup and Assembly
The Metro Mobility M1 scooter is designed for easy assembly. Follow these steps to prepare your scooter for use:
- Unpacking: Carefully remove all components from the packaging.
- Tiller Adjustment: Adjust the tiller (handlebar column) to your preferred angle and secure it.
- Seat Installation: Place the seat onto the seat post and ensure it is securely locked. The seat is height-adjustable and can swivel for easy access.
- Armrest Attachment: Slide the armrests into their designated slots on either side of the seat. Adjust their width as needed.
- Basket Installation: Attach the front basket to the tiller and the rear basket to the seat frame.
- Battery Connection: Ensure the two 12V batteries are correctly installed and connected.
Video 1: Product Installation Instructions. This video demonstrates the step-by-step assembly of a similar mobility scooter, including attaching the tiller, seat, and baskets.
Video 2: THERASHIELDZ 4 Wheel Mobility Scooter Installation Video. This video provides a visual guide for the installation process of a 4-wheel mobility scooter.

Figure 3: Scooter components ready for assembly.
4. Operating Instructions
Familiarize yourself with the controls before operating the scooter.
- Power On/Off: Insert the key and turn to the 'On' position.
- Speed Control: Use the speed adjustment dial on the control panel to set your desired speed.
- Directional Control: Use the ergonomic wraparound handles to control forward and reverse motion. Push one lever for forward, the other for reverse.
- Braking: Release the levers to engage the automatic electromagnetic brake.
- Horn & Lights: Use the dedicated buttons on the control panel for the horn and to activate the headlights/rear brake lights.
Video 3: Maxplus Commuting Car Usage Video. This video demonstrates the general usage and maneuverability of a mobility scooter in various settings.
Video 4: User Guide Video. This video offers a comprehensive guide to operating a mobility scooter, covering controls and basic maneuvers.
Video 5: How to Drive an Electric Mobility Scooter. A short video demonstrating basic driving techniques for an electric mobility scooter.

Figure 4: Scooter in use on a paved path.
5. Maintenance
Proper maintenance ensures the longevity and performance of your scooter.
- Battery Care: Charge the batteries regularly after each use. Avoid fully discharging the batteries. Store the scooter with fully charged batteries if not in use for extended periods.
- Cleaning: Wipe down the scooter with a damp cloth. Avoid using harsh chemicals or excessive water.
- Tire Inspection: Periodically check the 9-inch solid tires for wear or damage.
- General Inspection: Ensure all nuts, bolts, and connections are secure. Check the functionality of lights, horn, and brakes.

Figure 5: Removable battery pack for charging.
6. Troubleshooting
If you encounter issues, refer to the following common solutions:
- Scooter Not Powering On: Check if the key is fully inserted and turned to 'On'. Ensure batteries are charged and properly connected.
- Loss of Power/Intermittent Operation: This may be due to a loose battery connection. Verify battery connections are secure.
- Unusual Noises: Stop operation immediately and inspect for loose parts or obstructions.
- Reduced Range: This may indicate aging batteries or insufficient charging. Ensure full charge before each use.
For persistent issues, contact customer support.
7. Specifications
| Feature | Detail |
|---|---|
| Product Dimensions | 45.27 x 21.06 x 37.4 inches |
| Item Weight | 101 Pounds |
| Weight Capacity | 300 lbs |
| Motor Power | 300 Watt |
| Max Range | Up to 10 miles per charge |
| Tire Size | 9'' solid tires |
| Turning Radius | 42.5 inches |
| Climbing Grade | 8 degrees |
| Batteries | 2 x 12V (included) |
| Material | Leather (seat) |
| Model Number | M1 |
8. Warranty and Support
Metro Mobility provides a 5-year limited guarantee for this product. For any questions, technical assistance, or warranty claims, please contact Metro Mobility USA customer support. Your satisfaction is important to us.
Contact information can typically be found on the manufacturer's website or through your purchase platform.


