
1. Introduction
Thank you for choosing the BAOFENG AR-1909U Two-Way Radio. This high-power, portable radio is designed for reliable communication in various environments, including restaurants, hotels, and outdoor activities like hunting. This manual provides essential information for the safe and efficient operation of your device. Please read it thoroughly before use.
Safety Information
- Do not operate the radio in explosive atmospheres (e.g., flammable gases, dust particles, metallic powders).
- Do not charge the battery in wet environments.
- Use only BAOFENG approved batteries and chargers.
- Keep the radio away from medical devices to avoid interference.
- Avoid prolonged exposure to direct sunlight or extreme temperatures.
2. Package Contents
Verify that all items listed below are included in your package:
- BAOFENG AR-1909U Walkie Talkie
- Antenna
- Battery
- Belt Clip
- Lanyard
- Desktop Charger
- Power Adapter
- Type-C Charging Cable
- User Manual (this document)
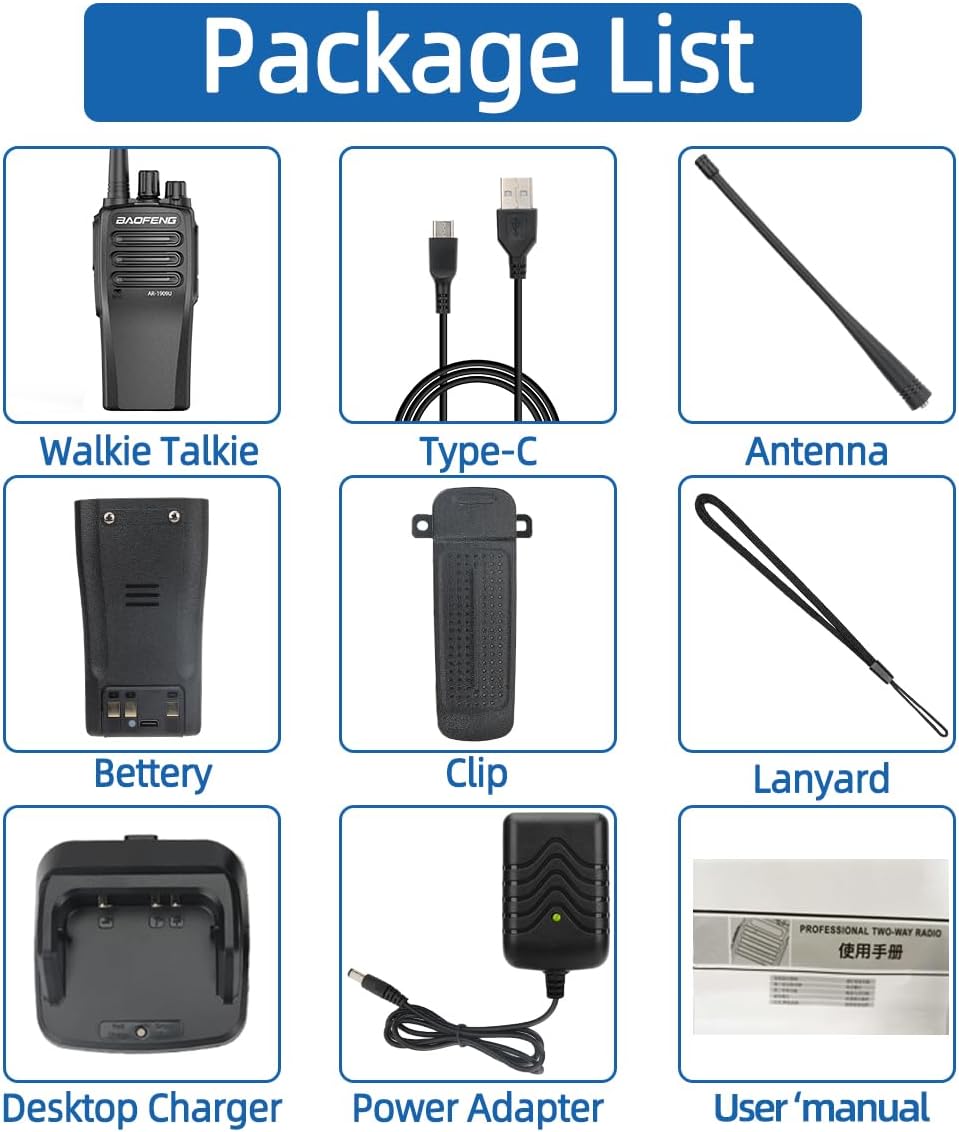
Figure 2.1: Included components of the BAOFENG AR-1909U radio package.
3. Product Overview
Familiarize yourself with the main parts and controls of your AR-1909U radio.

Figure 3.1: Key components and controls of the BAOFENG AR-1909U radio.
- Antenna: For transmitting and receiving signals.
- Channel Switch: Rotates to select desired communication channel.
- Power/Volume Knob: Turns the radio on/off and adjusts speaker volume.
- Speaker: Outputs received audio.
- Headphone Microphone Jack: Connects external audio accessories.
- PTT Key (Push-To-Talk): Press and hold to transmit, release to receive.
- FM Button: Activates the FM radio function.
- Microphone: Captures your voice for transmission.
4. Setup
4.1 Battery Installation and Charging
The AR-1909U uses a 3800mAh battery. Ensure the battery is fully charged before first use.
- Install Battery: Align the battery with the grooves on the back of the radio and slide it upwards until it clicks into place.
- Charge Battery:
- Using Desktop Charger: Place the radio (with battery installed) into the desktop charging cradle. Connect the power adapter to the cradle and plug it into a wall outlet. The charging indicator light will show charging status.
- Using Type-C Cable: Connect the Type-C charging cable directly to the Type-C port on the radio. You can charge using a car charger, PC, power bank, or standard wall socket adapter.

Figure 4.1: Various Type-C charging options for the radio.
4.2 Antenna Installation
Screw the antenna clockwise into the connector on the top of the radio until it is firmly seated. Do not overtighten.
4.3 Belt Clip Installation
Attach the belt clip to the designated slot on the back of the radio using the provided screws. This allows for convenient carrying.
5. Operating Instructions
5.1 Power On/Off and Volume Adjustment
Rotate the Power/Volume knob clockwise to turn the radio on. Continue rotating clockwise to increase the volume. Rotate counter-clockwise to decrease volume and turn the radio off.
5.2 Channel Selection
Rotate the Channel Switch knob to select one of the 16 available channels. Ensure both transmitting and receiving radios are on the same channel for communication.
5.3 Transmitting and Receiving
- To receive a transmission, simply ensure the radio is on and the volume is adjusted.
- To transmit, press and hold the PTT (Push-To-Talk) key on the side of the radio. Speak clearly into the microphone, holding the radio approximately 2-5 cm from your mouth. Release the PTT key when you finish speaking to return to receive mode.
5.4 FM Radio Function
Press the FM button on the side of the radio to activate the built-in FM radio. Press it again to exit FM radio mode and return to two-way radio operation.
5.5 CTCSS/DCS (Privacy Codes)
The AR-1909U supports CTCSS (Continuous Tone-Coded Squelch System) and DCS (Digital Coded Squelch) for enhanced privacy. These codes help filter out unwanted conversations on the same frequency. If configured, your radio will only receive transmissions from other radios using the same CTCSS/DCS code on the selected channel. Configuration of these codes typically requires programming software (not covered in this basic manual).
6. Maintenance
6.1 Cleaning
Wipe the radio's surface with a soft, damp cloth. Do not use harsh chemicals or abrasive cleaners. Ensure the radio is dry before use or charging.
6.2 Battery Care
- Do not short-circuit the battery terminals.
- Do not expose the battery to fire or extreme heat.
- If the radio will not be used for an extended period, remove the battery and store it in a cool, dry place.
6.3 Durability Features
The AR-1909U features a PC material shell designed for high strength, drop resistance, and dust resistance, allowing for normal use in harsh environments.

Figure 6.1: The radio's robust design for challenging conditions.
7. Troubleshooting
| Problem | Possible Cause | Solution |
|---|---|---|
| No power | Battery low or not installed correctly. | Charge the battery or re-install it properly. |
| Cannot transmit or receive | Wrong channel selected; radio out of range; antenna loose. | Ensure both radios are on the same channel. Move closer. Check antenna connection. |
| Poor audio quality | Volume too low/high; radio too far from mouth during transmit; interference. | Adjust volume. Speak clearly into microphone. Move away from sources of interference. |
| Short communication range | Obstructions (buildings, terrain); low battery; antenna issue. | Move to an open area. Charge battery. Check antenna. |
8. Specifications
Technical specifications for the BAOFENG AR-1909U radio:
| Feature | Detail |
|---|---|
| Model | AR-1909U (BF1909) |
| Power Output | 10W |
| Frequency Range | 400-512 MHz (UHF) |
| Number of Channels | 16 |
| Battery Capacity | 3800mAh |
| Battery Voltage | 7.4 Volts |
| Charging Method | Desktop Charger, Type-C Charging |
| Water Resistance | Water Resistant |
| Dimensions (L x W x H) | Approx. 5.9 x 2.16 x 1.4 inches (Radio body) |
| Item Weight | Approx. 1.28 pounds |
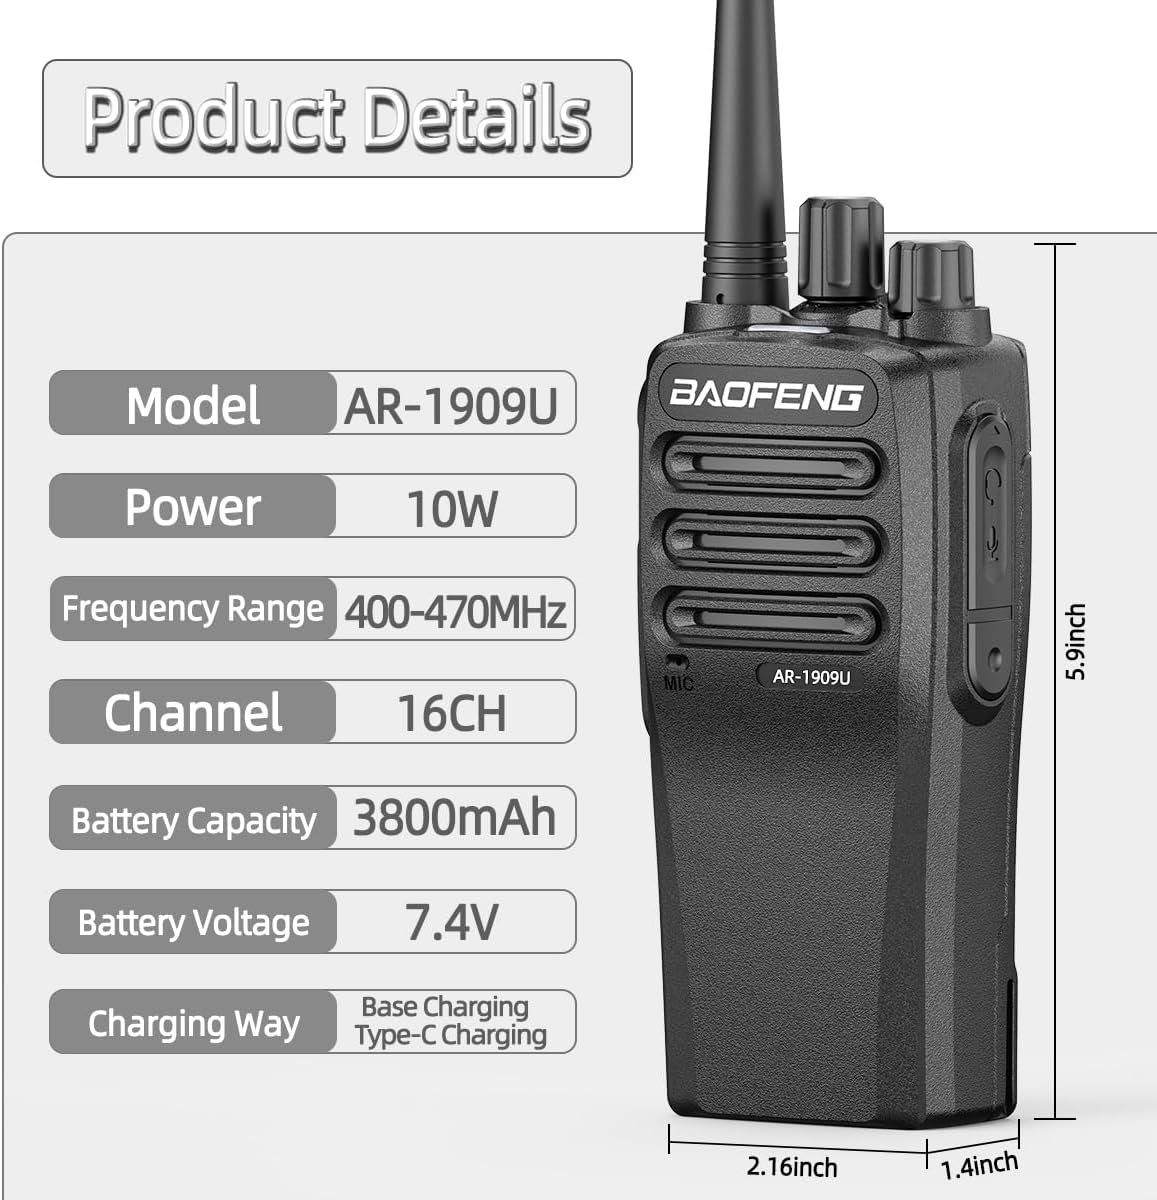
Figure 8.1: Detailed product specifications and dimensions.
9. Warranty and Support
BAOFENG products are manufactured to high quality standards. For warranty information or technical support, please refer to the warranty card included with your product or contact BAOFENG customer service through their official channels. Keep your purchase receipt as proof of purchase.
For further assistance, please visit the official BAOFENG website or contact your local distributor.


