
Xflyee 080
Xflyee 17 Inch Large Digital Wall Clock User Manual
Model: 080
1. Product Overview
The Xflyee 17 Inch Large Digital Wall Clock is a versatile and easy-to-read timepiece designed for various indoor environments. It features a large HD LED screen with high-contrast digits, a wireless remote control for convenient adjustments, and automatic/manual brightness settings. Beyond displaying time, it functions as an alarm clock and a timer, making it suitable for living rooms, kitchens, offices, and classrooms.

Figure 1: Xflyee 17 Inch Large Digital Wall Clock with included remote control.
2. Package Contents
- 1 x Xflyee 17 Inch Large Digital Wall Clock
- 1 x Wireless Remote Control
- 1 x Power Adapter and Power Cord
- 2 x AAA Batteries (for memory function)
- 1 x User Manual
- 1 x Mounting Hole Template
3. Setup
3.1 Power Connection
The clock operates via corded electric power. Connect the provided power adapter and power cord to the clock and then to a standard electrical outlet. The clock will power on automatically.
Note: This product is designed for plug-in use and does not support rechargeable or battery-operated primary power. The included AAA batteries are for the memory function only.

Figure 2: Power connection and memory function. The clock retains settings during power outages due to built-in AAA batteries.
3.2 Initial Time and Date Setting
Upon first power-on or after a prolonged power outage, you may need to set the time and date. Use the included wireless remote control for easy setup.
- Press the SET button on the remote control. The time display will begin to flash.
- Use the HR and MIN buttons to adjust the hour and minute respectively.
- Press SET again to move to the date setting. Adjust the month and date using the appropriate buttons.
- Continue pressing SET to cycle through other settings like 12/24H format, temperature unit (°F/°C), and alarm settings.
- Once all settings are configured, press SET one last time to save and exit the setup mode.
The clock features a memory function, so settings will be retained even if power is temporarily lost, thanks to the internal AAA batteries.
4. Operating Instructions
4.1 Time, Date, and Temperature Display
The clock displays time, day, date, and temperature simultaneously. The large 4.84-inch high-contrast digits ensure clear visibility from a distance. Time is displayed in white, while day, date, and temperature are in green for easy differentiation.

Figure 3: High-definition LED screen with large, bright numbers for easy viewing. The remote control has an effective distance of 32 feet.
- 12/24 Hour Format: Toggle between 12-hour (with AM/PM indicator) and 24-hour formats using the remote control.
- Temperature Unit: Switch between Celsius (°C) and Fahrenheit (°F) for temperature display.
- Automatic Daylight Saving Time (DST): The clock can automatically adjust for Daylight Saving Time.
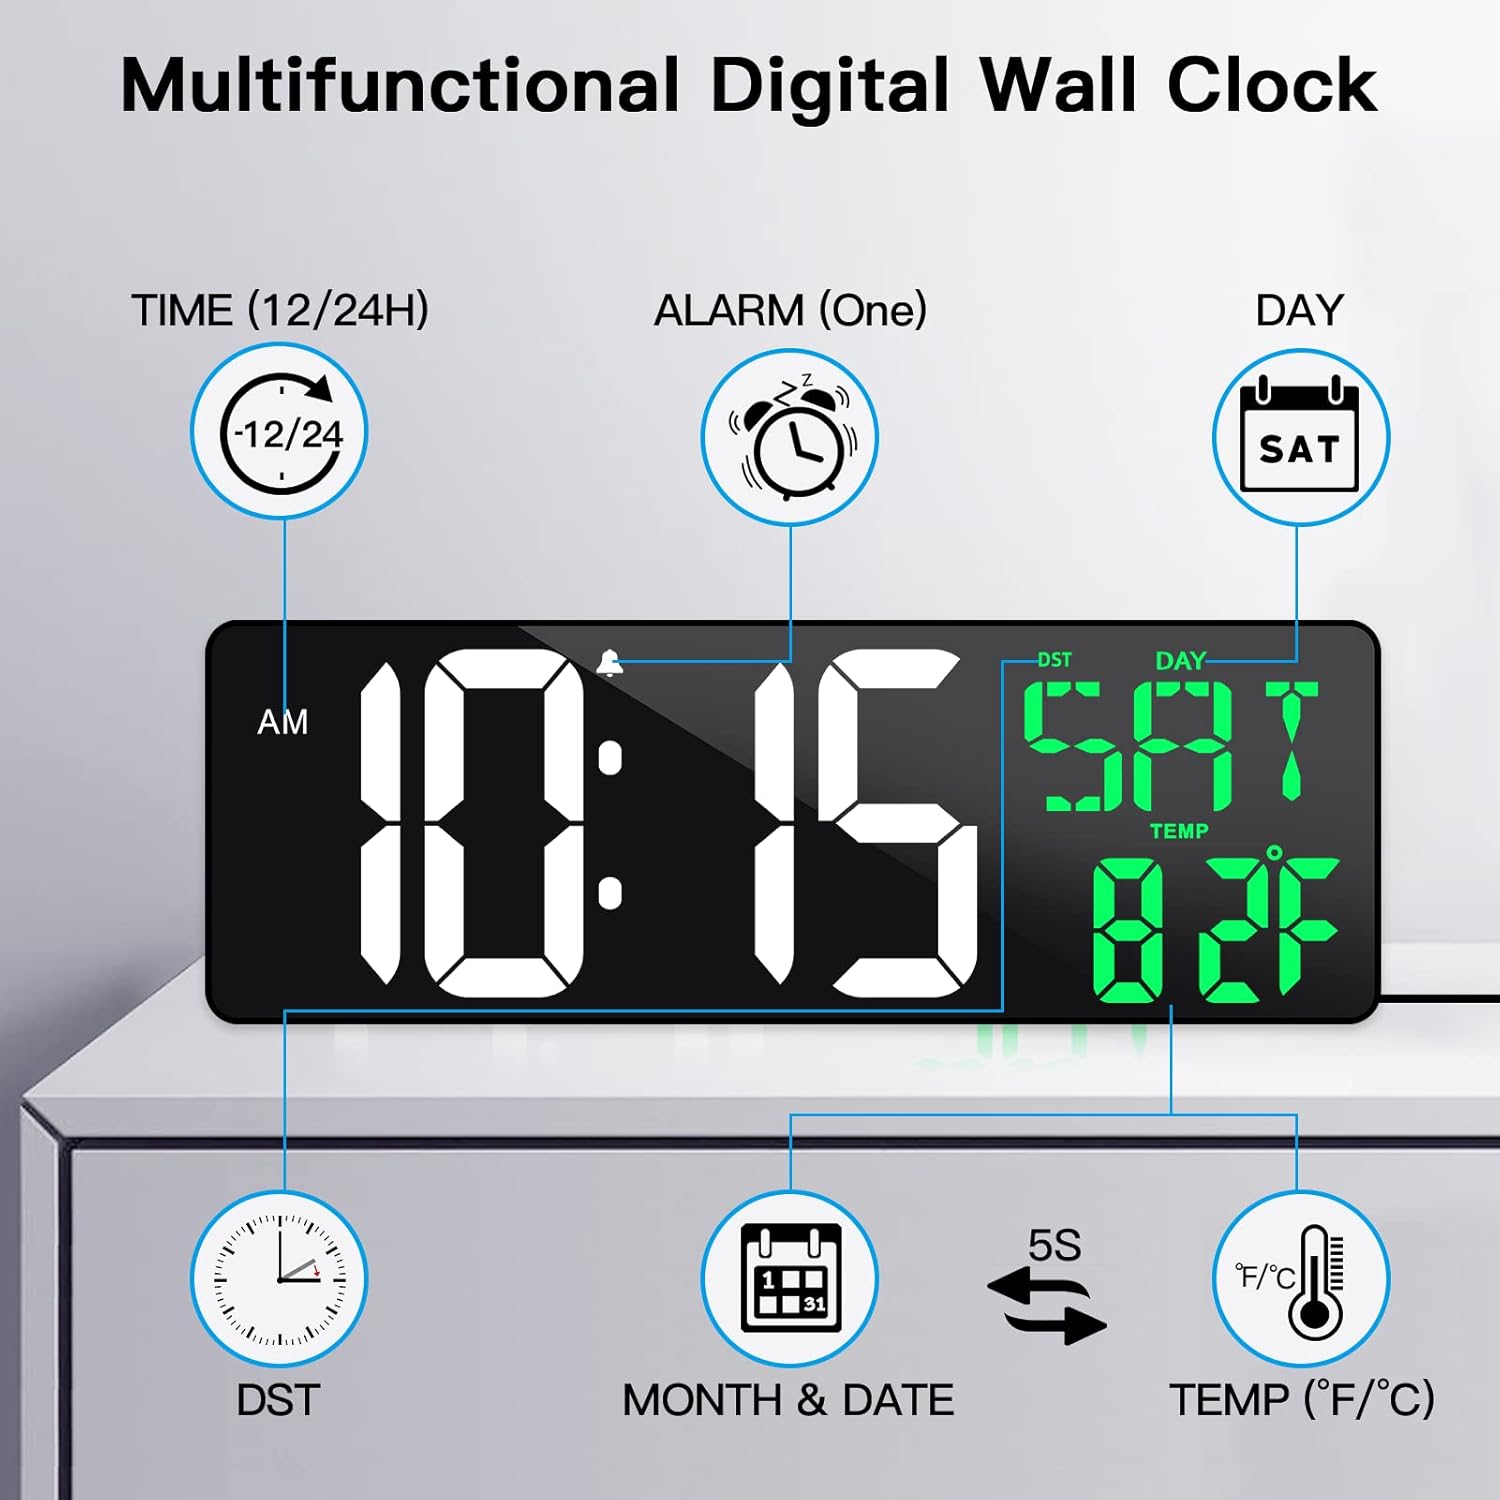
Figure 4: The clock automatically adjusts time for Daylight Saving Time (DST).
4.2 Brightness Adjustment
The clock features a built-in light sensor for automatic brightness adjustment and offers 4 levels of manual brightness control.
- Automatic Brightness: The integrated light sensor automatically adjusts the display brightness based on ambient light conditions.
- Manual Brightness: Use the remote control to cycle through 4 brightness levels (L1-L4) or turn the screen completely off. This is useful for light-sensitive environments like bedrooms.

Figure 5: The clock offers automatic brightness adjustment and four manual brightness levels, including an option to turn the display off.
4.3 Alarm Clock Function
The clock includes an alarm function. You can set one alarm.
- Press the ALARM SET button on the remote.
- Use the HR and MIN buttons to set the desired alarm time.
- Press ALARM SET again to confirm.
- To activate or deactivate the alarm, press the ALARM button on the remote.
- When the alarm sounds, press the SNOOZE button for a temporary pause, or any other button to turn it off.
4.4 Count Up & Down Timer Function
The clock can also function as a count-up or count-down timer.
- Press the TIMER button on the remote to enter timer mode.
- For Count-Down: Use the HR, MIN, and SEC buttons to set the desired countdown duration. Press TIMER START/STOP to begin.
- For Count-Up: In timer mode, ensure the display shows 0:00:00. Press TIMER START/STOP to begin counting up.
- Press TIMER START/STOP again to pause/resume the timer.
- Press TIMER RESET to clear the timer.

Figure 6: The clock supports three modes: standard clock display, timer, and alarm clock.
4.5 Remote Control Usage
The wireless remote control allows for convenient adjustment of all clock settings from a distance of up to 32 feet. Ensure there are no obstructions between the remote and the clock's sensor.
The remote control buttons are clearly labeled for intuitive operation of time setting, alarm, timer, and brightness adjustments.
5. Maintenance
- Cleaning: Use a soft, dry cloth to clean the display and casing. Avoid abrasive cleaners or solvents that could damage the surface.
- Placement: Place the clock in a stable location, away from direct sunlight, extreme temperatures, and high humidity to ensure optimal performance and longevity.
- Power: Always use the provided power adapter. Do not attempt to power the clock with other adapters.
6. Troubleshooting
| Problem | Possible Cause | Solution |
|---|---|---|
| Clock display is off. | No power, or screen brightness set to OFF. | Check power connection. Use remote to increase brightness or turn screen ON. |
| Remote control not working. | Batteries in remote are dead or incorrectly inserted. Obstruction between remote and clock. | Replace remote batteries. Ensure clear line of sight to the clock. |
| Time/Date is incorrect after power outage. | Memory batteries (AAA) are dead or missing. | Replace the 2xAAA batteries in the clock's battery compartment. Reset time/date manually. |
| Temperature reading seems inaccurate. | Clock placed near a heat source or vent. | Relocate the clock to an area with stable ambient temperature. |
7. Specifications
- Brand: Xflyee
- Model Number: 080
- Display Type: Digital LED
- Display Size: 17 Inch (16.5"W x 5.7"H)
- Digit Height: 4.84 inches (Time), smaller for Date/Day/Temp
- Color: Green + White display
- Power Source: Corded Electric
- Memory Function: Requires 2 x AAA batteries (included)
- Special Features: Large Display, Remote Control, Timer, Alarm, Auto Dimmable, Calendar Display, Auto DST
- Mounting Type: Wall Mount or Desktop Stand
- Item Weight: 2.4 Pounds
- Product Dimensions: 17.32"W x 10.31"H
- Country of Origin: China
8. Product Video Overview
Watch this official video from Xflyee LLC for a comprehensive overview of the 17 Inch Large Digital Wall Clock with Remote Control.
Video 1: Official product overview of the Xflyee 17 Inch Large Digital Wall Clock with Remote Control, provided by Xflyee LLC.
9. Warranty and Support
For warranty information or technical support, please contact Xflyee customer service. Refer to the contact details provided with your product packaging or visit the official Xflyee store on Amazon:
Visit the Xflyee Store on Amazon
Xflyee is committed to providing quality products and customer satisfaction.
Ask a question about this manual
Ask about setup, troubleshooting, compatibility, parts, safety, or missing instructions. Manuals+ will review the question and use this page’s manual context to help answer it.