
1. Important Safety Instructions
Always read and understand all safety warnings and instructions before operating this tool. Failure to follow the warnings and instructions may result in electric shock, fire, and/or serious injury.
- Work Area Safety: Keep your work area clean and well-lit. Cluttered or dark areas invite accidents.
- Electrical Safety: Ensure the power button is turned off before plugging in the saw. Do not expose power tools to rain or wet conditions.
- Personal Safety: Always wear appropriate personal protective equipment, including eye protection (safety glasses or goggles), hearing protection, and a dust mask. Do not overreach. Maintain proper footing and balance at all times.
- Tool Use and Care: Do not force the tool. Use the correct tool for your application. Disconnect the plug from the power source before making any adjustments, changing accessories, or storing power tools.
- Material Safety: The transparent baffle helps prevent debris from splashing. Ensure it is properly in place during operation. The bottom corners are equipped with anti-slip and shock-absorbing rubber feet to prevent shifting; ensure the saw is on a stable surface.
2. Product Overview and Components
The Mulcort Mini Table Saw is a versatile tool designed for precision cutting, sanding, and engraving of small items. It is suitable for materials such as PCB boards, wooden sticks, plastic sheets, thin wooden boards, cans, copper-clad panels, aluminum tubes, and copper tubes.

Figure 2.1: Mulcort Mini Table Saw with various accessories including different saw blades, sanding pieces, and a flexible shaft.
Main Components:
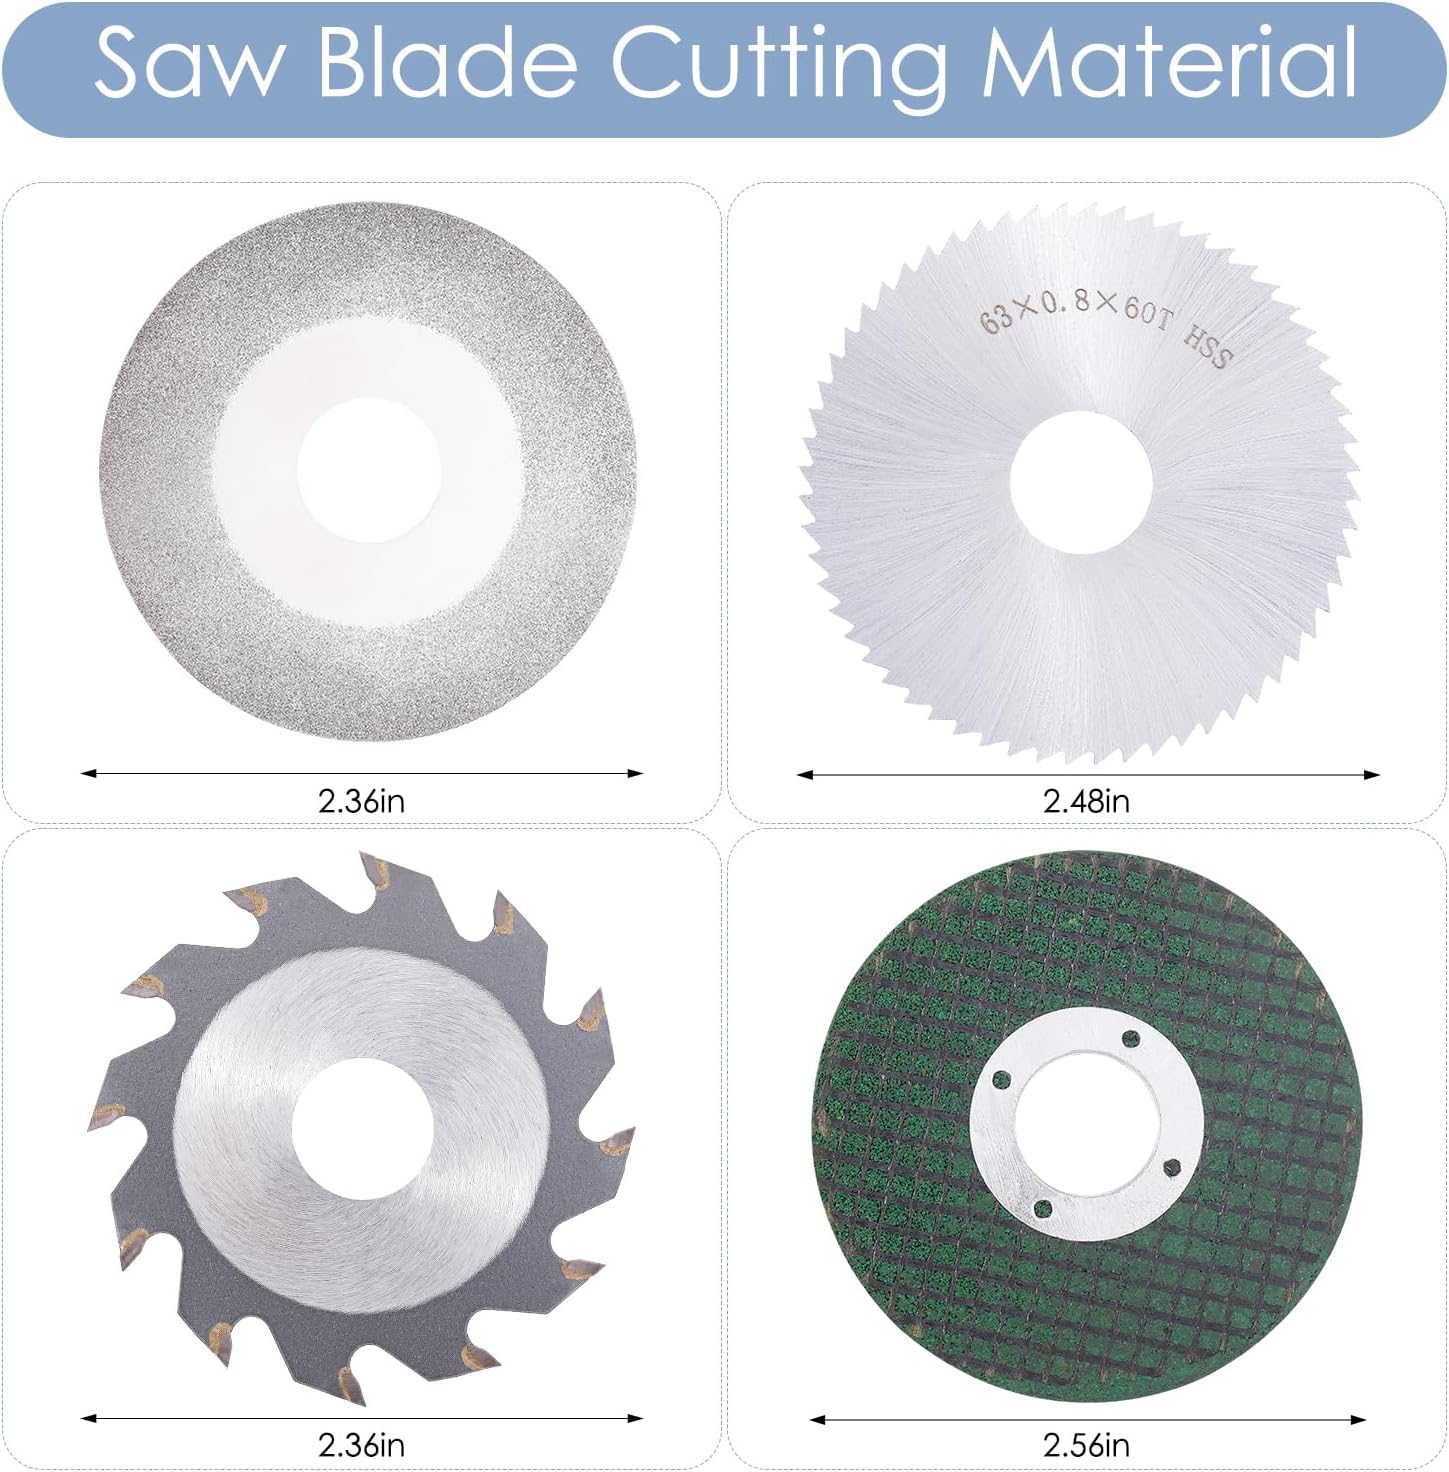
Figure 2.2: Detailed view of the table saw's structure with labeled parts.
- Safety Bezel: Transparent cover for protection.
- Miter Fence: Adjustable guide for precise cuts.
- Saw Blade (fixed): The primary cutting component.
- Switch: Power on/off control.
- Power Socket: For connecting the power adapter.
- Cold Rolled Steel Panel: Durable and sturdy work surface.
- Miter Gauge: For setting cutting angles.
- Heat Dissipation Hole: Ensures proper cooling of the motor.
- Dust Collection Port: For connecting a dust extraction system.
- Stainless Steel Feet: Provide stability and reduce vibration.
Included Accessories:
The package includes a comprehensive set of accessories to enhance the saw's functionality:
- 1 * Table Saw
- 1 * Power Adapter
- 1 * Screwdriver, 3 * Wrench
- 1 * Drill Chuck
- 1 * Felt Wheel, 1 * Sponge Wheel, 1 * Sticky Wheel
- 1 * Titanium-plated Emery Saw Blade, 1 * Resin Saw Blade, 1 * Steel Saw Blade, 1 * Alloy Saw Blade
- 10 * Sanding Piece
- 1 * Flexible Shaft
- 2 * Grinding Stone, 2 * Sanding Paper
- 4 * Felt Polishing Wheel, 8 * Sanding Slim Band, 8 * Sanding Band
- 2 * Cutting Disc
- 105 * Small Sanding Paper, 37 * Sanding Paper
- 2 * Sanding Drum, 1 * Wheel Mandrel, 1 * Felt Mandrel
- 5 * Stone Grinding Bit, 1 * Brush
- 1 * User Manual

Figure 2.3: Various saw blades included for different cutting needs. Blade size is 63mm diameter with a 16mm inner hole.
3. Setup
3.1 Initial Placement
Place the table saw on a stable, flat, and clean surface. Ensure the anti-slip rubber feet are firmly seated to prevent movement during operation.
3.2 Power Connection
Connect the power adapter to the power socket on the saw. Ensure the saw's power switch is in the 'OFF' position before plugging the adapter into a wall outlet.
3.3 Installing Saw Blades
Select the appropriate saw blade for your material. The saw blade lifting range is 0-0.63 inches (16 mm). Rotate clockwise to raise the saw blade, and counter-clockwise to lower it.

Figure 3.1: Saw blade height adjustment and safety bezel.
3.4 Installing the Miter Fence
Align the scales on both sides when installing the miter fence, then tighten the screws. The maximum cut width is 3.54 inches (9 cm).

Figure 3.2: Installation of the miter fence for accurate angle cutting.
4. Operation
4.1 Powering On/Off
To turn on the saw, press the power switch to the 'ON' position. To turn off, press the switch to the 'OFF' position. Always ensure the saw has come to a complete stop before leaving it unattended.
4.2 Adjusting Speed
The electric desktop saw features 7 adjustable speed settings, allowing for precise and efficient cutting. Adjust the speed according to the material being cut and the desired finish.
4.3 Adjusting Cutting Angle and Depth
The cutting angle can be adjusted from 0° to 90° using the miter gauge. The maximum sawing depth is 16 mm. Adjust both settings to suit your project requirements.
Figure 4.1: Angle adjustment dial and precise scale for accurate cuts.
4.4 Using the Flexible Shaft
The mini table saw includes a flexible shaft that can hold drilling heads with shank diameters of 0.5-3.2mm. This allows for additional functions such as sanding, engraving, and other fine manual work.

Figure 4.2: Flexible shaft attachment for grinding and engraving.

Figure 4.3: Precision drill chuck and compatible attachments for various applications.
5. Maintenance
Regular maintenance ensures the longevity and optimal performance of your Mulcort Mini Table Saw.
- Cleaning: After each use, disconnect the power and clean the saw. Remove sawdust and debris from the cutting area, transparent baffle, and dust collection port. Use a soft brush or compressed air.
- Blade Replacement: When a saw blade becomes dull or damaged, replace it with a new one of the correct size and type. Refer to Section 3.3 for blade installation.
- General Inspection: Periodically check all screws and fasteners to ensure they are tight. Inspect the power cord for any signs of damage.
- Storage: Store the saw and its accessories in a clean, dry place, away from direct sunlight and moisture.
6. Troubleshooting
If you encounter issues with your Mulcort Mini Table Saw, refer to the following common problems and solutions:
| Problem | Possible Cause | Solution |
|---|---|---|
| Saw does not power on | Power adapter not connected, power outlet issue, defective power supply. | Ensure power adapter is securely connected. Test the outlet with another device. If power supply is suspected defective, contact support. |
| Saw stalls or cuts poorly | Dull or incorrect saw blade for material, attempting to cut too thick material, motor overload. | Replace the saw blade. Ensure the correct blade type is used for the material. Do not exceed the 16mm cutting depth. Reduce feed rate. This tool is designed for small items. |
| Accessories (e.g., drill chuck) do not fit | Incorrect accessory size, improper installation. | Verify the accessory shank diameter (0.5-3.2mm for flexible shaft). Ensure proper installation as per instructions. |
| Excessive vibration | Unstable work surface, loose components, damaged blade. | Ensure the saw is on a stable, flat surface. Check and tighten all screws. Inspect the saw blade for damage and replace if necessary. |
If the problem persists after attempting these solutions, please contact Mulcort customer support.
7. Specifications
Detailed technical specifications for the Mulcort 100W Multi-Functional Table Saw:

Figure 7.1: Key product parameters and dimensions.
| Feature | Specification |
|---|---|
| Brand | Mulcort |
| Model Number | HS13003 |
| Power Source | Power Adapter |
| Wattage | 100 watts |
| Voltage | 240 Volts |
| Speed | Up to 6000 RPM (7 adjustable speeds) |
| Cutting Depth | 16 mm (0.63 inches) |
| Cutting Angle | 0 to 90 Degrees |
| Blade Material | Metal, Steel |
| Blade Length | 100 Millimeters |
| Product Dimensions (L x W x H) | 180mm x 160mm x 100mm (7.09"L x 6.3"W x 3.94"H) |
| Item Weight | 6.05 pounds |
| Country of Origin | China |
8. Warranty and Support
8.1 Warranty Information
This Mulcort product comes with a limited warranty. For specific details regarding the terms and conditions of the warranty, please refer to the warranty card included with your product or contact Mulcort customer support.
Note: Some product information indicates that the warranty may be applicable only to buyers in the People's Republic of China. Please verify your warranty coverage based on your region of purchase.
8.2 Customer Support
For any questions, technical assistance, or warranty claims, please contact Mulcort customer support. Refer to the contact information provided in your product packaging or on the official Mulcort website.