
1. Introduction
This manual provides essential information for the safe and effective use of your SHARP UA-KIN40E-W Air Purifier with Humidifier. Please read it thoroughly before operating the unit and retain it for future reference.
The SHARP UA-KIN40E-W is designed to improve indoor air quality by purifying the air and maintaining optimal humidity levels. It features a multi-stage filtration system and Plasmacluster Ion technology to address various airborne contaminants.

2. Safety Information
To ensure safe operation, always adhere to the following precautions:
- Do not block air inlets or outlets.
- Do not operate the unit with wet hands.
- Unplug the unit before cleaning or performing maintenance.
- Keep the unit away from water sources and direct sunlight.
- Ensure the power cord is not damaged or placed under heavy objects.
- This appliance is not intended for use by persons (including children) with reduced physical, sensory or mental capabilities, or lack of experience and knowledge, unless they have been given supervision or instruction concerning use of the appliance by a person responsible for their safety.
3. Package Contents
Verify that all items are present in the package:
- SHARP UA-KIN40E-W Air Purifier with Humidifier Unit
- Instruction Manual (this document)
- Warranty Card
- Pre-filter (installed)
- Anti-odor filter (installed)
- HEPA filter (installed)
4. Product Features
The SHARP UA-KIN40E-W incorporates advanced technologies for superior air purification and humidification:
- Plasmacluster Ion Technology: Generates positive and negative ions to neutralize airborne pollutants such as bacteria, viruses, allergens, and mold spores. It also helps reduce unpleasant odors and static electricity, and can improve skin moisture.
- 3-Level Filtration System:
- Pre-filter: Captures large dust particles, pet dander, and other airborne debris.
- Anti-odor filter: Absorbs various household odors, including pet odors, cooking smells, and cigarette smoke.
- HEPA filter: Traps 99.97% of microscopic particles as small as 0.3 microns, including pollen, dust mites, and fine particulate matter.
- Humidification Function: Adds moisture to the air, preventing dryness and creating a more comfortable environment.
- Multiple Operating Settings: Offers 5 fan speed settings (Max, Medium, Low, Pollen, Sleep) and an Auto mode for intelligent operation.
- Intelligent Sensors: Equipped with dust, odor, humidity, temperature, and light sensors to automatically adjust operation based on environmental conditions.
- Additional Functions: Includes a timer, child lock, Plasmacluster Ion spot mode for high efficiency, and an ion shower for extra high ion density.

5. Setup
5.1 Placement
Place the unit on a flat, stable surface. Ensure there is adequate space around the unit for proper airflow. The unit is suitable for rooms up to 28 m².
- Maintain at least 20 cm clearance from walls or furniture on all sides.
- Avoid placing near heat sources, direct sunlight, or areas with high humidity.
- The unit features swivel casters with brakes for easy mobility and secure positioning.
5.2 Filter Installation
The filters are typically pre-installed. Before first use, ensure all packaging materials are removed from the filters.
- Open the rear panel of the unit.
- Remove the pre-filter, anti-odor filter, and HEPA filter.
- Remove any plastic bags or protective films from the filters.
- Reinstall the filters in the correct order: HEPA filter first, then the anti-odor filter, and finally the pre-filter. Ensure they are securely seated.
- Close the rear panel.

5.3 Water Tank Filling
For humidification, fill the water tank:
- Gently pull out the water tank located on the side of the unit.
- Unscrew the tank cap and fill the tank with clean tap water. The tank capacity is 2.7 liters.
- Securely screw the cap back on.
- Slide the water tank back into the unit until it clicks into place.

6. Operating Instructions
6.1 Control Panel Overview
The control panel is located on the top of the unit and features various buttons and indicators.

6.2 Power On/Off
Press the Power button to turn the unit on or off.
6.3 Mode Selection
Press the Mode button to cycle through the available operating modes:
- Auto: The unit automatically adjusts fan speed and humidification based on sensor readings.
- Max: Highest fan speed for rapid purification.
- Medium: Moderate fan speed.
- Low: Quiet operation for continuous use.
- Pollen: Optimized for pollen removal.
- Sleep: Ultra-quiet operation with dimmed indicators for undisturbed rest.
6.4 Humidification Function
Press the Humidification button to activate or deactivate the humidification function. The unit will automatically maintain a comfortable humidity level in Auto mode, or you can manually control it in other modes.
6.5 Timer Function
Press the Timer button to set an operating duration (e.g., 2, 4, 8 hours). The unit will turn off automatically after the set time.
6.6 Child Lock
To prevent accidental changes to settings, press and hold the Child Lock button (often combined with another function, refer to specific icon on panel) for 3 seconds to activate or deactivate the child lock.
7. Maintenance
Regular maintenance ensures optimal performance and extends the lifespan of your air purifier.
7.1 Filter Cleaning and Replacement
- Pre-filter: Clean the pre-filter regularly (e.g., every 2-4 weeks) by vacuuming or washing with water. Ensure it is completely dry before reinstallation.
- Anti-odor filter & HEPA filter: These filters are not washable. Replace them approximately every 2-5 years, depending on usage and air quality. The unit may have an indicator light for filter replacement.

7.2 Water Tank and Humidifying Filter Cleaning
- Water Tank: Clean the water tank weekly to prevent mold and bacteria growth. Use a mild detergent and rinse thoroughly.
- Humidifying Filter: Clean the humidifying filter (located within the water tank assembly) regularly as per the manual's specific instructions, typically by soaking in a descaling solution if mineral deposits accumulate.
7.3 Exterior Cleaning
Wipe the exterior of the unit with a soft, damp cloth. Do not use abrasive cleaners or solvents.
8. Troubleshooting
If you encounter issues with your unit, refer to the table below for common problems and solutions.
| Problem | Possible Cause | Solution |
|---|---|---|
| Unit does not turn on | Power cord not plugged in; Power outage; Child lock activated | Check power connection; Restore power; Deactivate child lock |
| No air coming out / Weak airflow | Filters are clogged; Air inlets/outlets blocked | Clean or replace filters; Remove obstructions |
| No humidification | Water tank is empty; Humidification function is off; Humidifying filter is dirty | Fill water tank; Activate humidification; Clean humidifying filter |
| Unusual noise | Unit not on a flat surface; Foreign object inside; Filters not properly installed | Place on flat surface; Check for and remove foreign objects; Reinstall filters correctly |
| Odor persists | Anti-odor filter needs replacement; Water tank needs cleaning | Replace anti-odor filter; Clean water tank and humidifying filter |
If the problem persists after attempting these solutions, please contact customer support.
9. Specifications
Technical specifications for the SHARP UA-KIN40E-W Air Purifier with Humidifier:
| Feature | Specification |
|---|---|
| Brand | Sharp |
| Model Number | UA-KIN40E-W |
| Color | Light Grey |
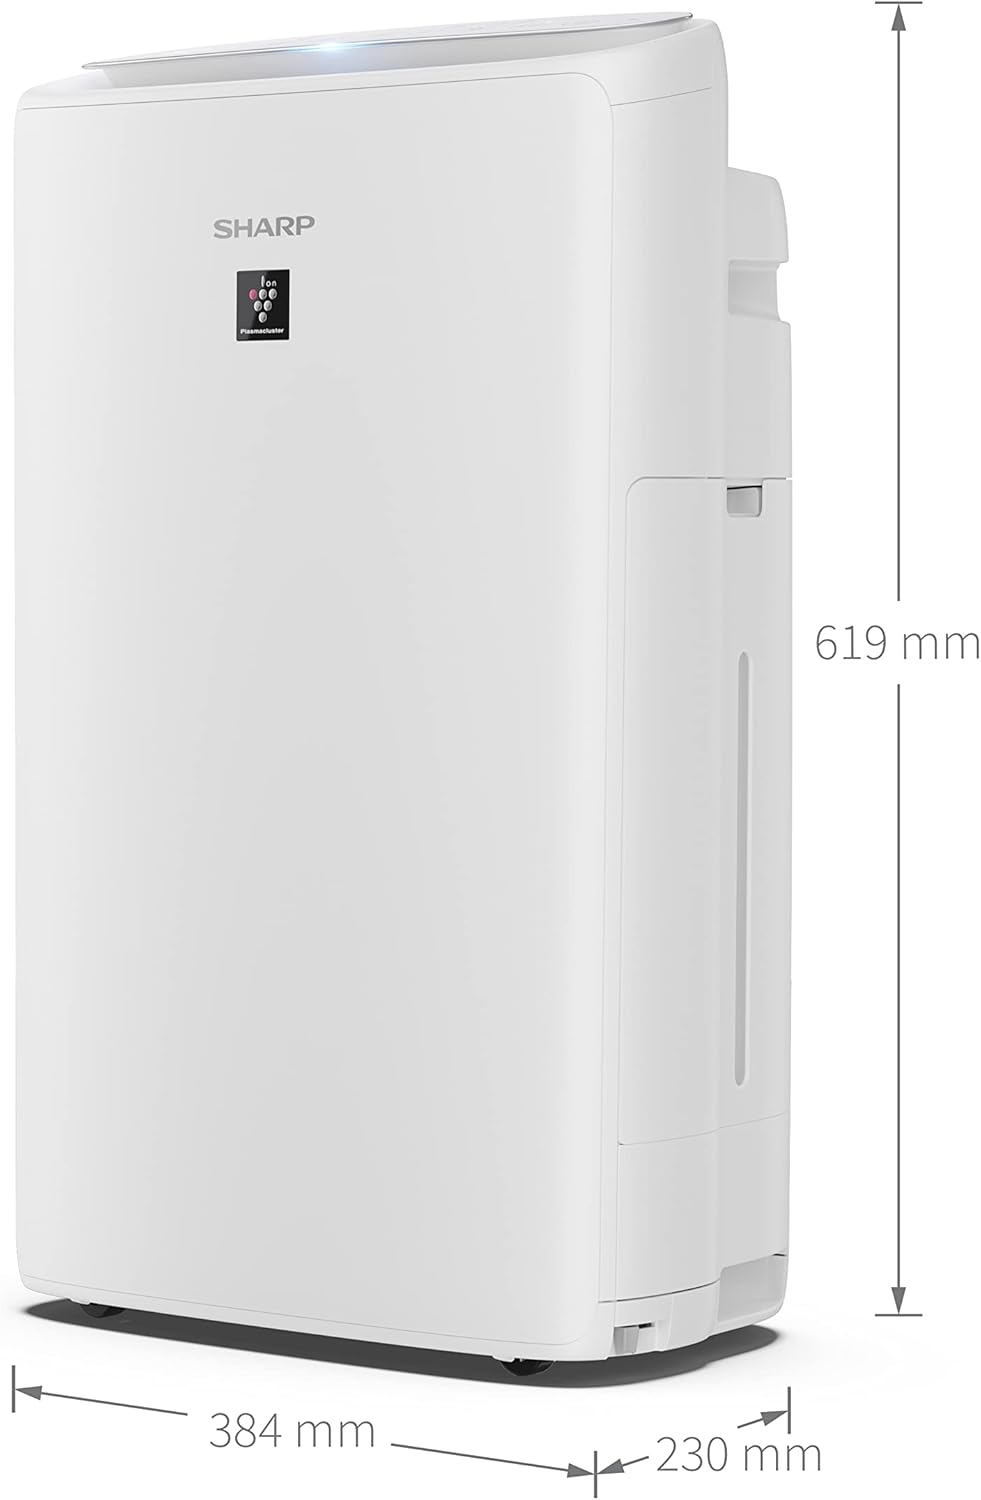
| Dimensions (L x W x H) | 23 x 38.4 x 61.9 cm |
| Weight | 8.2 Kilograms |
| Capacity (Water Tank) | 2.7 Liters |
| Voltage | 230 Volts |
| Material | Plastic |
| Noise Level | 46 Decibels (Max) |
| Filter Type | HEPA |
| Floor Area Coverage | Up to 28 square meters |
| Humidification Capacity | 440 ml/h |
| Airflow Rate | 60-240 m²/h |
| Control Method | Push Button |
| Special Feature | Dehumidifier (Note: Product description indicates humidification, not dehumidification. This specification might be a mislabeling in source data or refer to a related feature.) |
10. Warranty and Support
Your SHARP UA-KIN40E-W Air Purifier with Humidifier comes with a manufacturer's warranty. Please refer to the included warranty card for details regarding coverage, terms, and conditions.
For technical assistance, troubleshooting beyond this manual, or to inquire about replacement parts, please contact SHARP customer support. Contact information can typically be found on the warranty card or the official SHARP website.


