
1. Introduction
This manual provides essential information for the safe and efficient operation, maintenance, and troubleshooting of your YATO Welding Machine YT-08625. Please read this manual thoroughly before using the device to ensure proper function and to prevent injury or damage.
2. Safety Instructions
WARNING: Electric shock can kill. Arc rays can burn eyes and skin. Electric welding can be hazardous. Read and understand all safety precautions before operation.
- Always wear appropriate personal protective equipment (PPE), including welding helmet with proper shade, safety glasses, flame-resistant clothing, and welding gloves.
- Ensure the welding area is well-ventilated to avoid inhaling fumes.
- Keep children and unauthorized personnel away from the welding area.
- Ensure the welding machine is properly grounded.
- Do not operate the machine in damp or wet conditions.
- Disconnect power before performing any maintenance or adjustments.
- Avoid touching live electrical parts or electrodes with bare skin or wet gloves.
3. Product Overview and Components
The YATO Welding Machine YT-08625 is designed for various welding tasks. Key components include the power unit, electrode holder, and ground clamp. Below is an illustration of a typical magnetic ground clamp, often used with welding machines for secure electrical connection to the workpiece.
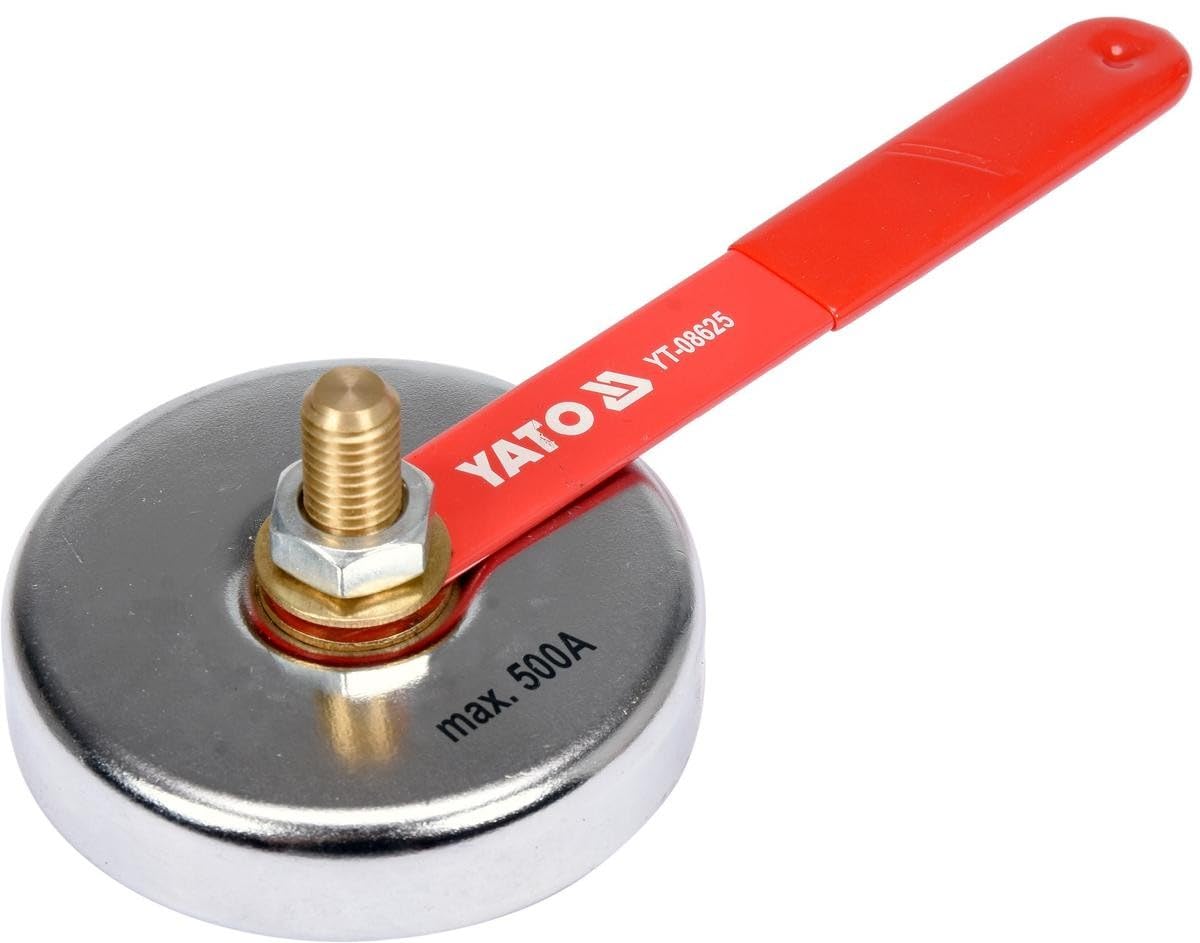
Figure 1: Magnetic Welding Ground Clamp. This image shows a magnetic ground clamp, a common accessory for welding machines. It features a circular magnetic base for attaching to ferrous workpieces and a brass contact point with a spring mechanism for electrical connection. A red handle is visible on the side for easy positioning and removal.
4. Setup Instructions
- Unpacking: Carefully remove the welding machine and all accessories from the packaging. Inspect for any shipping damage.
- Placement: Position the welding machine on a stable, level surface in a dry, well-ventilated area, away from flammable materials.
- Power Connection: Connect the machine to a suitable power supply as indicated on the machine's rating plate. Ensure the power outlet is properly grounded. (Power Source: Electric without cable, implies it needs to be connected to a power source, not battery operated).
- Ground Clamp Connection: Attach the ground clamp cable securely to the designated ground terminal on the welding machine. Connect the ground clamp to the workpiece, ensuring good electrical contact.
- Electrode Holder Connection: Connect the electrode holder cable securely to the designated output terminal on the welding machine. Insert the appropriate electrode into the holder.
5. Operating Instructions
- Preparation: Ensure all safety precautions are followed. Prepare the workpiece by cleaning off any rust, paint, or grease.
- Power On: Turn on the welding machine using the power switch.
- Current Adjustment: Set the welding current (amperage) according to the electrode type, diameter, and material thickness. Refer to electrode manufacturer guidelines.
- Striking an Arc: With the welding helmet down, gently scratch or tap the electrode against the workpiece to strike an arc. Maintain a consistent arc length.
- Welding: Move the electrode steadily along the joint, maintaining the correct travel speed and angle to create a uniform weld bead.
- Cool Down: Allow the workpiece to cool naturally after welding. Do not quench with water.
- Power Off: Once welding is complete, turn off the machine and disconnect from the power supply.
6. Maintenance
Regular maintenance ensures the longevity and safe operation of your welding machine.
- Cleaning: Periodically clean the machine's exterior with a dry cloth. Use compressed air to blow out dust from inside the machine, ensuring power is disconnected first.
- Cable Inspection: Regularly inspect welding cables, electrode holder, and ground clamp for damage, cuts, or loose connections. Replace damaged components immediately.
- Ventilation: Ensure ventilation openings are clear and unobstructed to prevent overheating.
- Storage: Store the welding machine in a dry, clean environment when not in use.
7. Troubleshooting
| Problem | Possible Cause | Solution |
|---|---|---|
| No power to machine | Power cord unplugged, circuit breaker tripped, faulty power switch. | Check power connection, reset circuit breaker, contact service if switch is faulty. |
| No arc or weak arc | Poor ground connection, incorrect current setting, damp electrode, faulty cable. | Ensure good ground contact, adjust current, use dry electrodes, check cables for damage. |
| Machine overheats | Blocked ventilation, exceeding duty cycle, high ambient temperature. | Clear vents, allow machine to cool, operate within duty cycle limits. |
8. Specifications
| Feature | Detail |
|---|---|
| Manufacturer | YATO |
| Part Number | YT-08625 |
| Product Dimensions | 25 x 10 x 2 cm |
| Item Model Number | YT-08625 |
| Color | Red |
| Power Source | Electric without cable |
| Item Package Quantity | 1 |
| Included Components | 1 (This usually implies the main unit, specific accessories are not detailed) |
| Item Weight | 616 g |
9. Warranty Information
YATO products are manufactured to high-quality standards. For specific warranty terms and conditions, please refer to the warranty card included with your product or visit the official YATO website. Keep your proof of purchase for any warranty claims.
10. Customer Support
Should you encounter any issues or have questions regarding your YATO Welding Machine YT-08625 that are not covered in this manual, please contact YATO customer support or your authorized dealer for assistance. Contact information can typically be found on the product packaging or the official YATO website.