
1. Introduction
This manual provides detailed instructions for the installation, operation, and maintenance of the Tupavco TP1721 Rack Mount Fan. This 1U, 19-inch rack-mountable cooling system is designed to manage heat within server, network, music, and AV cabinets, ensuring optimal operating temperatures for sensitive equipment. It features two 120mm fans, a digital temperature monitor, and adjustable temperature control.
2. Safety Information
- Read all instructions before installation and operation.
- Ensure the power supply matches the voltage requirements specified for the device.
- Do not operate the device with damaged cords or plugs.
- Avoid blocking the fan intake or exhaust vents to ensure proper airflow.
- Keep the device away from water or excessive moisture.
- Only qualified personnel should perform installation and maintenance.
3. Package Contents
Verify that all items are present in the package:
- Tupavco TP1721 Rack Mount Fan Unit
- Temperature Sensor Probe
- Power Cable
- Mounting Hardware (screws, cage nuts)
- Instruction Manual (this document)
4. Product Features
- Adjustable Temperature Control: Allows setting specific temperature thresholds for fan activation.
- Quiet and Powerful Fans: Equipped with two 120mm ball bearing fans, providing 150 CFM airflow with noise control.
- Optimal Airflow: Designed for top exhaust, effectively removing hot air from the cabinet.
- Compact 1U Design: Standardized for 19-inch server racks, occupying only one unit of space.
- Programmable Thermostat Sensor: Digital display for real-time temperature monitoring and configuration.
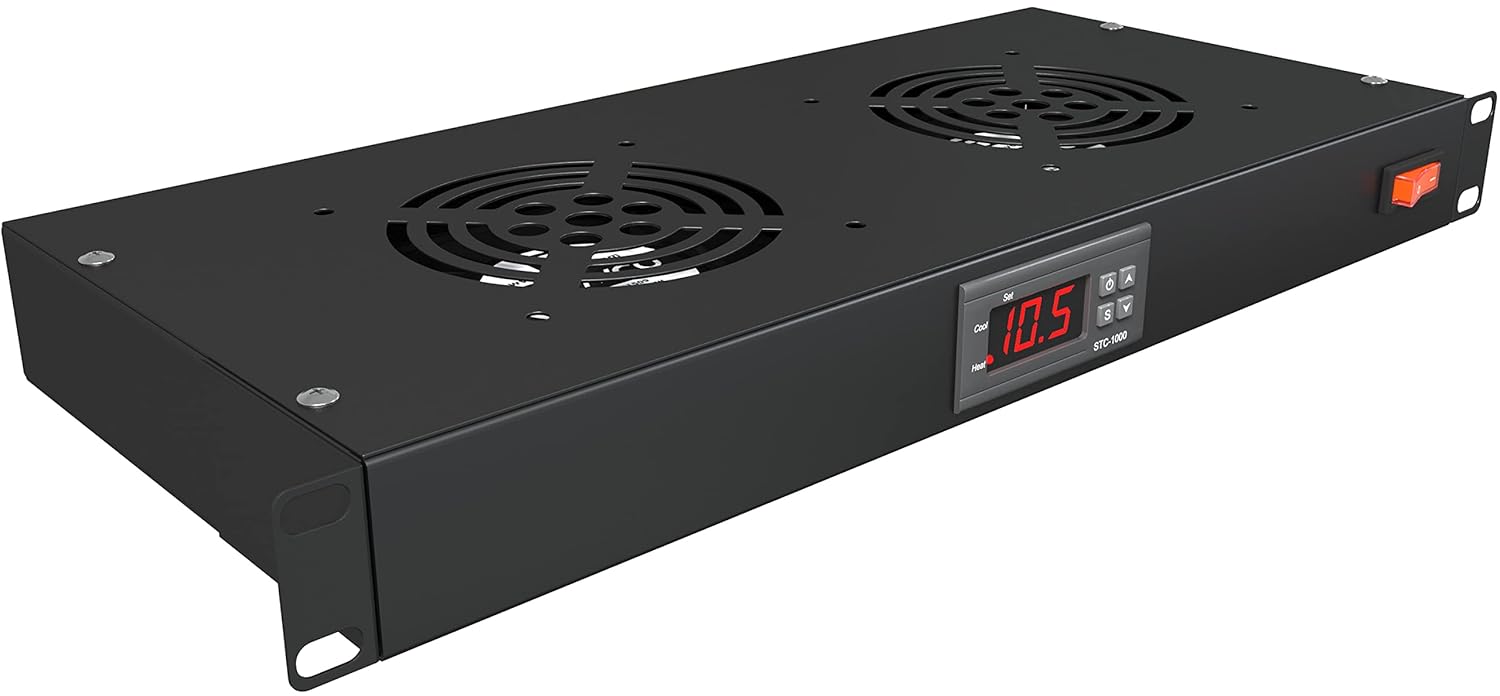
Figure 4.1: Front-top view of the Tupavco TP1721 Rack Mount Fan, showing the dual fans and digital display panel.
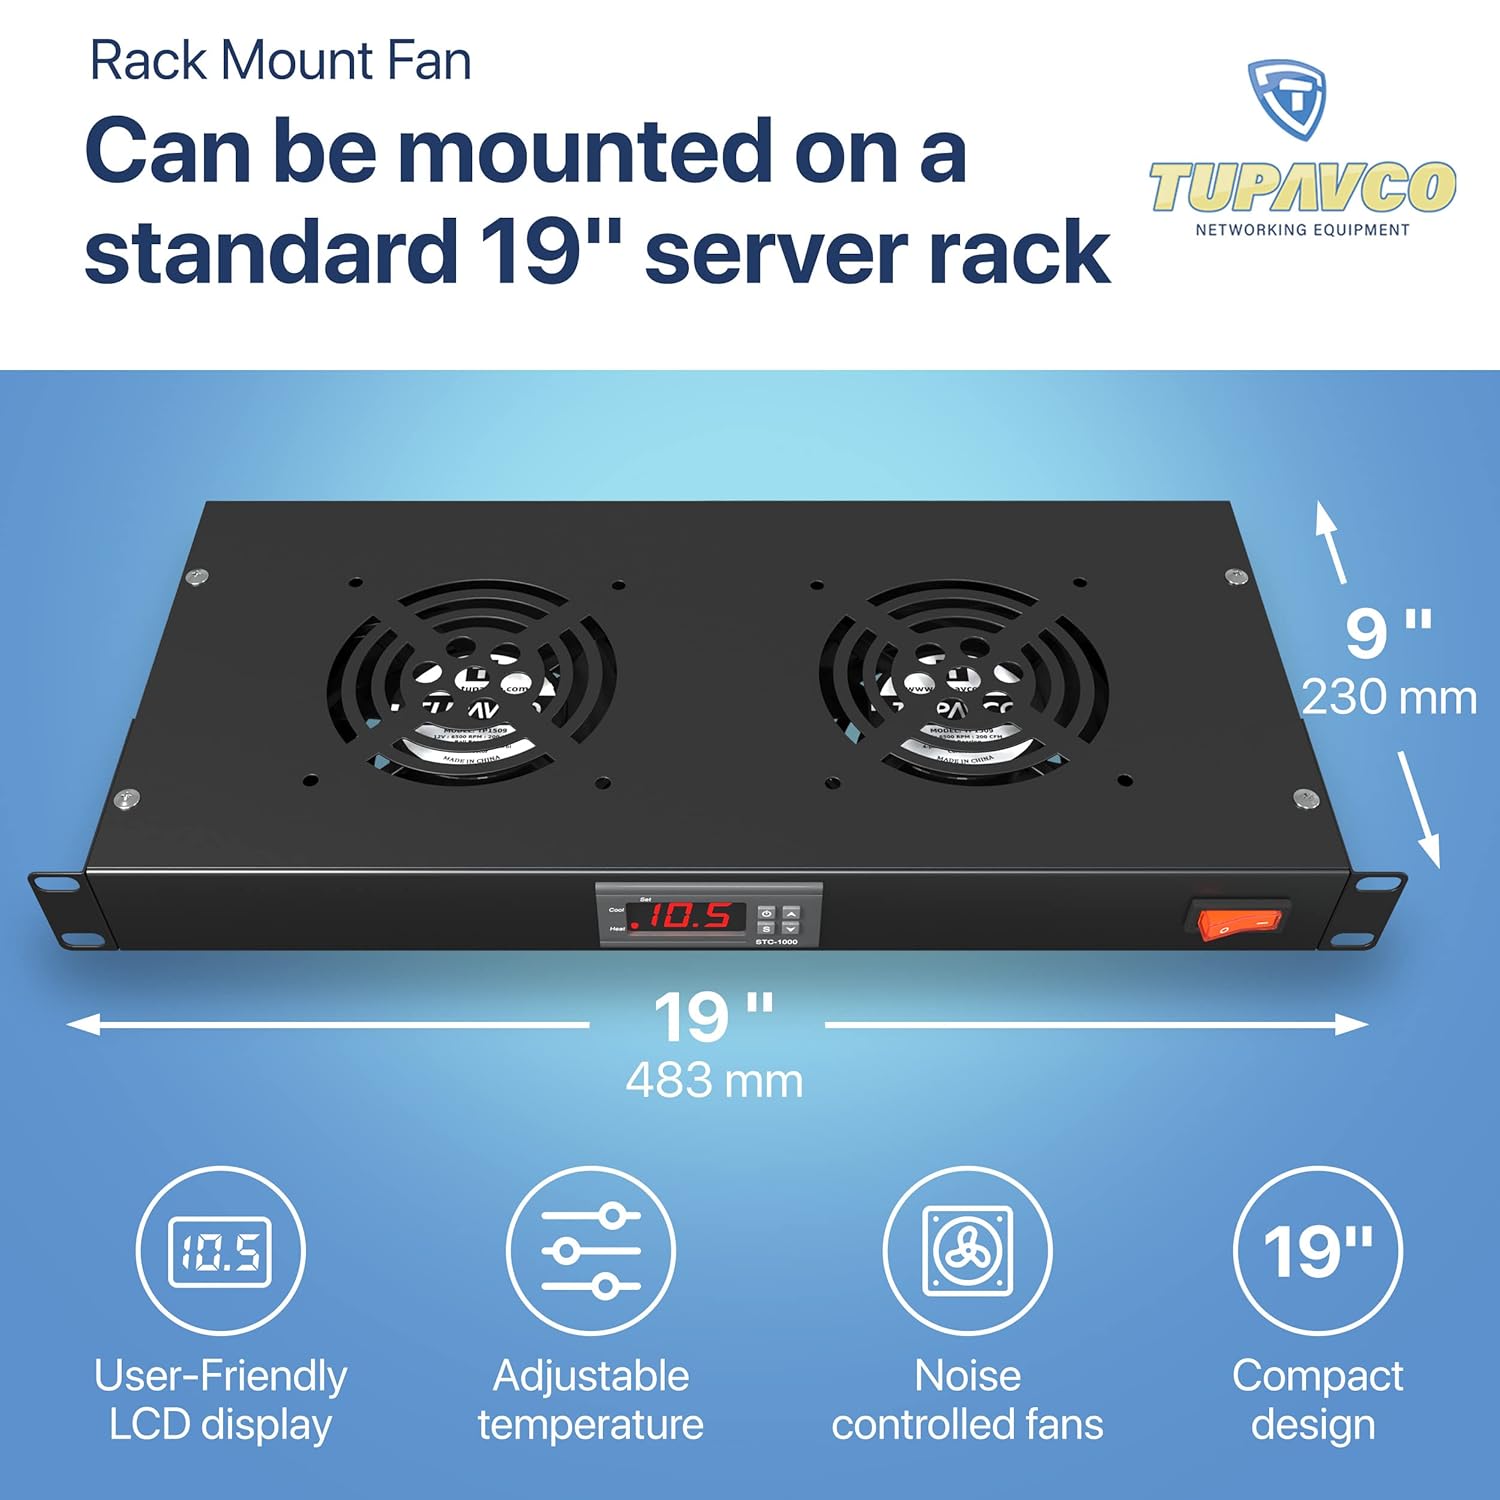
Figure 4.2: The TP1721 fan unit illustrating its 19-inch width and 1U height, along with icons representing its user-friendly LCD, adjustable temperature, noise-controlled fans, and compact design.
5. Setup and Installation
5.1 Mounting the Unit
- Identify an available 1U space in your standard 19-inch server rack or cabinet.
- Align the mounting ears of the TP1721 unit with the rack posts.
- Secure the unit using the provided mounting hardware (screws and cage nuts). Ensure it is firmly attached.
- Ensure there is adequate clearance above and below the unit for optimal airflow.
5.2 Connecting the Temperature Sensor
The temperature sensor probe is connected via a cable extending from the unit. Position the sensor in the area where temperature monitoring is most critical, typically near the hottest equipment or exhaust path within the cabinet.
5.3 Power Connection
Connect the provided power cable to the power inlet on the unit and then to a suitable AC power outlet. The unit operates on 12 Volts AC power.

Figure 5.1: Rear view of the TP1721 unit, showing the power input and the temperature sensor cable connection.

Figure 5.2: Illustration of the TP1721 unit installed in a server rack, demonstrating the upward airflow for heat exhaust.
6. Operating Instructions
6.1 Powering On/Off
Use the orange rocker switch located on the right side of the front panel to power the unit on or off.
6.2 Digital Display and Basic Operation
Upon powering on, the digital display will show the current temperature detected by the sensor probe. The unit features a user-friendly LCD display for monitoring and setting parameters.

Figure 6.1: The digital display showing the current temperature detected by the probe.
6.3 Setting Temperature Parameters
The unit allows for programmable temperature control. Follow these steps to adjust settings:
- Enter Settings: Press and hold the 'S' button for 3 seconds to enter the parameter setting mode. The display will show 'F1'.
- Select Parameter: Use the 'Up' or 'Down' arrows to navigate through the parameters (F1, F2, F3, F4).
- View Parameter Value: Press 'S' to display the current value of the selected parameter.
- Adjust Value: While viewing a parameter's value, use the 'Up' or 'Down' arrows to adjust it.
- Save Setting: Press the power ON/OFF button to save the new value and exit the setting mode for that parameter.

Figure 6.2: Step-by-step guide for adjusting the temperature control parameters on the digital display.
Parameter Definitions:
- F1 (Temperature Value): Sets the target temperature at which the fans will activate. Default: 97.0°F.
- F2 (Difference Set Value): Sets the temperature difference between the target temperature and the actual temperature before the fans turn off. Default: 3.0°F.
- F3 (Compressor Delay Time): Sets a delay before the fans start after the temperature threshold is met. Default: 2 minutes.
- F4 (Temperature Calibration Value): Allows for fine-tuning the temperature sensor reading if calibration is needed. Default: 0.0°F.

Figure 6.3: Setting the desired fan activation temperature (F1) on the digital display.

Figure 6.4: Visual representation of the adjustable temperature control system within a server rack, showing hot air being exhausted.
7. Maintenance
Regular maintenance ensures the longevity and efficient operation of your Tupavco TP1721 Rack Mount Fan.
- Cleaning: Periodically clean the fan grilles and blades to prevent dust buildup, which can impede airflow and reduce cooling efficiency. Use a soft, dry cloth or compressed air.
- Inspection: Regularly inspect the power cable and sensor cable for any signs of damage.
- Environmental Conditions: Ensure the operating environment is free from excessive dust, humidity, and extreme temperatures outside the specified range.
8. Troubleshooting
| Problem | Possible Cause | Solution |
|---|---|---|
| Fans not turning on | No power; Temperature below set point; F3 delay active | Check power connection and switch; Verify F1 setting; Wait for F3 delay to expire. |
| Inaccurate temperature reading | Sensor probe misplaced or damaged; F4 calibration needed | Reposition sensor; Check sensor cable for damage; Adjust F4 parameter for calibration. |
| Fans are excessively noisy | Dust buildup on fan blades; Loose mounting | Clean fan blades; Ensure unit is securely mounted in the rack. |
| Poor cooling performance | Blocked airflow; Incorrect temperature settings | Ensure vents are clear; Adjust F1 and F2 parameters for optimal cooling. |
9. Specifications
| Feature | Specification |
|---|---|
| Model Number | TP1721 |
| Product Dimensions | 19"L x 19"W x 1.75"H (1U) |
| Weight | 5.19 Pounds |
| Fan Size | 2 x 120mm |
| Air Flow Capacity | 150 Cubic Feet Per Minute (CFM) |
| Maximum Rotational Speed | 1800 RPM |
| Voltage | 12 Volts |
| Power Connector Type | AC Power Cable with Plug |
| Cooling Method | Air |
| Compatible Devices | Server, Network, AV Cabinets |
| Material | Aluminum |
| UPC | 709401088166 |
10. Warranty and Support
Tupavco products are designed for reliability and performance. This product is covered by a manufacturer's warranty. For specific warranty terms, technical support, or service inquiries, please refer to the official Tupavco website or contact their customer support directly. Keep your purchase receipt for warranty claims.