1. Introduction
Thank you for choosing the Hisense HV693C60AD Fully Integrated Dishwasher. This manual provides essential information for the safe and efficient operation, installation, and maintenance of your appliance. Please read these instructions carefully before use and keep them for future reference.
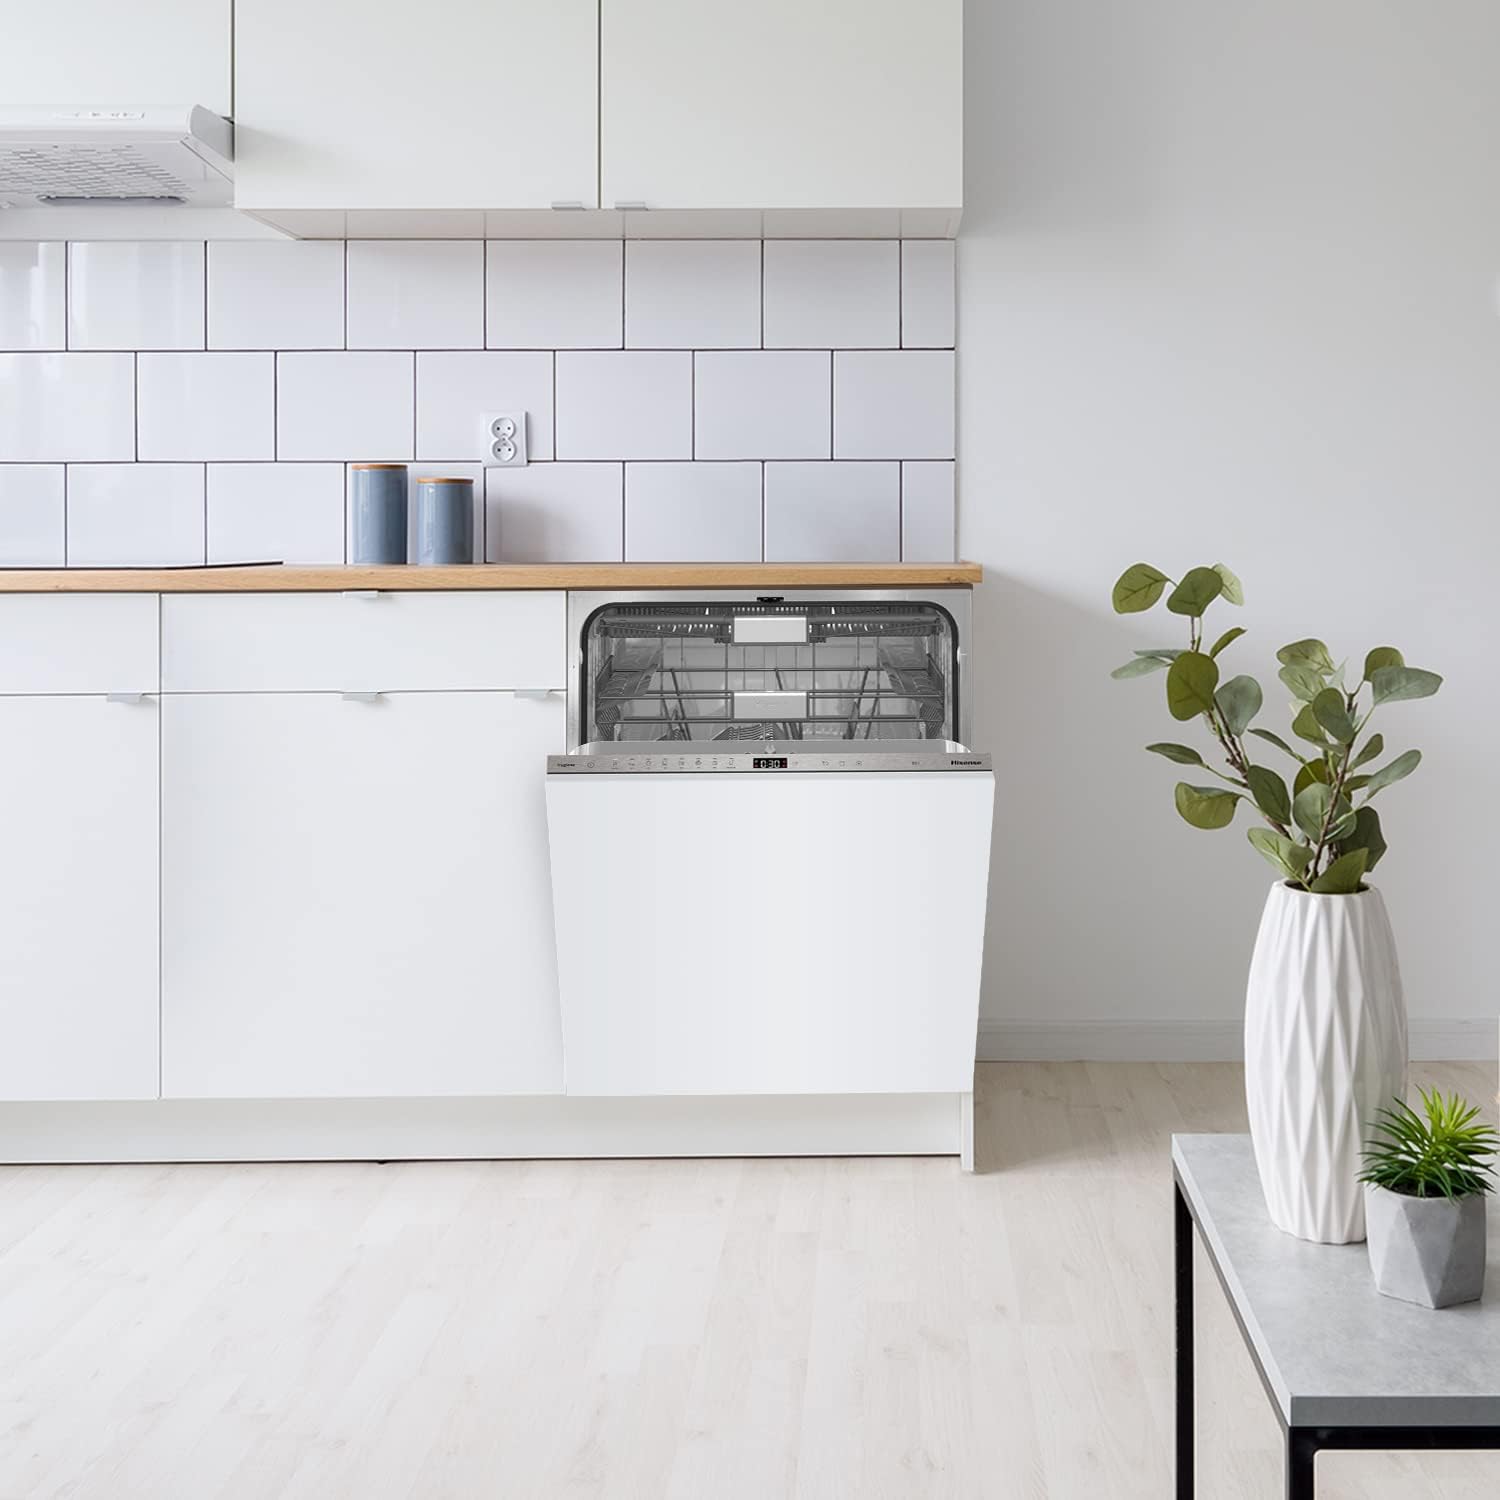
The Hisense HV693C60AD dishwasher seamlessly integrated into a kitchen cabinet, with its door slightly ajar, revealing the interior racks.
2. Safety Information
Always follow basic safety precautions when using electrical appliances to reduce the risk of fire, electric shock, or injury. This appliance is intended for household use only.
- Electrical Safety: Ensure the dishwasher is properly grounded. Do not use extension cords or adapters. Disconnect power before servicing.
- Water Safety: The Total Aqua Stop feature provides protection against water leaks. However, always check hoses for damage and ensure connections are secure.
- Child Safety: Keep children away from the dishwasher, especially when it is operating or when the door is open. Detergents are corrosive.
- Loading Safety: Load sharp items (knives, forks) with handles up to prevent injury. Do not overload the dishwasher.
- Installation: Installation must be performed by a qualified technician in accordance with local codes and regulations.

The Total Aqua Stop system provides enhanced protection against water leaks, ensuring safety and preventing potential damage.
3. Setup and Installation
Your Hisense HV693C60AD is a fully integrated dishwasher designed for seamless installation into your kitchen cabinetry. A mounting and installation kit is included.
3.1 Dimensions and Placement
Ensure the installation space meets the required dimensions for a proper fit. The dishwasher dimensions are approximately 55.5 cm (depth) x 60 cm (width) x 81.6 cm (height).
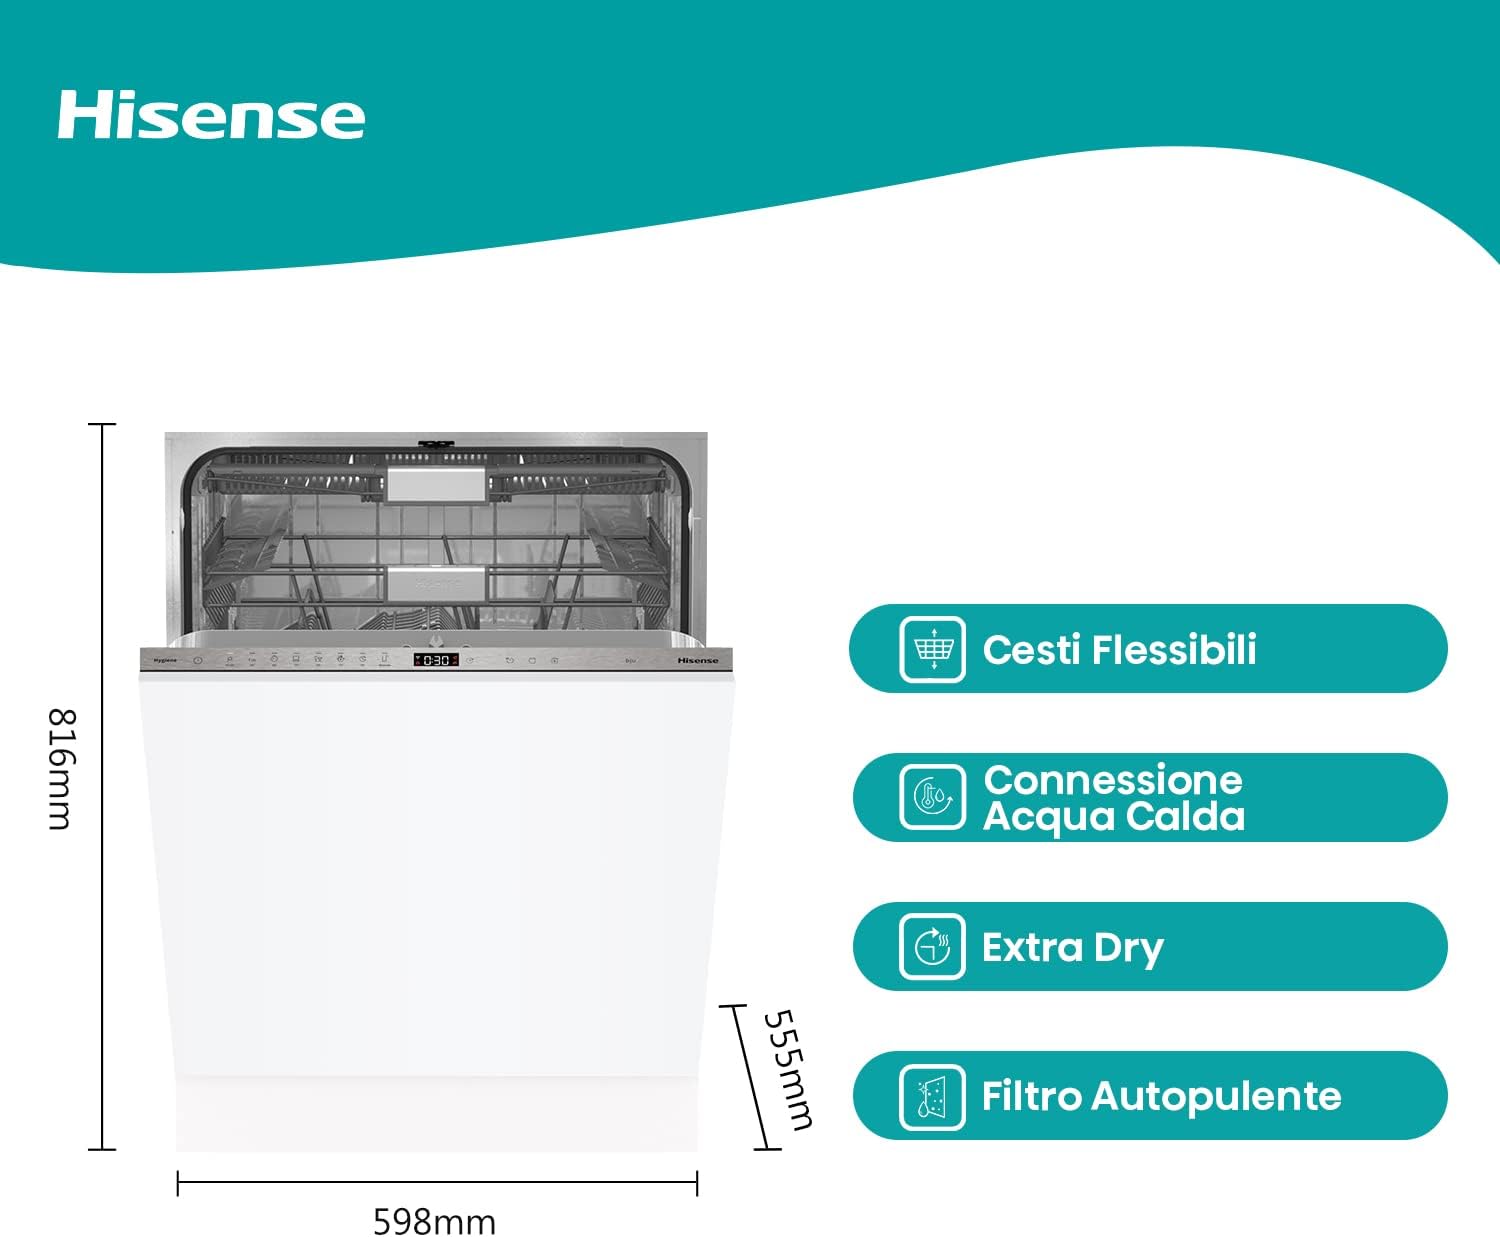
Detailed dimensions of the Hisense HV693C60AD dishwasher for installation planning.
3.2 Water Connection
This dishwasher supports a hot water connection, which can help save energy by utilizing pre-heated water. Connect the water inlet hose securely to a hot water supply.

The hot water connection point, designed to use pre-heated water for energy efficiency.
3.3 Electrical Connection
Connect the dishwasher to a dedicated 220V power outlet. Ensure the electrical supply is stable and meets the appliance's requirements.
3.4 Panel Installation
The dishwasher is designed to have a custom kitchen panel installed on its front door for a fully integrated look. Refer to the included mounting kit instructions for detailed steps on attaching the panel.
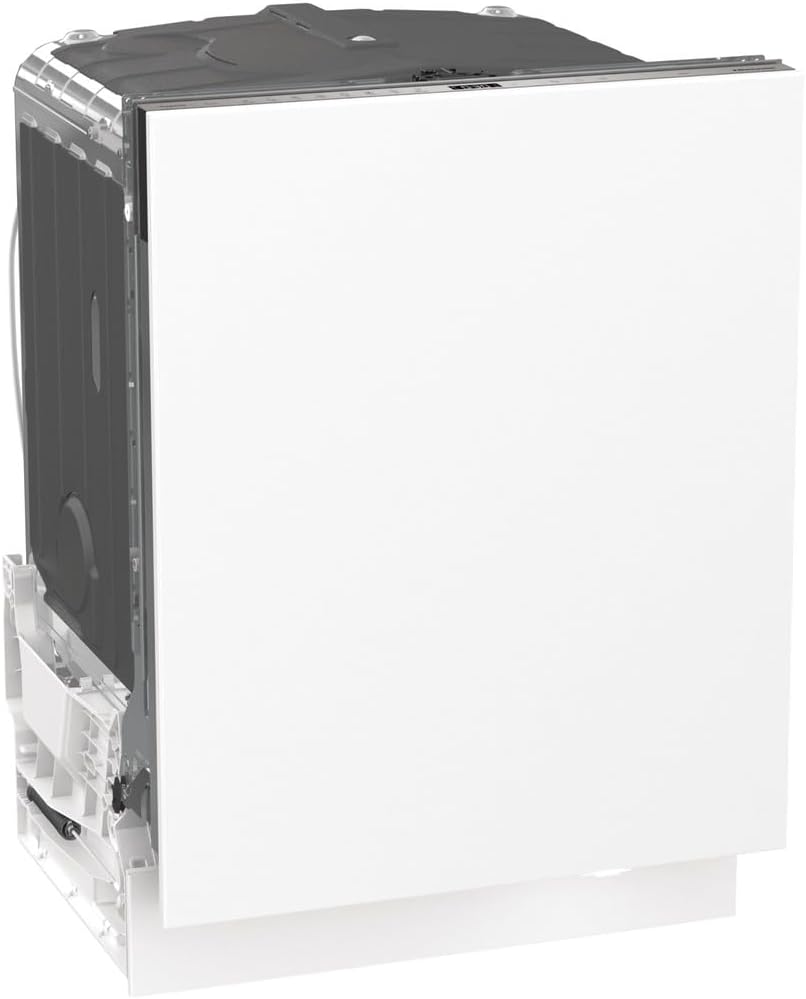
Side view of the dishwasher, illustrating its design for full integration with a custom kitchen panel.
4. Operating Instructions
Your Hisense HV693C60AD dishwasher offers advanced features for efficient and convenient dishwashing.
4.1 Loading the Dishwasher
This dishwasher accommodates up to 16 place settings and features flexible baskets and a third basket for cutlery. Arrange dishes to allow water spray to reach all surfaces.

The flexible baskets allow for versatile loading of various dish sizes and shapes.

The dedicated third basket provides ample space for all your cutlery, ensuring thorough cleaning.
4.2 Detergent Dispensing (Auto Dose)
The Smart Dosing feature automatically dispenses the correct amount of liquid detergent based on the selected program. The detergent reservoir has a 0.5-liter capacity, providing up to 20 wash cycles. A notification will appear on the control panel when the detergent level is low.
4.3 Program Selection
Choose from 7 wash programs and 7 temperature settings to suit your dishwashing needs. The intuitive control panel makes selection easy.
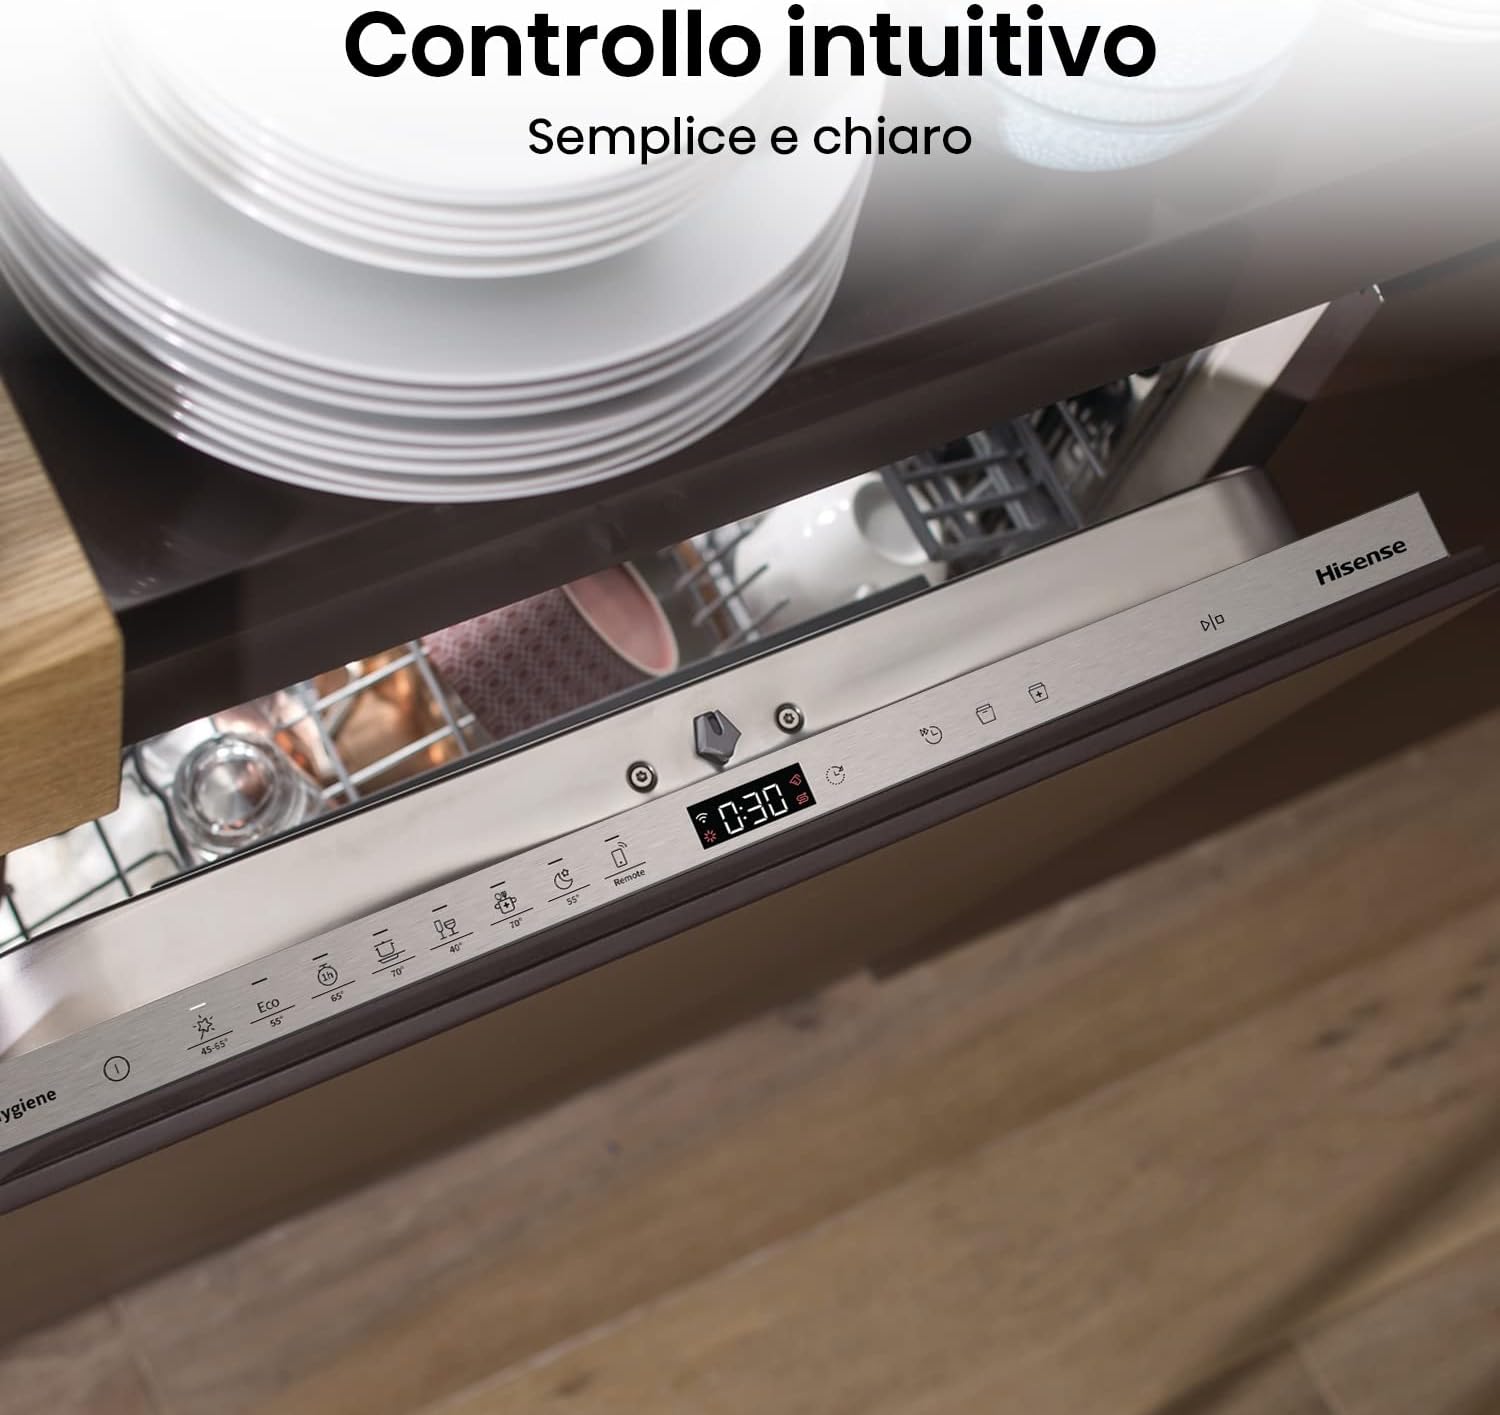
The intuitive control panel provides clear program selection and cycle information.
4.4 Delayed Start
Utilize the delayed start function to program the dishwasher to begin a cycle at a later time, up to 24 hours. This allows you to take advantage of off-peak electricity rates or have dishes ready when you need them.

The delayed start feature allows you to schedule wash cycles for convenience.
4.5 Extra Dry Function
For enhanced drying performance, select the Extra Dry function. This feature ensures dishes come out perfectly dry, reducing the need for manual towel drying.

The Extra Dry function ensures optimal drying results for all your dishes.
4.6 WiFi/ConnectLife Connectivity
Connect your dishwasher to the ConnectLife app via WiFi for remote monitoring and control. Receive instant notifications in case of a malfunction and activate programs from your smartphone.
5. Maintenance and Cleaning
Regular maintenance ensures optimal performance and longevity of your dishwasher.
5.1 Self-Cleaning Filter
The dishwasher is equipped with a self-cleaning filter system. Periodically check and clean the filter to remove any food debris and ensure efficient drainage. Refer to the detailed instructions in the full manual for filter removal and cleaning.

Regular cleaning of the self-cleaning filter is essential for optimal dishwasher performance.
5.2 Exterior and Interior Cleaning
Wipe the exterior with a damp cloth. Clean the interior periodically with a dishwasher cleaner or a mixture of vinegar and baking soda to prevent odors and mineral buildup.
6. Troubleshooting
Before contacting customer service, refer to the following common issues and solutions:
| Problem | Possible Cause | Solution |
|---|---|---|
| Dishwasher does not start | Power supply issue, door not closed properly, delayed start active. | Check power connection, ensure door is latched, cancel delayed start. |
| Dishes not clean | Improper loading, clogged spray arms, insufficient detergent, incorrect program. | Reload dishes, clean spray arm nozzles, check detergent level, select appropriate program. |
| Water not draining | Clogged filter, blocked drain hose, drain pump issue. | Clean the filter, check drain hose for kinks or blockages. |
| Excessive noise | Dishes interfering with spray arms, foreign object in pump, improper installation. | Rearrange dishes, inspect for foreign objects, ensure proper leveling. |
For error codes or persistent issues, consult the full instruction manual or contact Hisense customer support.
7. Specifications
Below are the key technical specifications for the Hisense HV693C60AD Dishwasher:
| Feature | Specification |
|---|---|
| Model Name | HV693C60AD |
| Installation Type | Fully Integrated |
| Dimensions (WxDxH) | 60 cm x 55.5 cm x 81.6 cm |
| Weight | 31.5 kg |
| Place Settings Capacity | 16 |
| Number of Programs | 7 |
| Noise Level | 42 dB |
| Energy Class | C |
| Voltage | 220V |
| Internal Material | Plastic |
| Special Features | Auto Dose, WiFi, Inverter Motor, Third Basket, Delayed Start, Total Aqua Stop, Extra Dry |
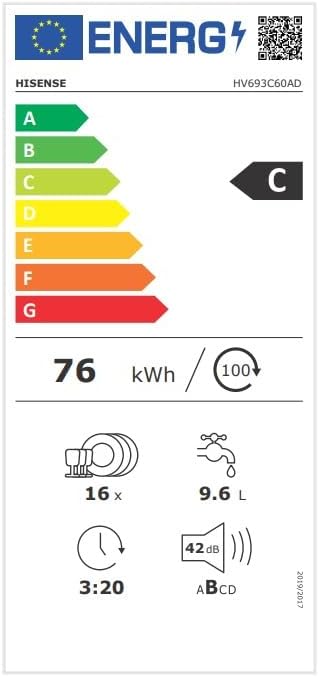
The energy label provides key performance indicators for the HV693C60AD model.
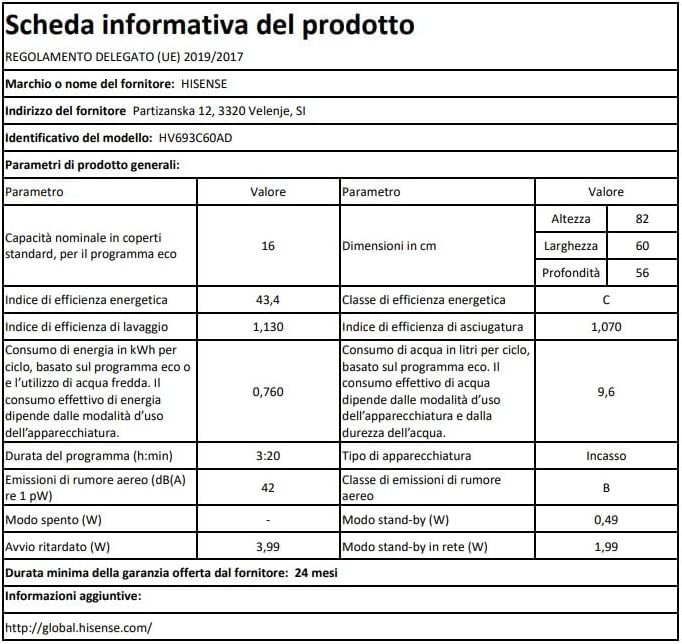
Detailed product information sheet outlining the dishwasher's performance and technical data.
8. Warranty and Support
Your Hisense HV693C60AD dishwasher comes with a minimum warranty period of 24 months from the date of purchase. For warranty claims, technical assistance, or spare parts, please contact Hisense customer support. Keep your proof of purchase for warranty validation.
For more information, visit the official Hisense website: global.hisense.com


