
1. Introduction
Thank you for purchasing the Xflyee 18" Large Digital Wall Clock. This manual provides detailed instructions for setting up and operating your new clock. Featuring a large LED display, remote control, and multiple functions including time, date, temperature, humidity, alarm, and timer, this clock is designed for clear visibility and ease of use in various environments.
2. What's in the Box
- Xflyee 18" Large Digital Wall Clock (Basic Model)
- Remote Control (with 2*AAA batteries included)
- Power Adapter and Power Cord
- Mounting Template
- Instruction Manual
3. Setup
3.1 Power Connection
Connect the provided power adapter and power cord to the clock's power input port. Plug the adapter into a standard AC outlet. The clock is designed for plug-in use and does not operate solely on batteries for display. The included AAA batteries are for memory function only.
3.2 Memory Function Battery Installation
The clock includes 2*AAA batteries for its memory function. These batteries ensure that time and alarm settings are retained even if the power supply is unexpectedly interrupted. To install or replace the batteries:
- Locate the battery compartment on the back of the clock.
- Open the battery compartment cover.
- Insert 2*AAA batteries, ensuring correct polarity (+/-).
- Close the battery compartment cover.

3.3 Mounting Options
The clock offers both wall-mounting and desktop placement options.
3.3.1 Wall Mounting
Use the provided mounting template to mark the positions for screws on your wall. Ensure the clock is level before drilling. The clock has two hanging holes on the back for secure wall placement.

3.3.2 Desktop Placement
The clock features a folding stand on its back, allowing it to be placed upright on a desk or table.
4. Operating Instructions
The clock can be operated using either the included remote control or the manual buttons located on the side of the unit.
4.1 Remote Control Functions

- ON/OFF: Turns the display on or off.
- SET: Enters setting mode for time, date, and other parameters. Use +/- buttons to adjust values.
- ALARM SET: Enters alarm setting mode.
- TIMER ST/SP: Starts/stops the timer.
- TIMER RESET: Resets the timer to zero.
- °C/°F: Toggles between Celsius and Fahrenheit for temperature display.
- 12-24HR: Switches between 12-hour and 24-hour time formats.
- V+/V-: Adjusts alarm volume.
- Brightness +/-: Manually adjusts display brightness.
4.2 Time and Date Setting
The clock can automatically set time and date when connected to Wi-Fi (if applicable to your model) or manually using the remote control.
- Press the SET button on the remote.
- The year will start flashing. Use the +/- buttons to adjust the year. Press SET to confirm.
- Repeat for month, day, hour, and minute.
- Press SET again to exit the setting mode.
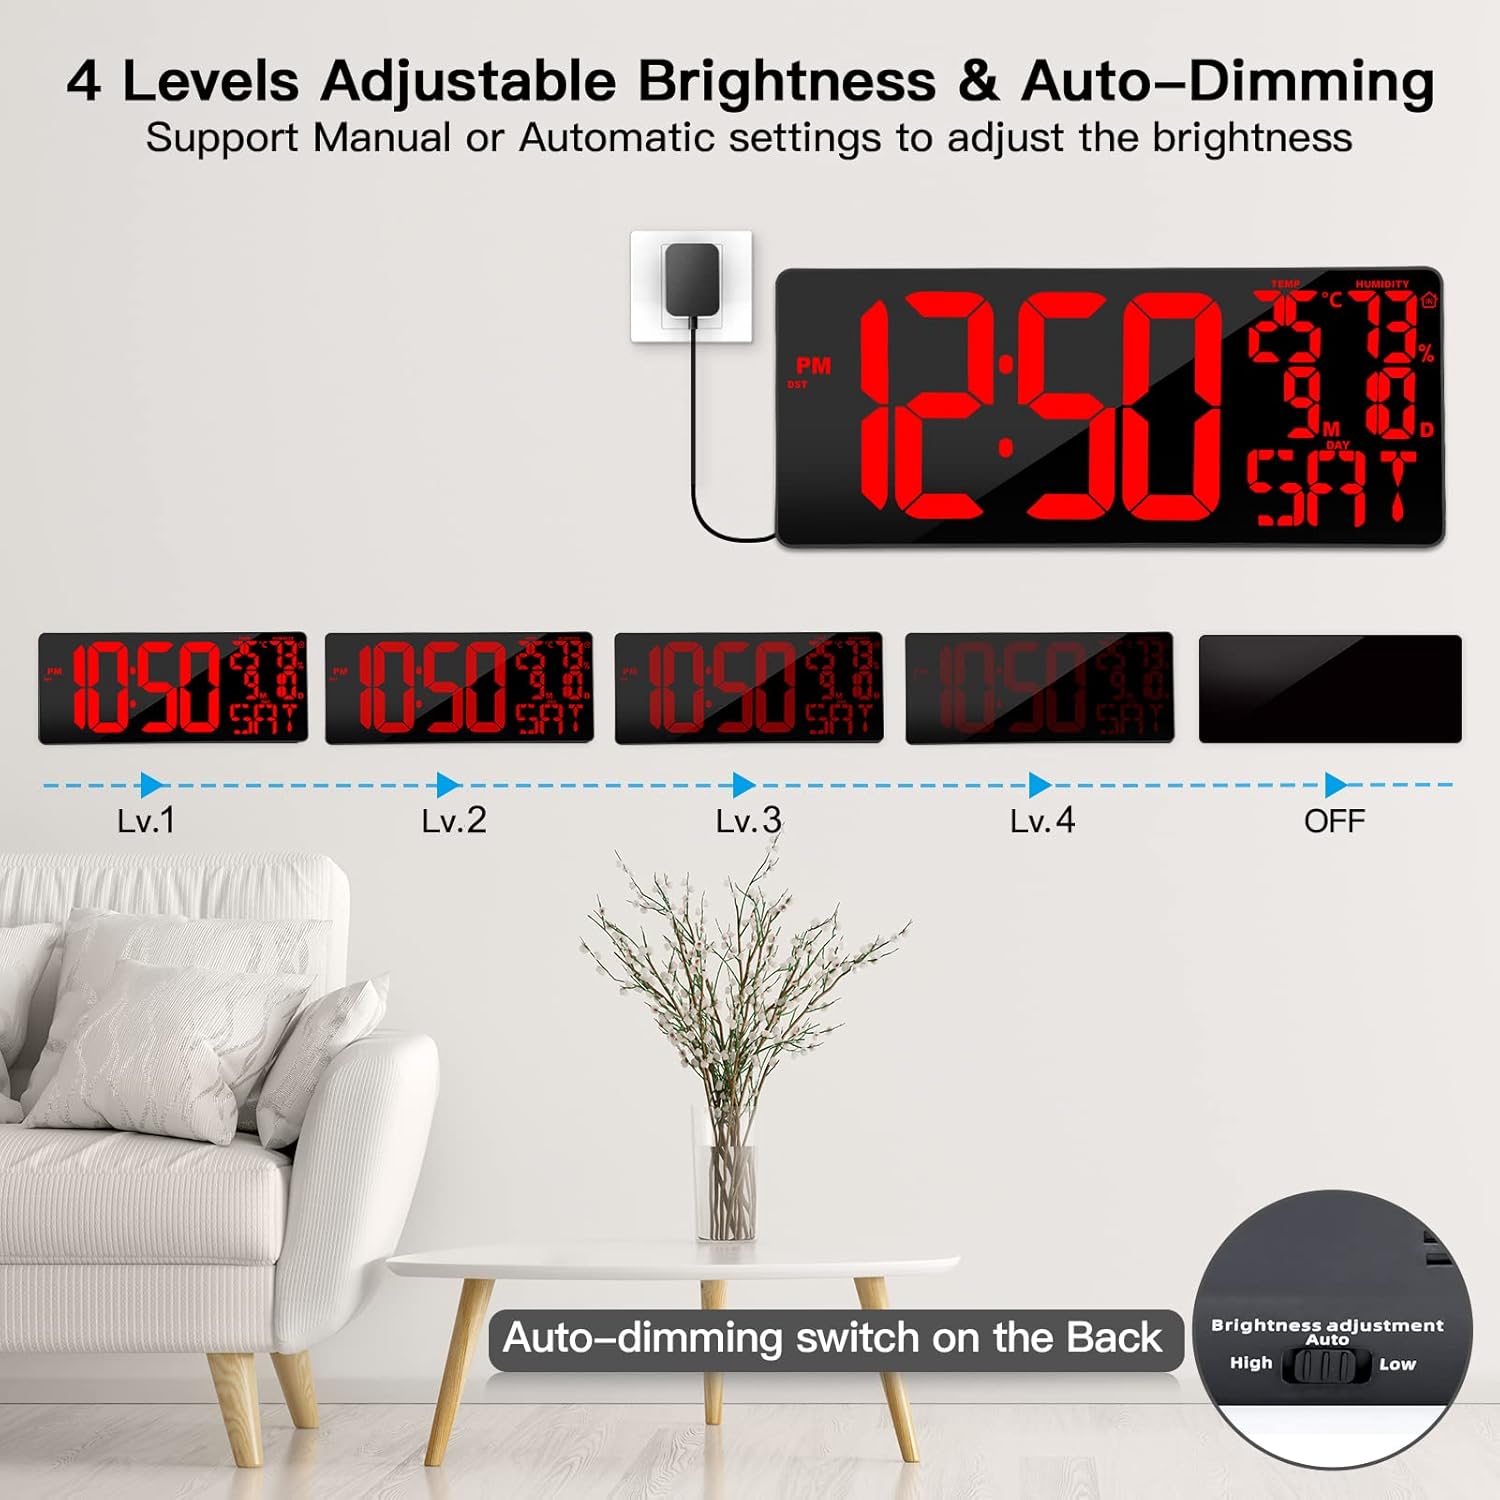
4.3 Auto-Dimming and Brightness Adjustment
The clock features a built-in sensitive light sensor that automatically adjusts display brightness based on ambient light. It also offers manual brightness control.
- Automatic Adjustment: Use the switch on the back of the clock to select 'Auto' for automatic brightness adjustment.
- Manual Adjustment: Use the Brightness +/- buttons on the remote control to cycle through 4 levels of brightness or turn the display completely off.
4.4 Daylight Saving Time (DST) Function
When the Auto DST function is enabled, the clock automatically adjusts the time one hour forward or backward as required by Daylight Saving Time, eliminating the need for manual adjustments.

4.5 Alarm Settings
The clock supports multiple alarm settings.
- Press the ALARM SET button on the remote.
- Use the +/- buttons to set the desired alarm time (hour and minute).
- Press ALARM SET again to select the alarm mode (e.g., Everyday, Working Day, Weekend).
- Press ALARM SET one more time to activate or deactivate the alarm.
4.6 Timer Function
The clock includes a versatile timer function that can operate as a stopwatch (count-up) or a countdown timer.
- Press the ENTER EXIT TIMER button on the remote to switch to timer mode.
- To set a countdown: Use HR, MIN, SEC buttons and +/- to set the desired countdown duration. Press TIMER ST/SP to start.
- To use as a stopwatch: Ensure the timer is at 0:00. Press TIMER ST/SP to start counting up.
- Press TIMER ST/SP to pause/resume the timer.
- Press TIMER RESET to clear the timer.

4.7 Manual Controls
In case the remote control is unavailable, essential functions can be accessed via buttons on the side of the clock. Refer to the labels next to the buttons for specific functions like SNOOZE, SET, ALARM SET, TIME, and TIMER.

5. Specifications
| Feature | Detail |
|---|---|
| Brand | Xflyee |
| Model Number | 099 |
| Display Type | Digital |
| Screen Size | 18 Inches |
| Product Dimensions | 16.9"W x 7"H |
| Item Weight | 2.78 Pounds |
| Power Source | Corded Electric |
| Batteries Included | 2 AAA batteries (for memory function) |
| Mounting Type | Wall Mount |
| Special Features | Alarm, Auto Dimmable, Calendar Display, Large Display, Temperature/Humidity Display |
6. Maintenance
- Cleaning: Use a soft, dry cloth to clean the display and casing. Avoid abrasive cleaners or solvents.
- Placement: Place the clock in a dry environment, away from direct sunlight or extreme temperatures, to ensure optimal performance and longevity.
- Battery Replacement: Replace the AAA memory batteries annually or if you notice settings are not retained during power outages.
7. Troubleshooting
- Display is Off: Ensure the power cord is securely plugged into the clock and a working power outlet. Check if the display was manually turned off using the remote.
- Settings Not Retained: Verify that the 2*AAA memory batteries are correctly installed and are not depleted. Replace if necessary.
- Remote Control Not Working: Check if the remote's battery is functional. Ensure there are no obstructions between the remote and the clock's sensor.
- Incorrect Time/Date: Manually set the time and date using the remote control as described in section 4.2. If your model supports Wi-Fi, ensure it's connected for automatic updates.
- Temperature/Humidity Inaccurate: Ensure the clock is placed in an area with good air circulation, away from direct heat sources or vents that might affect sensor readings.
8. Warranty & Support
This Xflyee Digital Wall Clock comes with a 3-Year Warranty.
For further assistance, please visit the official Xflyee Store or contact customer support through your purchase platform.
Xflyee is committed to providing quality products and support. For more information about Xflyee products, visit their store: Xflyee Store.