
1. Introduction
Thank you for purchasing the LVWIT 31CM Dimmable and Color-Tunable E26 Pendant Light with LED Bulb and Remote Control. This manual provides essential information for the safe and efficient installation, operation, and maintenance of your new lighting fixture. Please read these instructions thoroughly before use and retain them for future reference.
2. Product Overview and Specifications
The LVWIT pendant light is designed for duct rail systems, offering versatile lighting with adjustable brightness and color temperature. It features a retro design and comes with a remote control for convenient operation.
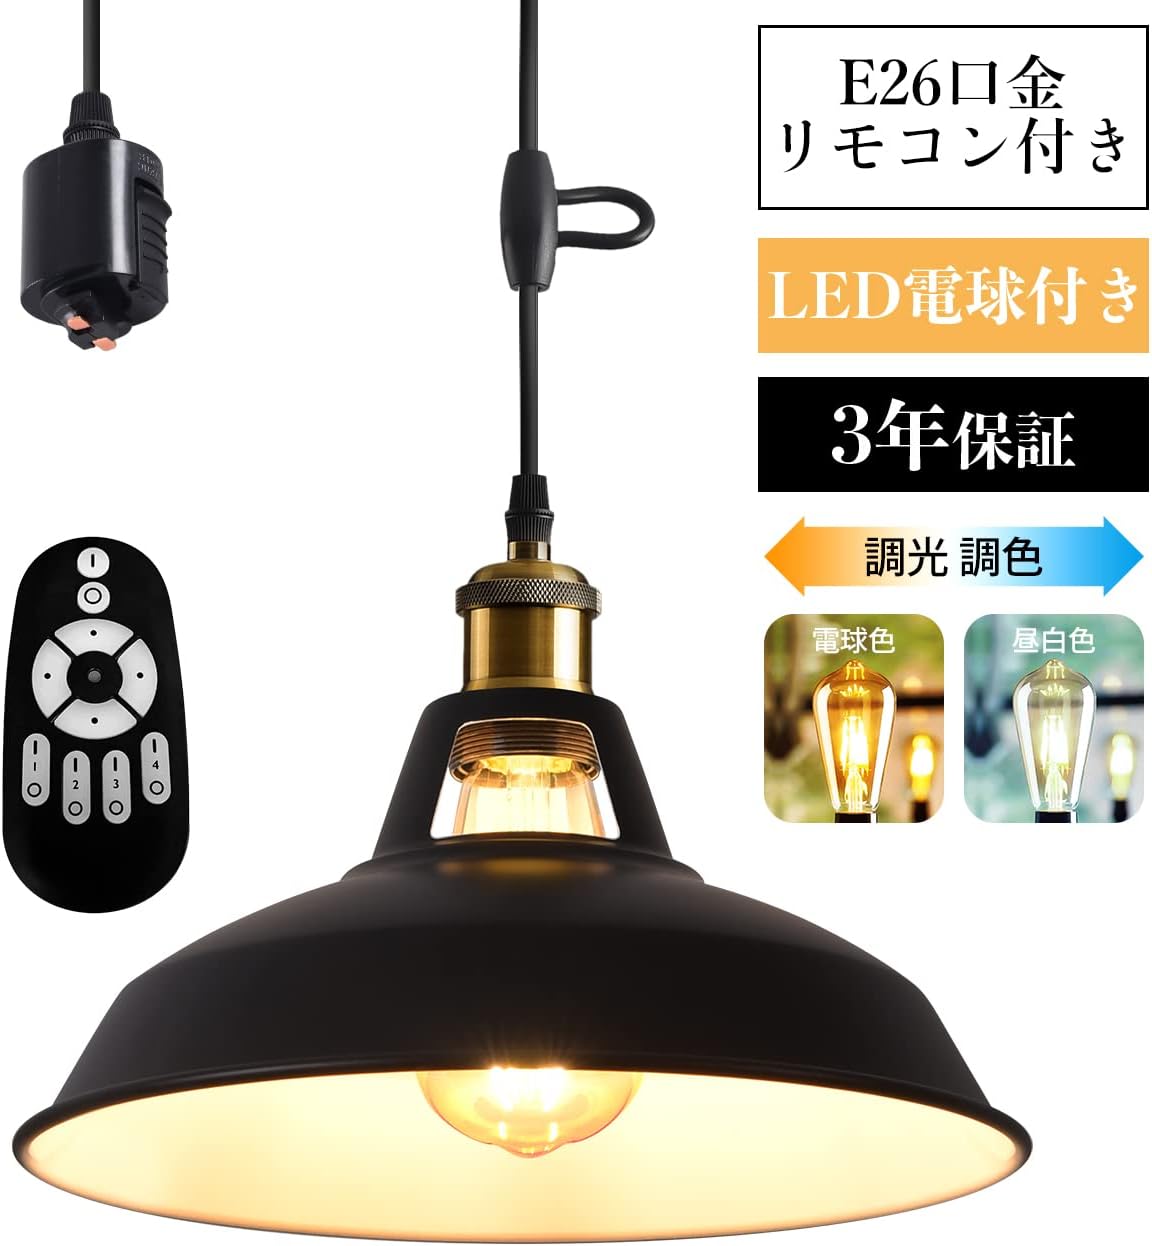
Figure 2.1: LVWIT Pendant Light with Remote Control

Figure 2.2: Product Dimensions and Basic Specifications
Key Features:
- Stepless Dimming & Color Tuning: Adjust brightness from 0% to 100% and color temperature from warm white (2200K) to cool white (6500K) using the included remote control.
- Adjustable Cord Length: The 60cm cord length can be freely adjusted to suit various applications and ceiling heights.
- Easy Duct Rail Installation: Designed specifically for Japanese lighting duct rails, requiring no tools for installation.
- Remote Control Functions: Includes group management for multiple lights and a convenient night light mode.
- Energy Efficient: The included 6W LED bulb provides brightness equivalent to a 60W incandescent bulb.
Detailed Specifications:
| Specification | Value |
|---|---|
| Model Number | JPV-1000016-12 |
| Fixture Socket | E26 |
| Cord Length | 60cm (Adjustable) |
| Fixture Weight | Approx. 600g |
| Shade Size | Diameter 31cm x Height 15cm |
| LED Bulb Socket | E26 |
| LED Bulb Brightness | 600LM (Dimmable) |
| LED Bulb Power Consumption | 6W (Equivalent to 60W incandescent) |
| LED Bulb Color Temperature | 2200K-6500K (Color Tunable) |
| LED Bulb Size | Diameter 64mm x Height 140mm |
| Input Voltage | 100V |
| Material | Aluminum |
| Usage Environment | Indoor |
3. Package Contents
Please check that all items are present and undamaged upon opening the package.
- Pendant Light Fixture (1 unit)
- E26 LED Dimmable/Color-Tunable Bulb (1 unit)
- Remote Control (1 unit)
- Instruction Manual (This document)
Note: For shipping safety, batteries for the remote control are not included. Please prepare two AAA batteries separately.
4. Safety Information
To ensure safe operation and prevent damage, please observe the following safety precautions:
- Always turn off the power supply before installation, cleaning, or maintenance.
- Do not install in damp locations or outdoors. This product is for indoor use only.
- Ensure the voltage supply matches the product's specifications (100V).
- Do not disassemble or modify the product. Unauthorized modifications may lead to electric shock or fire.
- Keep the product out of reach of children.
- If any abnormal operation or damage occurs, immediately discontinue use and contact customer support.
- The product is designed for duct rail systems. Do not attempt to install it on other types of wiring or fixtures.
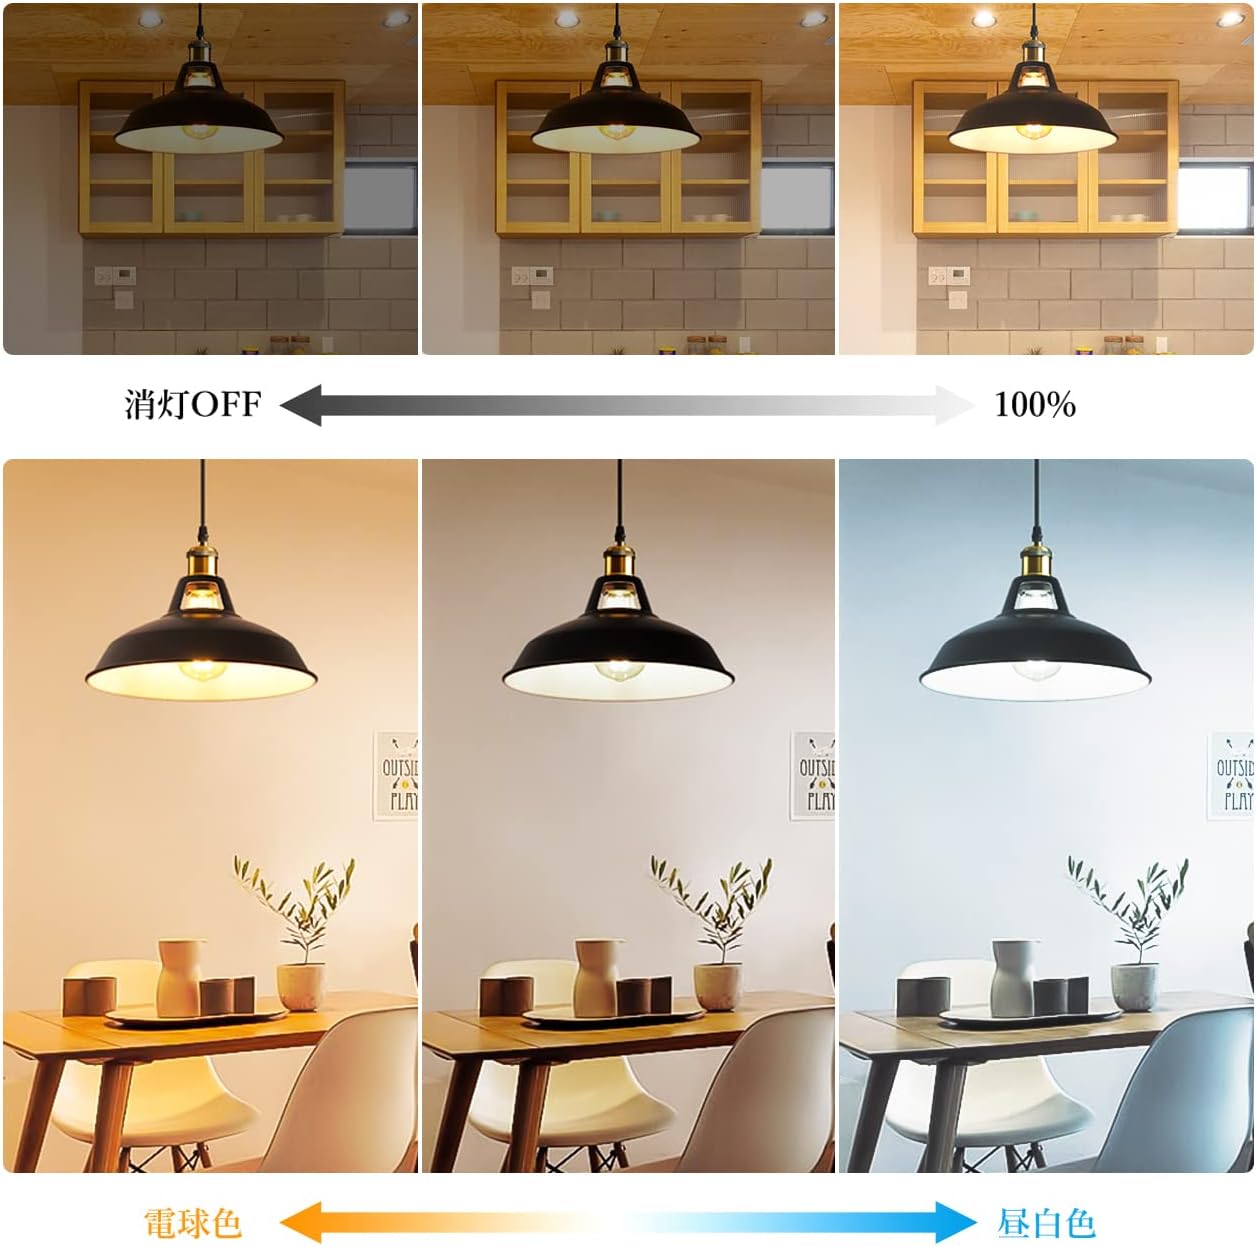
Figure 4.1: PSE Certification for Safety and Quality
5. Setup and Installation
Follow these steps to assemble and install your pendant light.
5.1 Assembling the Lamp Shade and Bulb
- Unscrew and remove the ring from the lamp socket.
- Insert the lamp socket into the top opening of the lamp shade.
- Screw the ring back onto the socket from the bottom of the shade to secure the shade.
- Carefully screw the LED bulb into the E26 socket.

Figure 5.1: Lamp Shade and Bulb Assembly
5.2 Installing on a Duct Rail
This fixture is designed for easy installation on standard Japanese lighting duct rails.
- Align the duct rail adapter with the groove of the duct rail. Push the adapter upwards until the stopper engages.
- Rotate the fixture clockwise until you hear a "click" sound, indicating it is securely locked in place.


Figure 5.2: Duct Rail Installation Steps
5.3 Adjusting Cord Length
The cord length can be adjusted using the cord adjuster provided on the cable.
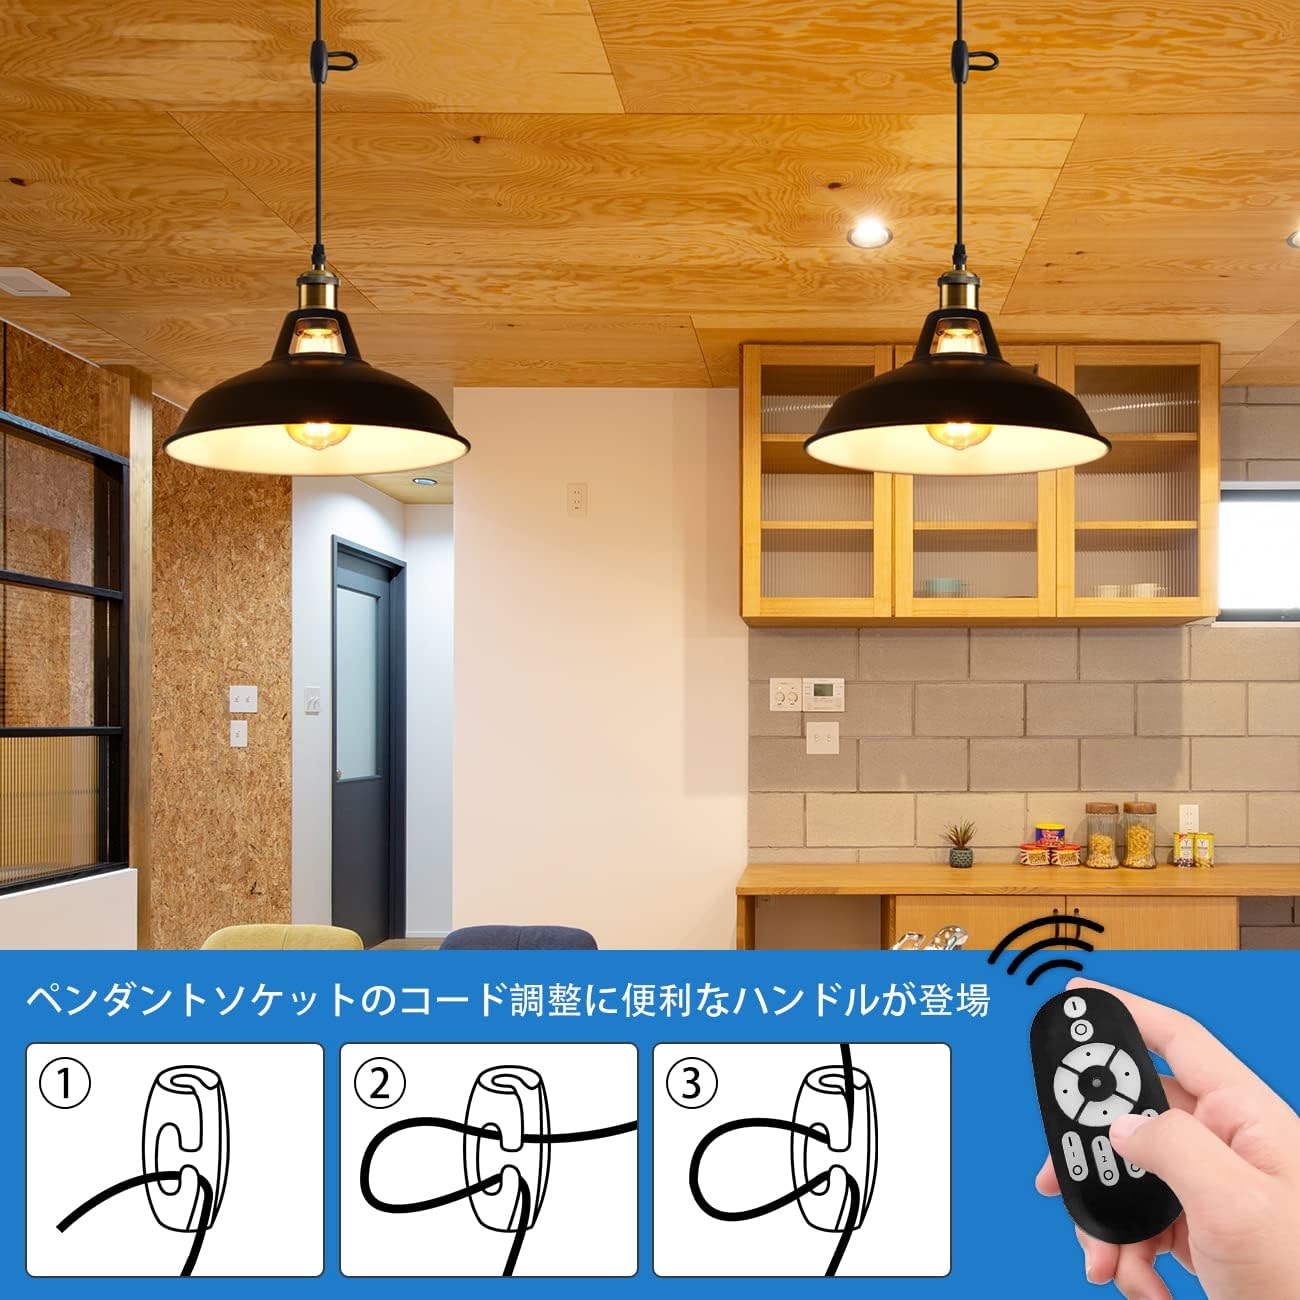
Figure 5.3: Cord Length Adjustment
6. Operating Instructions
Your LVWIT pendant light is operated using the included remote control.
6.1 Remote Control Functions
Insert two AAA batteries into the remote control before use. The remote allows you to control power, brightness, color temperature, and group settings.
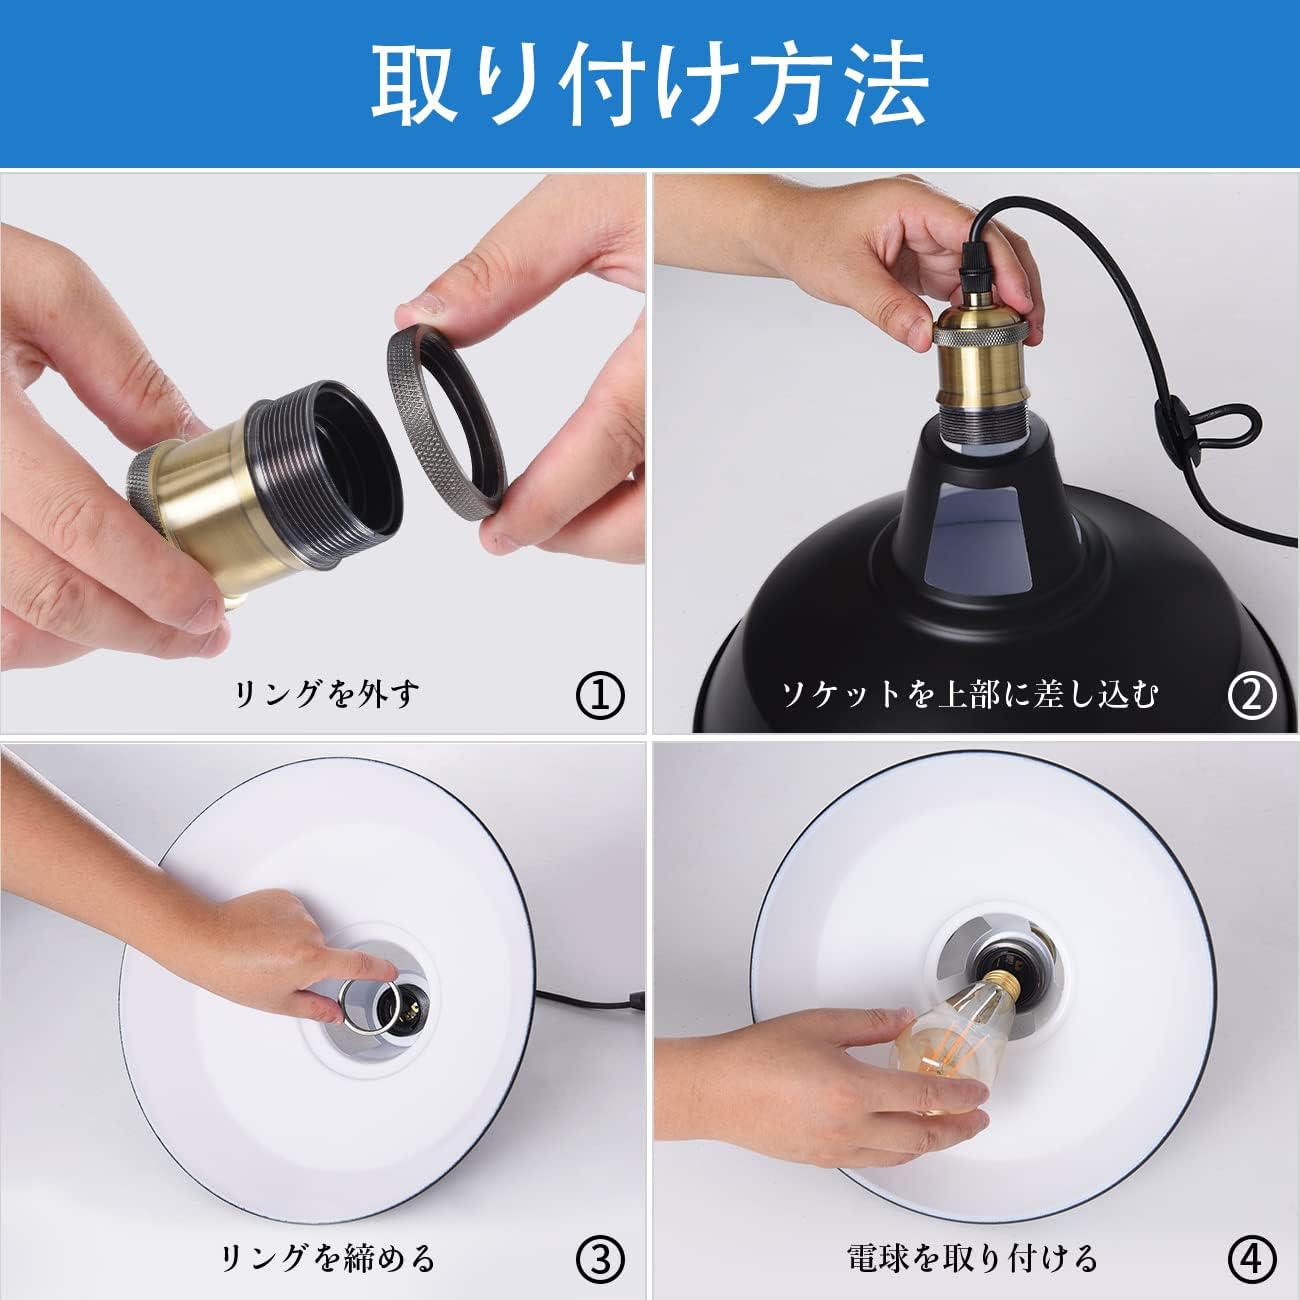
Figure 6.1: Remote Control Layout and Functions
- (1) All ON: Turns on all paired lights.
- (2) All OFF: Turns off all paired lights.
- (3) Brightness +: Increases brightness.
- (4) Brightness -: Decreases brightness.
- (5) Warm White (Bulb Color): Adjusts color temperature towards warmer tones (e.g., 2200K).
- (6) Cool White (Daylight Color): Adjusts color temperature towards cooler tones (e.g., 6500K).
- (7) Group Switches (1-4): Allows individual control or group control of multiple lights. Press to select a group, then use other buttons to control.
- (8) Indicator: Lights up when a button is pressed.
6.2 Dimming and Color Tuning
Use the brightness and color temperature buttons on the remote to customize your lighting. The light offers stepless dimming from 0% to 100% and continuous color tuning from warm white to cool white.
Figure 6.2: Dimming and Color Tuning Examples
6.3 Night Light Function
The remote control includes a dedicated night light function (often integrated with the lowest brightness setting or a specific button, refer to remote diagram for exact button if available). This provides a soft, gentle light suitable for sleeping or low-light environments.
6.4 Group Management
If you have multiple LVWIT LED bulbs, you can group them using the remote control's group switches (7-1 to 7-4). This allows you to control the brightness and color of specific groups of lights simultaneously.
7. Maintenance
Regular maintenance ensures the longevity and optimal performance of your pendant light.
- Cleaning: Ensure the power is off before cleaning. Wipe the fixture and shade with a soft, dry cloth. Do not use abrasive cleaners, solvents, or liquids that could damage the finish or electrical components.
- Bulb Replacement: If the LED bulb needs replacement, ensure the power is off and the bulb has cooled down. Unscrew the old bulb and replace it with a new E26 LED dimmable/color-tunable bulb.
8. Troubleshooting
If you encounter any issues, please refer to the following common problems and solutions:
| Problem | Possible Cause | Solution |
|---|---|---|
| Light does not turn on. | No power supply, bulb not screwed in correctly, remote control batteries dead. | Check power switch. Ensure bulb is securely screwed in. Replace remote control batteries. |
| Remote control not working. | Batteries are dead or incorrectly inserted, remote not paired. | Replace batteries, ensure correct polarity. Refer to pairing instructions (if applicable, usually automatic for this type of product). |
| Light flickers or dims unexpectedly. | Loose bulb connection, unstable power supply. | Ensure bulb is tightly screwed in. Check household wiring or consult an electrician if power supply is suspected. |
| Cannot adjust brightness or color. | Remote control issue, light not responding. | Ensure remote is within range. Try re-pairing the remote if possible (usually by turning power off/on and pressing a button). |
If the problem persists after trying these solutions, please contact customer support.
9. Warranty and Support
This product comes with a 3-year warranty from the date of purchase. During this period, if you encounter any issues with the product under normal use, please do not hesitate to contact our customer support. We are committed to providing assistance and ensuring your satisfaction.
For support, please refer to the contact information provided on your purchase receipt or the seller's page.