
1. Introduction
This manual provides detailed instructions for the assembly, operation, and maintenance of your Pokitter Projector Floor Stand. Designed for versatility and stability, this stand is suitable for projectors, small cameras, webcams, microphones, and GoPro devices. Please read this manual thoroughly before use to ensure proper functionality and longevity of the product.

Figure 1.1: The Pokitter Projector Floor Stand, showcasing its sleek design and stable base.
2. Product Features
- Adjustable Height: The stand offers a versatile height range from 4.1 inches to 40.2 inches, allowing for optimal positioning of your device.
- 360-Degree Swivel Ball Head: Equipped with a pivot ball head that allows for full 360-degree rotation, enabling precise angle adjustments for your mounted device.
- Integrated Cable Management: Designed with internal channels to neatly route cables, maintaining a clean and organized setup.
- Stable Floor Base: Features a weighted, circular base for enhanced stability, preventing accidental tipping.
- Multi-Device Compatibility: Ideal for use with projectors, small cameras, webcams, microphones, and GoPro devices.

Figure 2.1: Illustration of the stand's adjustable height capabilities, showing various height configurations.
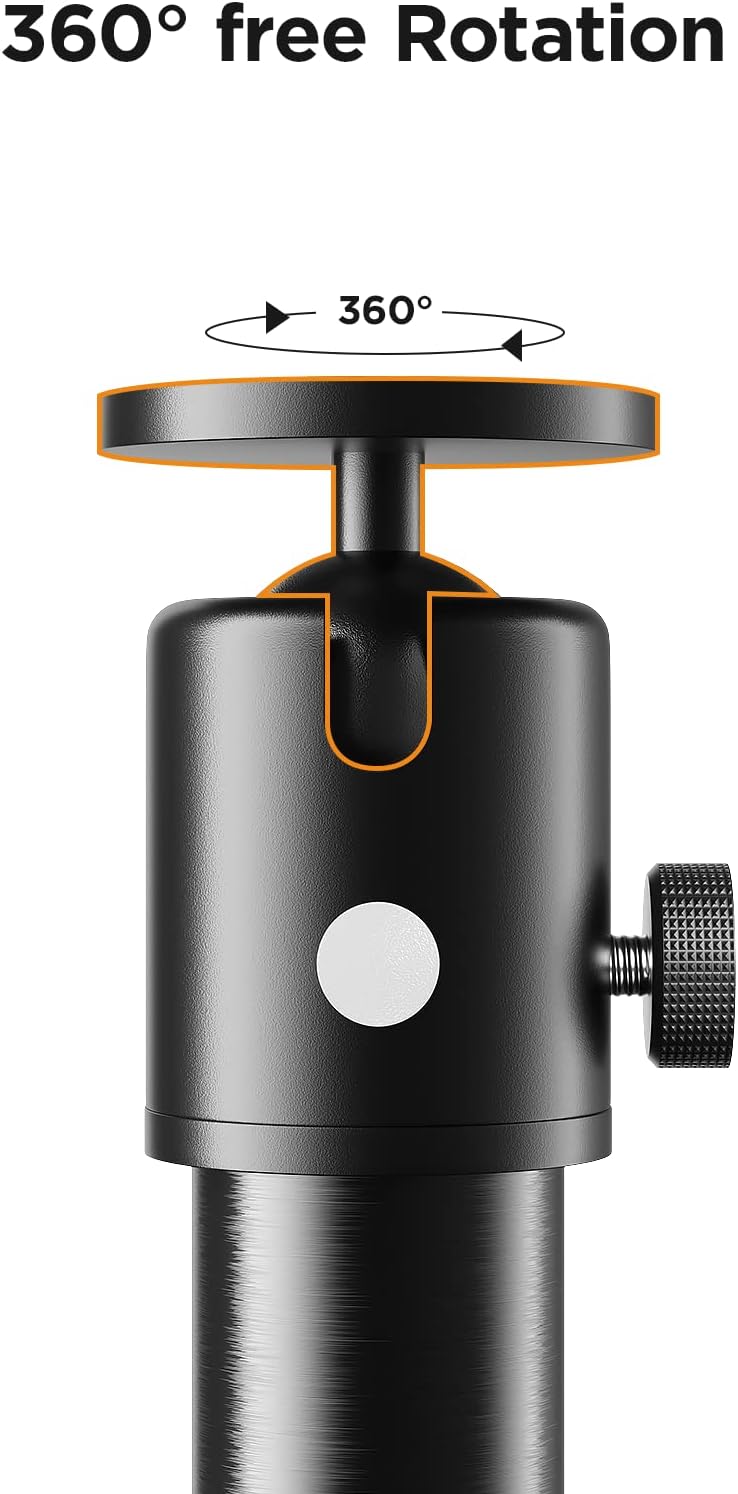
Figure 2.2: Close-up view of the 360-degree swivel ball head, demonstrating its rotational freedom.

Figure 2.3: The stand in use, highlighting the integrated cable management system and the stable circular base.
3. Setup Instructions
Follow these steps to assemble your Pokitter Projector Floor Stand:
- Unpack Components: Carefully remove all parts from the packaging. Verify that all components shown in Figure 3.1 are present.
- Assemble Pole Sections: Screw the individual pole sections together clockwise until they are securely fastened. The number of sections used will determine the initial height.
- Attach Base: Screw the assembled pole onto the circular base, ensuring it is tightened firmly to provide stability.
- Attach Ball Head: Screw the 360-degree swivel ball head onto the top of the assembled pole.
- Mount Device: Attach your projector, camera, or other compatible device to the ball head's mounting screw. Ensure it is securely fastened.
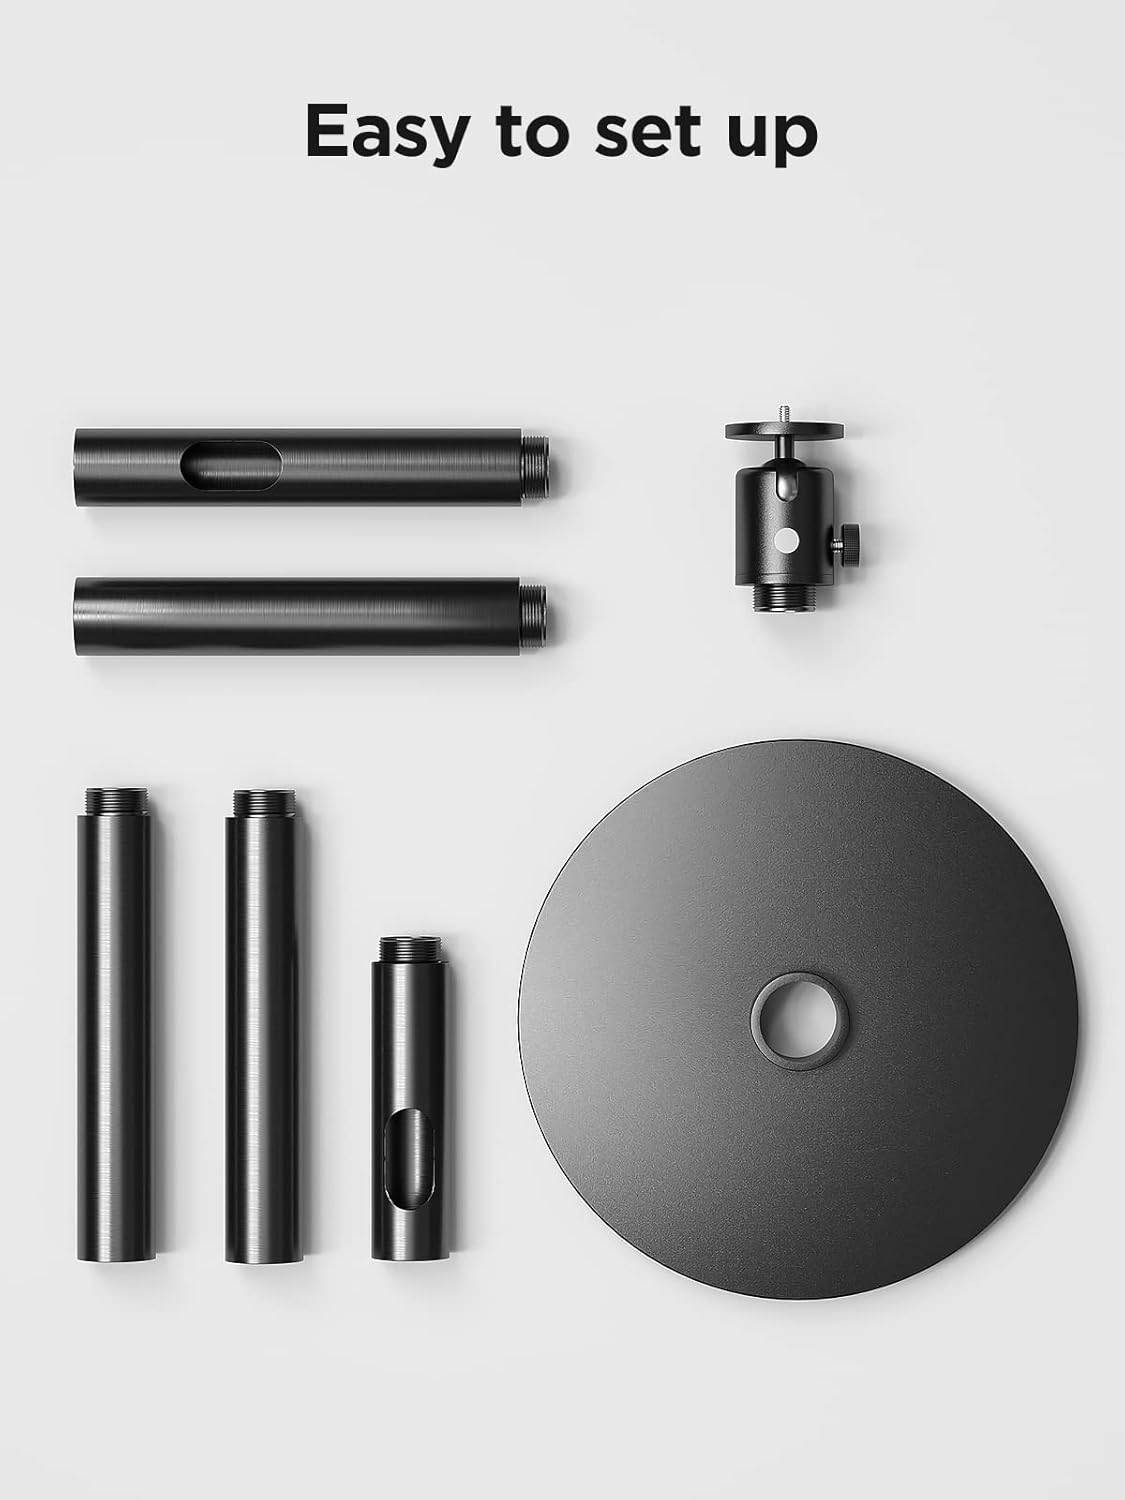
Figure 3.1: All components of the Pokitter Projector Floor Stand laid out for easy assembly.
4. Operating Instructions
- Adjusting Height: To adjust the height, loosen the locking collars on the pole sections, extend or retract the sections to the desired height, and then tighten the collars securely.
- Adjusting Angle: Loosen the knob on the side of the ball head to adjust the angle of your mounted device. Once the desired angle is achieved, tighten the knob firmly to lock it in place. The ball head allows for full 360-degree rotation.
- Cable Management: Route your device's power and data cables through the internal channels of the stand's pole for a tidy setup.

Figure 4.1: The Pokitter Projector Stand in a typical usage scenario, demonstrating its practical application.
5. Maintenance
- Cleaning: Wipe the stand with a soft, dry cloth to remove dust and dirt. Avoid using abrasive cleaners or solvents.
- Regular Checks: Periodically check all screws and connections to ensure they remain tight and secure.
- Storage: When not in use for extended periods, store the stand in a cool, dry place, ideally in its original packaging or a protective cover.
6. Troubleshooting
| Problem | Possible Cause | Solution |
|---|---|---|
| Stand feels unstable. | Loose connections or uneven surface. | Ensure all pole sections and the base are tightly screwed. Place the stand on a flat, stable surface. |
| Device angle slips. | Ball head knob not tightened sufficiently. | Tighten the ball head adjustment knob firmly after setting the desired angle. Ensure the device weight does not exceed the stand's capacity. |
| Difficulty adjusting height. | Locking collars are too tight or dirty. | Loosen locking collars sufficiently before adjusting. Clean any debris from the pole sections. |
7. Specifications
| Feature | Detail |
|---|---|
| Model Number | 2 |
| Brand | Pokitter |
| Adjustable Height Range | 4.1 inches to 40.2 inches |
| Item Weight | 8.72 pounds |
| Material | Silicone (as per product specifications) |
| Head Type | 360 Degree Swivel Pivot Ball Head |
8. Warranty and Support
Pokitter stands behind the quality of its products. For specific warranty information, please refer to the documentation included with your purchase or visit the official Pokitter website. For technical support, troubleshooting assistance, or any inquiries regarding your product, please contact Pokitter customer service through their official channels.
You can find more information and contact details by visiting the Pokitter Store on Amazon.
