
1. Product Overview
The Haisito 25AMP Smart Car Battery Charger is a versatile and intelligent device designed for charging and maintaining a wide range of 12V and 24V batteries. It supports LiFePO4, Lithium, and various lead-acid battery types including AGM, Gel, EFB, MF, and VRLA. This charger features a fast charging capability with a maximum current of 25A for 12V batteries and 13A for 24V batteries, an intelligent 9-step charging process, and a pulse repair mode for reconditioning idle or deeply discharged batteries.
It incorporates multiple protection functions such as reverse polarity, short-circuit, and overcharge protection, ensuring safe operation. The built-in fan maintains optimal temperature, and the clear LCD screen provides real-time charging status, voltage, current, and temperature information.

Image 1.1: The Haisito 25AMP Smart Car Battery Charger connected to a battery.
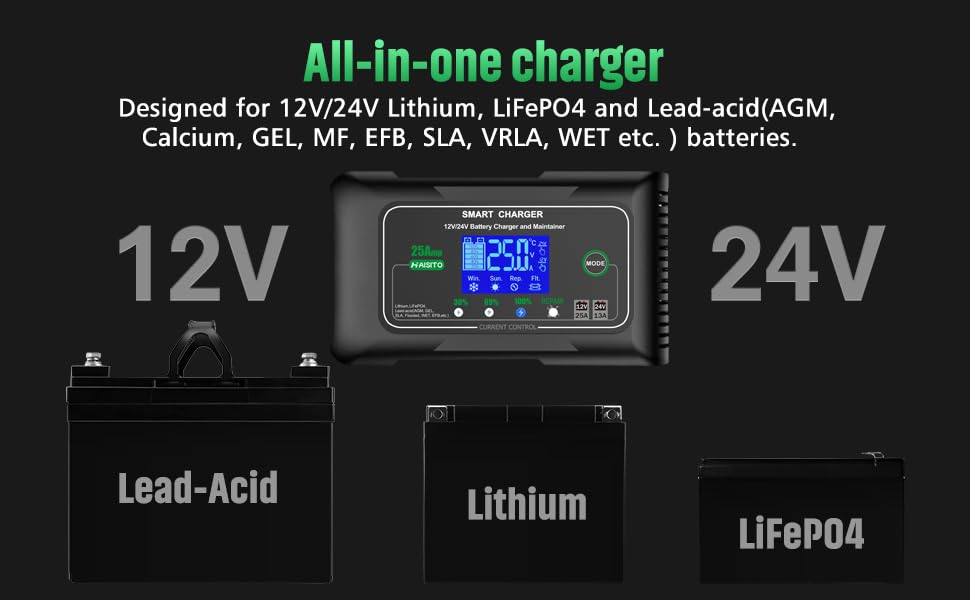
Image 1.2: Compatibility with Lead-Acid, Lithium, and LiFePO4 batteries.
2. Safety Information
Please read all safety instructions carefully before using the Haisito Smart Car Battery Charger. Failure to follow these instructions may result in electric shock, fire, or serious injury.
- Always wear eye protection and protective clothing when working with batteries.
- Ensure the charging area is well-ventilated.
- Never smoke or allow sparks or flames near the battery or charger.
- Do not charge a frozen battery. Allow it to thaw before charging.
- Do not charge a damaged battery.
- Connect the charger to the battery terminals correctly: positive to positive, negative to negative. Avoid reverse polarity.
- Disconnect the AC power supply before connecting or disconnecting the battery clamps.
- Keep out of reach of children.
- This charger is designed for 12V and 24V LiFePO4, Lithium, and lead-acid batteries only. Do not use it for other battery types.
- If the charger or battery shows signs of damage, discontinue use immediately.
3. Package Contents
Verify that all items are present in your package:
- Haisito 12V/24V 25A Smart Battery Charger (Model 25AMP)
- Power Cable (300cm length)
- Alligator Clips (88cm length)
- Cable Lugs (0.6cm diameter)
- User Manual

Image 3.1: All components included in the Haisito 25AMP Smart Charger package.
4. Technical Specifications
| Feature | Specification |
|---|---|
| Brand | Haisito |
| Model Number | 25AMP |
| Input Voltage | 12 Volts (AC input not specified, assuming standard household) |
| Output Voltage | 12 Volts / 24 Volts (Automatic detection) |
| Max Charging Current (12V) | 25 A |
| Max Charging Current (24V) | 13 A |
| Supported Battery Types | LiFePO4, Lithium, Lead-Acid (AGM, Gel, EFB, MF, VRLA, Flooded) |
| Minimum Start Voltage | 2V |
| Charging Stages | 9-stage intelligent charging |
| Protection Features | Reverse Polarity, Short-Circuit, Overcharge, Over-temperature |
| Dimensions (L x W x H) | 15.5 x 9 x 5 cm (6.1 x 3.54 x 1.96 inches) |
| Item Weight | 932 Grams |
| Power Cable Length | 300 cm |
| Charging Cable Length (Alligator Clips) | 88 cm |
5. Setup and Connection
Follow these steps to safely connect the charger to your battery:
- Ensure the charger is disconnected from the AC power outlet before making any connections to the battery.
- Identify the battery terminals: The positive terminal is usually marked with a "+" symbol and is larger, while the negative terminal is marked with a "-" symbol.
- Connect the red (positive) alligator clip from the charger to the positive (+) terminal of the battery.
- Connect the black (negative) alligator clip from the charger to the negative (-) terminal of the battery.
- For vehicles, if the battery is still installed, connect the negative clip to the vehicle chassis away from the battery and fuel line, if possible, to minimize sparking.
- Plug the charger's power cable into a standard AC power outlet. The charger will power on and automatically detect the battery voltage (12V or 24V) and type.

Image 5.1: Proper connection of the charger to a vehicle battery.
6. Operating Instructions
6.1. Automatic Battery Detection and Charging Process
Once connected to power and the battery, the charger automatically detects the battery voltage (12V or 24V) and initiates a 9-stage intelligent charging process. This process includes desulfation, soft start, bulk charging, absorption charging, trickle charging, battery test, recondition charging, float maintenance, and small current maintenance to optimize battery power and extend its lifespan.

Image 6.1: Visual representation of the 9-stage smart charging process.
6.2. Charging Current Selection
The charger offers three charging current levels: 30%, 60%, and 100% of the maximum current. Use the "MODE" button to cycle through these options. The selected current level will be displayed on the LCD screen.

Image 6.2: Selecting charging current levels with the "MODE" button.
6.3. Repair Mode
The repair mode is designed to detect and repair sulfated or acid-stratified batteries, including unused or deeply discharged ones. This function uses pulse repair technology to restore battery performance and extend its life. To activate, press the "MODE" button until "REPAIR" is displayed. Note that a completely empty battery (below 2V) cannot be activated by this mode.

Image 6.3: The charger operating in Repair Mode.
6.4. Temperature Adaptive Charging
The charger automatically adjusts the charging voltage based on the ambient temperature. This feature prevents overcharging in hot conditions and undercharging in cold conditions, ensuring optimal and safe charging performance regardless of the environment.

Image 6.4: Temperature adaptive charging in different weather conditions.
6.5. LCD Display Information
The clear LCD screen provides real-time information about the charging process:
- Charge Percentage: Indicates the current charge level of the battery.
- Voltage: Displays the current battery voltage.
- Current: Shows the charging current in Amperes.
- Internal Temperature: Displays the charger's internal temperature.
- Mode Indicators: Icons for selected charging current (30%, 60%, 100%) and Repair mode.
- Error Messages: Alerts for incorrect polarity, battery full, or standby status.

Image 6.5: Understanding the LCD display indicators.
6.6. Wide Application
The Haisito Smart Car Battery Charger is suitable for a wide range of vehicles and applications, including cars, motorcycles, RVs, trucks, boats, lawn mowers, scooters, and golf carts.

Image 6.6: Examples of vehicles compatible with the Haisito charger.
7. Maintenance
Proper maintenance ensures the longevity and optimal performance of your Haisito Smart Car Battery Charger:
- Cleaning: Disconnect the charger from power and the battery before cleaning. Use a soft, dry cloth to wipe the exterior. Do not use harsh chemicals or abrasive cleaners.
- Storage: Store the charger in a cool, dry place when not in use. Keep it away from direct sunlight, moisture, and extreme temperatures.
- Cable Inspection: Regularly inspect the power cable and battery clamps for any signs of damage, fraying, or corrosion. Replace damaged components immediately.
- Ventilation: Ensure the charger's ventilation openings are clear of dust and debris to prevent overheating. The built-in fan helps maintain optimal operating temperature.
8. Troubleshooting
If you encounter issues with your Haisito Smart Car Battery Charger, refer to the following common problems and solutions:
| Problem | Possible Cause | Solution |
|---|---|---|
| Charger does not turn on. | No power from AC outlet; loose power cable connection. | Check AC outlet with another device; ensure power cable is securely plugged in. |
| "Incorrect Polarity" error displayed. | Battery clamps connected incorrectly (red to negative, black to positive). | Disconnect from AC power, then reconnect clamps correctly: red to positive (+), black to negative (-). |
| Battery not charging or "FUL" (Full) displayed prematurely. | Battery is already fully charged; battery is severely damaged or sulfated; incorrect battery type selected (though charger is automatic, manual override might be needed for specific cases not covered by auto-detection). | Verify battery charge level; try Repair Mode for sulfated batteries (if voltage is above 2V); consult a professional for severely damaged batteries. |
| Charger gets hot during operation. | Normal operation, especially during high current charging; poor ventilation. | Ensure adequate ventilation around the charger. The built-in fan helps manage heat. If overheating persists or is excessive, discontinue use and contact support. |
| Repair mode does not activate a completely dead battery. | Battery voltage is below the minimum activation threshold (2V). | The charger cannot activate batteries below 2V. The battery may be beyond repair. |
9. Warranty and Support
Information regarding specific warranty terms and conditions for the Haisito 25AMP Smart Car Battery Charger is not provided in the available product data. Please refer to the warranty card included in your product packaging or contact Haisito customer support directly for detailed warranty information and technical assistance.
For support, you may visit the official Haisito website or contact their customer service department using the contact information provided in your product documentation.

