
1. Introduction
This manual provides essential information for the safe and efficient operation, maintenance, and care of your Mont Alpi MA-957 Premium Outdoor Kitchen Island. This compact, standalone unit is designed for outdoor use, featuring a 5-burner gas grill, an infrared rear burner, storage cabinets, and white granite countertops. Please read all instructions carefully before assembly and use.

Figure 1: Mont Alpi MA-957 Premium Outdoor Kitchen Island
2. Safety Guidelines
- Always operate the grill in a well-ventilated outdoor area.
- Keep children and pets away from the grill during operation.
- Do not store flammable materials near the grill.
- Ensure all gas connections are secure and leak-free before use.
- Never leave a lit grill unattended.
- Use heat-resistant gloves when handling hot surfaces.
3. Unpacking and Assembly
The Mont Alpi MA-957 outdoor kitchen island is largely pre-assembled for your convenience. Upon delivery, carefully uncrate the unit. Minor assembly steps include attaching handles, tool hooks, and connecting the gas line. Refer to the included assembly guide for detailed, step-by-step instructions.

Figure 2: Interior view of the grill during assembly
The island's dimensions are 70 inches wide, 24 inches deep, and 46 inches high (with the hood closed). Ensure adequate space for placement and safe operation.

Figure 3: Product Dimensions
4. Gas Connection
The MA-957 grill is designed for use with Propane (LPG) and is natural gas convertible with pre-installed orifices. An adapter hose and regulator are included for propane tank connection. If converting to natural gas, it is recommended to have a qualified technician perform the conversion and connection to your home's natural gas line.
- Ensure the gas supply is turned off before making any connections.
- Connect the regulator to the propane tank valve, tightening securely.
- Connect the other end of the hose to the grill's gas inlet.
- Perform a leak test using a soapy water solution on all connections. Bubbles indicate a leak.
5. Operating the Grill
Main Burner Ignition
- Open the grill lid.
- Ensure all burner control knobs are in the 'OFF' position.
- Turn on the gas supply at the tank or natural gas line.
- Push and turn one main burner control knob to the 'HIGH' position. The knob will illuminate with red and blue changing lights.
- Press and hold the 'IGNITE' button until the burner ignites.
- Once lit, release the 'IGNITE' button and adjust the flame to your desired cooking temperature.
- Repeat for other main burners as needed.
Infrared Rear Burner Operation
The ceramic infrared rear burner is ideal for rotisserie cooking, providing even, intense heat.
- To ignite, push and turn the infrared burner control knob to 'HIGH'.
- Press and hold the 'IGNITE' button until the burner lights.
- Adjust heat as required.
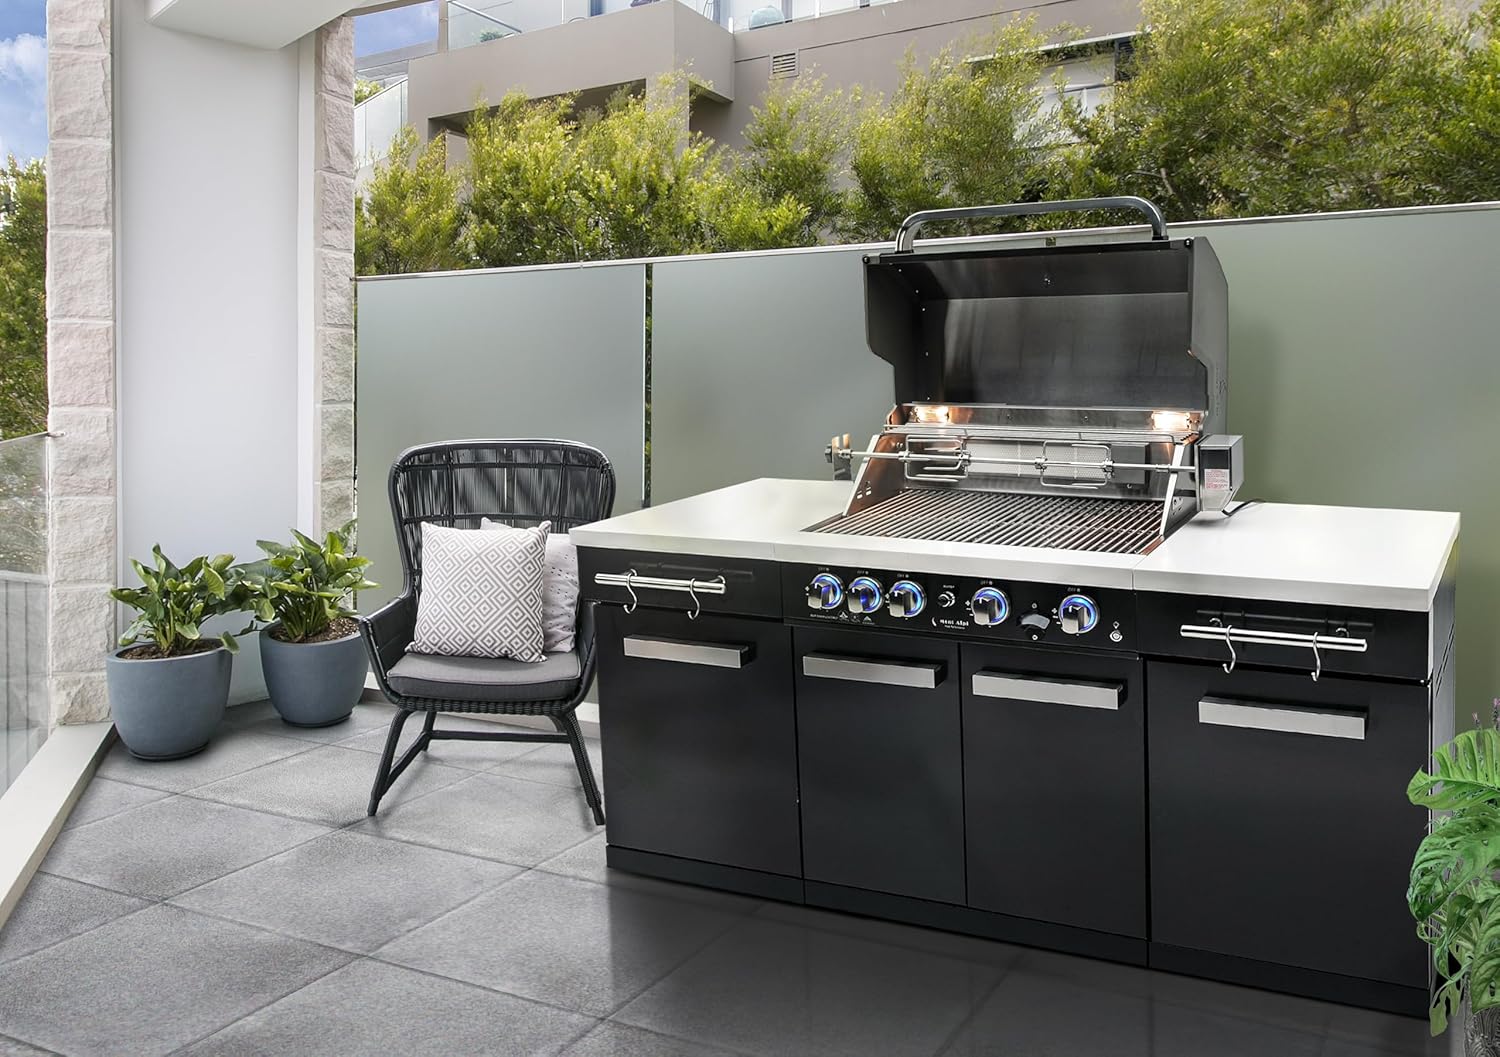
Figure 4: Infrared Rear Burner
Rotisserie Kit Usage
The included 110V 4-watt heavy-duty rotisserie kit can hold up to 25 lbs of meat. Install the rotisserie rod and forks according to the separate rotisserie instructions. Position food centrally on the rod for balanced rotation.

Figure 5: Rotisserie in Use
Lighting and Features
The grill features two halogen cooking surface lights for visibility during night use. The control knobs are backlit with red and blue changing lights, indicating when a burner is active. A built-in bottle opener is also provided for convenience.

Figure 6: Illuminated Control Knobs and Bottle Opener
6. Care and Maintenance
Cleaning
- Grill Grates: Clean stainless steel grids after each use with a grill brush while warm.
- Exterior Surfaces: Wipe black stainless steel and granite surfaces with a soft cloth and mild detergent. Avoid abrasive cleaners.
- Grease Tray: The easy-access full front pull-out grease tray should be emptied and cleaned regularly to prevent flare-ups.

Figure 7: Pull-Out Grease Tray
Weather Cover
A water-resistant full weather cover is included to protect your outdoor kitchen island from the elements. Ensure the grill is completely cool before applying the cover. Improper use or application of the cover on a hot surface may cause damage to the unit's finish.
7. Troubleshooting
| Problem | Possible Cause | Solution |
|---|---|---|
| Burner fails to ignite | No gas flow, clogged burner port, faulty igniter. | Check gas supply, clean burner ports, inspect igniter electrode. |
| Uneven heating | Clogged burner ports, low gas pressure. | Clean burner ports, check gas tank level or regulator. |
| Excessive flare-ups | Grease buildup, high heat setting. | Clean grease tray and grill grates, reduce heat. |
8. Product Specifications
| Feature | Specification |
|---|---|
| Model Name | Mont Alpi Compact Outdoor Kitchen Islands |
| Model Number | MA-957 |
| Product Dimensions (D x W x H) | 24"D x 70"W x 46"H |
| Item Weight | 360 Pounds |
| Main Burner Count | 4 |
| Heating Power | 63,000 BTU (total) |
| Cooking Surface Area | 504 Square Inches (main grill) |
| Fuel Type | Propane / Natural Gas (convertible) |
| Material Type | Granite, Stainless Steel |
| Color | White / Black Stainless Steel |
| Rotisserie Kit | 110V 4-watt, 25 lbs capacity |
| Included Components | Adapter Hose & Regulator, Grill Cover, Rotisserie Kit, Thermometer, Tool Holder |
9. Official Product Video
Watch the official product video to see the Mont Alpi Compact Outdoor Islands in action and learn more about their features.
Video 1: Official video showcasing the features and design of Mont Alpi Compact Outdoor Islands, including the MA-957 model.
10. Warranty and Customer Support
The Mont Alpi MA-957 Outdoor Kitchen Island comes with a limited lifetime warranty. For warranty claims, technical assistance, or any product-related inquiries, please contact Mont Alpi customer support. Refer to your purchase documentation for specific contact details or visit the official Mont Alpi website.
For additional support, you may also visit the Mont Alpi Store on Amazon.


