
Cutex Needle Position Synchronizer
Cutex Needle Position Synchronizer Instruction Manual
Model: Needle Position Synchronizer
Introduction
The Cutex Needle Position Synchronizer is an essential accessory designed for industrial sewing machine servo motors. This device enables precise control over the needle's stopping position, allowing it to halt in either an up or down position after each sewing operation. This functionality significantly enhances efficiency and control for various sewing tasks.
Product Overview
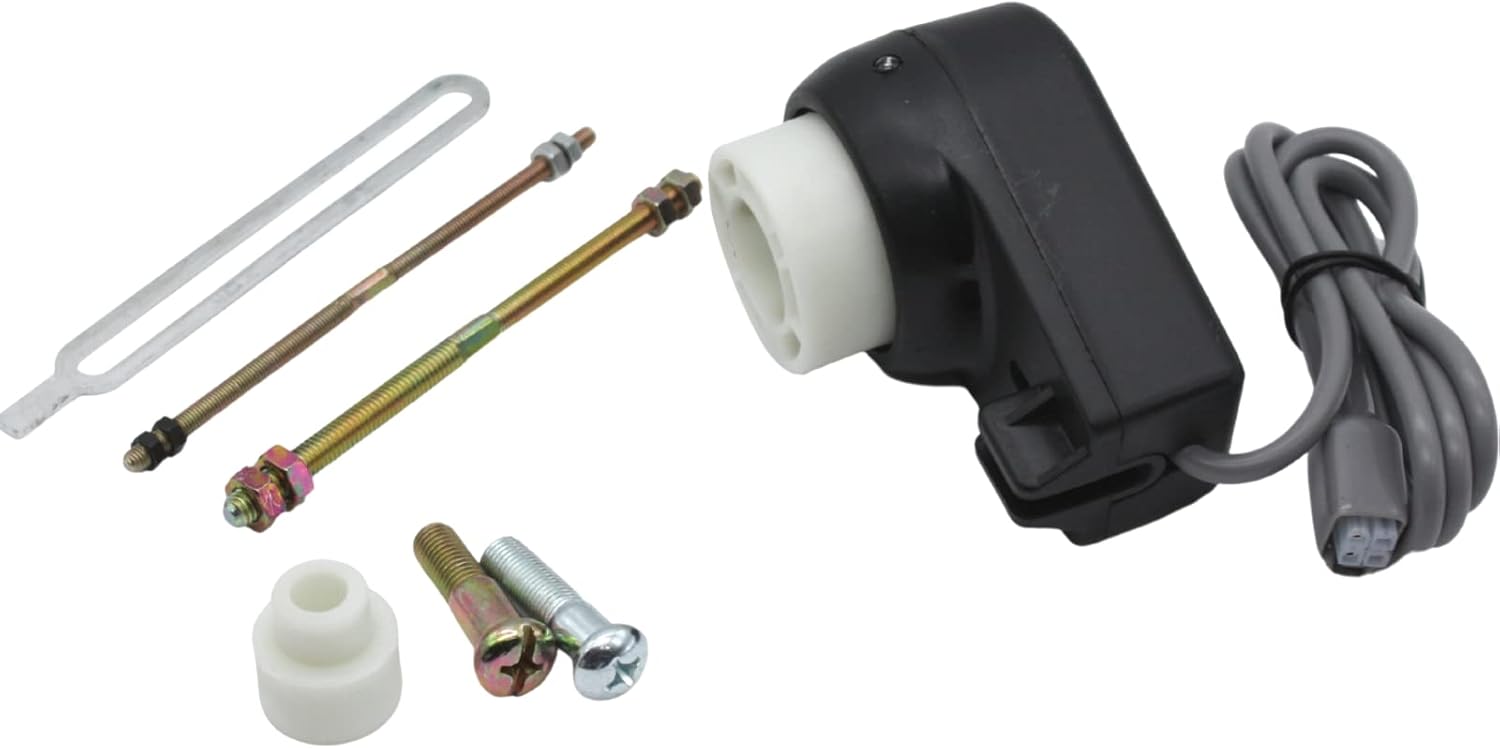
Image 1: Components of the Cutex Needle Position Synchronizer. This image displays the main synchronizer unit (black housing with a white rotating part and grey cable), two threaded mounting rods with nuts, two mounting screws, a white plastic bushing, and a flat metal bracket.
The synchronizer kit typically includes the main sensor unit, various mounting hardware such as threaded rods and screws, and a bushing. These components are designed to integrate with your industrial sewing machine's servo motor to provide accurate needle positioning.
Compatibility
This Needle Position Synchronizer is compatible with industrial sewing machines that have the handwheel pinned or screwed to the main shaft. It is specifically designed to work with the following servo motors:
- Consew CSM1000
- Consew CSM1001
- Consew CSM3000
- Consew CSM3001
Please note that this synchronizer may not work with all industrial sewing machines, and an adapter might be required for certain models not listed above.
Setup and Installation
Installation of the Needle Position Synchronizer requires careful attention to detail. It is recommended that installation be performed by a qualified technician or an individual with experience in industrial sewing machine maintenance.
- Power Disconnection: Before beginning any installation, ensure the sewing machine and its servo motor are completely disconnected from the power supply.
- Identify Handwheel Attachment: Verify that your industrial machine's handwheel is pinned or screwed directly to the main shaft. This synchronizer is designed for this type of attachment.
- Mounting the Sensor Unit: Secure the main synchronizer sensor unit to the designated mounting points on your sewing machine, typically near the handwheel or motor shaft. Use the provided mounting rods and screws as appropriate for your machine's configuration. Ensure the unit is stable and does not interfere with moving parts.
- Bushing Placement: If included and necessary for your specific motor model, install the white plastic bushing onto the motor shaft or within the synchronizer unit as per the motor's instructions. This ensures proper alignment and rotation.
- Cable Connection: Connect the synchronizer's grey cable to the appropriate port on your servo motor. Refer to your servo motor's manual for the exact connection point. Ensure the connection is secure.
- Testing and Calibration: After physical installation, reconnect power and perform initial tests. The synchronizer may require calibration through your servo motor's control panel to accurately set the needle's up and down stopping positions. Consult your servo motor's instruction manual for calibration procedures.
If you encounter difficulties or if the synchronizer does not function as expected, refer to the troubleshooting section or consult a professional.
Operating Instructions
Once installed and calibrated, the Needle Position Synchronizer operates in conjunction with your servo motor's control system. Its primary function is to ensure the needle consistently stops in a pre-defined up or down position after the foot pedal is released or a sewing cycle is completed.
- Needle Up Position: When configured for needle-up stopping, the needle will automatically rise to its highest point when you lift your foot from the pedal, allowing for easy fabric removal or repositioning.
- Needle Down Position: When configured for needle-down stopping, the needle will remain inserted in the fabric when you lift your foot, which is ideal for pivoting corners or intricate sewing without losing your stitch position.
The specific method for selecting between needle-up and needle-down stopping positions is typically controlled via the servo motor's control panel or a dedicated switch on the motor. Refer to your servo motor's user manual for detailed instructions on how to adjust these settings.
Maintenance
The Cutex Needle Position Synchronizer is designed for durability and requires minimal maintenance. However, regular checks can ensure its longevity and optimal performance:
- Cleaning: Periodically wipe the exterior of the synchronizer unit with a soft, dry cloth to remove dust and lint. Avoid using harsh chemicals or abrasive cleaners.
- Connection Check: Ensure all electrical connections, especially the cable connecting to the servo motor, remain secure and free from damage.
- Mounting Security: Verify that the synchronizer unit remains firmly mounted and that all screws and nuts are tightened. Vibrations from the sewing machine can sometimes loosen fasteners over time.
- Environmental Conditions: Operate the synchronizer in a clean, dry environment, free from excessive dust, moisture, or extreme temperatures.
Troubleshooting
| Problem | Possible Cause | Solution |
|---|---|---|
| Synchronizer not functioning / Needle not stopping correctly. |
|
|
| Physical fit issues (e.g., "It will not fit the Yamata FY335A"). |
|
|
If troubleshooting steps do not resolve the issue, contact Cutex customer support or a certified sewing machine technician for further assistance.
Specifications
- Product Type: Needle Position Synchronizer
- Application: Industrial Sewing Machine Servo Motors
- Function: Allows needle to stop in up or down position after sewing operations.
- Compatibility: Works with industrial machines where handwheel is pinned or screwed to main shaft. Compatible with Consew CSM1000, CSM1001, CSM3000, CSM3001 servo motors.
- Manufacturer: Cutex Sewing Supplies
- Date First Available: July 23, 2022
Warranty and Support
Specific warranty information for the Cutex Needle Position Synchronizer is not provided in this manual. For details regarding warranty coverage, returns, or technical support, please refer to the product packaging, the official Cutex website, or contact the retailer from whom the product was purchased.
For additional support or inquiries, you may visit the Cutex Store on Amazon.
Ask a question about this manual
Ask about setup, troubleshooting, compatibility, parts, safety, or missing instructions. Manuals+ will review the question and use this page’s manual context to help answer it.