
1. Introduction
Thank you for choosing the Memphis Audio PRX500.2V Power Reference 2-Channel Amplifier. This amplifier is designed to deliver reliable power and performance for your audio system. This manual provides essential information for proper installation, operation, and maintenance to ensure optimal performance and longevity of your amplifier.
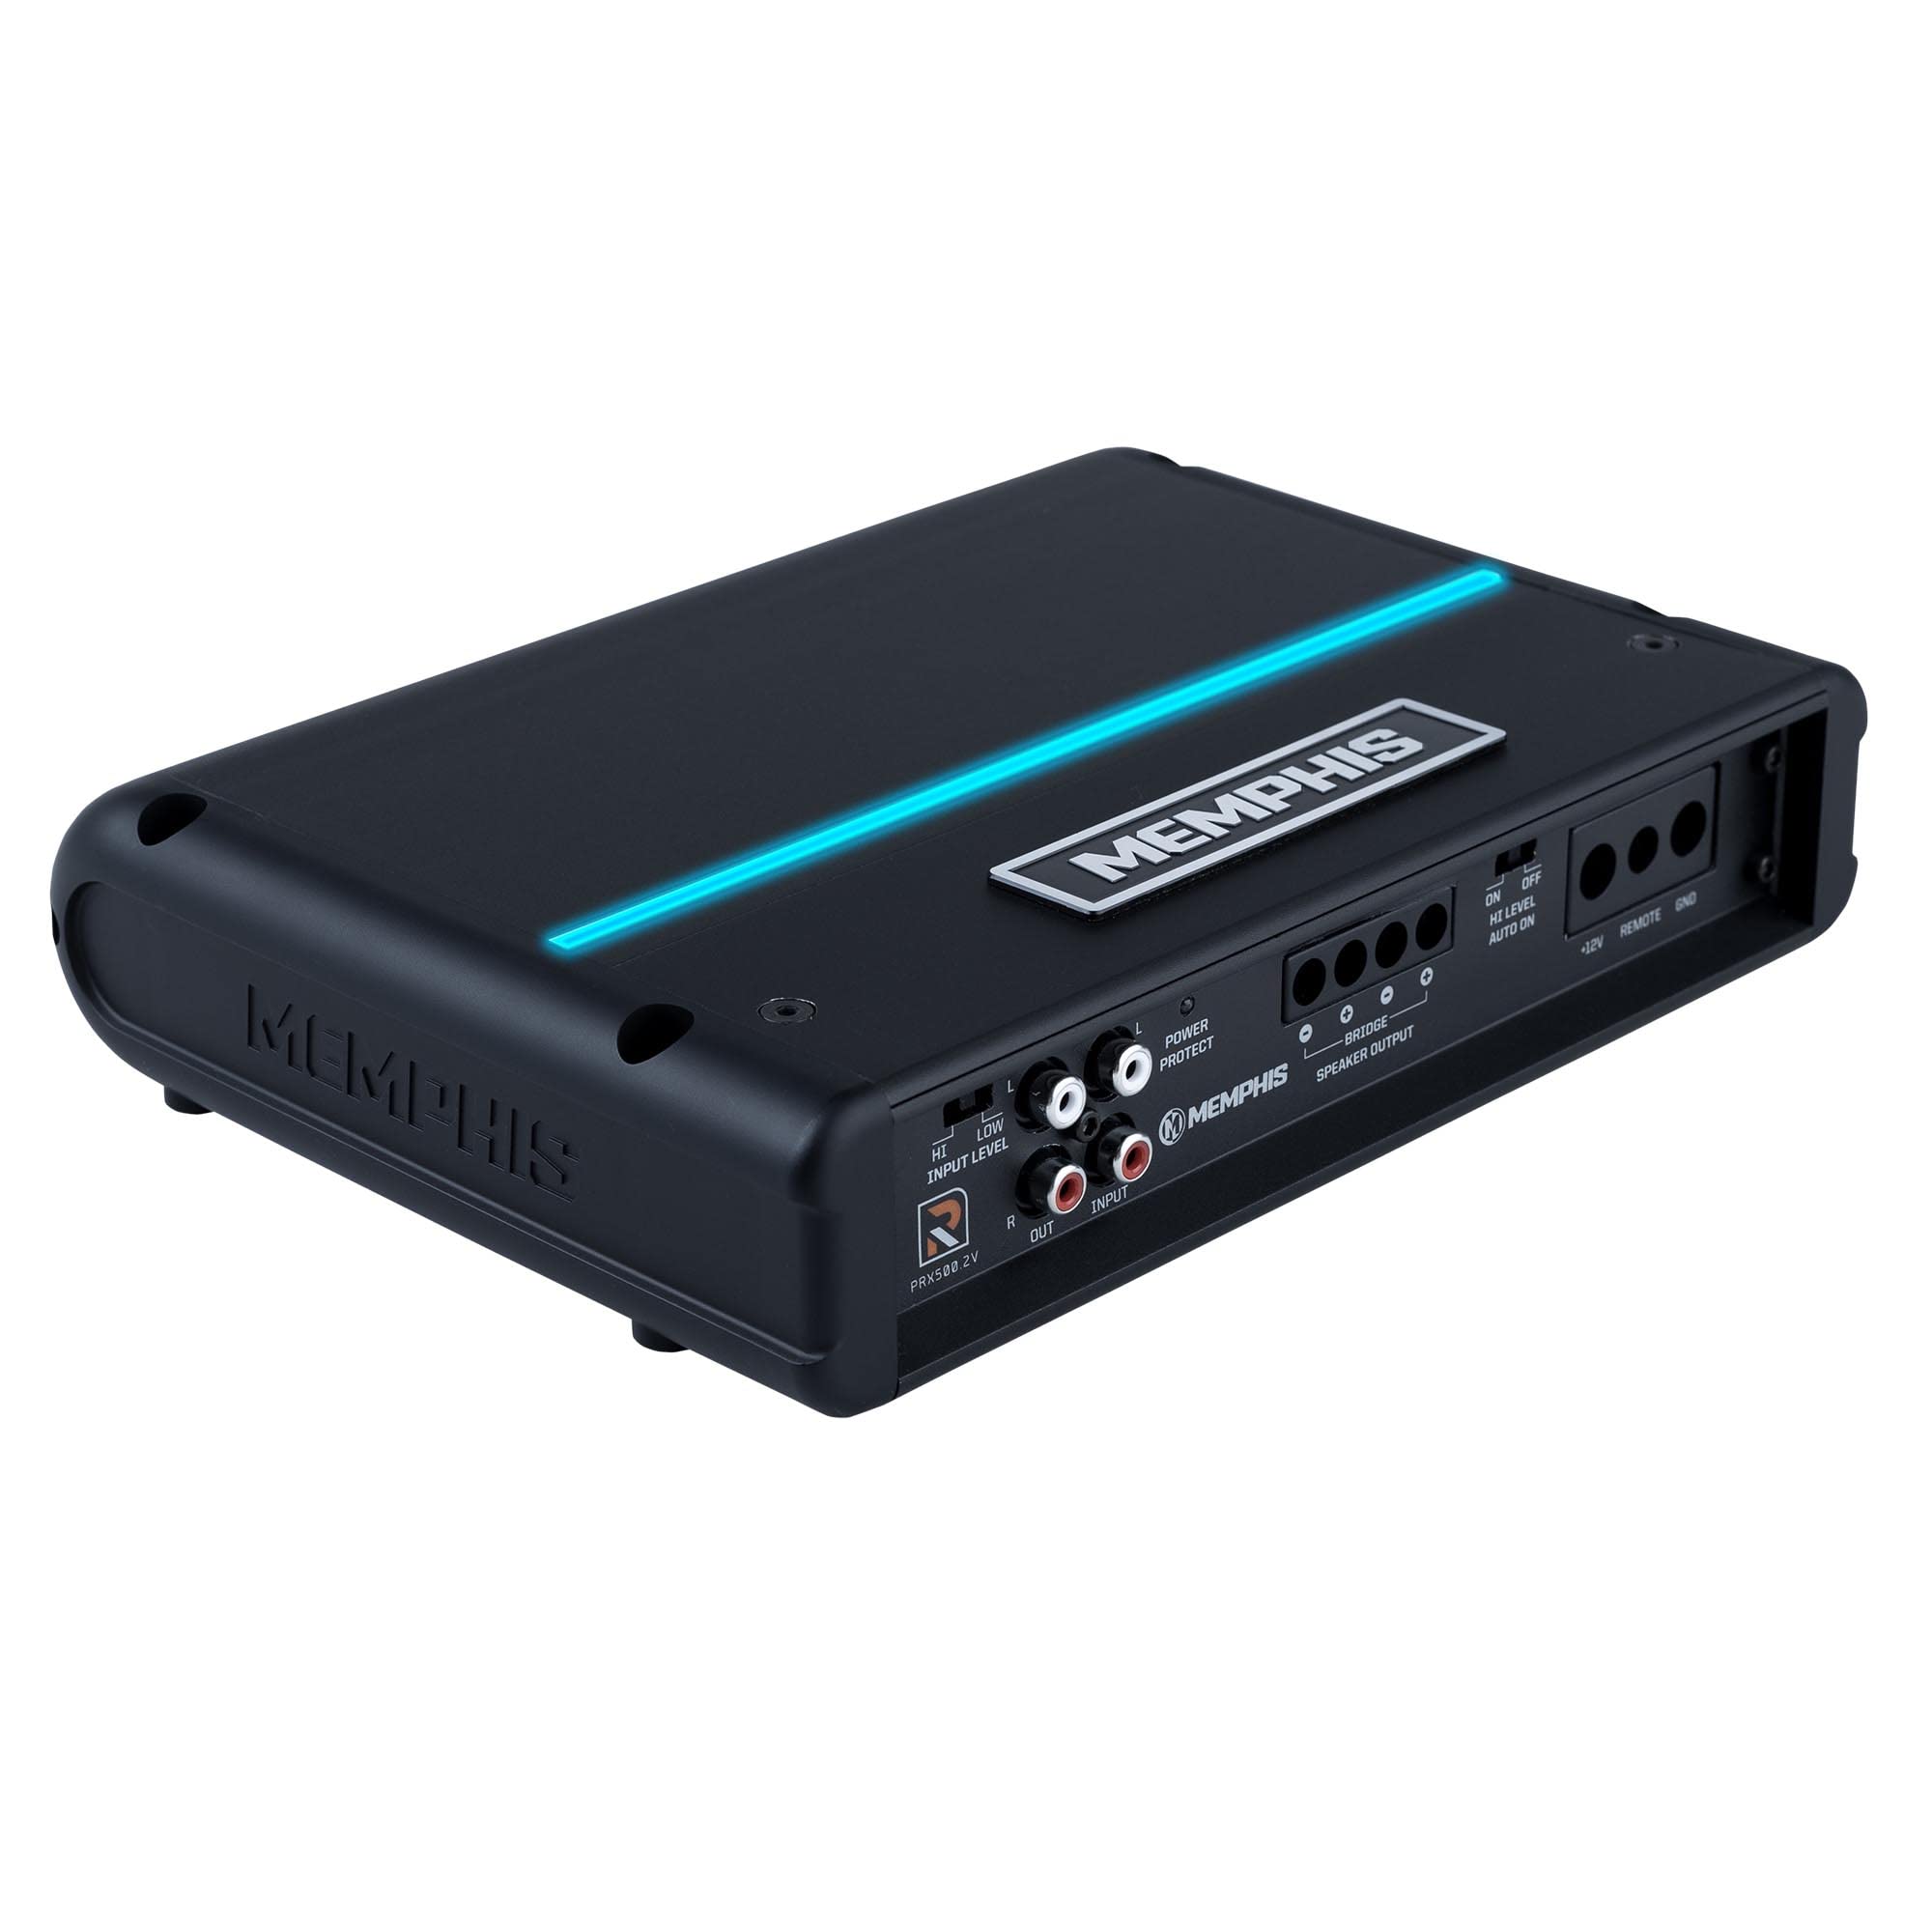
Image 1.1: Top-down view of the Memphis Audio PRX500.2V Power Reference 2-Channel Amplifier.
2. Features
The PRX500.2V amplifier includes the following key features:
- Extruded aluminum heatsink for efficient heat dissipation.
- Signal sensing auto turn-on for convenient system integration.
- Top-mounted controls for easy access and adjustment.
- 12dB/octave Butterworth crossovers for precise audio tuning.
- LED light strip for visual indication.
3. Setup and Installation
Proper installation is crucial for the performance and safety of your amplifier. It is recommended that installation be performed by a qualified professional.
3.1 Mounting Location
Choose a mounting location that provides adequate ventilation for the amplifier's heatsink. Avoid mounting in enclosed spaces or directly on carpet, which can restrict airflow. Ensure the location is secure and protected from moisture and excessive vibration.
3.2 Wiring Connections
Refer to the diagram below for proper wiring connections. Ensure all connections are secure and properly insulated to prevent short circuits.

Image 3.1: Control panel and wiring terminals of the PRX500.2V amplifier.
- Power (BATT +12V): Connect a 4-gauge (4GKIT recommended) power cable directly from the vehicle's positive battery terminal. Install an appropriate fuse (not included) within 18 inches of the battery.
- Ground (GND): Connect a 4-gauge ground cable from the amplifier to a clean, unpainted metal surface of the vehicle chassis. The ground point should be as short as possible.
- Remote (REMOTE): Connect a remote turn-on wire from your head unit's remote output to this terminal. If using the signal sensing auto turn-on feature, this connection may not be necessary.
- Speaker Output (BRIDGE SPEAKER OUTPUT): Connect your speakers to the designated speaker output terminals. For bridged mono operation, connect to the specified terminals as indicated on the amplifier.
- Input Level (HI/LOW INPUT LEVEL): Connect your audio source (head unit) to the RCA input jacks. Use the HI/LOW switch to select the appropriate input level based on your head unit's output.
3.3 Signal Sensing Auto Turn-On
The amplifier features a signal sensing auto turn-on function. When enabled (switch set to "ON" for HI LEVEL AUTO ON), the amplifier will automatically power on when it detects an audio signal from the input. This eliminates the need for a separate remote turn-on wire from the head unit, especially useful for factory head unit integration.
4. Operating the Amplifier
Once installed, the amplifier's performance can be optimized using the top-mounted controls.
4.1 Gain Adjustment
The gain control matches the amplifier's input sensitivity to the output of your head unit. Start with the gain set to minimum. Gradually increase the gain until you hear distortion, then back off slightly. Do not use the gain control as a volume knob.
4.2 Crossover Settings
The PRX500.2V features 12dB/octave Butterworth crossovers. These allow you to filter specific frequencies to your speakers. Adjust the crossover frequency according to your speaker type and desired sound. For full-range speakers, you may set the crossover to full range or a high-pass filter to protect smaller speakers from low frequencies.
4.3 LED Indicators
The amplifier is equipped with LED indicators to show its operational status:
- Power LED: Illuminates when the amplifier is powered on and operating normally.
- Protect LED: Illuminates when the amplifier enters protection mode due to overheating, short circuit, or low voltage. Refer to the troubleshooting section if this LED illuminates.
5. Maintenance
The Memphis Audio PRX500.2V amplifier requires minimal maintenance to ensure long-term performance.
- Cleaning: Periodically clean the amplifier's exterior with a soft, dry cloth. Do not use harsh chemicals or solvents. Ensure the heatsink fins are free from dust and debris to maintain proper cooling.
- Connections: Periodically check all wiring connections for tightness and corrosion. Loose connections can lead to power loss or intermittent operation.
6. Troubleshooting
If you experience issues with your amplifier, consult the following troubleshooting guide before contacting support.
6.1 No Power / No Sound
- Check the main fuse near the battery.
- Verify all power, ground, and remote connections are secure.
- Ensure the remote turn-on wire is receiving +12V from the head unit, or that the signal sensing auto turn-on is enabled and receiving an audio signal.
- Check the head unit for proper operation and output.
6.2 Distorted Sound
- Reduce the amplifier's gain setting.
- Check speaker wiring for proper polarity and ensure no wires are shorting.
- Verify the input signal from the head unit is clean and not distorted.
- Ensure speaker impedance matches the amplifier's specifications.
6.3 Amplifier Goes into Protection Mode (Protect LED On)
- Overheating: Allow the amplifier to cool down. Ensure adequate ventilation around the amplifier.
- Short Circuit: Check all speaker wires for shorts to ground or to each other. Verify speaker impedance.
- Low Voltage: Check the vehicle's battery and charging system. Ensure power and ground wires are of adequate gauge and connections are secure.
7. Specifications
The following are the technical specifications for the Memphis Audio PRX500.2V amplifier:
| Specification | Value |
|---|---|
| RMS Power @ 4Ω | 150W x 2 |
| RMS Power @ 2Ω | 250W x 2 |
| Bridged Mono @ 4Ω | 500W x 1 |
| THD% | <1% |
| Frequency Response | 10Hz-25KHz |
| Dimensions (in) | 9.7 x 7.3 x 2 |
| Item Weight | 5.59 pounds |
| Recommended Amp Kit | 4GKIT |
8. Warranty and Support
Memphis Audio products are designed and manufactured to the highest quality standards. For specific warranty information, please refer to the warranty card included with your product or visit the official Memphis Audio website. Keep your purchase receipt as proof of purchase.
For technical support, troubleshooting assistance, or service inquiries, please contact Memphis Audio customer service or visit their official website for up-to-date contact information and resources.
Official Website: www.memphiscaraudio.com


