
1. Important Safety Instructions
Read all safety warnings, instructions, illustrations, and specifications provided with this power tool. Failure to follow all instructions listed below may result in electric shock, fire, and/or serious injury.
- Work Area Safety: Keep work area clean and well-lit. Cluttered or dark areas invite accidents. Do not operate power tools in explosive atmospheres, such as in the presence of flammable liquids, gases, or dust.
- Electrical Safety: Power tool plugs must match the outlet. Never modify the plug in any way. Avoid body contact with earthed or grounded surfaces such as pipes, radiators, ranges, and refrigerators.
- Personal Safety: Always wear eye protection. Use personal protective equipment such as dust masks, non-skid safety shoes, hard hats, or hearing protection when appropriate. Prevent unintentional starting. Ensure the switch is in the off-position before connecting to battery pack, picking up or carrying the tool.
- Power Tool Use and Care: Do not force the power tool. Use the correct power tool for your application. Disconnect the battery pack from the power tool before making any adjustments, changing accessories, or storing power tools.
- Circular Saw Specific Safety:
- Keep hands away from the cutting area and the blade.
- Do not reach underneath the workpiece.
- Adjust the cutting depth to the thickness of the workpiece.
- Never hold the workpiece in your hands or across your leg while cutting.
- Check the lower guard for proper closing before each use.
2. Product Overview
Familiarize yourself with the components of your Eastvolt 20V Cordless Circular Saw before operation.
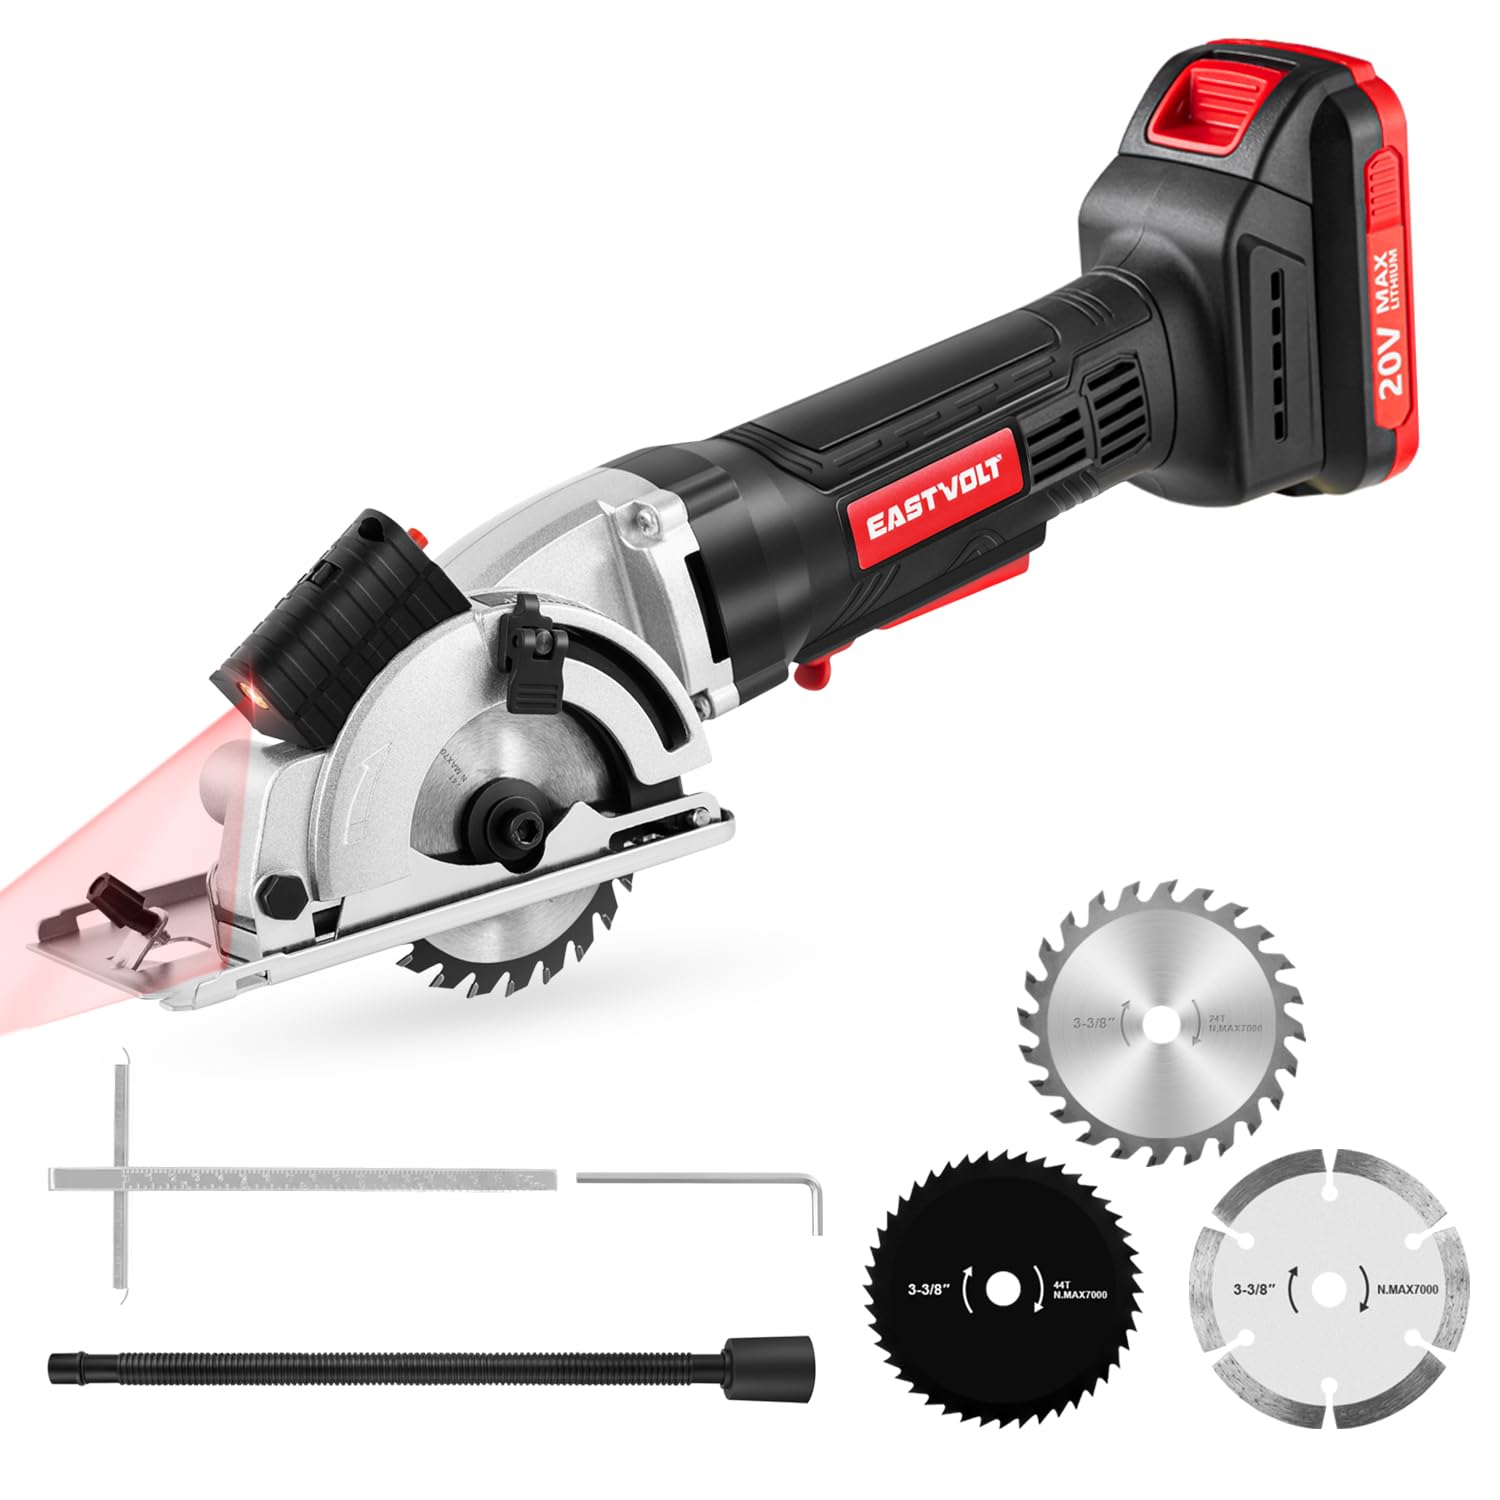
Figure 2.1: Overview of the Eastvolt Circular Saw components. Key parts include the Spindle Lock Button, Dust Extraction port, Adjustment Knob, Ergonomic Soft Rubber Handle, Laser Guide, Switch Trigger, Safety Button, Sawblade, and Cutting Depth Setting mechanism.
- Spindle Lock Button: Used to lock the spindle for blade changes.
- Dust Extraction Port: Connects to a vacuum cleaner for dust collection.
- Adjustment Knob: For adjusting various settings, such as bevel angle (if applicable) or base plate position.
- Ergonomic Soft Rubber Handle: Provides a comfortable and secure grip.
- Laser Guide: Projects a laser line for accurate cutting alignment.
- Switch Trigger: Activates the saw motor.
- Safety Button: Must be pressed before the switch trigger can be engaged to prevent accidental starts.
- Sawblade: The cutting accessory.
- Cutting Depth Setting: Mechanism to adjust the depth of cut.
3. Setup
3.1 Battery Installation
Ensure the battery is fully charged before use. Align the battery pack with the tool's battery port and slide it in until it clicks securely into place. To remove, press the release button and slide the battery out.
3.2 Blade Installation and Selection
Always disconnect the battery before changing blades. Use the hex wrench provided to loosen the blade bolt while pressing the spindle lock button. Remove the old blade, ensuring the arbor washer is correctly positioned. Install the new blade with the teeth pointing in the direction of rotation indicated on the saw. Tighten the blade bolt securely.

Figure 3.1: The three included blade types: 24T TCT blade for wood, 44T HSS blade for soft metal and plastics, and a diamond blade for tile. Select the appropriate blade for your material.
- 24T TCT Blade: For cutting wood and plastics.
- 44T HSS Blade: For cutting wood and soft metal.
- Diamond Blade: For cutting tile.
3.3 Adjusting Cutting Depth
The cutting depth can be adjusted from 0 to 1-1/16 inches. Loosen the depth adjustment lever, move the base plate to the desired depth, and then securely tighten the lever. Ensure the blade extends only slightly below the workpiece to minimize kickback.

Figure 3.2: Illustration of the cutting depth adjustment mechanism, showing how to set the maximum cutting depth of 1-1/16 inches.
3.4 Laser Guide and Parallel Guide Setup
The integrated laser guide assists in making straight cuts. Ensure the laser is clean and unobstructed. For precise parallel cuts, attach the scale ruler (parallel guide) to the saw's base plate. Adjust the guide to the desired distance from the blade and secure it.

Figure 3.3: The laser indicator projects a line for accurate cutting, complemented by the parallel guide for consistent straight cuts.
3.5 Dust Extraction Connection
For a cleaner work environment, connect a vacuum cleaner hose to the dust extraction pipe on the saw. This helps to collect sawdust and debris during operation.

Figure 3.4: The dust extraction port allows for connection to a vacuum cleaner, reducing airborne dust during operation.
4. Operating Instructions
4.1 Starting and Stopping the Saw
To start the saw, first press the safety button, then depress the switch trigger. The saw will begin to operate. To stop the saw, release the switch trigger. The blade will come to a stop.
4.2 General Cutting Techniques
Always secure the workpiece firmly before cutting. Position the saw with the front of the base plate resting on the workpiece. Allow the blade to reach full speed before entering the material. Guide the saw smoothly along the cutting line, applying steady, even pressure. Do not force the saw.
4.3 Plunge Cutting
For plunge cuts (starting a cut in the middle of a workpiece), ensure the saw is stable and the blade is not touching the material. Start the saw, then slowly lower the blade into the workpiece until the desired depth is reached, then proceed with the cut.

Figure 4.1: Demonstrating a plunge cut, where the saw blade is carefully lowered into the material to begin a cut away from the edge.
5. Maintenance
5.1 Cleaning
Regularly clean the saw's ventilation openings to prevent motor overheating. Use a soft brush or compressed air to remove dust and debris. Do not use water or chemical cleaners. Keep the base plate and blade guard clean for smooth operation.
5.2 Blade Care
Inspect blades before each use for damage, dullness, or missing teeth. Replace worn or damaged blades immediately. Clean resin and pitch buildup from blades using a suitable blade cleaner to maintain cutting efficiency.
5.3 Battery Care
Store batteries in a cool, dry place away from direct sunlight and extreme temperatures. Do not store batteries in a discharged state for extended periods. Follow the charging instructions provided with your battery charger.
6. Troubleshooting
| Problem | Possible Cause | Solution |
|---|---|---|
| Saw does not start | Battery not installed correctly or discharged; Safety button not pressed; Faulty switch. | Ensure battery is fully charged and properly seated. Press safety button before trigger. If problem persists, contact customer service. |
| Reduced cutting performance | Dull or incorrect blade; Blade buildup; Incorrect cutting depth. | Replace blade with a sharp, appropriate type. Clean blade. Adjust cutting depth. |
| Excessive vibration | Damaged or improperly installed blade; Loose components. | Inspect blade for damage and ensure it is installed correctly and securely tightened. Check for any loose parts. |
| Laser guide not visible | Dirty laser lens; Low battery. | Clean the laser lens. Ensure the battery is charged. |
7. Specifications
| Feature | Specification |
|---|---|
| Model Number | EVDMC040D |
| Brand | Eastvolt |
| Voltage | 20 Volts |
| No-Load Speed | 5000 RPM |
| Blade Diameter | 3-3/8 inches |
| Max Cutting Depth | 1-1/16 inches |
| Item Weight | 3.45 Kilograms |
| Product Dimensions (L x W x H) | 38.1L x 45.7W x 45.7H centimetres |
| Included Blades | 1 x 24T TCT Blade, 1 x 44T HSS Blade, 1 x Diamond Blade |
| Special Features | Laser Guide, Brushless Motor |
8. Warranty and Support
This Eastvolt product is covered by a manufacturer's warranty. For specific warranty details, claims, or technical support, please refer to the warranty card included with your purchase or contact Eastvolt customer service directly. Keep your proof of purchase for warranty validation.