
1. Introduction
Thank you for choosing the NORTHCLAN Ice Maker. This manual provides important information regarding the safe operation, maintenance, and troubleshooting of your new appliance. Please read it thoroughly before first use and keep it for future reference.
2. Important Safety Instructions
To reduce the risk of fire, electric shock, or injury when using your ice maker, follow these basic precautions:
- Read all instructions before use.
- Do not touch the evaporator or ice cubes when the ice maker is operating.
- Do not immerse the appliance, power cord, or plug in water or other liquids.
- Unplug the ice maker from the power outlet when not in use and before cleaning.
- Do not operate any appliance with a damaged cord or plug, or after the appliance malfunctions or has been damaged in any manner.
- Ensure the voltage of the ice maker corresponds to your household voltage.
- Do not use outdoors.
- Do not place the ice maker near hot gas or electric burners, or in a heated oven.
- Do not use the appliance for other than its intended use.
- Keep the ice maker away from direct sunlight and other heat sources.
- Ensure proper ventilation around the unit. Maintain a minimum of 15 cm clearance on all sides.
3. Product Overview
Components
The NORTHCLAN Ice Maker comes with the main unit, an ice basket, and an ice scoop.

Image: The NORTHCLAN Ice Maker in black, showing the main unit, a clear lid, and an ice scoop with ice cubes in front.
Key Features
- Rapid Ice Production: Produces 9 spherical ice cubes in just 6-8 minutes, with a daily capacity of up to 14 kg.
- Quiet Operation: Operates silently below 40dB, ensuring a peaceful environment.
- Intelligent LED Display: Features intuitive LED indicators for 'Add Water' and 'Ice Full' status.
- Large Water Tank: Equipped with a generous 2-liter water reservoir, reducing the need for frequent refills.
- Energy Efficient: High-quality foam insulation layer helps maintain ice solidity longer and reduces energy consumption.
- Durable Construction: Made with a durable ABS casing and food-grade inner materials for safety and longevity.
- Portable Design: Compact and lightweight (7.6 kg) for easy transport and countertop placement.
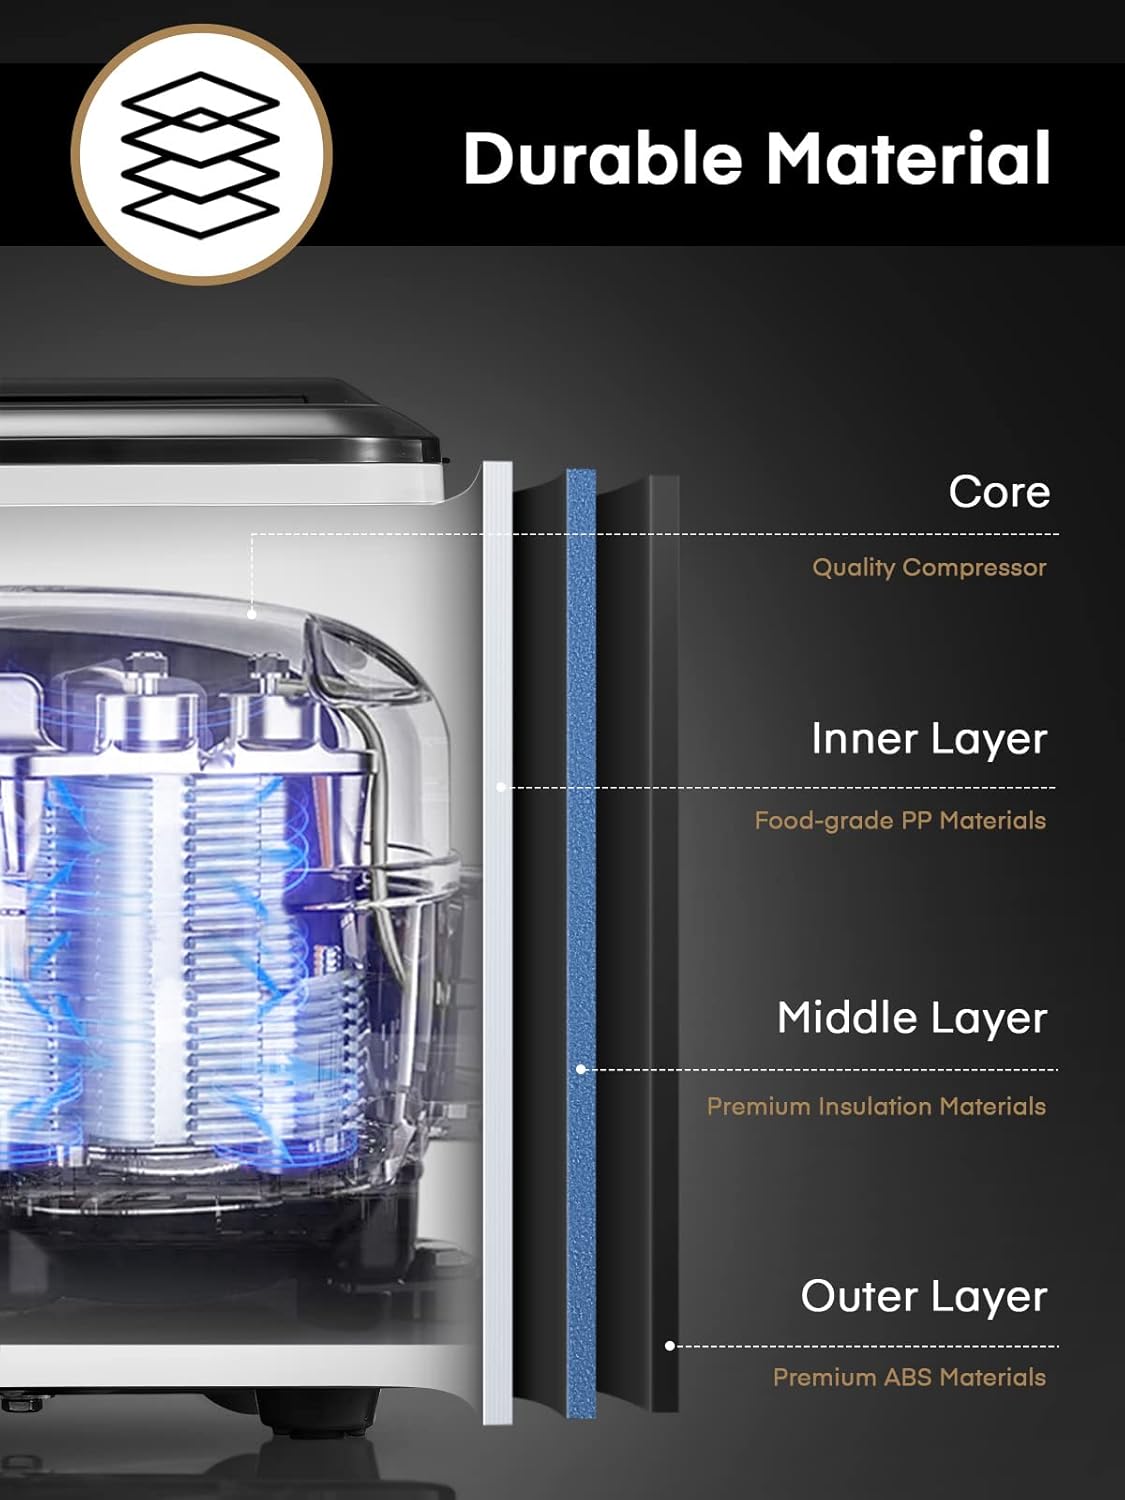
Image: A cutaway diagram illustrating the durable multi-layer construction of the ice maker, including the compressor, food-grade inner layer, insulation, and ABS outer layer.

Image: The ice maker positioned on a table next to a person reading, with a graphic indicating low noise levels (around 40dB).

Image: A visual representation highlighting the advanced IR sensor for ice level detection, a large air vent for efficient cooling, and a large transparent viewing window.
4. Setup
Unpacking
- Carefully remove all packaging materials.
- Inspect the ice maker for any damage. If damaged, do not operate and contact customer support.
- Remove the ice basket and ice scoop from inside the unit.
Placement
- Place the ice maker on a stable, level surface.
- Ensure there is adequate ventilation around the unit (at least 15 cm clearance on all sides).
- Avoid placing the unit near heat sources (e.g., ovens, radiators) or in direct sunlight.
- Allow the unit to stand upright for at least 2 hours before plugging it in, especially if it was tilted during transport. This allows the refrigerant to settle.
Initial Cleaning
Before first use, clean the interior of the ice maker:
- Wipe the interior with a soft cloth dampened with warm water and a mild detergent.
- Rinse thoroughly with clean water.
- Drain any remaining water through the drain plug at the bottom.
- Dry the interior completely.
5. Operating Instructions
Adding Water
- Open the lid of the ice maker.
- Remove the ice basket.
- Fill the water reservoir with potable water up to the MAX fill line. Do not overfill.
- Replace the ice basket and close the lid.
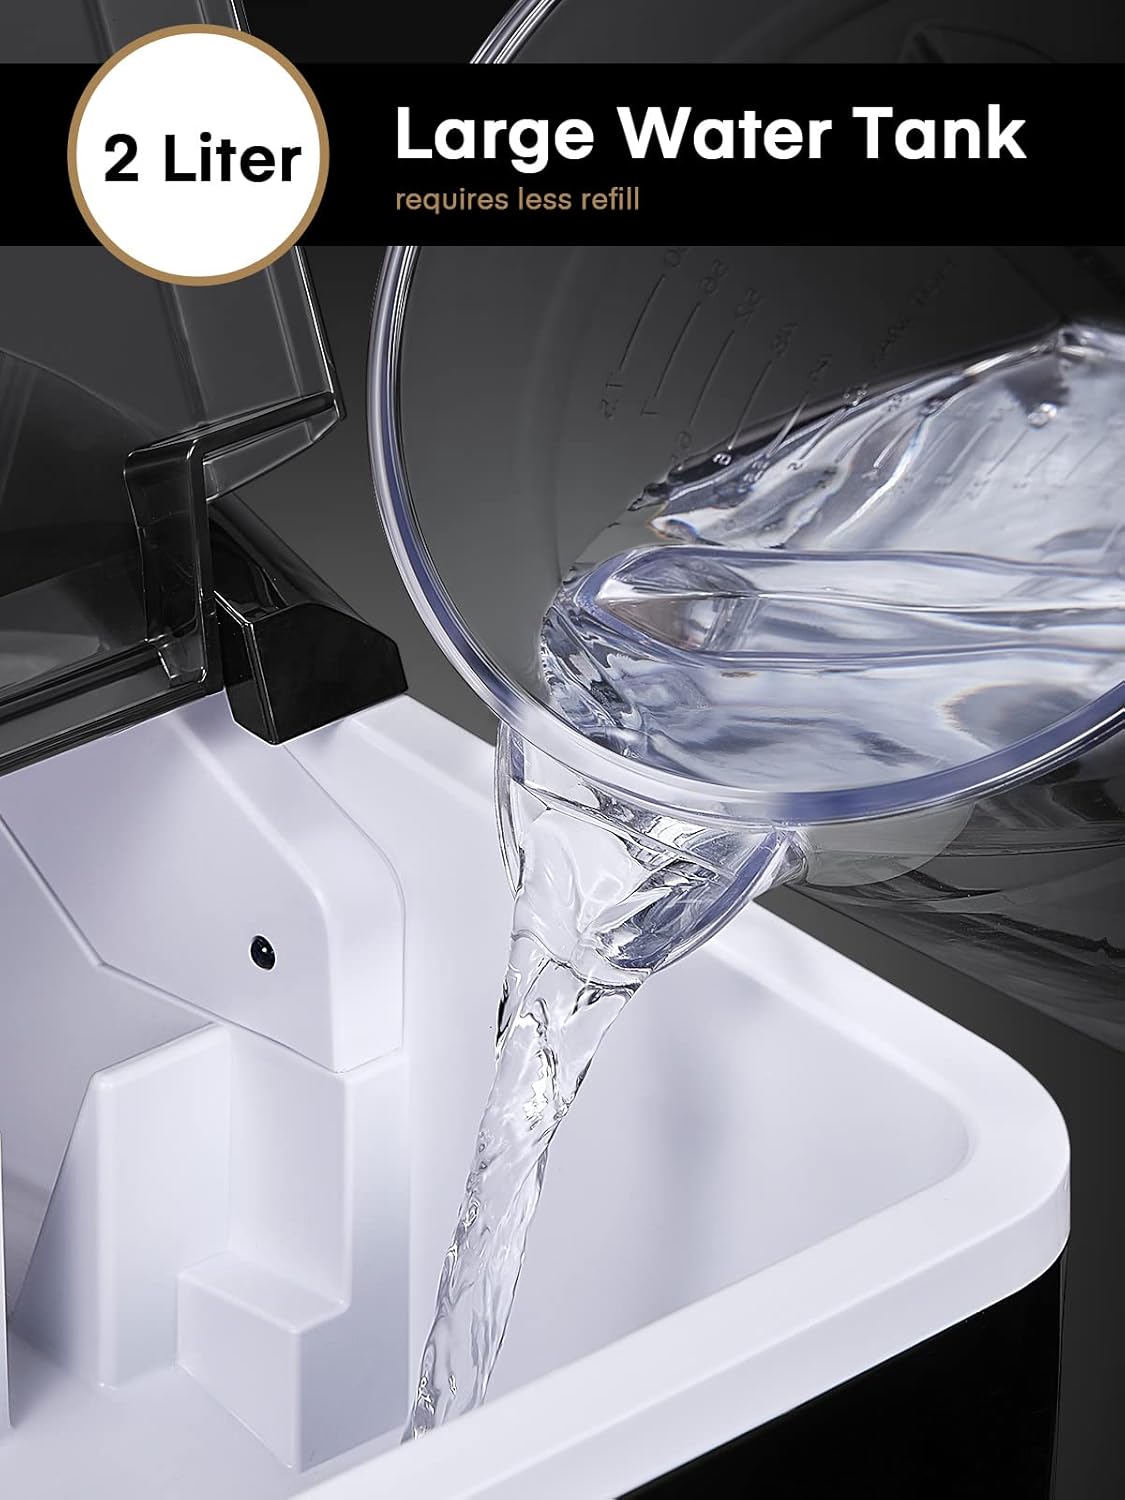
Image: A hand pouring water from a measuring jug into the ice maker's water tank, highlighting its 2-liter capacity.
Making Ice
- Plug the ice maker into a grounded electrical outlet.
- Press the power button on the control panel to start the ice making cycle. The 'ICE MAKING' indicator will light up.
- The first batch of ice may take slightly longer and the cubes might be smaller or imperfect. This is normal. Allow the machine to run for several hours to stabilize the refrigeration system.
- The ice maker will automatically produce ice cubes. Each cycle takes approximately 6-8 minutes.

Image: A detailed view of the ice maker's control panel, showing the power button and LED indicators for 'ICE FULL', 'ICE MAKING', and 'ADD WATER'.

Image: The ice maker's interior with freshly made ice cubes in the basket, illustrating the rapid production of 9 cubes in 6 minutes.
LED Indicators
- ADD WATER: This indicator will light up when the water reservoir is low and needs refilling.
- ICE FULL: This indicator will light up when the ice basket is full. The ice making process will pause automatically. Remove ice to resume operation.
Harvesting Ice
When the 'ICE FULL' indicator lights up, use the provided ice scoop to remove the ice cubes from the basket. Transfer them to a separate freezer for storage, as the ice maker is not designed to keep ice frozen for extended periods.

Image: Hands demonstrating the removal of the ice basket, which is filled with ice cubes, from the ice maker.
6. Maintenance and Cleaning
Regular cleaning ensures optimal performance and hygiene of your ice maker.
Daily Cleaning
- After each use, unplug the unit.
- Drain any remaining water from the reservoir using the drain plug at the bottom.
- Wipe the interior and exterior surfaces with a soft, damp cloth.
- Dry thoroughly.
Deep Cleaning (Monthly or as needed)
- Unplug the ice maker.
- Remove the ice basket.
- Prepare a solution of warm water and a small amount of vinegar or a mild, food-safe cleaning agent.
- Pour the solution into the water reservoir and let it sit for 10-15 minutes.
- Scrub the interior surfaces with a soft brush or cloth.
- Drain the cleaning solution completely.
- Rinse the reservoir several times with clean water, draining after each rinse, to ensure no cleaning residue remains.
- Wipe down the exterior with a damp cloth.
- Ensure all parts are dry before storing or next use.
Storage
If the ice maker will not be used for an extended period, clean it thoroughly, drain all water, and store it in a dry, well-ventilated area away from direct sunlight and extreme temperatures.
7. Troubleshooting
Before contacting customer support, please refer to the following common issues and solutions:
| Problem | Possible Cause | Solution |
|---|---|---|
| Ice cubes are small or imperfect (especially first batches). | Refrigeration system needs to stabilize. | Allow the machine to run for several hours until the refrigeration system functions stably. |
| Ice melts quickly in the basket. | The ice maker is not a freezer. | Transfer ice cubes to a separate freezer for long-term storage. |
| 'ICE FULL' indicator is on, but basket is not full. | Ice cubes are blocking the sensor. | Rearrange or remove some ice cubes from the basket. |
| 'ADD WATER' indicator is on. | Water reservoir is empty or low. | Refill the water reservoir with potable water up to the MAX line. |
| No ice production. | Unit not plugged in, power off, or water level too low. | Check power connection, ensure unit is turned on, and fill water reservoir. |
| Unusual odor from ice. | Water not fresh or unit needs cleaning. | Use fresh water. Perform a deep clean of the unit. |

Image: A graphic summarizing key troubleshooting tips, including advice for initial ice production, ice melting, and optimal operating conditions.
8. Specifications
| Feature | Detail |
|---|---|
| Brand | NORTHCLAN |
| Model Number | 1226 |
| Product Dimensions (L x W x H) | 32 x 30 x 24 cm (12.6 x 11.8 x 9.4 inches) |
| Weight | 6.6 kilograms (14.55 lbs) |
| Capacity | 2 Liters (water reservoir) |
| Power | 120 Watts |
| Voltage | 220 Volts |
| Refrigerant | R600a |
| Material | Acrylonitrile Butadiene Styrene (ABS) |
| Ice Shape | Bullet |
| UPC | 735940861618 |

Image: The ice maker displayed with its key dimensions (depth, width, height) for easy placement assessment.
9. Warranty and Support
NORTHCLAN offers 2 years of worry-free support for this product. This includes 24/7 online assistance and replacement support. If you have any questions or encounter any issues with your ice maker, please do not hesitate to contact us. Our professional team is always ready to assist you and provide the best solutions.