
Introduction
This manual provides comprehensive instructions for the installation, operation, and maintenance of your Lorex 4KA88-3 8-Channel 2TB 4K DVR System. This system is designed to provide professional-quality security surveillance for your home or business, featuring 4K resolution cameras, smart motion detection, and Color Night Vision technology.
Please read this manual thoroughly before setting up and using your system to ensure proper functionality and to maximize its capabilities.
1. Setup
1.1 Package Contents
Before beginning installation, verify that all components are present:
- 1 x 8-Channel 4K DVR with 2TB HDD
- 8 x 4K Analog HD Security Cameras
- 8 x Siamese BNC Cables (for camera connection)
- 1 x DVR Power Adapter
- 8 x Camera Power Adapters
- 1 x USB Mouse
- 1 x HDMI Cable
- Mounting Hardware for Cameras
1.2 System Overview
The Lorex 4KA88-3 system consists of a Digital Video Recorder (DVR) and eight 4K Analog HD cameras. The DVR processes and stores video footage, while the cameras capture high-resolution video, even in low-light conditions.
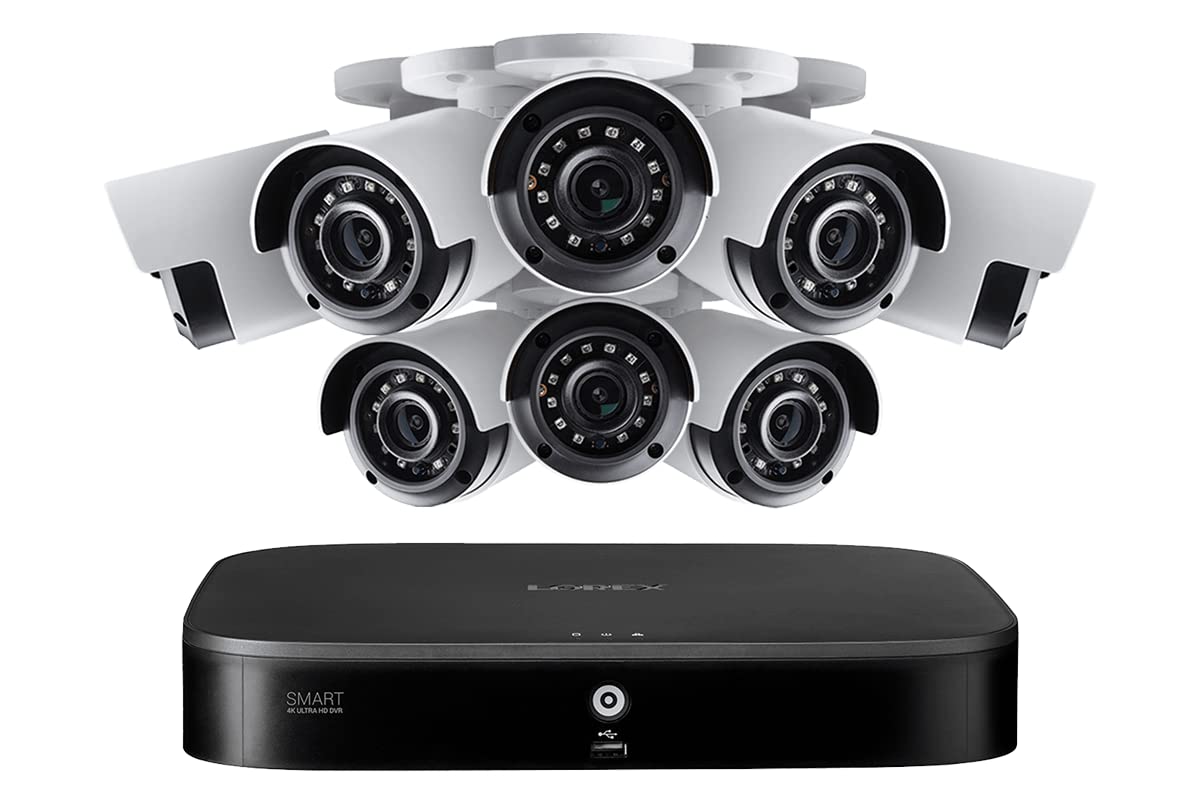
Image 1: Overview of the Lorex 4KA88-3 8-Channel 2TB 4K DVR System components. This image displays the DVR unit, several security cameras, and associated cables, illustrating the complete surveillance package.
1.3 Connecting the DVR
- Connect the included HDMI cable from the DVR's HDMI output to your monitor's HDMI input.
- Connect the USB mouse to a USB port on the DVR.
- Connect an Ethernet cable (not included) from the DVR's LAN port to your router for network access and remote viewing.
- Connect the DVR power adapter to the DVR's power input, then plug it into a power outlet. The DVR will power on automatically.
1.4 Connecting Cameras
Each camera uses a siamese BNC cable for both video transmission and power. This simplifies wiring by combining two functions into one cable.
- Connect the BNC connector of the siamese cable to the BNC video input on the back of the DVR for each camera.
- Connect the power connector of the siamese cable to the camera's power input.
- Connect the other end of the siamese cable's power connector to a camera power adapter, then plug the adapter into a power outlet.
- Repeat for all 8 cameras.
1.5 Initial Setup Wizard
Upon first power-up, the DVR will guide you through an initial setup wizard. Follow the on-screen prompts to:
- Create a secure password for the DVR.
- Configure date and time settings.
- Set up network connectivity.
- Adjust recording preferences.
2. Operating Your System
2.1 4K Resolution Video
The cameras record video at 4K (8 million pixels) resolution, providing superior detail and clarity. This high resolution allows for greater digital zoom capabilities during playback, enabling closer inspection of recorded events.
2.2 Smart Motion Detection (Person and Vehicle)
The DVR features smart person and vehicle detection on all channels. This technology differentiates between human and vehicle movement and other motion sources, reducing false alarms.
- Configuration: Access the DVR's menu to define motion detection zones and sensitivity settings for each camera.
- Notifications: When a person or vehicle is detected, the system can send push notifications to your Lorex Home app.
2.3 Face Detection
For specific areas like entrances, Face Detection can be enabled. This feature notifies you only when a human face is detected, preventing alerts from general motion.
- Event Review: You can easily preview captured faces and filter face detection events using the Smart Search function on the DVR.
2.4 Color Night Vision (CNV) and IR Night Vision
The cameras are equipped with Lorex's exclusive Color Night Vision (CNV) technology, which provides full-color video in low-light conditions when sufficient ambient light is available.
- CNV Operation: Requires ambient light (e.g., streetlights, porch lights) to function.
- IR Night Vision: In complete darkness or insufficient ambient light, cameras automatically switch to infrared (IR) night vision, providing black and white video. The IR range is up to 120ft (37m) in low-light and 82ft (25m) in complete darkness.
2.5 Lorex Home App Remote Viewing
The Lorex Home app allows you to access your security system remotely from your smartphone or tablet.
- Download the Lorex Home app from your device's app store.
- Create an account and add your DVR system by scanning the QR code or entering the device ID.
- View live camera feeds, review recorded footage, and receive motion-activated push notifications and email alerts with screenshot attachments.
2.6 Recording and Playback
The DVR includes a built-in 2TB security-grade hard drive for continuous recording. You can configure recording schedules and motion-triggered recording.
- Playback: Use the DVR interface or Lorex Home app to search and play back recorded footage by date, time, or event type (e.g., motion, person, vehicle, face detection).
- Storage: The 2TB HDD provides ample storage, and the system supports expansion up to 8TB.
3. Maintenance
3.1 Camera Durability
The 4K security cameras are rated IP67, indicating they are designed to withstand various weather conditions. They can operate in temperatures ranging from -40°F to 131°F (-40°C to 55°C).
3.2 Hard Drive Management
The 2TB hard drive is designed for 24/7 surveillance. Regularly check the DVR's storage status through the system menu. If storage is full, the DVR will typically overwrite the oldest footage. Consider upgrading to an 8TB hard drive for extended recording capacity.
3.3 Cleaning Cameras
Periodically clean the camera lenses with a soft, damp cloth to ensure clear image quality. Avoid using harsh chemicals that could damage the lens coating.
4. Troubleshooting
4.1 No Video Display on Monitor
- Ensure the DVR is powered on and the power adapter is securely connected.
- Verify the HDMI cable is firmly connected to both the DVR and the monitor.
- Check if the monitor is set to the correct input source (e.g., HDMI 1, HDMI 2).
- Try a different HDMI cable or monitor if available.
4.2 No Camera Image
- Check that the camera's siamese BNC cable is securely connected to both the camera and the DVR.
- Ensure the camera's power adapter is connected and receiving power.
- Verify the camera is receiving power (some cameras have an indicator light).
- Test the camera with a different BNC cable or DVR channel if possible.
4.3 Motion Detection Not Triggering / Too Many False Alarms
- Not Triggering: Adjust motion detection sensitivity settings in the DVR menu. Ensure detection zones are correctly configured.
- False Alarms: Reduce sensitivity. Refine detection zones to exclude areas with constant movement (e.g., trees swaying, busy roads). Utilize person/vehicle detection and face detection features to filter events.
4.4 Remote Viewing Issues with Lorex Home App
- Ensure the DVR is connected to the internet via an Ethernet cable to your router.
- Verify your smartphone or tablet has a stable internet connection (Wi-Fi or cellular data).
- Check if the Lorex Home app is updated to the latest version.
- Restart the DVR and your mobile device.
- Confirm that the DVR is properly added to your Lorex Home account.
5. Specifications
| Feature | Detail |
|---|---|
| Brand | Lorex |
| Model Number | 4KA88-3 |
| Connectivity Technology | Wired |
| Video Capture Resolution | 2160p (4K) |
| Number of Channels | 8 |
| Memory Storage Capacity | 2 TB (expandable up to 8 TB) |
| Power Source | Corded Electric |
| Camera Description | 4K Analog HD security camera |
| Night Vision | Color Night Vision (CNV), IR Night Vision (120ft/37m low-light, 82ft/25m complete darkness) |
| Recording Mode | Motion Detection, Continuous |
| Video Input | HDMI |
| Signal Format | Analog |
| Operating Temperature | -40°F to 131°F (-40°C to 55°C) |
| Ingress Protection (Camera) | IP67 |
| Item Dimensions (Package) | 40 x 30 x 30 inches (approximate) |
| UPC | 695529039022 |
6. Warranty and Support
6.1 Product Warranty
Lorex products typically come with a limited warranty. Please refer to the warranty card included with your purchase or visit the official Lorex website for detailed warranty terms and conditions specific to the 4KA88-3 system.
6.2 Technical Support
For technical assistance, troubleshooting, or further inquiries, please visit the official Lorex support website or contact Lorex customer service. Support resources often include FAQs, video tutorials, and contact information for direct assistance.
Lorex Official Website: www.lorex.com


